If your edges slide out by lunchtime and every slick back looks like a sticky mess by 3 p.m., this is for you. I learned the hard way, practicing on second-day curls and paying for a salon fix after botched gel attempts. These 15 ponytail ideas are what I actually wear when I need a hold that looks clean, feels comfortable, and is doable at home.
These looks work best on 3A through 4C natural hair, and a few can be adapted for straighter textures with small changes. Expect quick styles that take five to 25 minutes, most under $40, with a couple of tool splurges mentioned. Almost everything here is DIY friendly, except when I call out a color or cut that needs a pro.
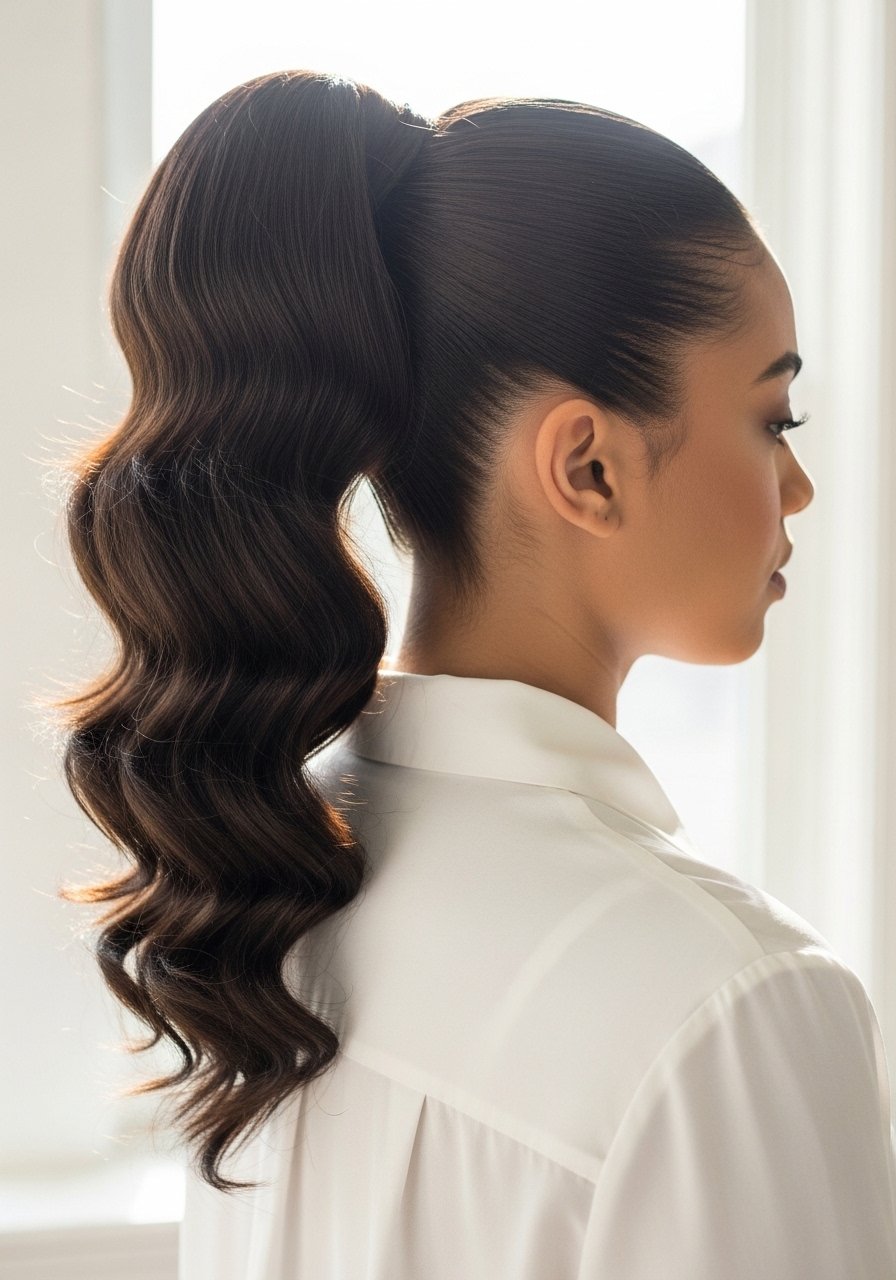
Sleek Low Ponytail For Fine Natural Hair

If your hair is on the finer side, a low pony keeps weight against the scalp so it looks sleek, not stringy. Work with damp hair. On each side I smooth three small 1-inch sections toward the nape with a lightweight leave-in, then do a quick brush through with a boar bristle brush to distribute oils. Two light pumps of a silicone serum through the mid-lengths prevents frizz without flattening the roots. Use a snag-free elastic wrapped twice and tuck the ends under for a polished edge. Common mistake is using too much gel at the crown. That makes roots look wet and limp. If you must heat-style the ends, always apply a heat protectant before any iron over 300F and use 300F for fine hair to avoid frying.
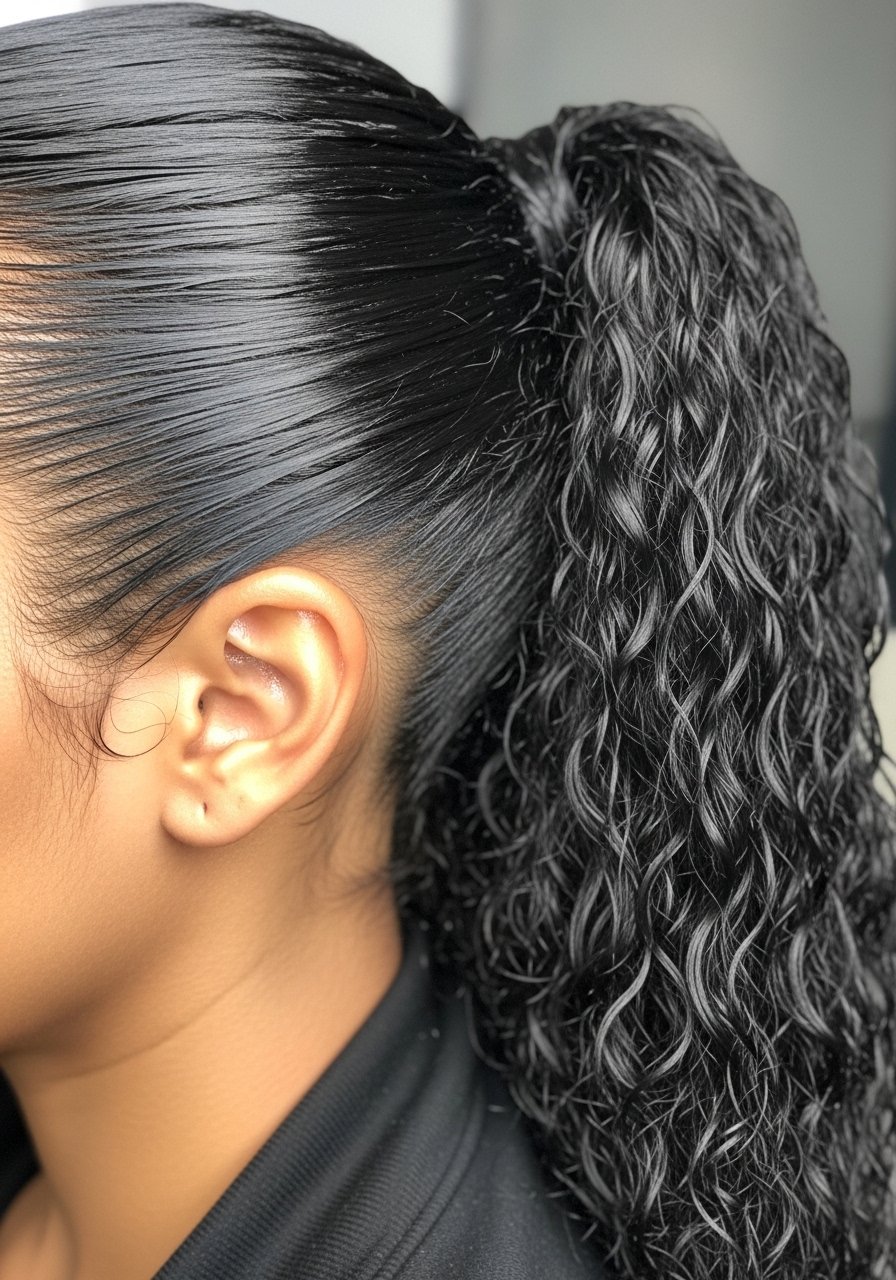
High Slicked Pony With Braided Base For Thick Coils

Thicker, denser coils hate slipping elastics. I anchor the pony with a three-strand braid around the base before wrapping the hair up high. Section the perimeter into six small clips, create a tight braid that hugs the scalp, then gather the remaining hair into the pony on top of that braid for grip. A generous pea-size of thick gel on the scalp perimeter tames edges and holds the braid. Real talk, this takes 10 extra minutes but saves redoing the pony once it starts sagging. If you color-treated recently, avoid heavy tension at the hairline and check for scalp sensitivity when using strong edge products.
Edge-Defined Ponytail For Short Edges And Baby Hairs
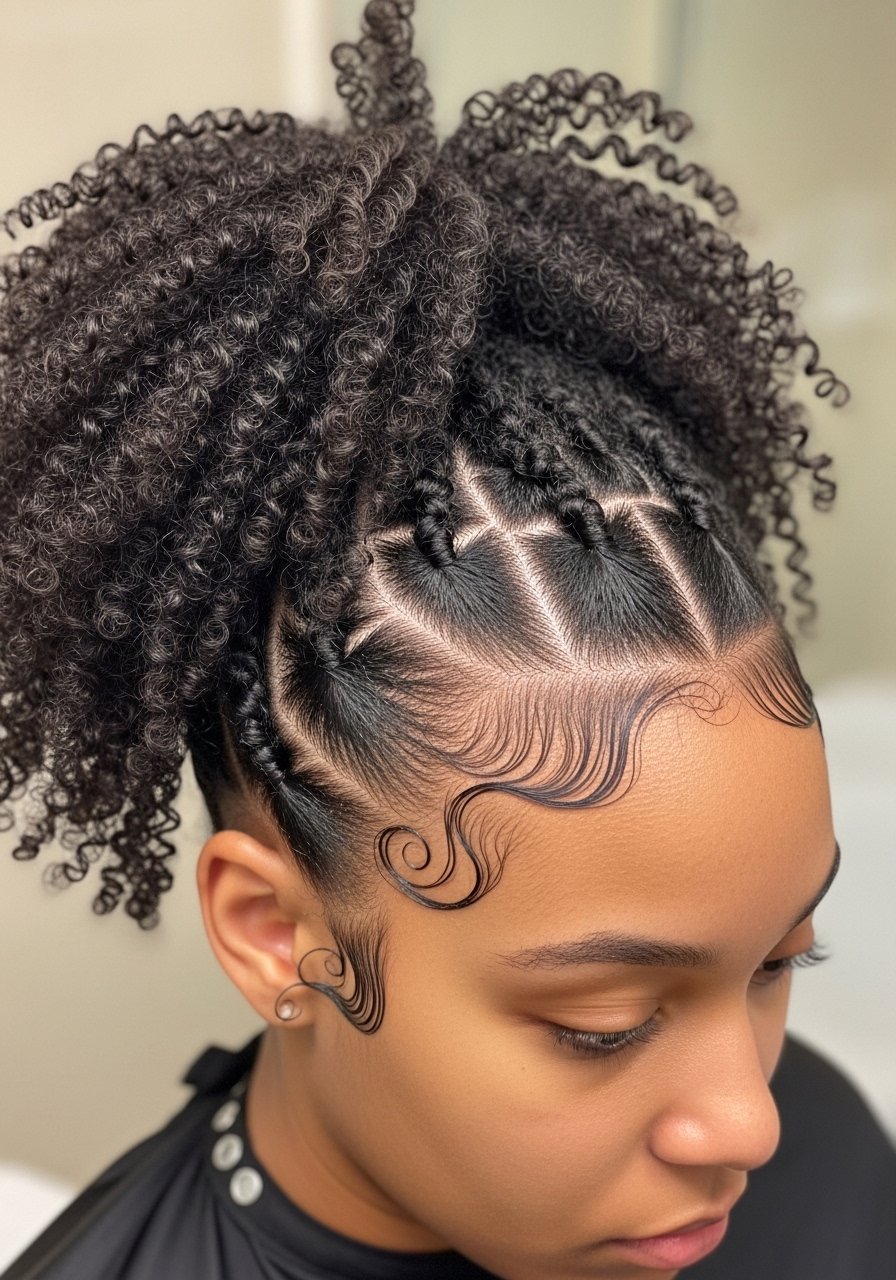
Short edges can make slick backs look unfinished. I use a tiny amount of edge formula on a soft toothbrush and work in 30-second strokes to sculpt swoops that read natural. Section the front into four small pieces, not one big chunk, so the swoops lie close to the forehead. Too much product creates a crunchy halo and flakes by midday, so wipe the toothbrush on a towel after each swipe. For a second-day refresh, wet the hairline with a damp cloth, restyle gently, and avoid pulling tight elastics that cause breakage. This method works for 3A to 4B hair and takes under five minutes.
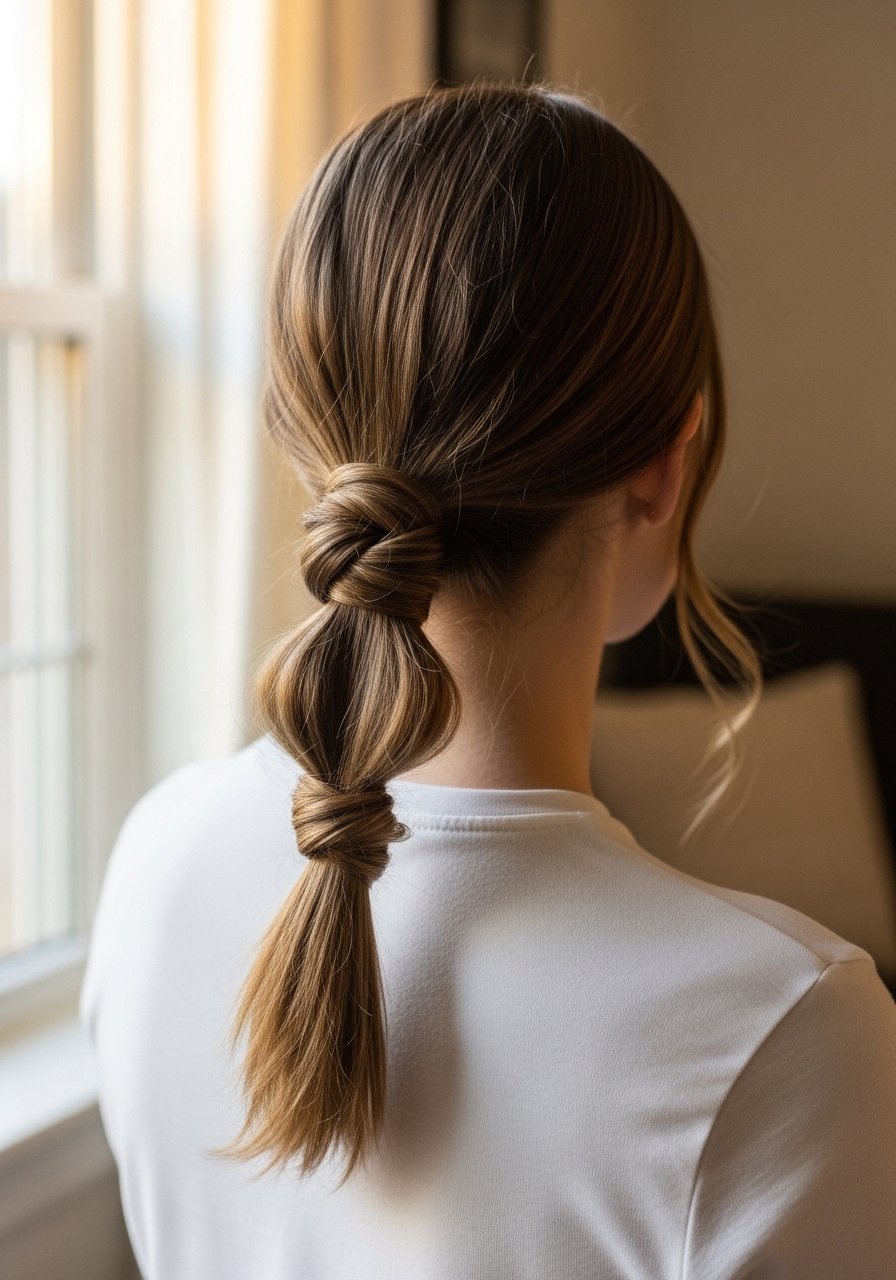
Bubble Ponytail That Survives Humidity
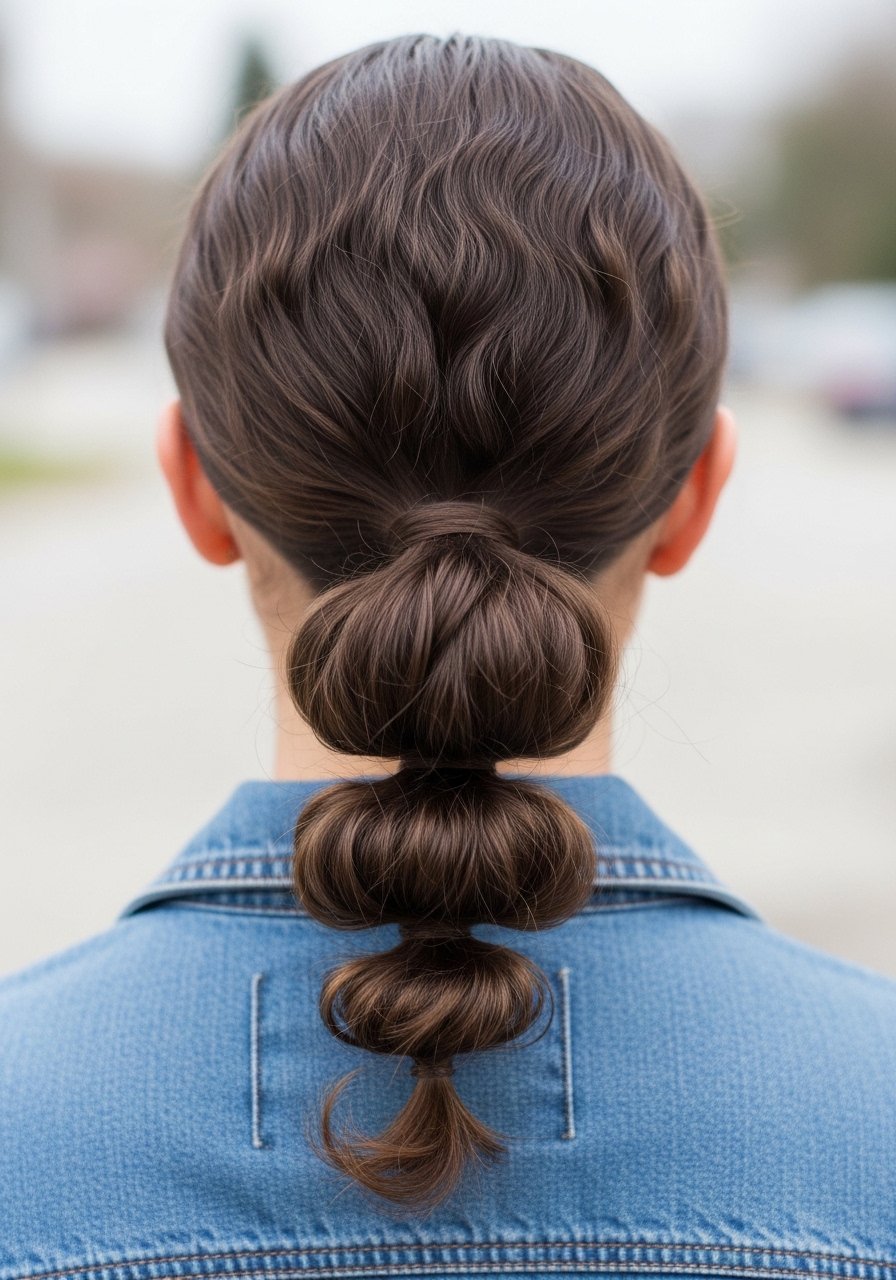
Bubble styles are lifesavers in humid weather because the elastic placement carries the weight and reduces frizz on the scalp. After smoothing the hair into one low pony, place elastics every 2.5 inches, gently pulling the hair between elastics to puff the bubbles. I use a lightweight gel at the crown to stop frizz, then mist the finished bubbles with an anti-humidity spray. Common error is pulling each bubble too hard, which breaks the hair at the elastic. Keep the pulls soft and use a no-metal elastic. Budget friendly, takes 8 to 12 minutes, and works best on 2C through 4A with shoulder length or longer.
Wrapped Elastic Finish For A Clean, Polished Look

Wrapping a piece of hair around the elastic hides the hardware and protects the band from snagging ends. Pull a 1-inch section from the tail, smooth it, wrap twice around the elastic, and secure the end underneath with a hairpin. I use two pins, crossed, for extra hold. This also stops the elastic from digging in when you sleep. People skip the pins and then the wrap slips by day two. This technique costs nothing and adds one to two minutes to your routine. Works for most curl types and straight hair.
Defined Ends With A Single Pass Flat Iron For Curly Ponytails
If you like a sleek crown but defined ends, only iron the last four inches of the ponytail. Dry the hair fully, mist with a heat protectant, then set a 1-inch flat iron to 350F for 3B-C hair and glide once, rotating the wrist into a soft bend. One pass is enough to shape ends without heat fatigue. The detail most articles miss is using a wider plate, 1.25 inches, which smooths faster and reduces time. Always use heat protectant before any iron over 300F and keep sessions short. This is a salon-polish trick you can do at home in under 10 minutes.
Wet-Look Ponytail Without Heavy Build-Up
You can get a wet finish without turning hair into a hard helmet. Start with damp hair, apply three small pumps of a water-based gel through the perimeter only, then smooth with a soft brush. Use the 80/20 product placement rule here, most product at the hairline and just a light mist through the tail. Let the gel set for five minutes before touching the tail to avoid transfer. The usual mistake is globbing gel through the whole length; that kills movement. This method works on 2A through 3C and costs under $15 with drugstore options.
What I Pack For A Slick Back Ponytail Run
- I bring this kit when I travel, it fits a carry-on and covers every look above
- A no-heat detangler brush for quick smoothing, under $15
- A boar bristle brush to distribute scalp oils, 1 count, around $20
- A set of snag-free elastics 30 pack, budget friendly
- Eco Styler clear gel 16oz, about $8, great for edges and perimeter control
- Silk scarf for tying edges queen size, under $12
- Color Wow Dream Coat anti-humidity spray 4oz, splurge but lasts a long time, also available at Ulta
- Olaplex No. 3 hair perfector 3.3oz, buy from the official Olaplex store on Amazon or at Sephora to avoid counterfeits
- Lightweight heat protectant spray 6oz, keeps ends from dulling when you touch up
- No-show ponytail nets 10 pack, for glossy finishes and flyaway control
Half-Up Slick Ponytail For 3A Loose Curls
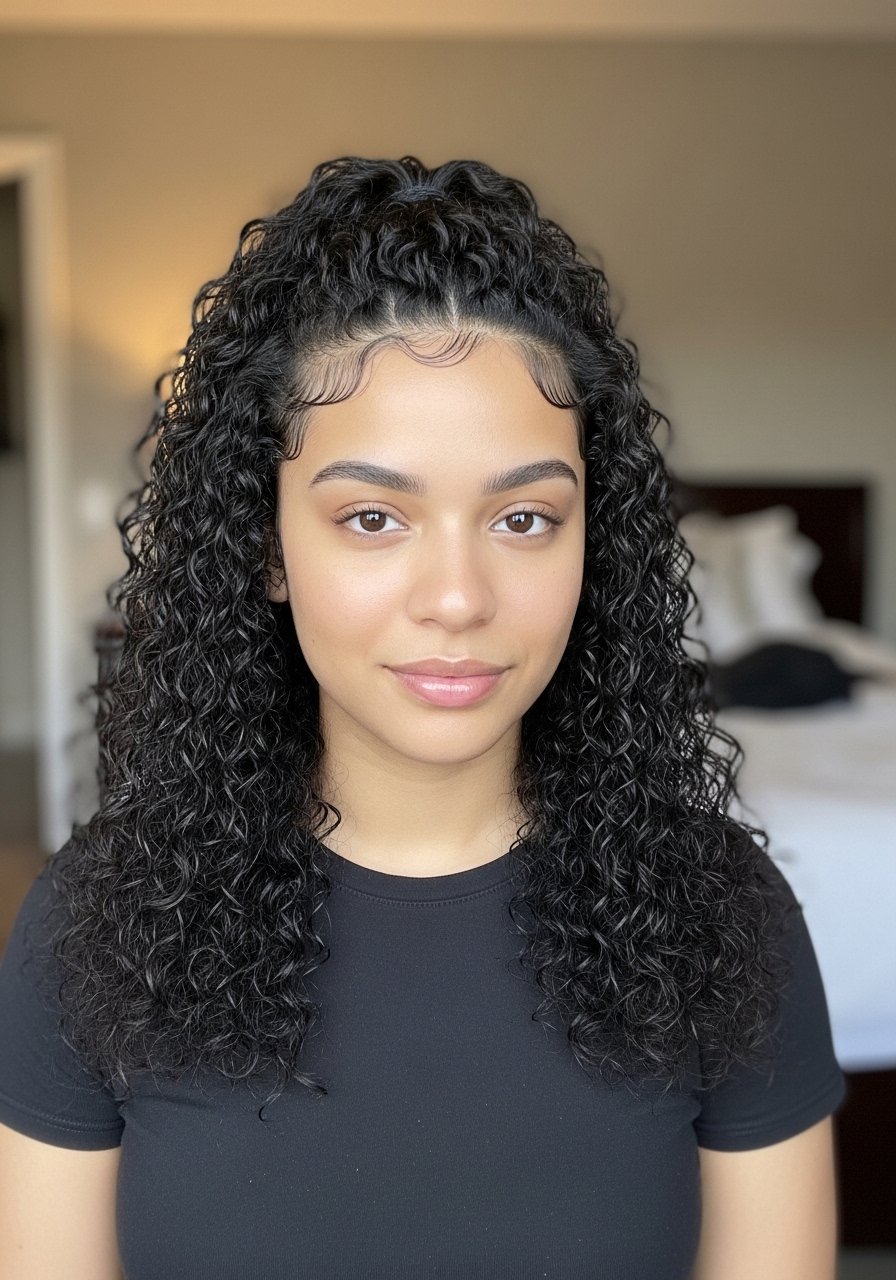
A half-up slick keeps face-framing curls controlled while leaving movement in the rest of the hair. Divide the top section from temple to temple into five small subsections and smooth each toward the crown with a small amount of cream, not gel, to avoid flaking. Clip the rest down, gather the top into a pony, then release the lower hair and blend by finger combing. This gives a cleaner look than pulling everything back and keeps volume at the back. Common mistake is using the same product for both sections. Use a cream on top and a light custard through the tail for the best separation.
Low Textured Pony With Tucked Ends For Medium Hair
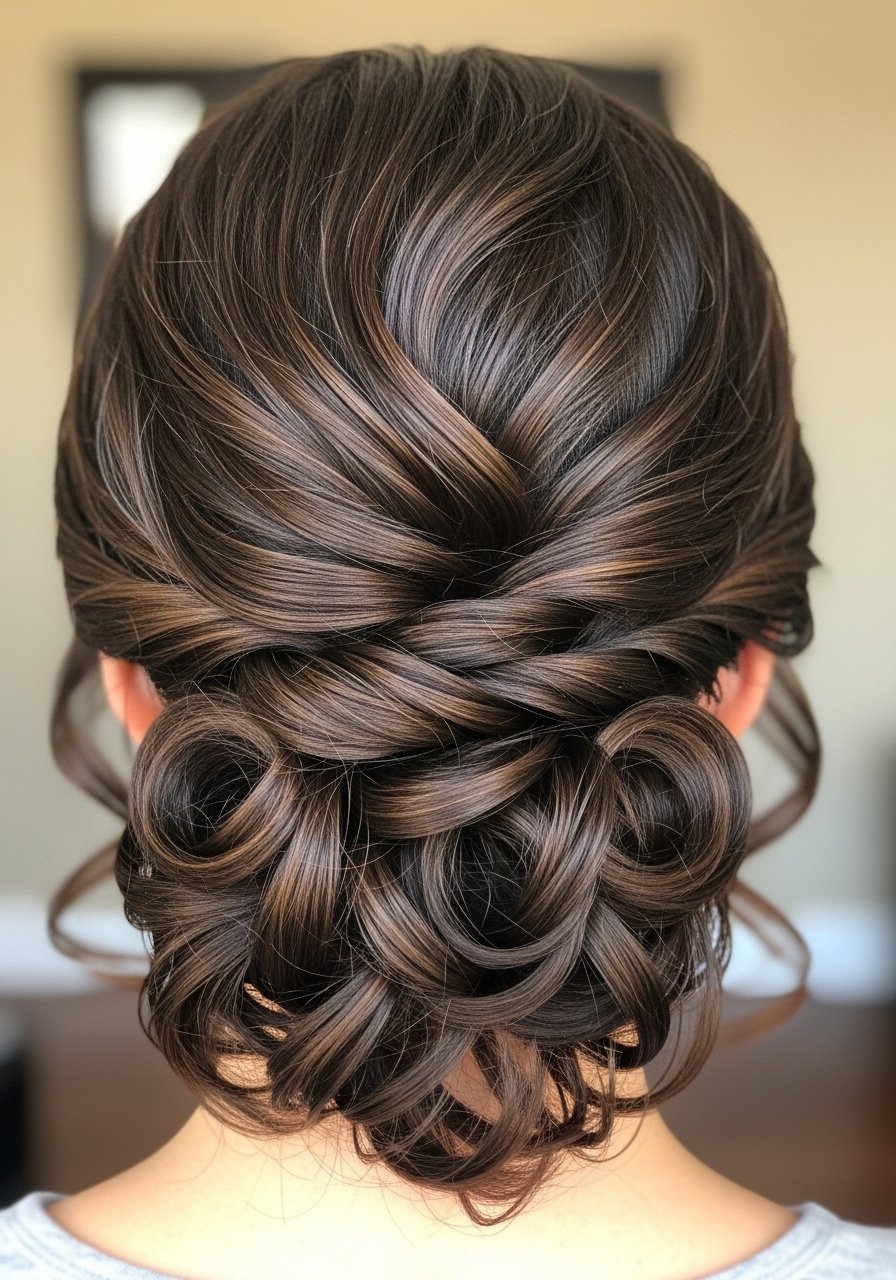
For medium hair that wants texture but not frizz, twist the ponytail once, tuck the ends under and pin along the nape to create a low roll. Before tucking, spritz a texturizing spray into the tail and rake gently so the roll holds shape. This is great for 3B-3C hair that wants evening-friendly polish without heat. The extra detail most guides skip is using three pins placed horizontally for security rather than one vertical pin. DIY friendly and takes under 10 minutes.
Invisible Net Ponytail For Super Smooth Hold
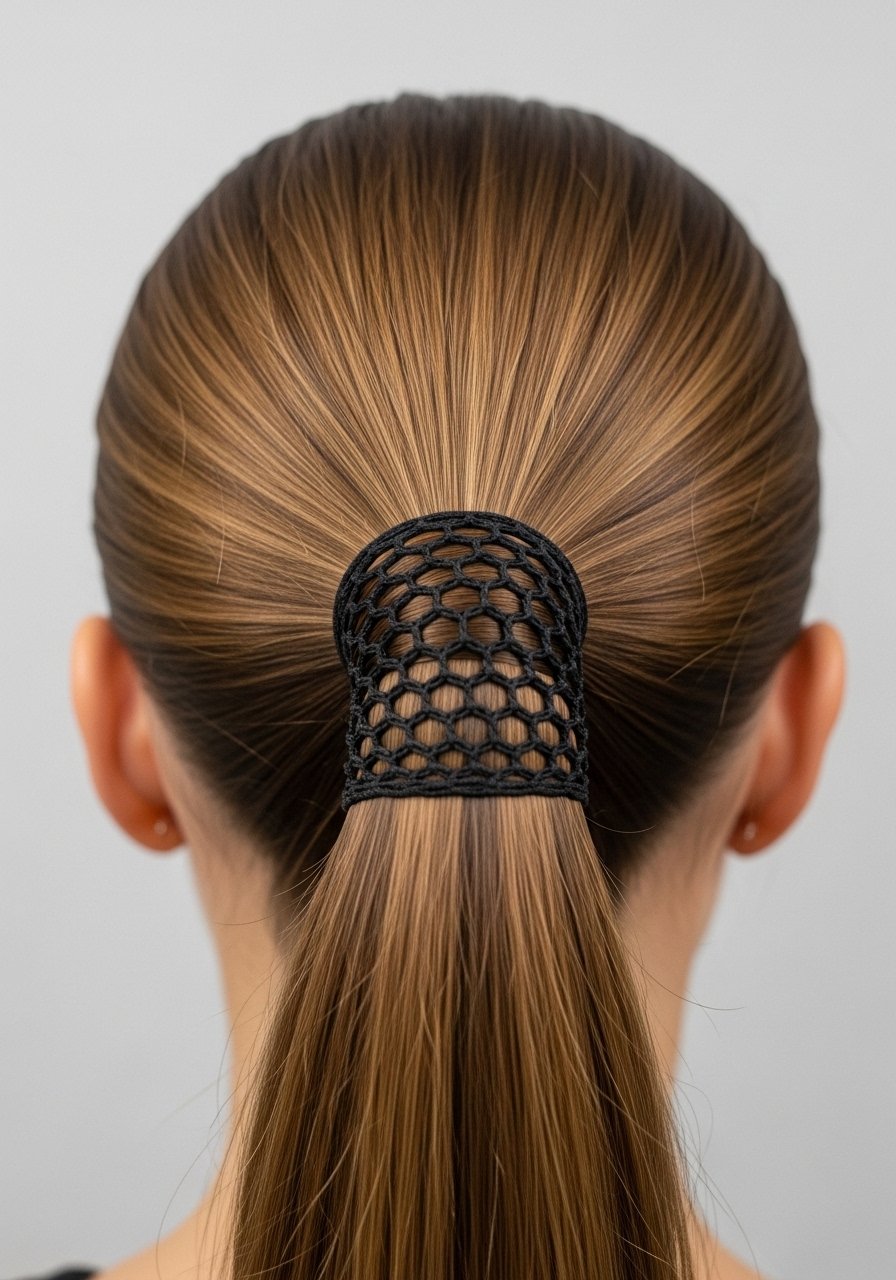
A ponytail net hides flyaways and gives a sleek finish ideal for events. Stretch the net over the tail, then wrap the tail around the net and secure with pins. Nets are a staple in theatre styling because they hold shape without heavy product. People overload on gel when a net alone would have done the job. If you use a net, skip heavy oils so pins do not slip. This costs under $10 and can be reused if washed gently.
Scarf-Wrapped Pony For Color Protection And Style

Wrapping a silk scarf around the base protects hair from elastic friction and adds a finished look. For color-treated hair, silk reduces color fade caused by friction while you sleep or move. Wrap twice and tie securely, tucking the knot under. If your color is fresh, avoid tight wraps right at the scalp for 48 hours to prevent pressure marks. Scarves are cheap style upgrades and take under two minutes. This detail keeps dyed ends smoother between washes.
Quick Knot Ponytail For Shorter Lengths
When you do not have length, a quick knot tricks the eye into a longer pony. Tie the elastic low, make a small loop and pull the tail through halfway to create a faux knot. Pin the loop base flat to the head. The trick is using two elastics, one for the base and one to lock the knot. People try this with one elastic and then complain about slipping. Works on 2C through 3C hair, under five minutes, and looks best with a little texture spray through the tail.
Two-Strand Twist Pony To Reduce Breakage

To minimize tension from a single tight band, create a two-strand twist through the pony. Split the tail into two even pieces, twist each away from you, then wrap them around each other into the elastic. This spreads stress across more hair and prevents single-point breakage. A common mistake is twisting too tightly near the scalp. Keep the twist gentle and secure with a no-metal elastic. This is a low-tech method that helps retain length for coily textures.
Overnight Pineapple Ponytail For Second-Day Wear

The pineapple method preserves curl shape and keeps a slick back pony achievable on day two. Use a soft silk scrunchie, gather hair loosely at the crown into one big loop, and sleep on a silk pillowcase. In the morning, gently release and use a bit of water mixed with leave-in to reshape the front before smoothing to a pony. Major mistake is tightening the scrunchie overnight. Keep it very loose to avoid kinks. This is the easiest no-heat route to a slick style that still looks fresh.
Pre-Pull Volume Trick For Thin Ends

Thin ends can make a slick pony look flat. Create subtle volume by pre-pulling the crown: after securing the pony, lift the top layer of hair and gently tug three small 1-inch sections to create soft lift. Avoid pulling from the hairline which causes tension. Finish with a light mist of texturizer on the lifted area. People overdo this and end up with a halo of frizz. A tiny bit goes a long way and makes the pony read fuller in photos without obvious padding.
Little Rules I Use For Any Slick Back Ponytail
- Heat protectant goes on damp hair, not dry. The cuticle is more open right after drying, so the product absorbs better. A reliable heat protectant spray keeps ends safe when I touch up.
- Grab a silk scarf under $15. It stops friction overnight and keeps slick styles looking put together.
- I keep a small jar of a water-based brushable gel in my bag for emergency touch-ups. A little goes a long way and prevents crunchy buildup. Eco Styler clear gel is cheap and easy to dab on.
- When using heat on textured hair, I choose 350F as a middle ground to reduce damage while shaping ends, and I only do one pass. Heat protectant always comes first.
- If your pony keeps sliding, check the elastic placement. The most secure spot is usually slightly lower or higher than you think. Move it 1 inch and try again before escalating product use.
Frequently Asked Questions
Q: Can I get a slick back look on type 4 hair without heavy gel?
A: Yes. Start with a smoothing cream at the perimeter, brush it flat with a boar bristle or soft bristle brush, and use a light water-based gel only where you need hold. Finish with a silk scarf for 10 minutes to set. This prevents the crunchy feel while still keeping edges tamed.
Q: How often should I use Olaplex No. 3 if I wear ponytails daily?
A: Once a week is usually enough to strengthen bonds without overloading hair. If you heat style frequently, keep it weekly until the ends stabilize. Buy Olaplex from the official store on Amazon or at Sephora to avoid counterfeits.
Q: My ponytails cause breakage. What am I doing wrong?
A: Most breakage comes from tight elastics and pulling at the same spot daily. Switch to no-metal elastics, loosen the tension, and rotate where you place the pony. The two-strand twist trick spreads stress across more hair and helps retain length.
Q: Is a net or heavy hairspray better for a long event?
A: A ponytail net gives a super smooth look without stickiness and is great indoors. Use a light mist of anti-humidity spray on top if you expect humidity. Heavy hairsprays can flake and look obvious in photos.
Q: Will wrapping hair around the elastic damage my ends?
A: Not if you wrap gently and pin the wrap so it does not rub. The wrap protects the elastic from snagging and reduces friction. Avoid tight knots that create pressure points.
Q: Can I bleach or color hair and still do slick back ponytails?
A: You can, but avoid heavy tension at the hairline for the first 48 hours after a color service. If you lifted color, wait until hair has had a bond-building treatment or a salon trim before pulling into very tight styles.
Q: What is the simplest daily quick slick back for mornings when I have five minutes?
A: Smooth the perimeter with a cream, brush into a low pony, wrap a strand around the elastic, and tie a silk scarf for two minutes. Release the scarf, pat the crown, and you are out the door.