I was fed up with fringes that poofed out or clung to my forehead by noon. After letting a salon over-thin my bangs and learning the hard way about one-too-many heavy waxes, I figured out how to keep short hair with fringe subtle, wearable, and low fuss. Below are eleven looks and routines I actually put on my head, with the exact products, timing, and little errors I keep fixing for friends.
These picks suit straight to wavy 1A through 3A hair mostly, plus a few options for denser curls with small tweaks. Most styles take under 20 minutes to style, the upkeep ranges from $0 for trims to a $30 splurge on a tiny blow dryer, and four styles do benefit from a salon cut first.
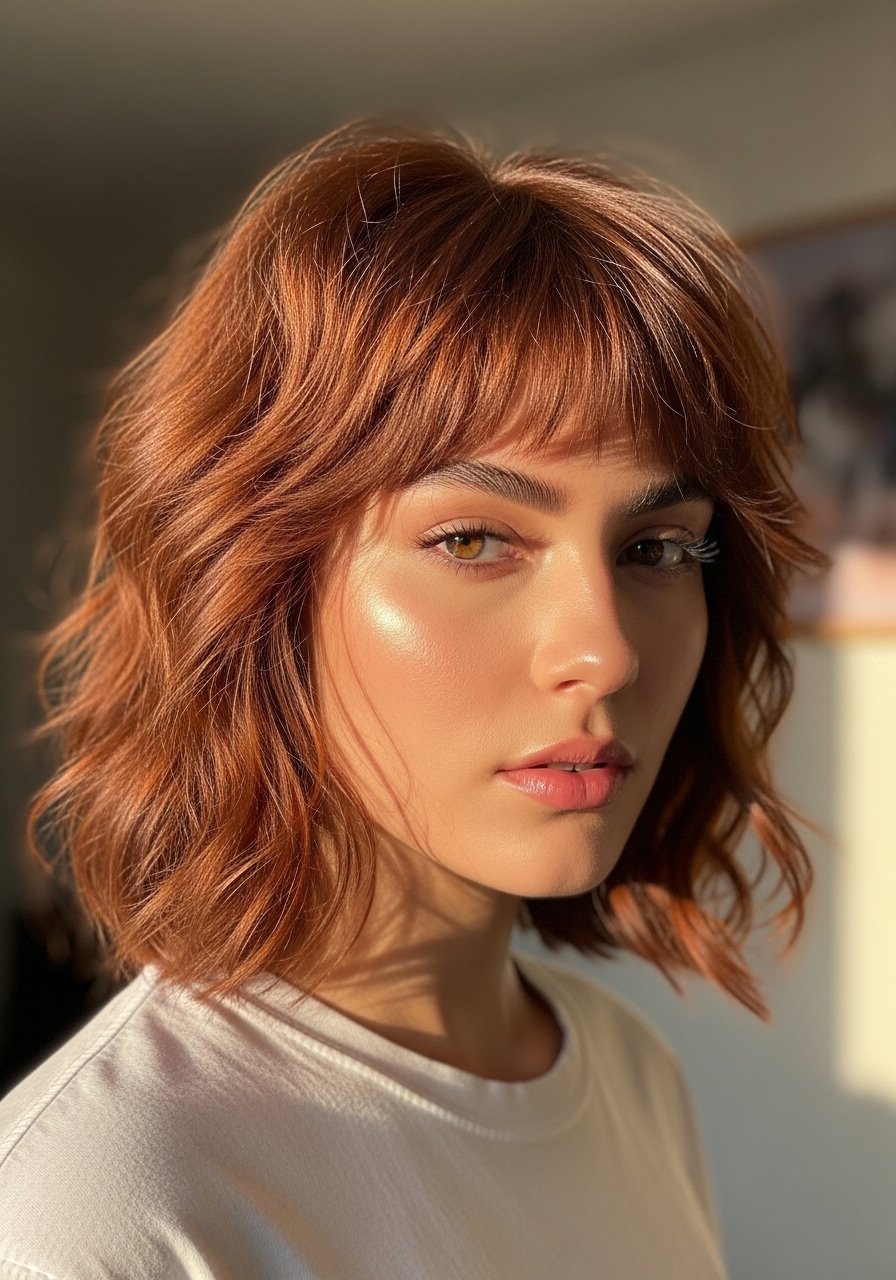
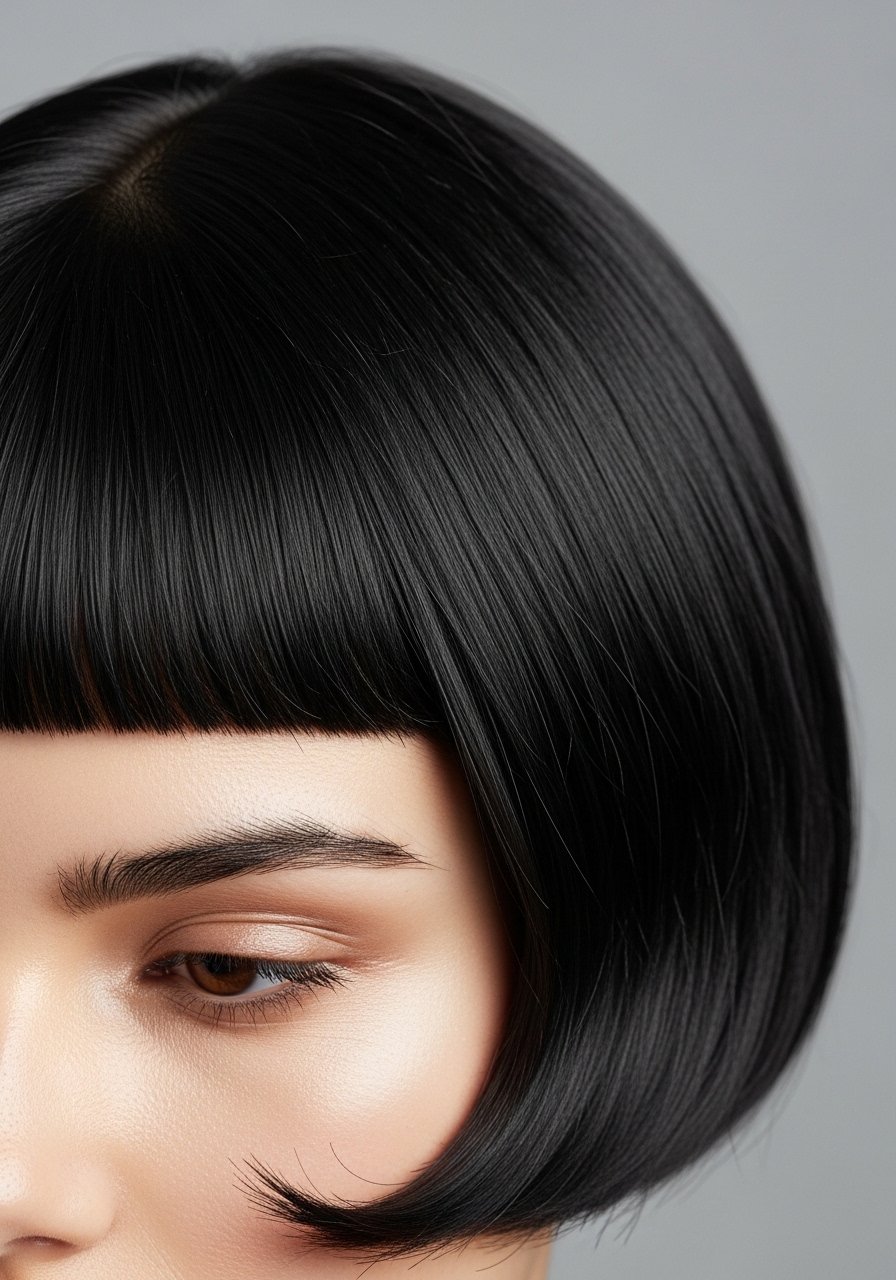
Blunt Micro Fringe With Soft Texture
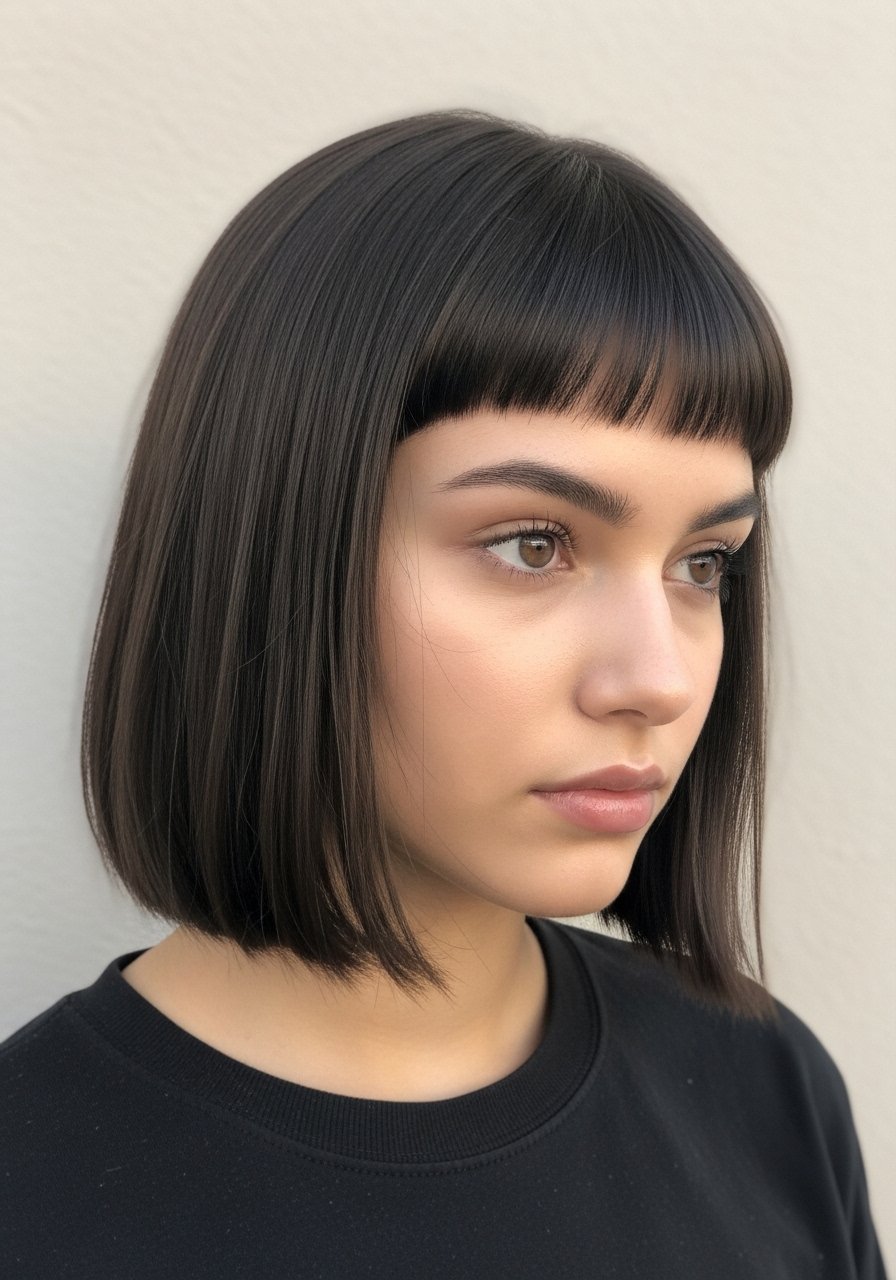
If you want a statement fringe that still reads subtle, keep the fringe short and the ends slightly feathered. On fine straight hair I ask for the fringe to sit about 1 1/2 to 2 centimeters above the brow and then point-cut tiny vertical snips to avoid a helmet look. I smooth a pea-sized amount of a lightweight styling cream through damp hair and blow dry with a small round brush on medium heat, about 300 to 350 degrees on the dryer nozzle. A common mistake is over-thinning at the salon, which makes the fringe see-through by week two. If your stylist suggests thinning with large shears, say no. Trim at home between appointments by lifting the fringe in three small triangular sections and trimming a few millimeters at a time with sharp scissors. For smoothing, I use a travel-size combo of heat protectant and lightweight cream.
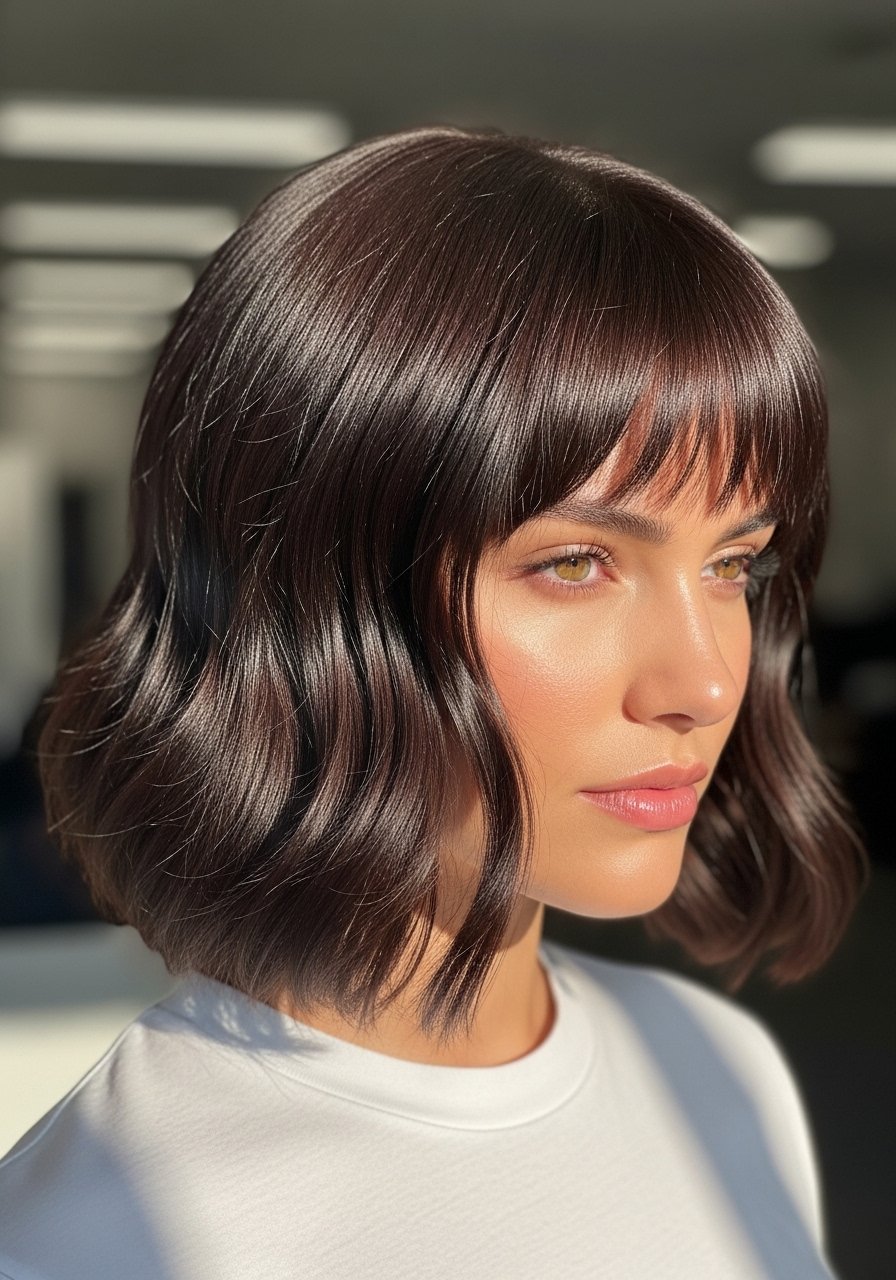
Curtain-Style Fringe That Reads Understated
Curtain fringe is the easiest way to get fringe without the daily commitment. Ask for slightly longer face-framing pieces that angle toward your cheekbones. I split the fringe into two thin sections and blow dry each section inward on a low heat for about 60 seconds using a small round brush, then finish with a one-spray hit of light hold hairspray. The trick that most people miss is product placement. Use the 80/20 product placement rule, putting most product mid-lengths and ends, not at the roots, so the fringe stays airy. This look suits shoulder-to-chin-length cuts, and it is forgiving when your fringe grows out. If you sleep on it crushed, spritz dry shampoo at the root and restyle with a warm brush for 20 seconds.
Wispy Side Fringe for Curly Short Hair

Curly hair plus fringe is tempting but tricky. I stopped trying to cut heavy straight bangs into my curls and learned to keep a single wispy side fringe instead. After washing, I use the LOC method, applying a small dollop of leave-in, then a pea-sized amount of curl cream, and finish with a light gel only where the fringe sits to keep definition without cast. Use five to seven small curls in the fringe area, not a single chunky section, so it blends with the rest. If your curls spring up too short, sleep with the fringe in a loose silk scarf wrap and avoid heavy pomades that flatten the curl pattern. If you are color treating this area, do an allergy patch test first.
Pixie With Feathered Mini Fringe
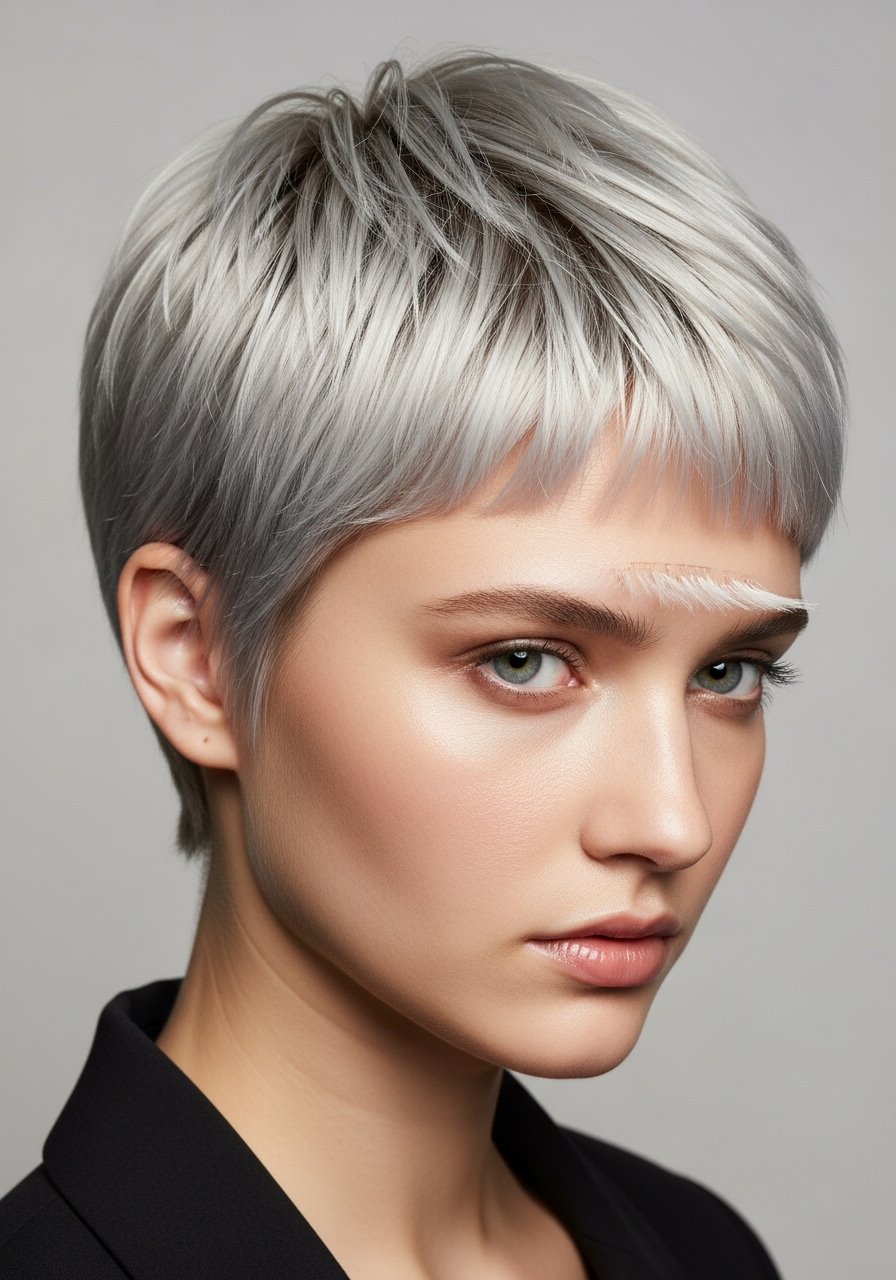
A pixie with a tiny feathered fringe keeps things modern and minimal. The important detail is how the top gets cut. Ask for razor texturizing in 1-centimeter staggered sections across the crown so the fringe sits naturally. For styling, I rough-dry on cool for 30 seconds, then use a 1-inch flat iron at 300 degrees to bend a few strands inward. Always apply heat protectant before any iron over 300F. Finish by tapping a rice-grain amount of paste between fingers and sketching strands into place. The mistake I used to make was globbing product onto the whole top. With short hair you only need dots at the front and crown, not a heavy layer that gums the fringe down.
Shaggy Bob With Choppy Fringe
This is my fallback when I want movement and a casual fringe that can be messy. The stylist should cut the fringe in small diagonal sections rather than one straight line, creating choppy pieces that break at different spots. I diffuse on low heat for about eight to ten minutes with my hair upside down to keep the body, then run a nickel-sized amount of texturizing spray through the bangs only for separation. People often spray too much while the hair is still wet which dilutes hold. Another detail to try is backcombing a millimeter of hair at the crown before shaping the fringe, it makes the face-framing pieces sit better without weight. If your fringe is color-treated, consider a gloss between salon visits to keep tones even.
Soft Blunt Fringe For Thick Hair
Thick hair can make a blunt fringe look heavy fast. The fix is to keep the line blunt but slice the underside with thinning shears so the weight is reduced, not the density across the surface. I like to towel-dry gently, then apply a dime-sized amount of smoothing cream through mid-lengths only. Blow dry the fringe straight down for 45 to 60 seconds with a medium round brush, then blast with cool air to lock the cuticle. A very common mistake is using too much oil on the fringe, which turns it flat and greasy. If oil is your issue, try a lightweight dry shampoo at the root on day two instead.
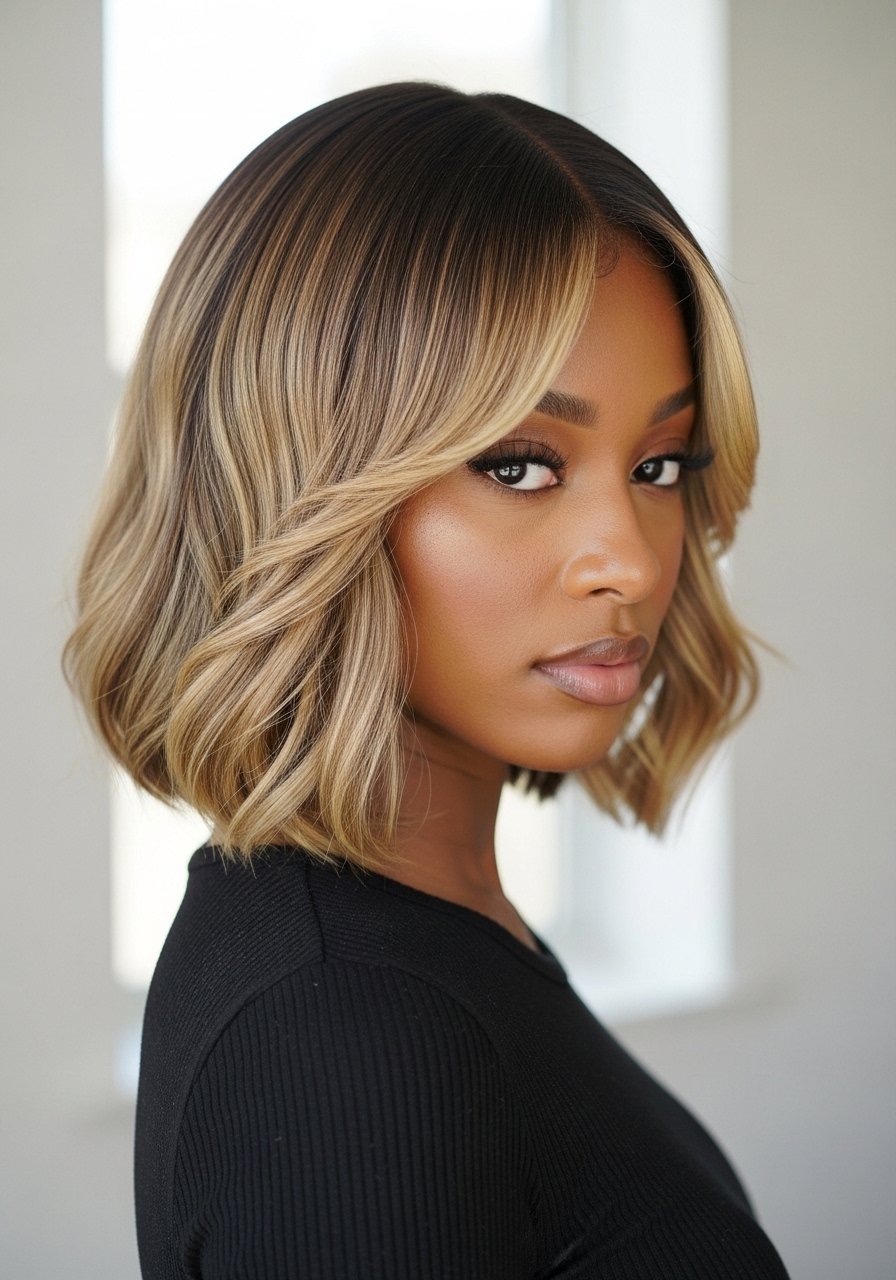
Textured Fringe With Subtle Highlights
If you want the fringe to read soft without a full color commitment, put subtle highlights through the face-framing fringe and the top layers. I asked my colorist for baby-light dimensions, two to three foils, each lifted one to two levels with a low-risk glaze. This creates depth without a high-maintenance grow-out. The trade-off is upkeep. Expect a touch-up or gloss every eight to ten weeks. For home care, use a 10-ounce sulfate-free color-safe shampoo once or twice weekly and a bond-building treatment every one to two weeks. If you decide to lighten more aggressively, do it at the salon to avoid lift-over-lift damage.
Micro-Bangs With a Side Sweep for Round Faces

Micro-bangs can make a round face appear leaner when cut slightly off center and swept at a 15- to 20-degree angle. The stylist should cut the fringe shorter in the center and blend outward to create that side sweep. In the morning I wet the fringe lightly, use a 0.5-inch round brush, and pull the fringe sideways while directing a hair dryer on low for 30 seconds. Overstyling with heavy wax is the error I see most. Instead, use a light cream worked with fingertips to define the sweep. This look is quick to grow out and forgiving if you trim tiny amounts yourself every two weeks.
Low-Maintenance Fringe for Natural Gray Blends

If your hair is going gray and you want a subtle short fringe, embrace a softer line that blends with the natural regrowth. Ask for the fringe to be cut slightly longer than usual so it can be tucked behind the ear when it grows. I use a gentle color-depositing conditioner every three washes to keep brassy tones muted and a leave-in with UV filters for daytime. A common problem is over-washing, which strips natural oils and makes grays feel dry. Cut back to three washes a week if possible, and use a silk pillowcase to reduce friction on the fringe overnight.
Short Curly Fringe That Frames Without Shrinking
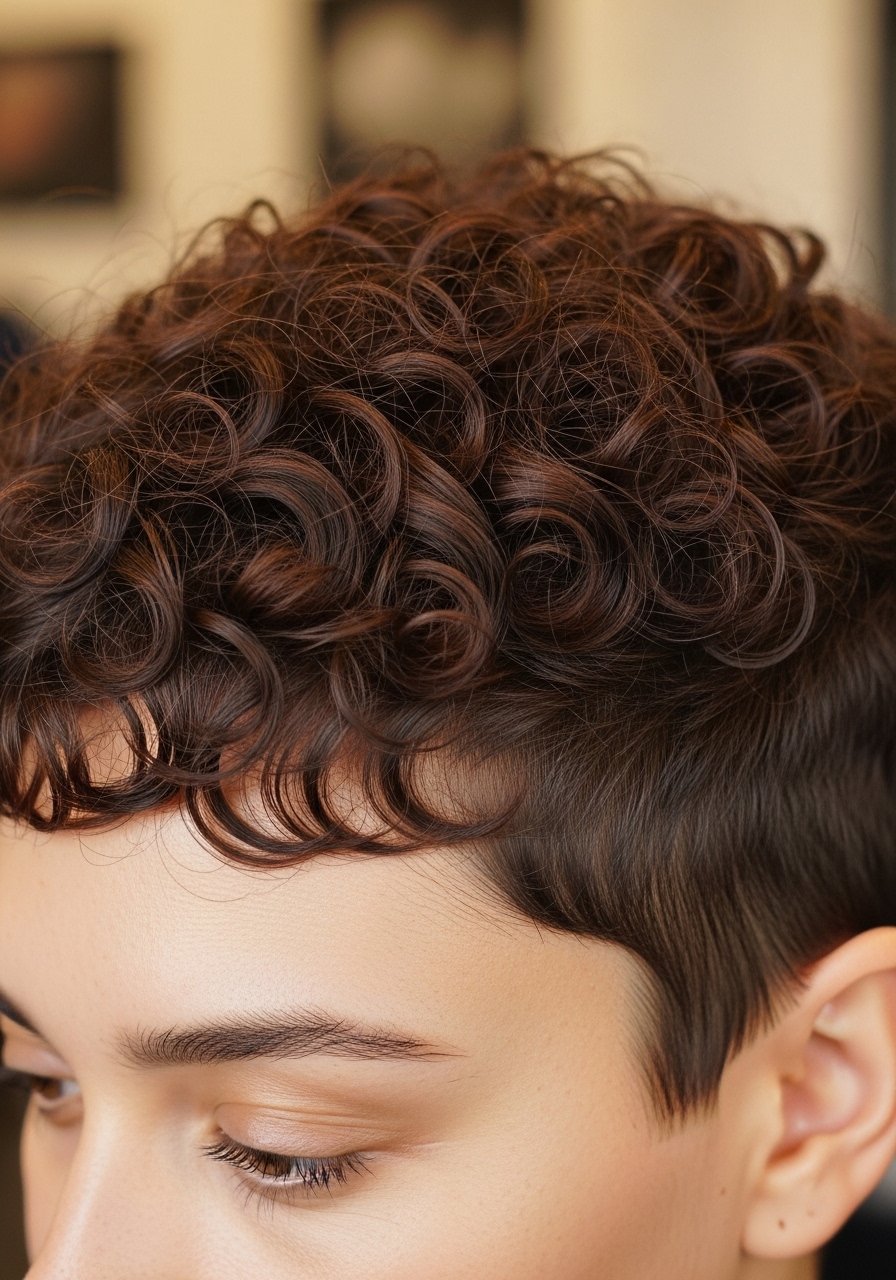
Curls shrink. I learned the hard way that cutting a curly fringe dry, in its natural loop, prevents surprise micro-fringes the next morning. For a cropped curly fringe, have the stylist cut while hair is dry and at rest, trimming in small increments. I style with a pea-size of gel applied by praying hands then scrunch for five seconds. Mistake to avoid is cutting wet and expecting the same length once dry. If you use any heat on the curls, always use heat protectant on the fringe and never go above 320 degrees on small irons. If your scalp is sensitive and you have treatments planned, patch test any high-acid products first.
Retro-Inspired Short Fringe With Modern Finish
I tried a full retro fringe and realized the look can be modernized with softened ends and texture on top. Ask your stylist to leave 3 to 5 millimeters of length at the ends of the fringe then texturize the tip with a razor. For styling, I rough-dry the crown for 40 seconds to add lift, then brush the fringe straight down and lock with a light mist of flexible hairspray. The upkeep is predictable, which I like. If you are coloring your fringe, watch for uneven brassiness at the ends. Use a purple shampoo no more than once a week if you notice warm tones appearing.
What I Actually Keep In My Short Fringe Kit
- For quick trims between salon visits, sharp hairdressing scissors and a small comb. A precise trimming scissor set costs under $25 and saves a panic-appointment
- A travel-size heat protectant I toss in my bag. A heat protectant spray 3.4oz is the one I use most
- For second-day freshness, a lightweight dry shampoo that does not leave flakes
- A small 1-inch flat iron for fringe shaping. A compact 1-inch flat iron keeps costs low and fits in drawers
- For texturizing without weight, a salt-free texturizing spray that gives separation
- One silk pillowcase to stop overnight friction. A silk pillowcase queen size under $25 cut my morning frizz noticeably
- For damage control, a bond builder for weekly use. Buy from the brand store on Amazon or Sephora to avoid knockoffs. Olaplex No. 3 hair perfector is the one I use
- A travel blow dryer with a low heat setting. A compact dryer with cool shot costs around $40 and is easier to aim on short hair
- A small round brush, 1 inch, for fringe shaping. A 1-inch ceramic round brush makes the 20-minute finish possible
- Color care: a 10oz sulfate-free shampoo for highlighted fringe pieces. A sulfate-free color shampoo 10oz
What I Wish Someone Told Me Before I Cut A Fringe
- Heat protectant goes on damp hair, not dry. The cuticle is more open and the product actually absorbs. A lightweight heat protectant spray 3.4oz is worth keeping in the shower caddy
- If you have curly hair, insist the stylist cuts the fringe dry. Wet cutting shrinks curly lengths unpredictably
- Trim every three to five weeks for short fringe. It is cheaper than fixing a botched grown-out fringe two months later
- Hair grows about half an inch a month at most, regardless of supplements. Reducing breakage lets you keep length. Use a silk pillowcase and a weekly bond mask for length retention
- Swap heavy waxes for a lightweight cream or paste when you want subtle hold. The paste gives definition without the crunchy look
Frequently Asked Questions
Q: How often should I trim a short fringe to keep it subtle?
A: Trim every three to five weeks for most short fringes. If you push it to six or eight weeks you will notice it losing shape and starting to flop. Micro-fringes sometimes need a touch every two to three weeks.
Q: Can I style a fringe with a flat iron without frying it?
A: Yes, as long as you apply a heat protectant and keep the iron at or below 320 degrees for small sections. Always protect hair first and avoid daily high-heat passes. If you see dryness, cut back and do a weekly bond treatment.
Q: Will a fringe make my forehead look oily faster?
A: A fringe can make the forehead area seem oilier because oil transfers from skin to hair. Try an 80/20 product placement approach and avoid applying oils to the fringe. A lightweight dry shampoo on day two fixes most oil issues.
Q: I have thick curly hair. Can I have a fringe that looks subtle?
A: Yes, but the stylist should texturize the underside and cut the fringe dry to prevent unexpected shrinkage. Keep styling light, use the LOC method, and avoid heavy pomades that flatten the curl pattern.
Q: Is it safe to bleach a fringe at home to match highlights?
A: Lifting over previously colored hair is risky and often leads to breakage. If you have existing color, book a salon appointment for a controlled lift. If you try at home, do a strand test and space sessions months apart.
Q: Does Olaplex No. 3 actually help damaged fringe?
A: It helps strengthen the strand structure and smooth the appearance when used weekly, but it will not reverse past breakage. Buy from the official store on Amazon or Sephora to avoid counterfeits. Olaplex No. 3 hair perfector works well for me when I use it once a week.