
I kept pinching my roots to fake volume until I learned how the back of short thick hair actually wants to sit. I cut my own bob once out of spite and paid a stylist to fix the uneven layers two weeks later. These screenshots are ideas I actually used when I needed the back to look intentional, not accidental. Each one notes what works for thicker textures, how long it takes, and which product or tool will save you headaches or salon bills.
These ideas are geared to thick hair from short pixies up to collarbone bobs. Most take 5 to 25 minutes to style once you know the sectioning. Budget ranges from under $15 for sprays to a couple of splurges for a good cut or tool. Several are DIY, but a few call out when a pro cut is worth the price.
Textured Pixie With Tapered Nape
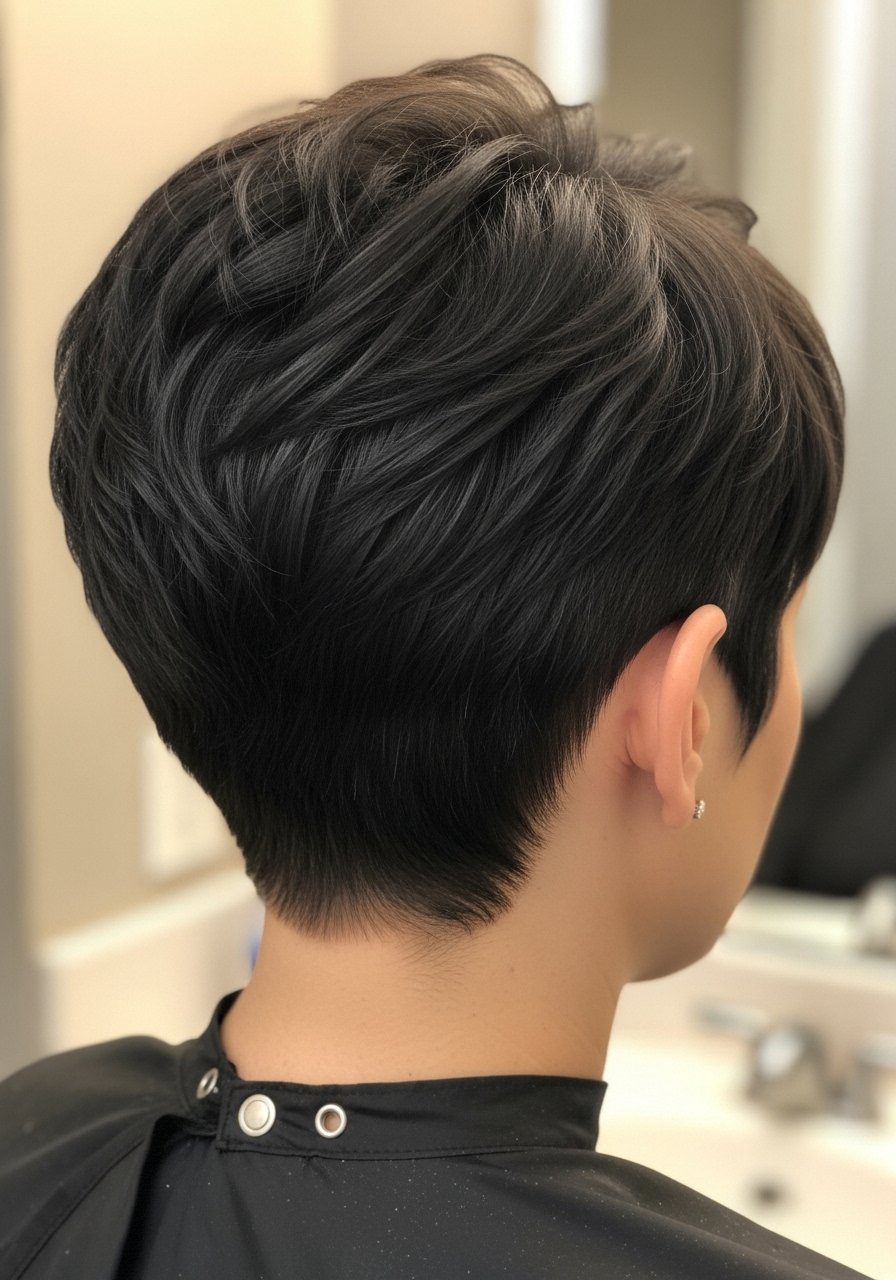
If your hair is thick, a pixie looks messy if the nape is not tapered. Ask your stylist for 3 to 4 graduated clipper passes at the nape, then point-cut the top by hand to keep movement. The result is a rounded back that does not pyramid out. Styling is five minutes: two pumps of lightweight cream through damp hair, rough-dry on low with your fingers, then a 300F flat iron if you want polished pieces. A common mistake is leaving the back one length, which makes the bulk sit oddly. This is a salon cut, not a kitchen scissor job, unless you are very experienced.
Stacked Bob With Short Interior Layers
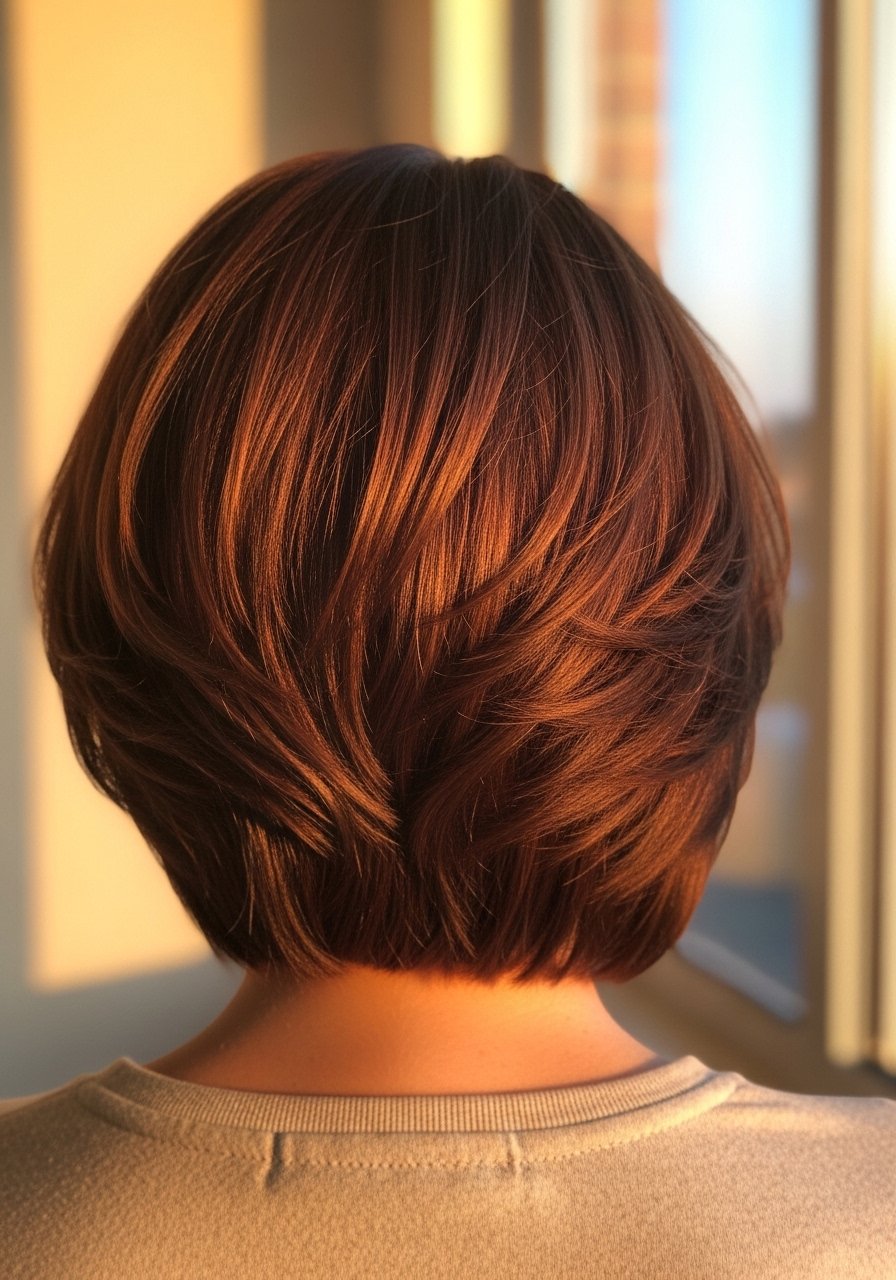
Stacked bobs are the easiest way to get a clean short hair back view on thick hair. The interior stacking removes weight and makes the outer line sit crisp. If you DIY, work in 1-inch vertical sections for accuracy, then dry and cross-check the balance. For styling, two spritzes of sea salt spray and a quick blast with a round brush while directing the crown up gives the shape that photos love. A mistake is over-smoothing the layers with too much oil, which kills the separation. This cut is worth a pro hand, but you can maintain the shape with a monthly light trim.
Razor Shag Bob For Natural Movement
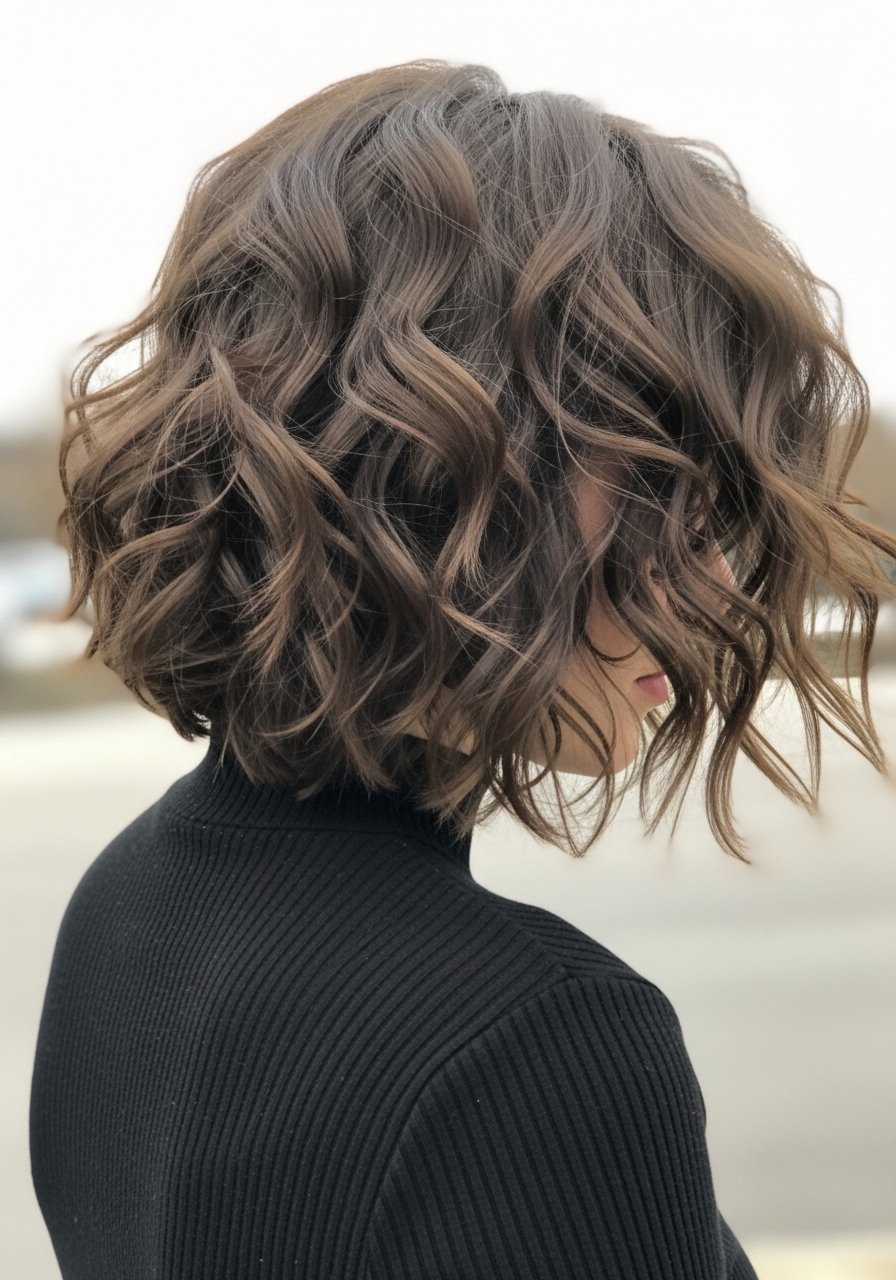
Shags are the fix when thick hair wants motion but not bulk. The razor or slicing technique thins the ends without losing density at the crown. I have seen the back go from helmet to lived-in with just three stepped layers, each about 1.5 inches apart. On styling days, use the LOC method, applying leave-in cream, a light oil, then a cream gel for hold. Avoid using a three-inch section size when razoring, too big and you remove shape. DIY razoring risks frizzed ends, so get the first cut with a pro and ask them to show you how the layers were placed.
Sleek Short Hair With Defined Center Part
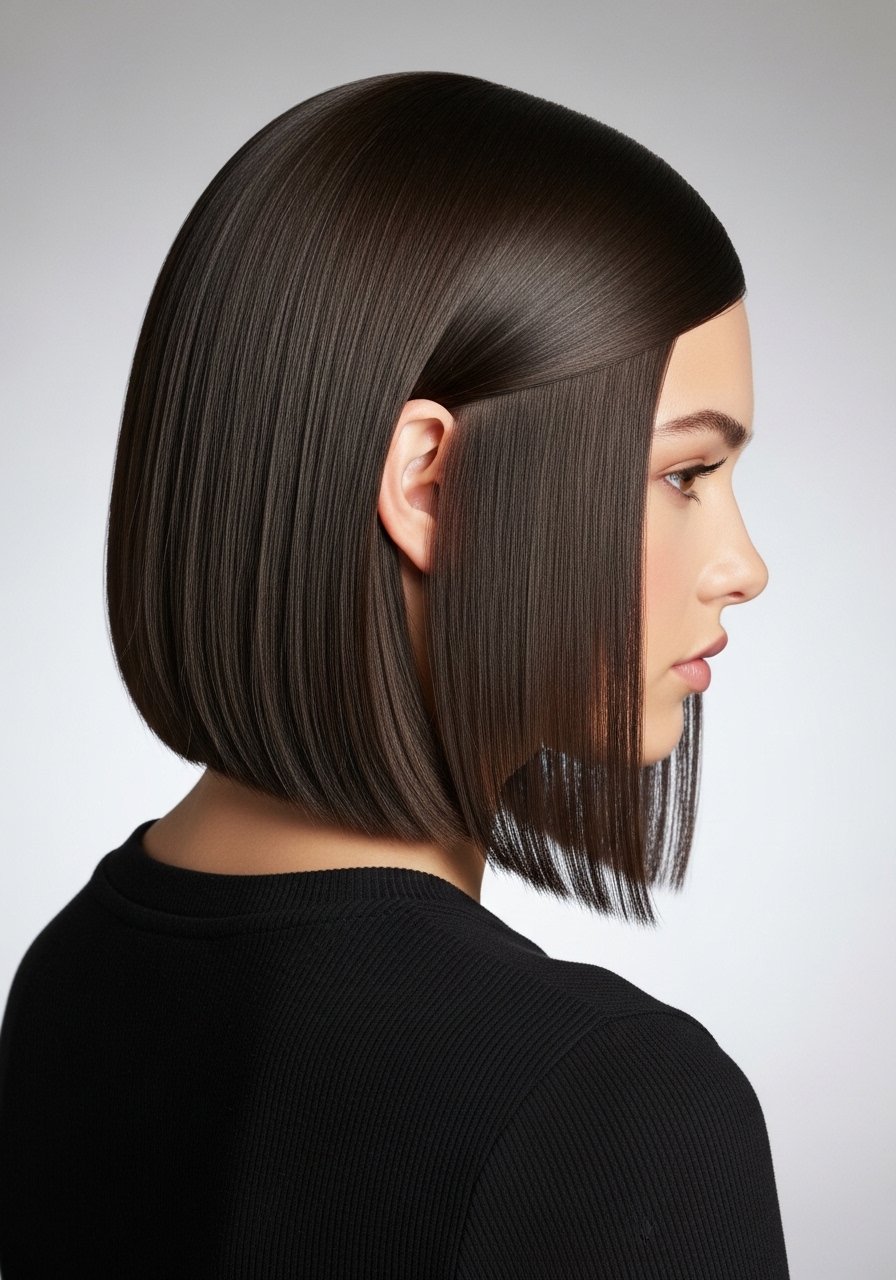
If your thick short hair tends to look bulky, a defined center part and a sleek finish can make the back look sculpted. Use a heat protectant on damp hair, especially before any iron over 300F, then blow-dry with a paddle brush hugging the crown for 60 seconds at low speed. Finish with a thin mist of anti-humidity spray so the drape holds for a couple of days. Common mistake is overloading oil at the roots which flattens volume. This is an at-home styling routine that takes 10 minutes once you practice the parting.
Curly Crop With Stacked Back For Bounce
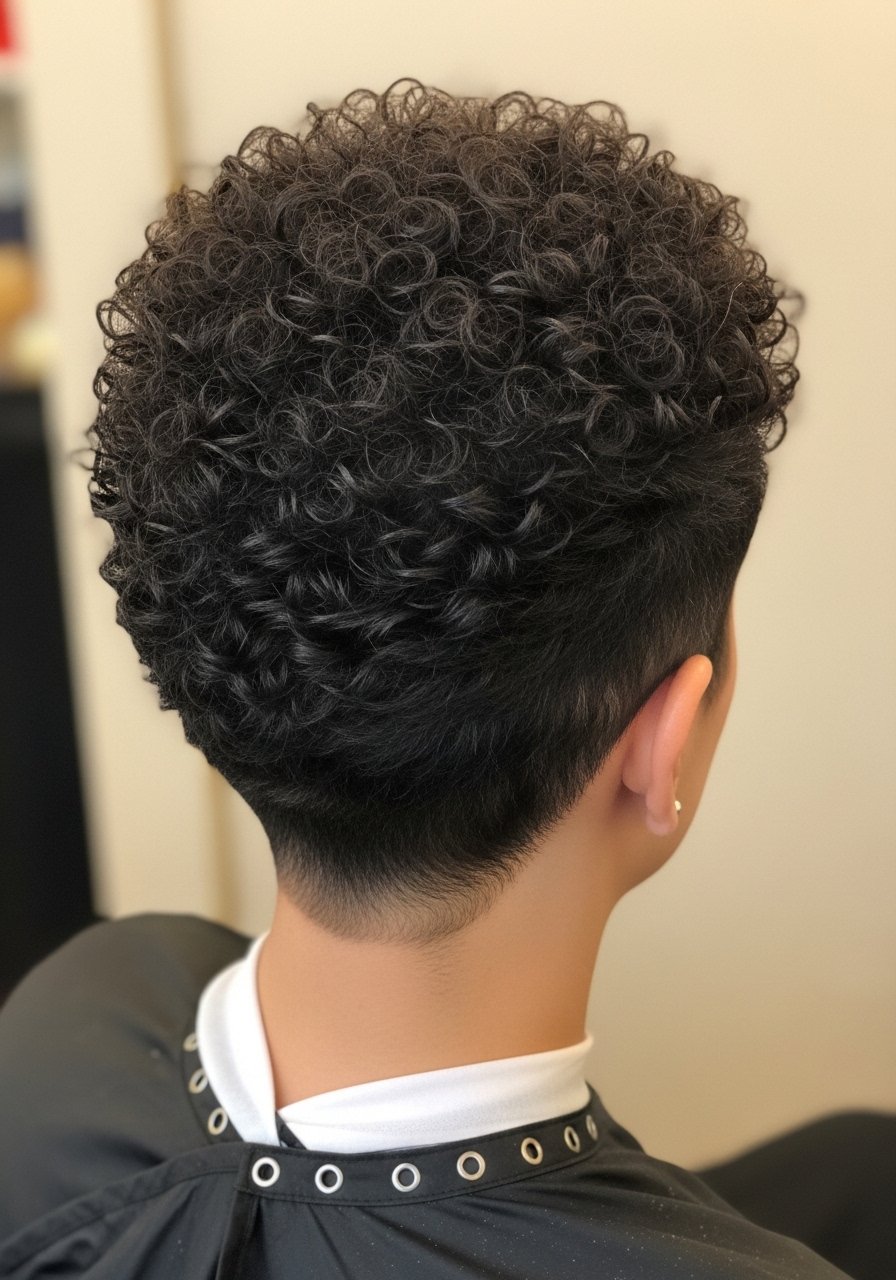
Thick coils can look heavy if the back is one length. Stacking and a slightly shorter nape lets curls spring up instead of laying flat. Detangle in sections no larger than a thumb width to keep curl clumps defined. I do a weekly deep condition and use a leave-in with medium hold, then finger-scrunch while air-drying or diffuse on low for 8 to 10 minutes. A mistake is applying gel to already-dry hair, which makes it crunchy and flakey. This look is manageable at home but expect trims every six to eight weeks to keep the stack tidy.
Hidden Undercut For Reduced Bulk
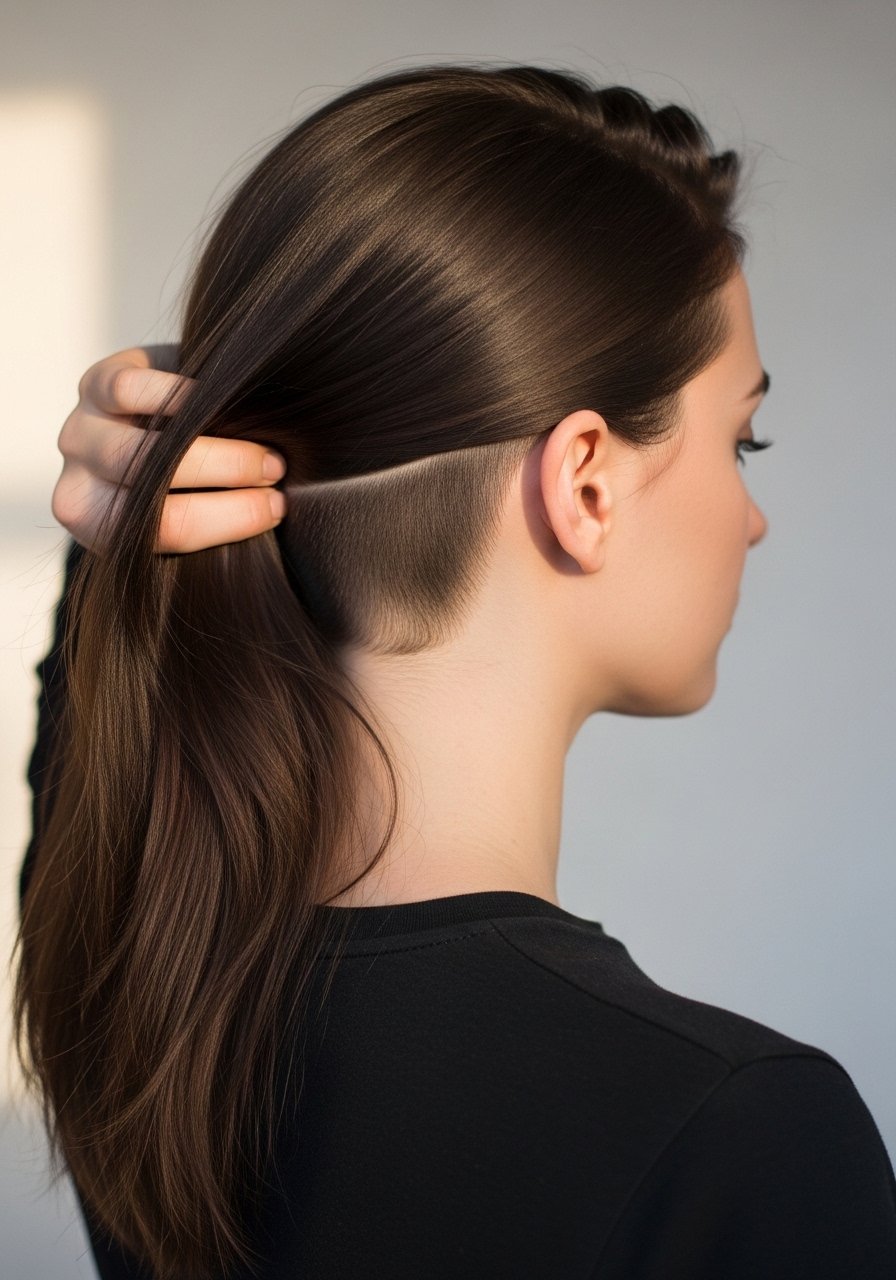
A hidden undercut is a lifesaver if your short back view needs shape without losing length. The shaved section sits below the weight and gives instant reduction in bulk. I recommend keeping the undercut small, about two fingers wide, and blending the top with scissors-over-comb. The downside is regrowth lines in three to five weeks, so plan trims or embrace the grow-out by blending layers. This is a salon job. If you try it at home, start small and stop to check the silhouette often.
Short Hair Half-Up With Twisted Detail
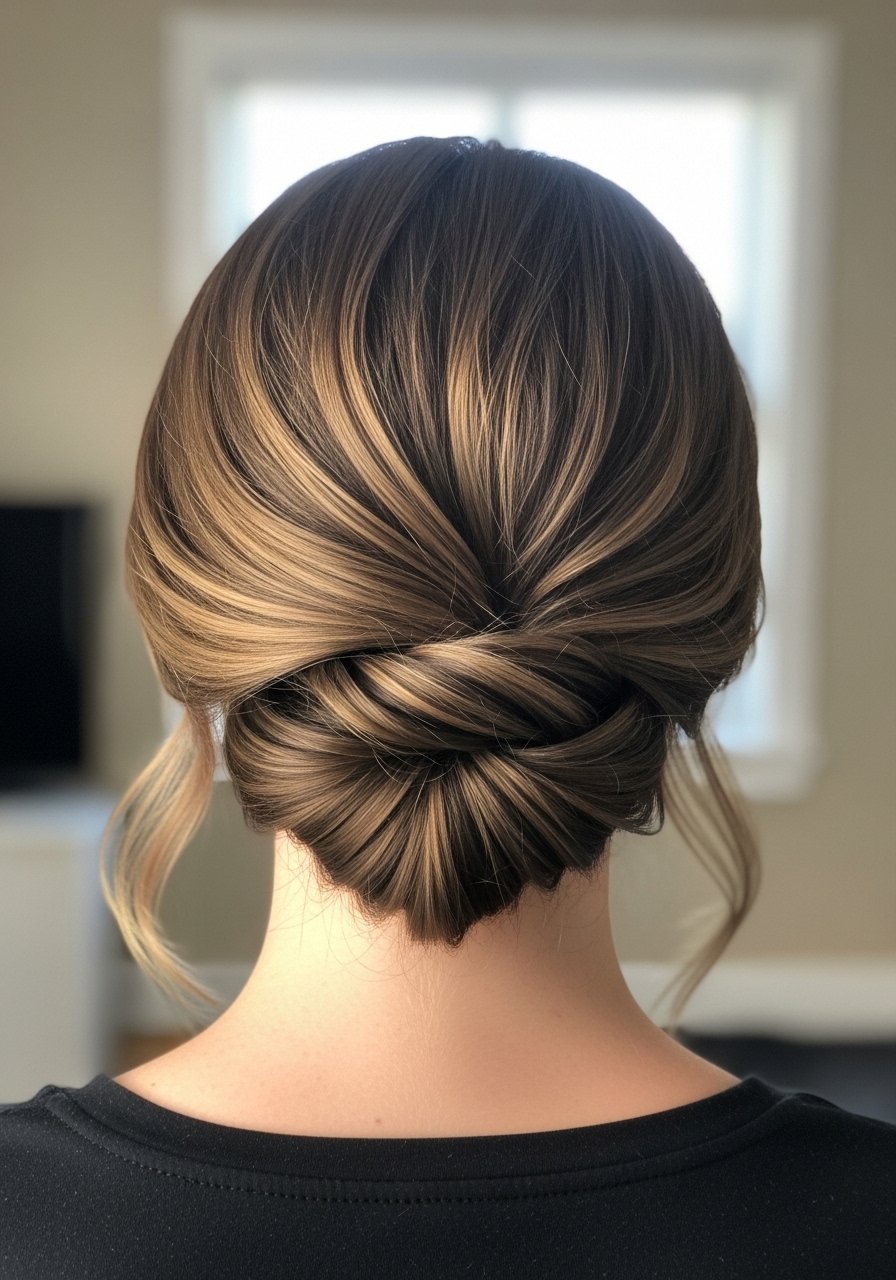
When I wanted the back to look intentional fast, I started twisting two 1-inch sections from each side and pinning them into a low knot. It takes three minutes and makes thick hair look styled without heat. Use two U-pins and a dab of texturizing paste on the ends to keep the knot from slipping. People over-twist, which can create a flat back; instead, leave a little looseness for lift. This is a great on-the-go trick paired with the stacked bob or shag cuts above.
What I Actually Screenshot When I Want Short Back View Ideas
- Olaplex No. 3 hair perfector 3.3oz. Weekly bond treatment that smoothed my frayed ends after a DIY color disaster. Buy from the official Olaplex store on Amazon or Sephora to avoid counterfeits
- A silk pillowcase queen size. Saved morning frizz and reduced breakage on short crowns
- Microfiber hair towel wrap. Cuts dry time by a third when you are working with dense hair
- Boar bristle paddle brush. Helps distribute scalp oils to the back without stretching layers
- Color Wow Dream Coat anti-humidity spray 3.4oz. One quick application before blow-drying keeps a sleek back for days
- Texturizing sea salt spray. Two spritzes for short bobs to add separation and grip for twists
- Claw clips set. Useful for sectioning thick back hair while cutting or styling
- Razor comb for texturizing. Use carefully or have a stylist demo before trying on thick hair
- A light-hold cream gel for curl crops and shags that need flexible hold
Blunt Bob With Hidden Layers For Shape
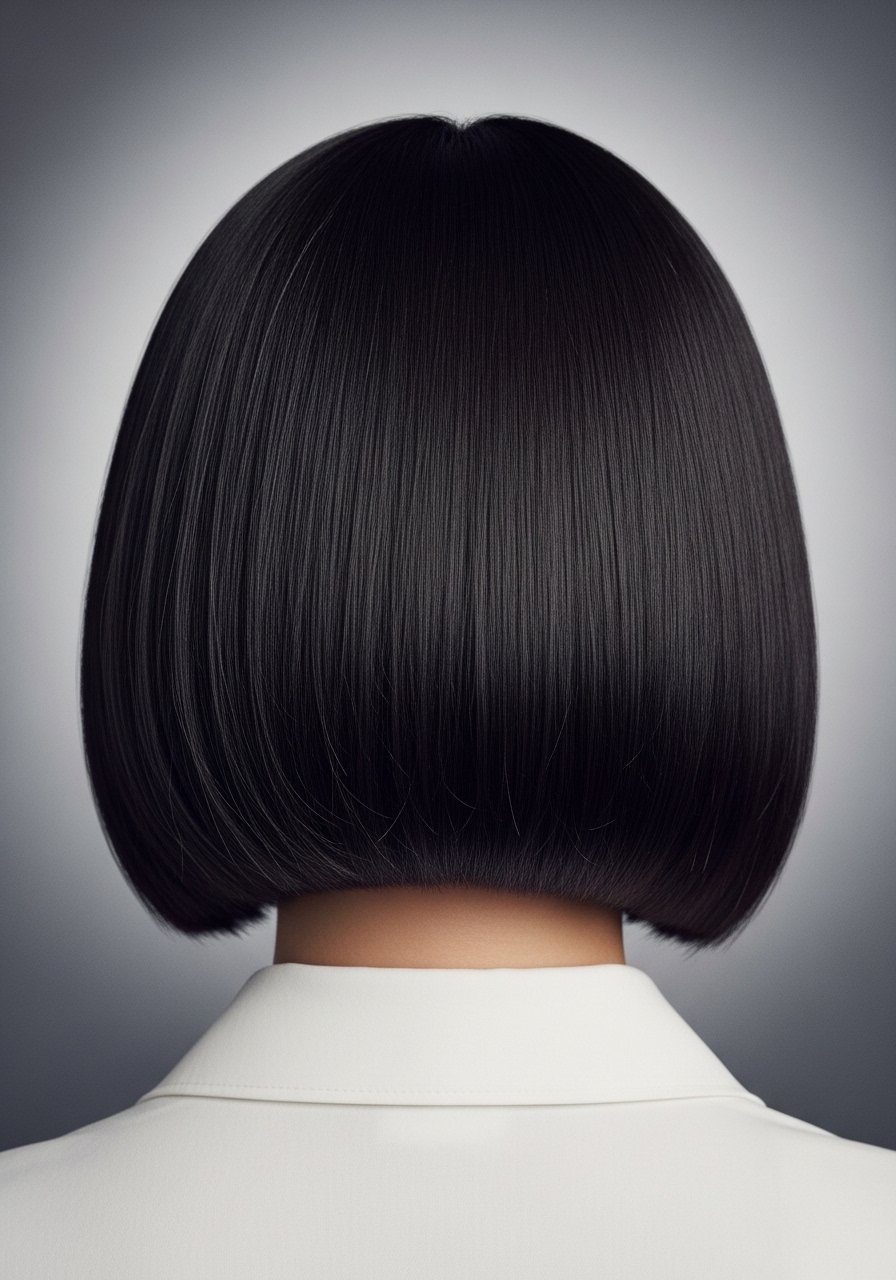
Blunt outer lines framed around hidden short layers keep thickness under control while giving a bold back silhouette. The trick is the layers start 2 to 3 inches in from the perimeter so the blunt edge remains intact. On styling days, use a small amount of smoothing cream on the ends only and a round brush to direct the outer line. A common error is layering too shallow which creates a heavy crown. This style is best cut by a stylist who understands interior weight removal for thick hair.
Short Curly Mohawk With Tapered Sides
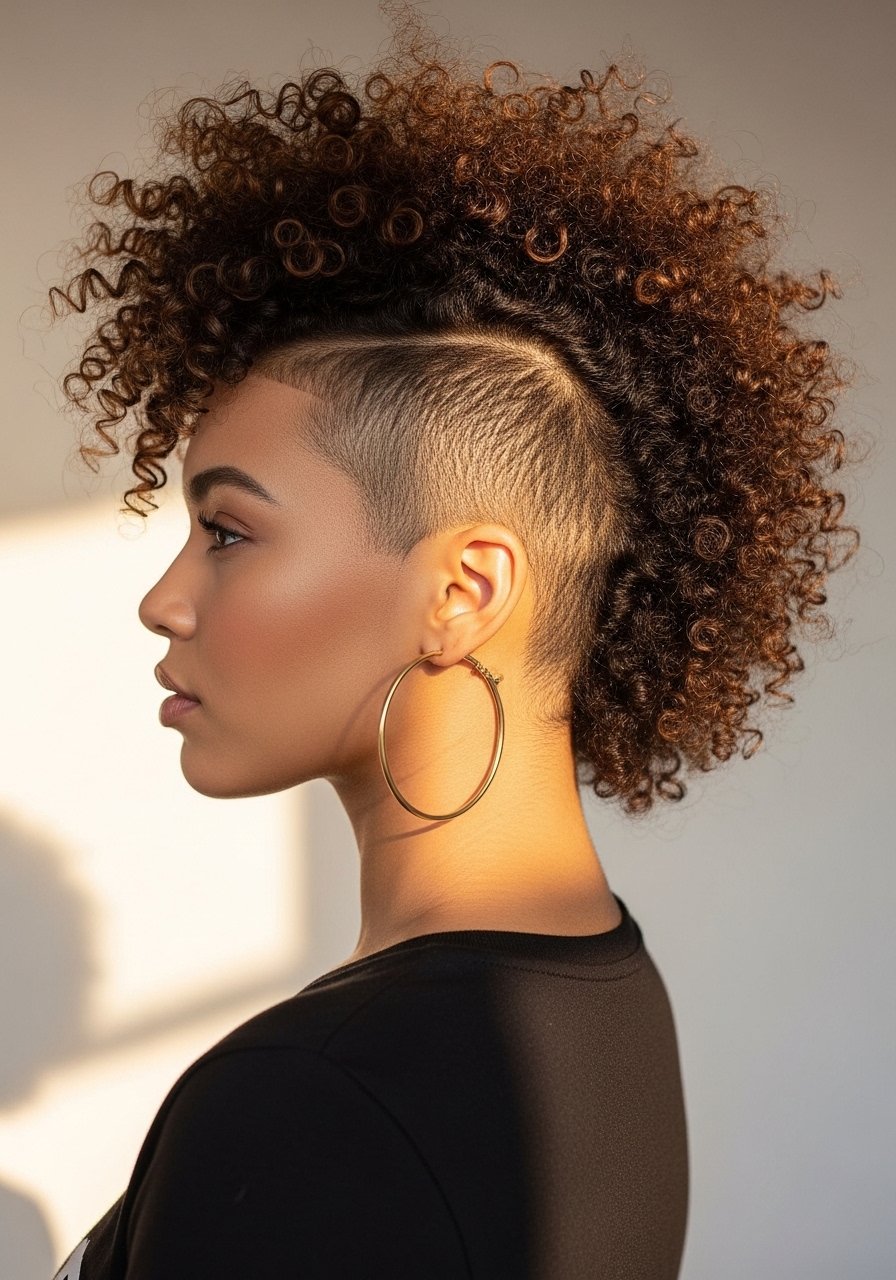
If you want drama in the back without bulk, a curly mohawk keeps the center full and shaves or tapers the sides. Keep the shaved sections minimal if you plan to grow it out. Use a curl cream layered under a light gel while hair is damp and diffuse on low for 6 to 8 minutes. A mistake is trying to do too wide a taper which looks like an uneven cut when grown out. Salon is best for the initial shape. Maintenance is trimming every four to six weeks.
Faux Undercut With Sculpted Padding
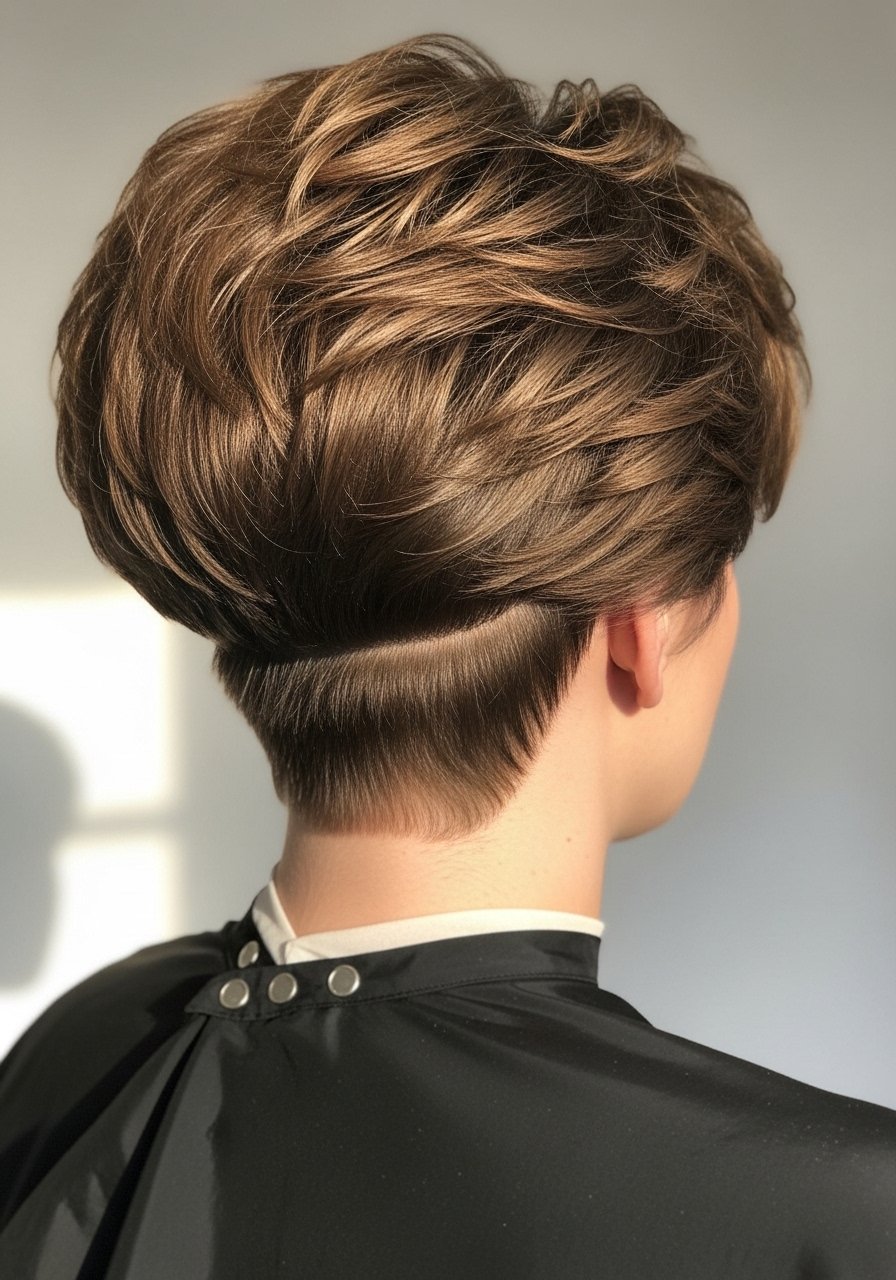
If you are not ready to shave the nape, use a small padded insert under the top layers and pin to create the illusion of an undercut. This gives the back a smaller base without commitment. Secure with two long bobby pins and hide with the top layer. I use a few sprays of texture paste on the top layer to keep it from slipping. Overuse of padding looks artificial, so aim for a small bump no larger than a quarter for short cuts. This is an at-home styling hack, not a permanent solution.
Short Hair With Money Piece Face Frames
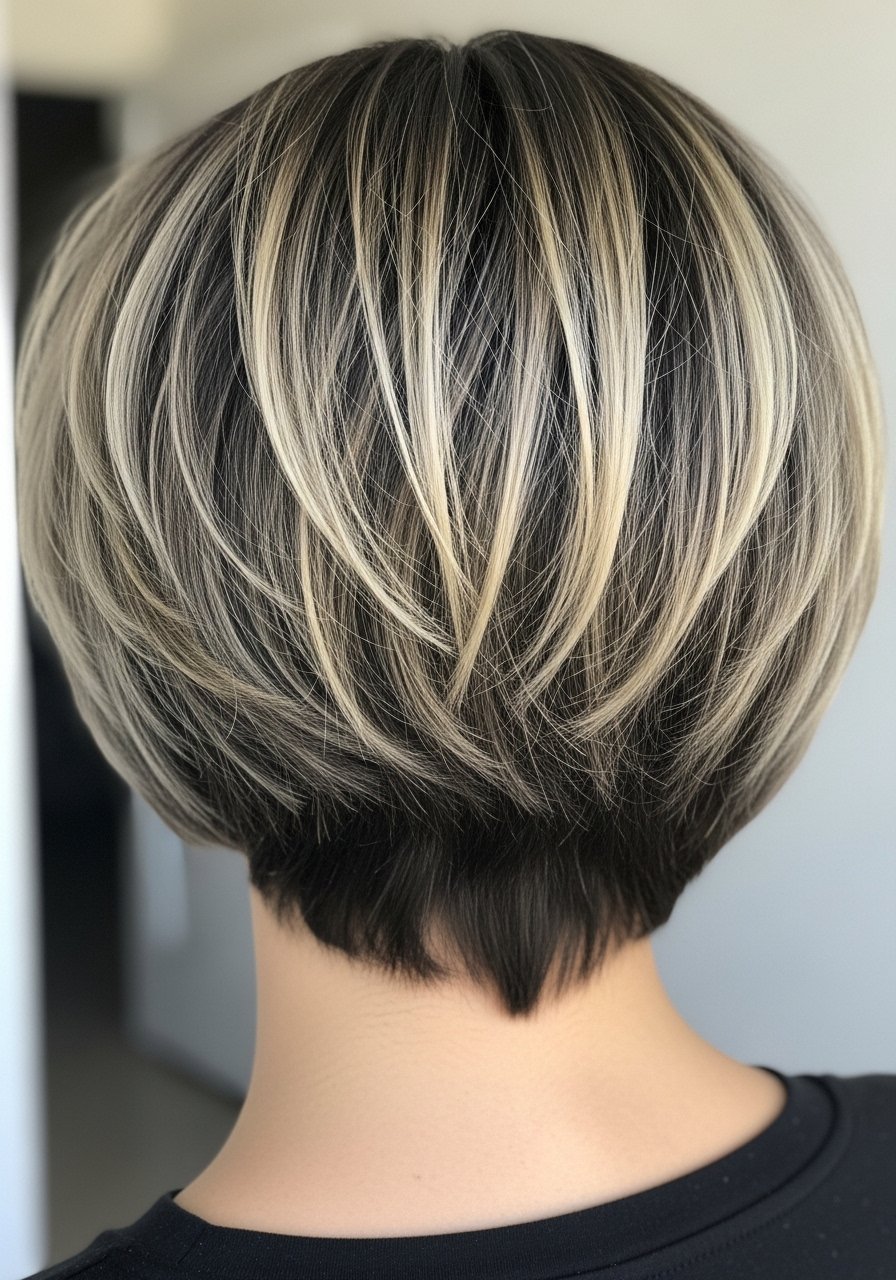
Money piece highlights can brighten the whole haircut and make the back look intentionally darker, which adds depth. For thick hair, keep the front slices small, about 1/2 inch, so the color reads without creating heavy regrowth lines. If you are coloring at home, do an allergy patch test first and use lower developer strengths to avoid breakage on previously colored hair. Over-lightening the entire front is a frequent mistake. Salon touch-ups every 8 to 12 weeks keep the line clean with less overall damage.
Short Wet Look With Sculpted Nape
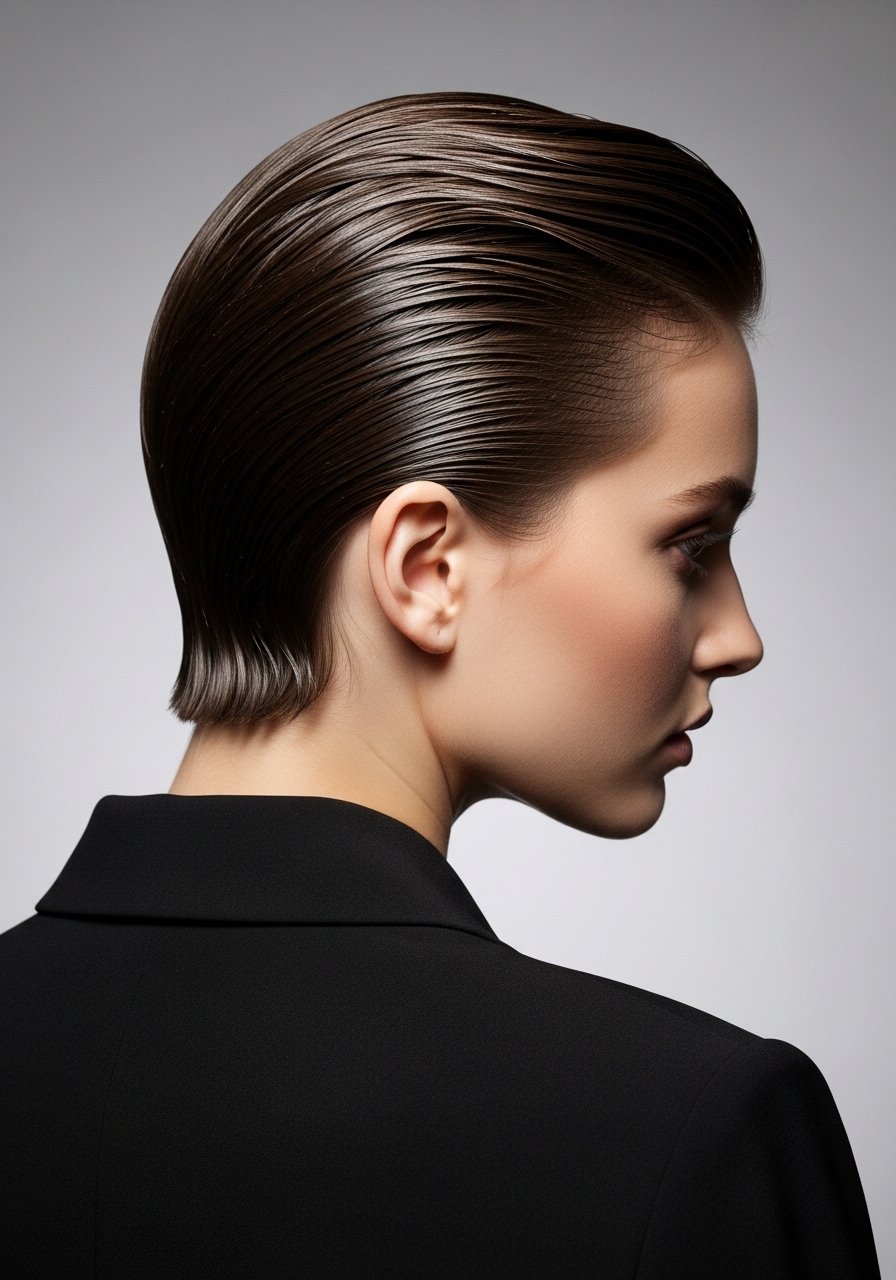
The wet look can make short thick backs appear polished and deliberate. Work a pea-size amount of gel through damp hair focusing on the nape and crown, then comb back and set with a light mist. For long-lasting hold, seal with a micro-fine hairspray. The classic error is using too much product at the roots which makes hair stiff and greasy. Heat is unnecessary for this style. If you colored recently, wait at least 48 hours before heavy gels or sprays to avoid product buildup affecting the dye.
Short Braided Accent At The Nape
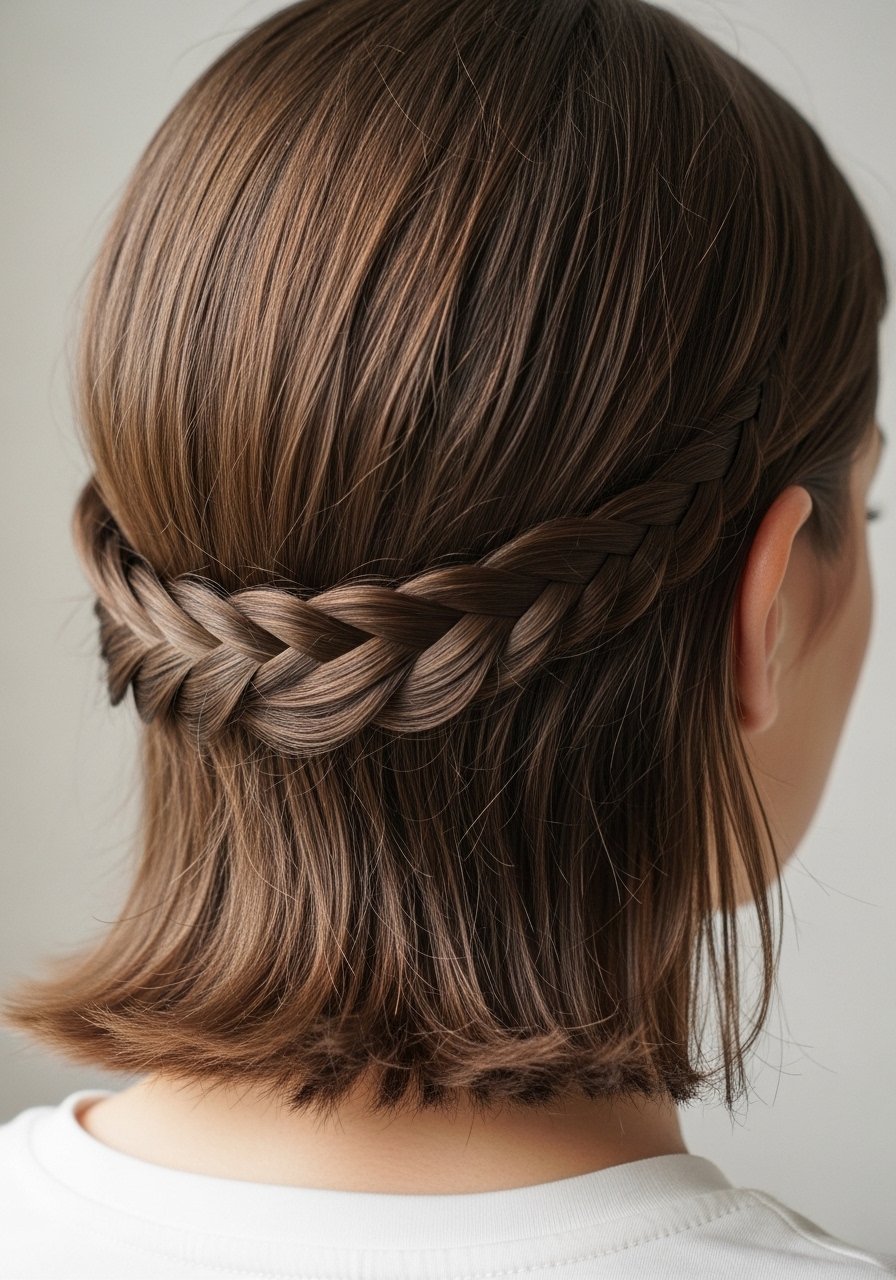
A tiny braid at the nape adds interest and keeps shorter hairs tucked in. I braid with a 3/8 inch section and secure with a small clear elastic, then pin the braid flat against the head. This is perfect when you want a detail visible from the back without changing the cut. Common mistakes include making the braid too thick which changes the silhouette, or braiding wet hair which causes shrinkage. This is a quick DIY move that photographs well and survives movement.
Tousled Bedhead Using Robe Tie Heatless Curls
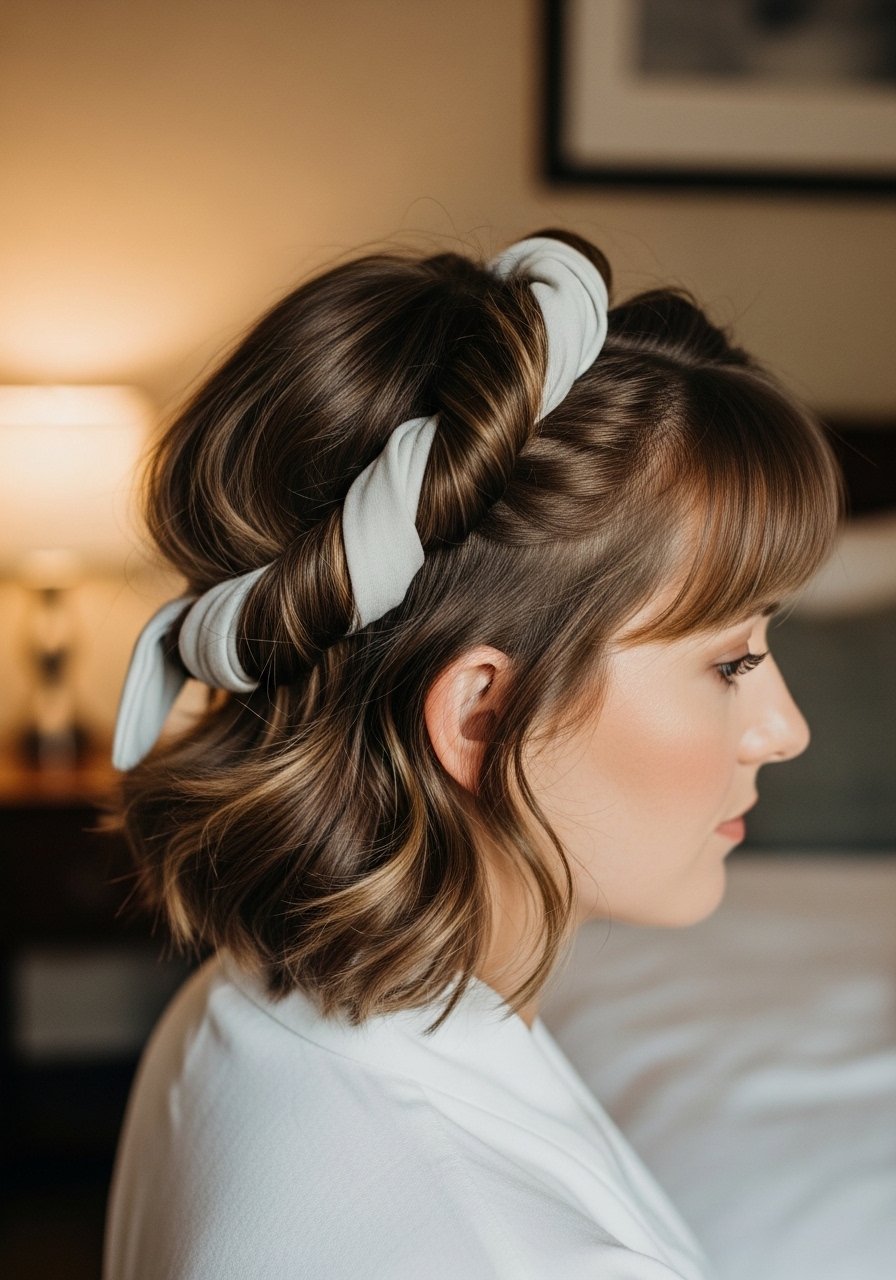
For softer waves on short thick hair, the robe tie method works overnight without heat. Section hair into four 1-inch pieces and coil each around the sash, securing the ends. In the morning, unravel and finger-comb to separate. The mistake people make is using chunks too big which gives uneven waves. This is a low-cost option and kinder to hair than daily heat. If your hair is color-treated, you can still do this nightly. Finish with a light mist of texturizing spray for hold.
Side-Swept Volume With Root Lift
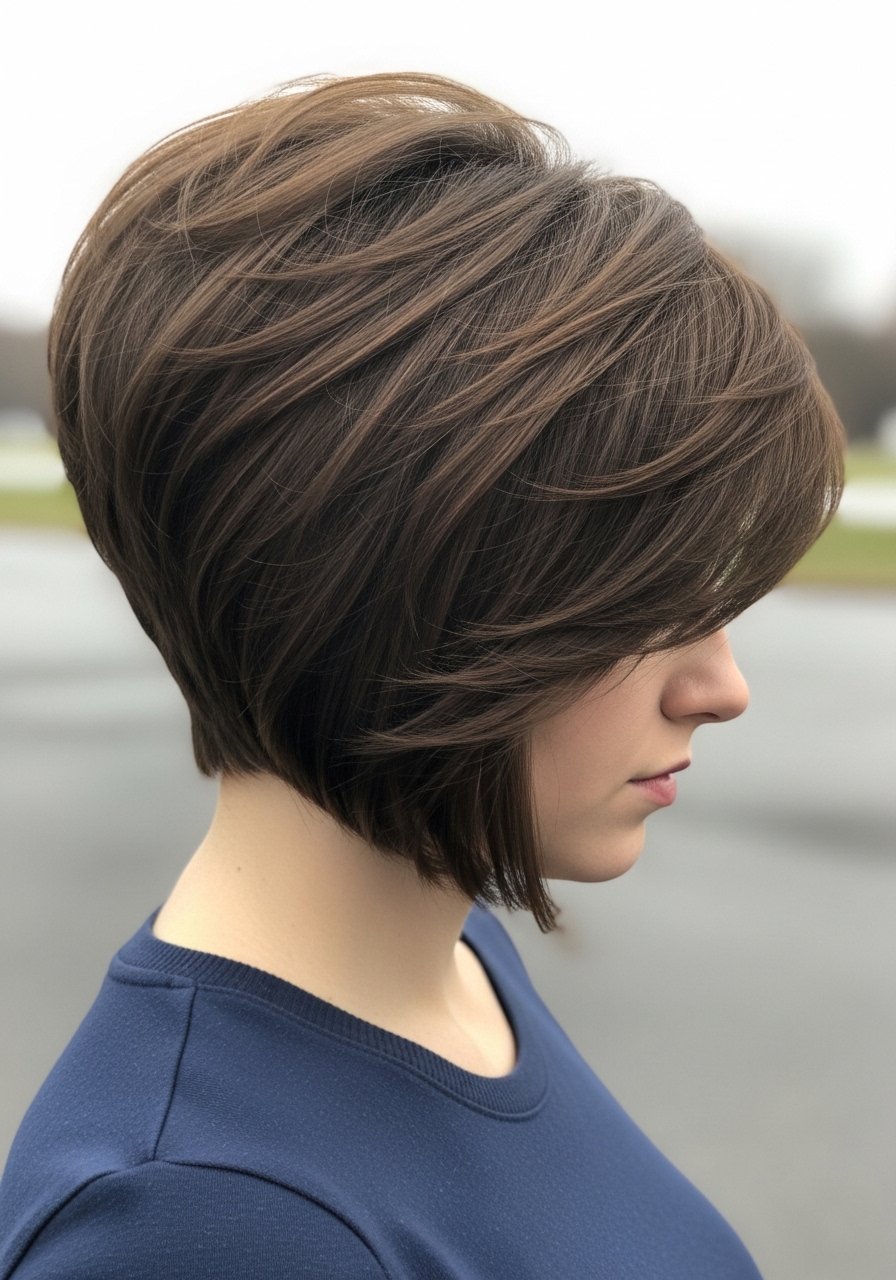
If the back looks flat, create lift by blow-drying sections at the crown up and forward with a round brush, then pin them back for five minutes to set. I usually do three horizontal sections across the crown, each about two inches tall. A root-lifting spray on damp hair makes this hold without stiffness. The trap is skipping the pin-set step which shortens the longevity to an hour. This is a quick fix before photos or events and pairs nicely with the stacked bob idea earlier.
What I Wish Someone Had Told Me Before Cutting Thick Hair Short
- Heat protectant goes on damp hair, not dry. The cuticle is more open and the product actually absorbs. Color Wow heat protectant spray is one I use before any hot tool over 300F
- Grab a microfiber hair towel for $12. It shaves drying time when you are working with dense hair
- Hair grows about half an inch a month at most, regardless of what biotin gummies promise you. Reduce breakage and you keep length
- If you are cutting layers into thick hair, ask for interior thinning rather than blunt removal. A stylist told me this and it saved six months of awkward regrowth
- For color, buy from the official brand store on Amazon or Sephora for Olaplex and similar brands to avoid counterfeits
- Use an inexpensive claw clip for sectioning during a cut. It keeps the back tidy and makes the shape easier to see
Frequently Asked Questions
Q: Can I get a stacked bob if my hair is very thick and coarse?
A: Yes, but ask a stylist to remove interior weight with graduated layers rather than slicing bluntly. That preserves a strong outer line while reducing bulk. Expect trims every six to eight weeks to keep the stack crisp.
Q: How often should I use Olaplex No. 3 on short, thick hair?
A: Once a week if you use heat or color regularly. It does not reverse past damage but it helps strengthen strands so they break less. Buy from the official Olaplex Amazon store or Sephora to avoid counterfeits. Olaplex No. 3 hair perfector
Q: Is an undercut practical if I want to grow my hair out later?
A: A small hidden undercut is the most grow-out friendly option. It reduces bulk while allowing the top to grow. Expect a visible regrowth line in three to five weeks and plan blending trims or strategic styling to camouflage it.
Q: Can short curly hair use the robe tie method without frizz?
A: Yes, if you detangle in small sections and use a leave-in before wrapping. Placing each coil on the sash with a little product and pinning lightly prevents rolling that causes frizz. Finish with a light mist of anti-frizz spray.
Q: What heat setting should I use on flat irons for short thick hair?
A: Start at 300F and only increase if you have coarse resistant hair. Always apply heat protectant to damp or just-dried hair first. Most heat protectants need a minute to absorb to be effective.
Q: How often should I trim a textured pixie to keep the tapered nape sharp?
A: Every four to six weeks for a maintained tapered nape. If you prefer a relaxed look, you can stretch to eight weeks but expect more styling to hide regrowth.
Q: Will money piece highlights increase maintenance too much on short hair?
A: They add some touch-ups since the front is more visible, but because slices are small, you can stretch appointments to 8 to 12 weeks and use a gloss at home to refresh tone in between.
Q: My short back always looks flat at midday. What quick fix works?
A: Pin-set the crown in three horizontal sections for five minutes after blow-drying, or use a root-lifting spray on damp hair and rough-dry the crown up for 30 to 60 seconds. That usually holds through the afternoon.