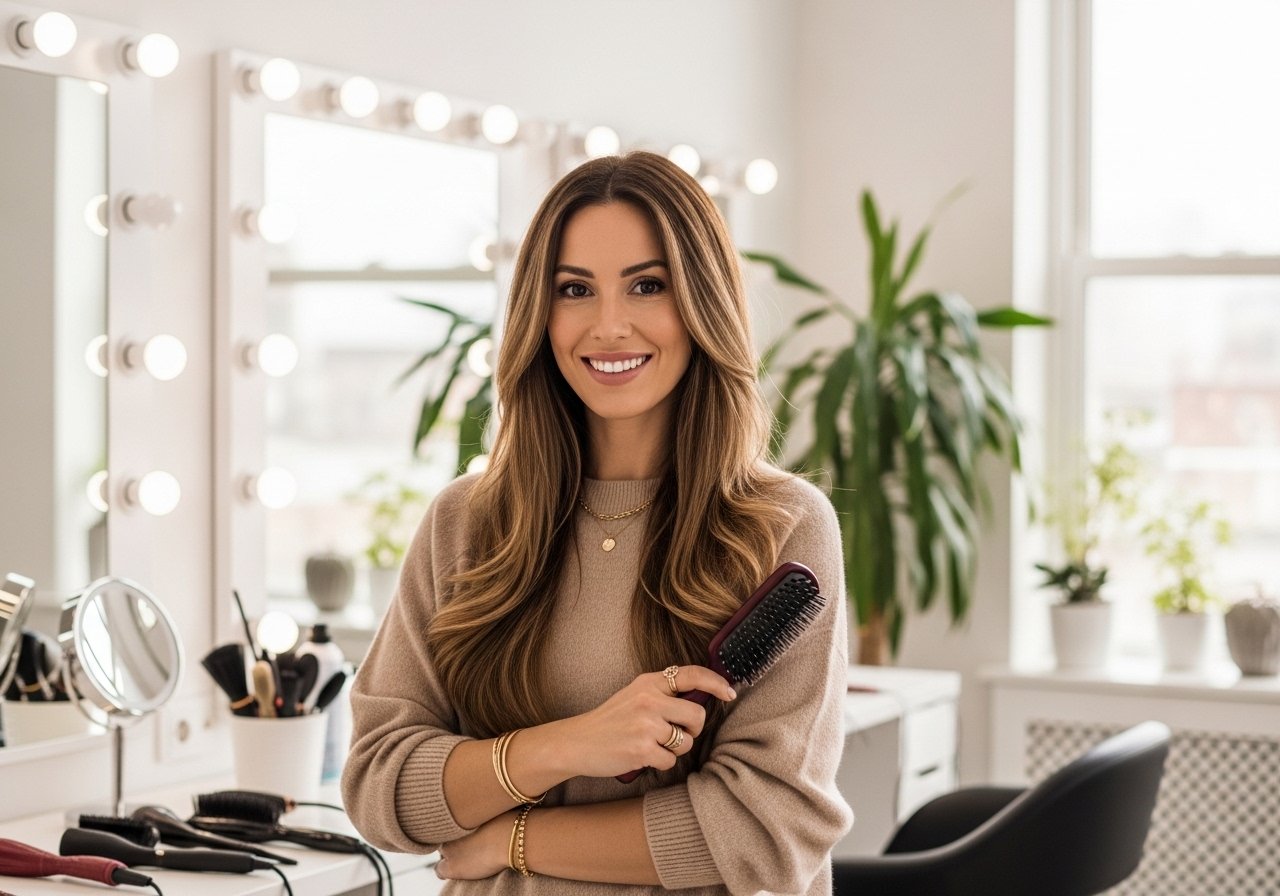
I bleached my own hair last winter trying to save $200. Three months later I paid $400 to fix it. Olaplex No. 3 saved what was left. These lowlight ideas are for people who want depth without daily maintenance, mainly for fine to medium straight or wavy hair, and a few that work on looser curls with tweaks noted. Most are doable at home in under an hour, a couple are salon-level touchups. Budget ranges from under $20 for a DIY glaze to $150 for a salon gloss or professional color correction. If you want easy, focus on placement and lower developer volumes.
Soft Lowlights for Everyday Dimension
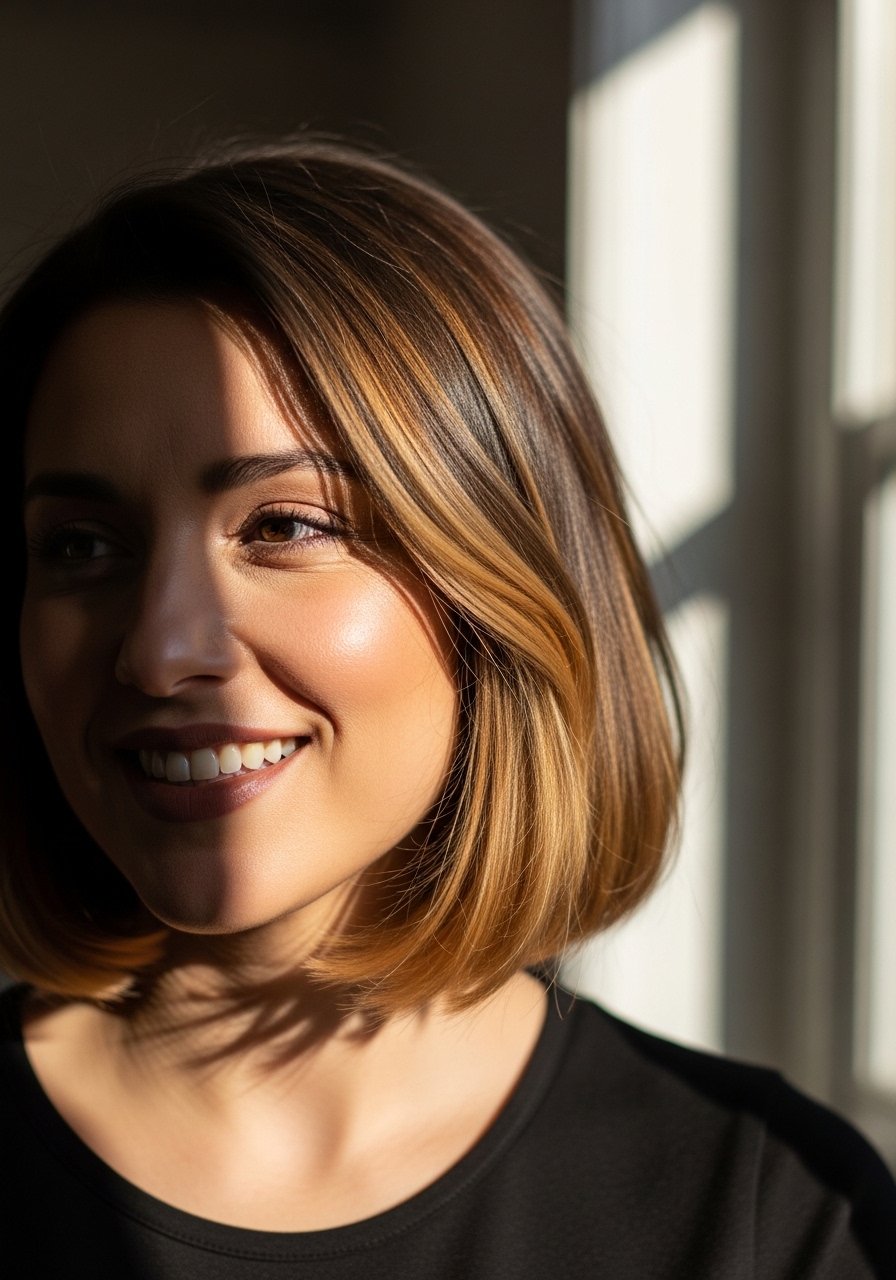
If you have thin or fine hair and worry highlights will make you look washed out, soft lowlights add the illusion of density without taking away brightness. I ask for a 1-2 shade darker tone on 20-volume developer for a gentle lift and deposit when I want contrast without bleach. It takes about 20 to 25 minutes in the chair, or you can use a demi-permanent dye at home for 15 to 20 minutes. For DIY, section the hair into four parts and paint thin 1/4-inch slices around the crown only, otherwise the look gets heavy. A common mistake is dunking whole foils from root to end. That makes the lowlights read blocky. After color, glossing with a clear demi once every six weeks helps the pieces blend and last.
Face-Framing Low Pieces to Ground Lighter Color
If you went blonde and your face looks pale, adding darker face-framing low pieces brings contrast and makes features read warmer. I ask for thicker, money-piece-adjacent lowlights near the temples, painted with a 10-volume developer so you are depositing color, not lifting. The result is immediate structure without a full recolor and it usually needs retouching every 10 to 12 weeks. Salon pros do this freehand; at home, use a whisker-thin tint brush and two to three 1/2-inch sections on either side only. Watch for scalp sensitivity and do a patch test first. Pair with a moisture-rich conditioner two washes after coloring to avoid any dryness.
Micro Lowlights to Fake Density on Thin Hair
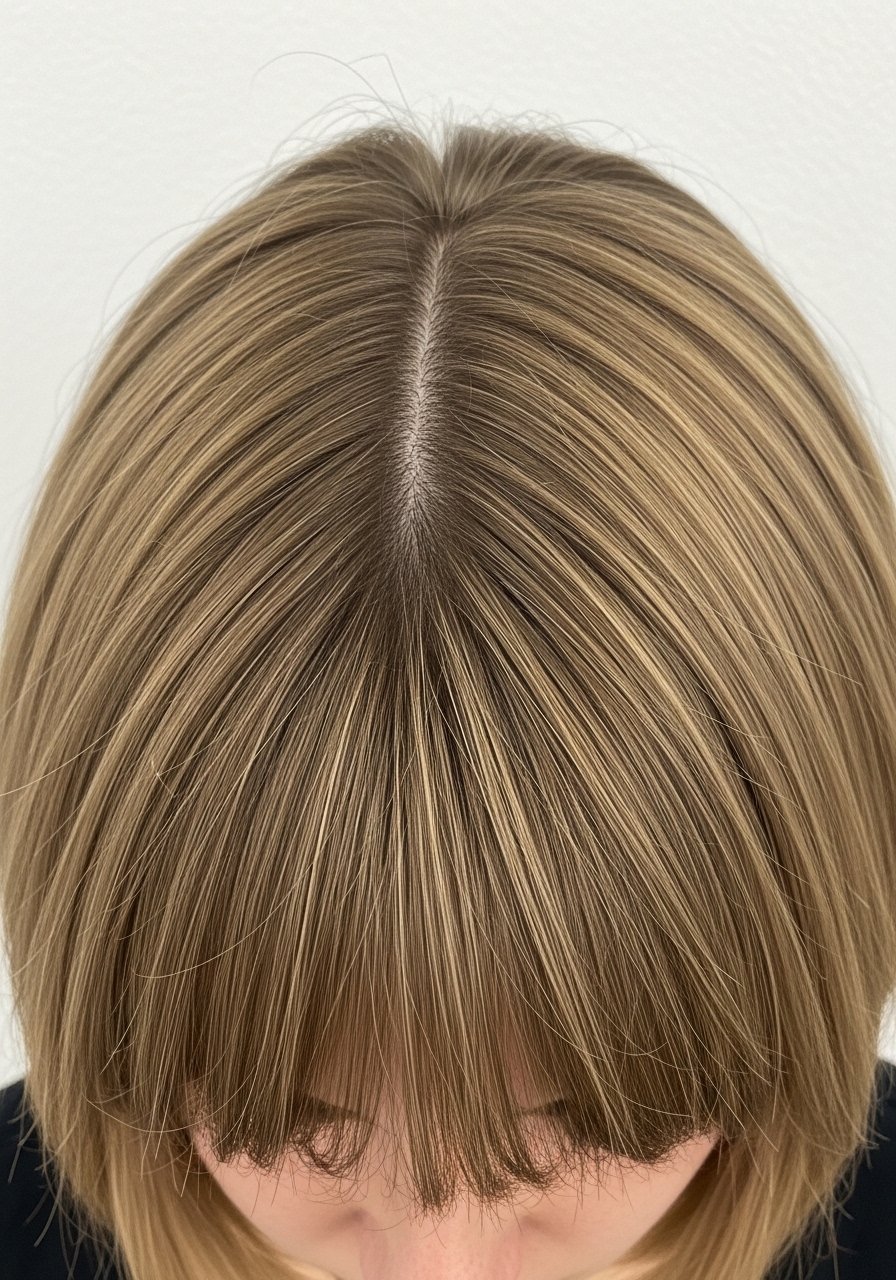
Micro lowlights are the trick I use when my part looks like a scalp stripe. They are tiny, frequent darker deposits woven in to mimic natural shade variation. Ask for 1/8-inch slices painted with a demi or gloss and left for 10 to 15 minutes. This is a time-consuming salon service, but you can do a toned-down DIY version by using a temporary color mascara on individual strands for events. The mistake is using blocky foils or large sections, which kills the illusion. If your hair is fine, avoid heavy conditioners at the root after the service. Hair grows about half an inch a month at most, regardless of what biotin gummies promise you, so micro placement makes that regrowth blend.
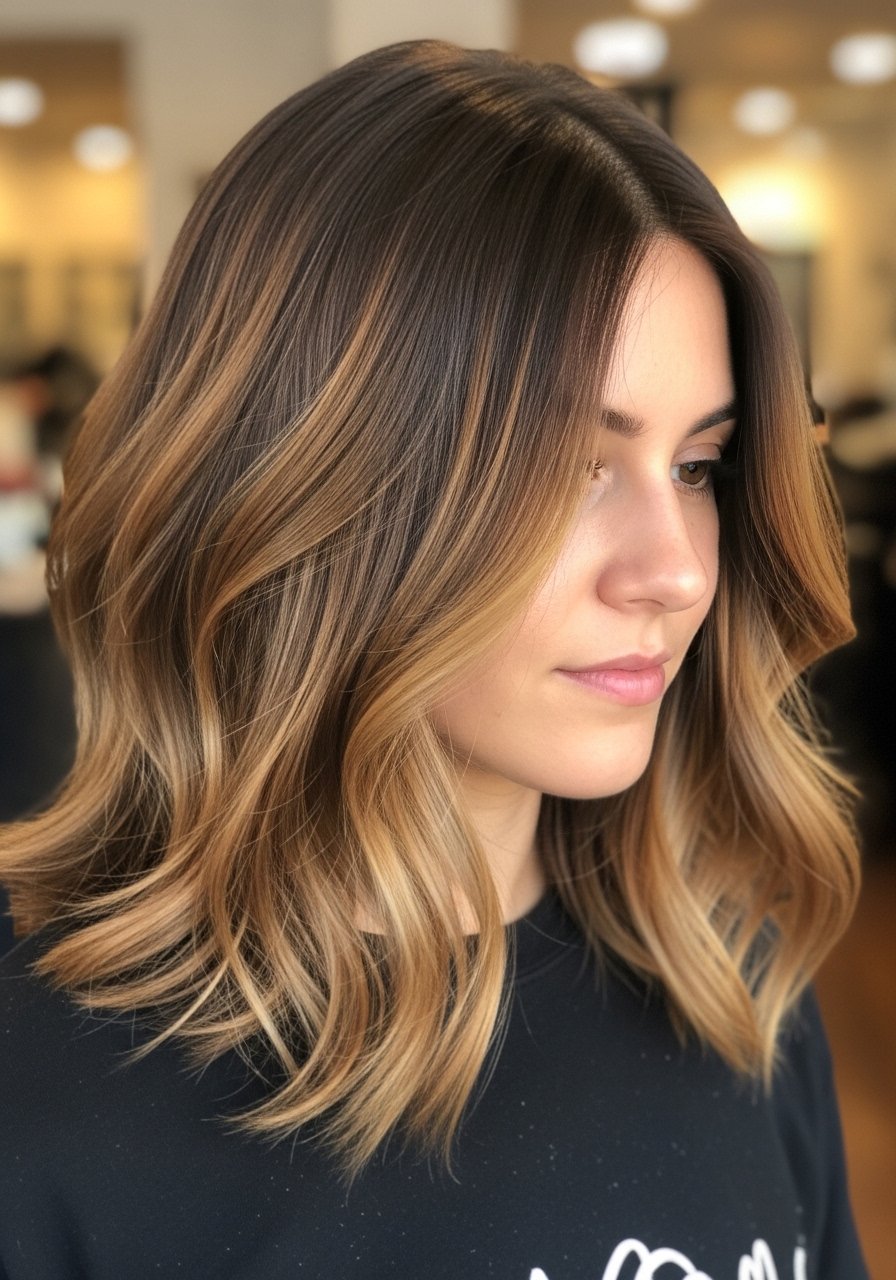
Chunky Lowlights for Texture and Movement
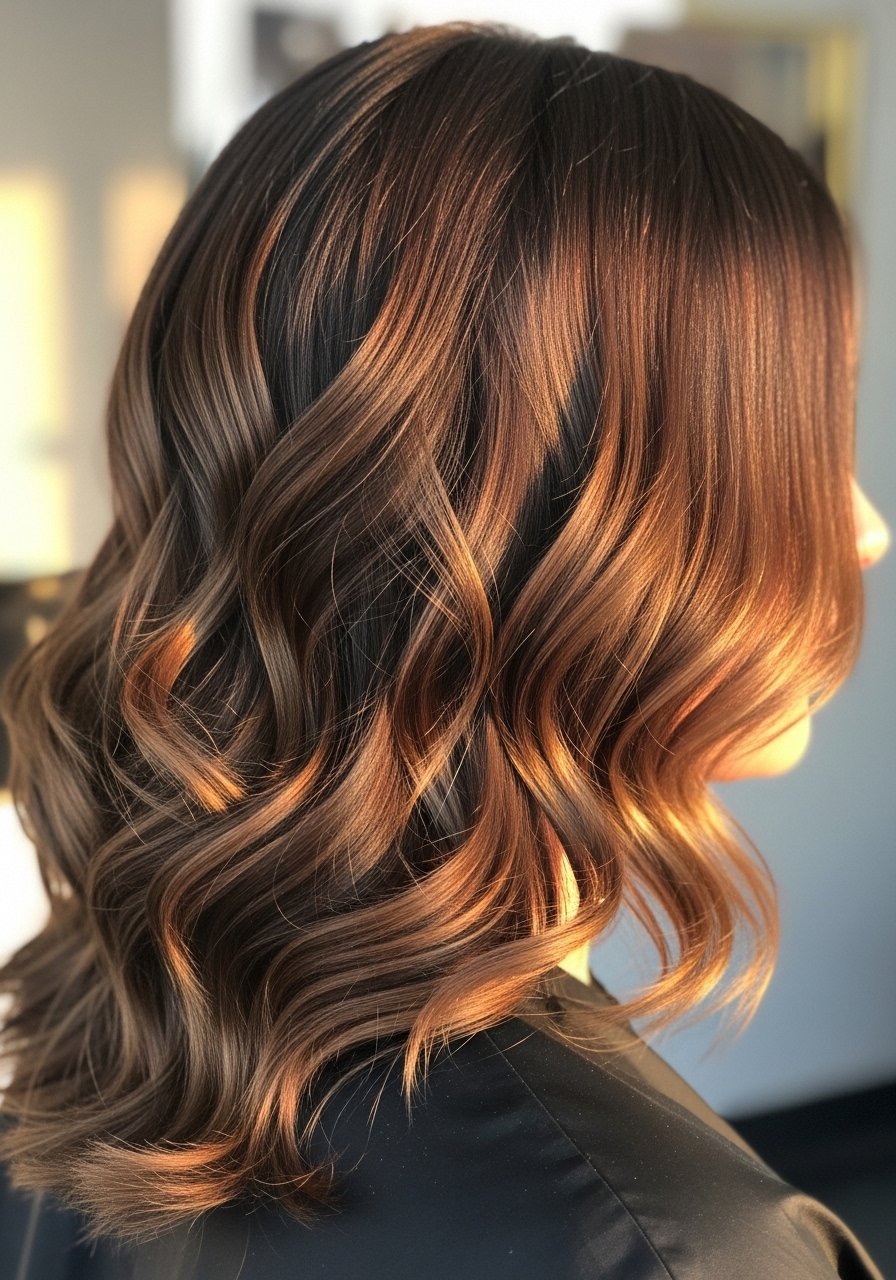
Chunky lowlights are obvious on purpose. I ask for panels 1/2 to 1 inch wide painted through the mid-lengths and ends to create movement. It takes about 30 minutes in the salon and looks especially good on textured waves and loose curls. DIYers can section the hair into larger pieces and use a cap technique if they are comfortable, but beware of the DIY chunky mistake: placing chunks too close to the face without blending. That makes the style look dated. If you plan to heat style, remember to apply heat protectant before any iron over 300F and use a lower pass at 320F to keep cuticles calm.
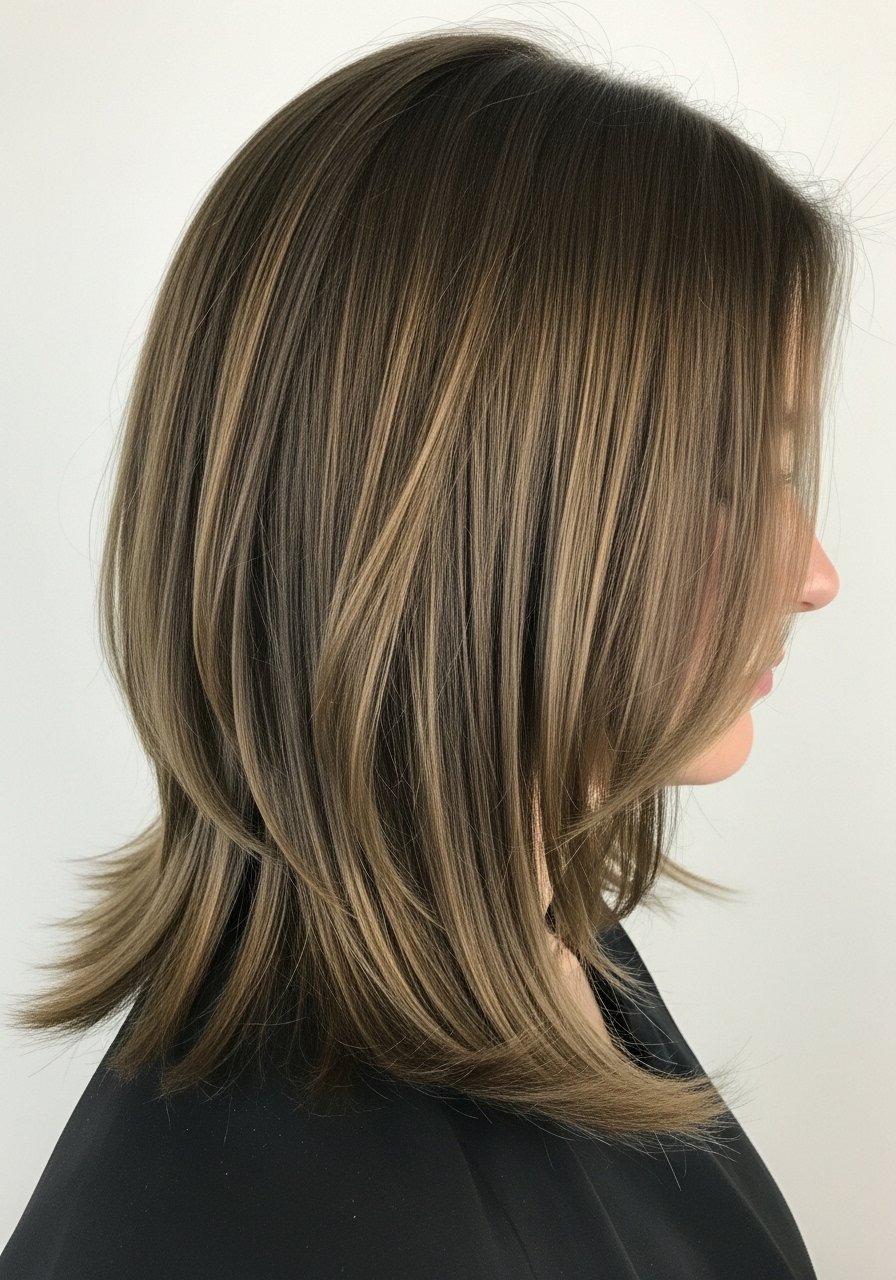
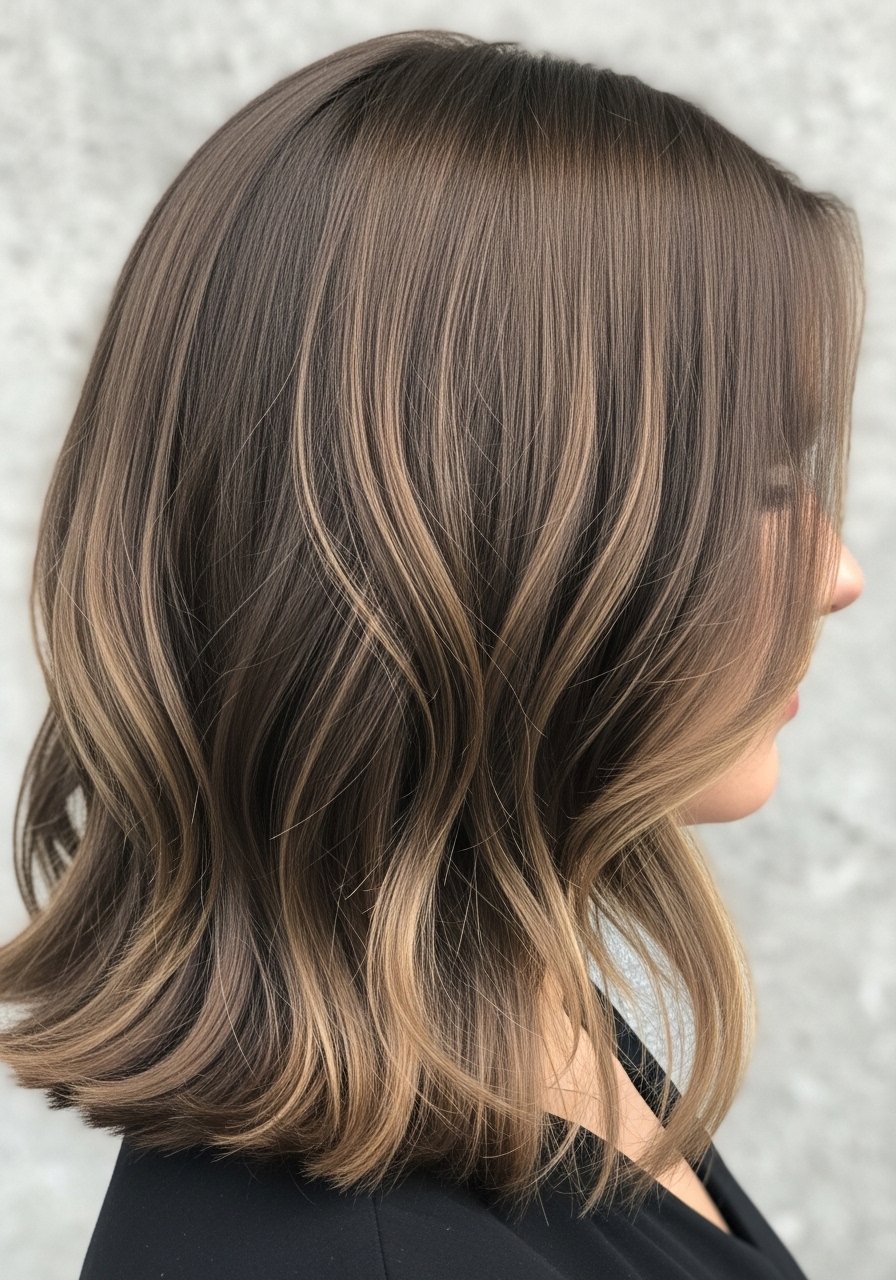
Balayage-Style Lowlights for Low Upkeep

Balayage lowlights are painted softer at the root and heavier at the mid-lengths, so regrowth is forgiving. The trick is feathering the brush strokes and using a glaze to deposit low pigment into the painted pieces. Most salons use a 10- or 20-volume developer with careful feathering, left for 15 to 25 minutes based on desired depth. At home, a demi-permanent glaze works if you limit processing to 10 minutes and strand-test. A frequent error is over-saturating foils, which creates blocky lines. Pair these lowlights with a sulfate-free color-safe shampoo and a weekly bond builder if your hair has been lightened elsewhere.
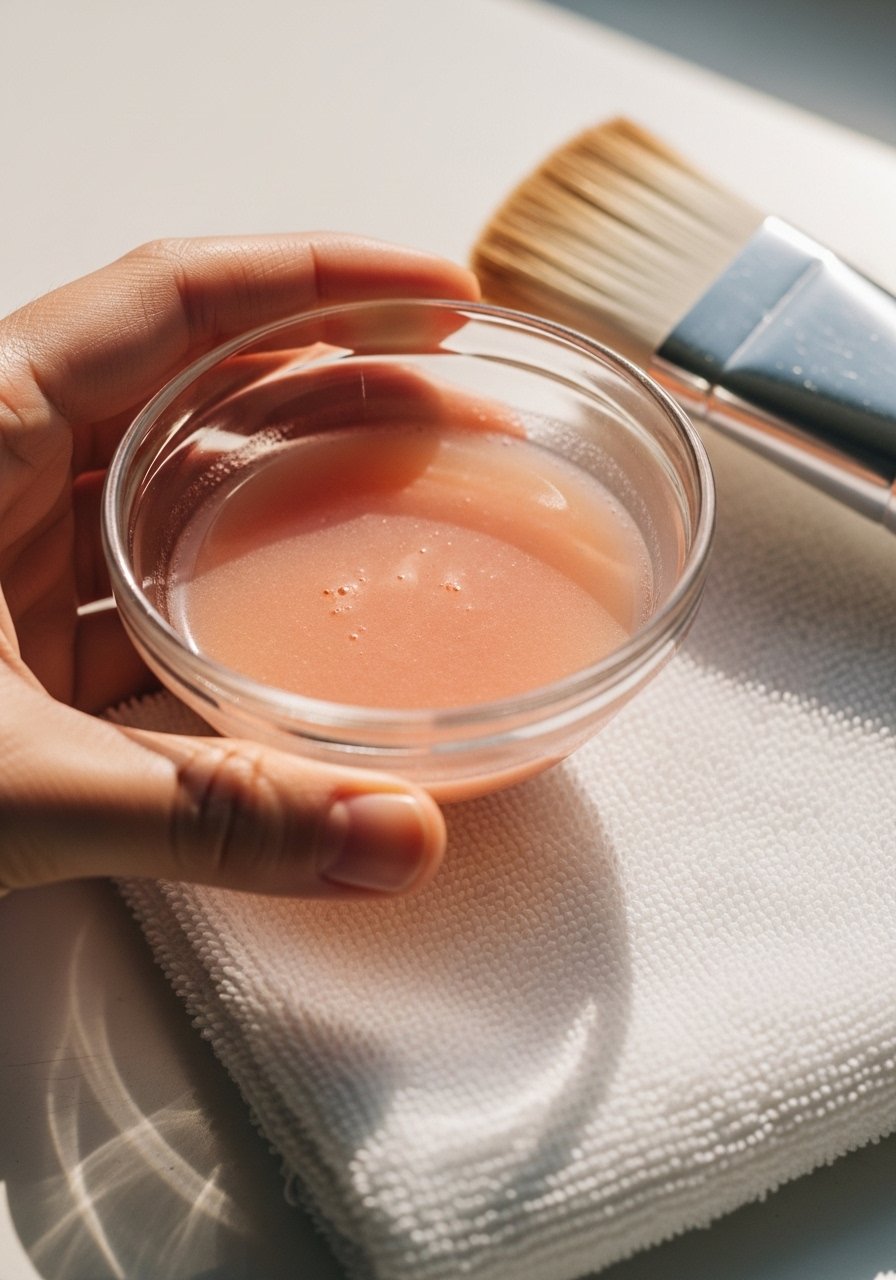
Gloss Over Lowlights to Calibrate Tone
A gloss is the easiest salon add-on after lowlights, and it actually stretches the life of the color. I usually ask for a demi-permanent gloss with 10-volume developer or clear glaze left for 10 minutes to even out ashiness or boost warmth. At home, a gloss you leave on for five to ten minutes every four to six weeks maintains tone. One mistake is treating gloss like a deep conditioner and leaving it on too long. That can pile too much pigment and shift your lowlights darker. If you color at home, pick a gloss from the pro line or buy from the official store on Amazon to avoid fakes.
Root-Shadow Lowlights for Longer Between Visits
Root shadows put darker pigment at the roots so regrowth is less obvious. For people who hate touching up every four weeks, this saves time and money. The stylist typically uses a 10-volume deposit-only approach and blends down with a feathered brush stroke over 15 minutes. You can create a simpler at-home version by darkening the first inch of new growth with a demi-permanent in the same family as your natural color. The classic DIY error is overlapping an already lowlighted mid-length, which makes a muddy band. If you have any scalp irritation history, do a patch test; darker pigments can sometimes sting fresh microabrasions.
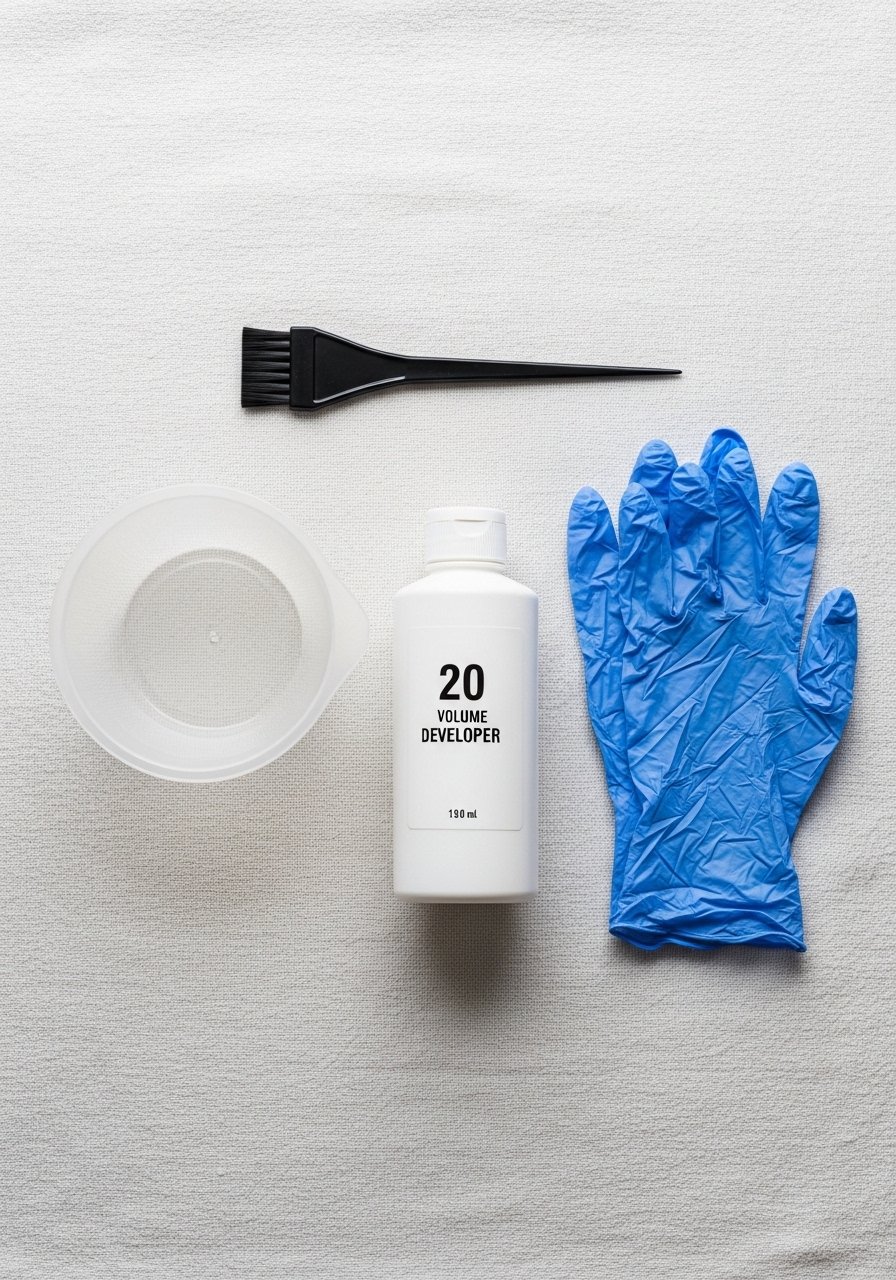
What I Actually Keep in My Lowlights Kit
[Color-correcting glosses, bond builders, and a few tools I actually use are below. Everything here links to Amazon for quick grabs, and I note when you should buy from the brand to avoid counterfeits.]
- Honestly the best $30 I spend in any year. Olaplex No. 3 hair perfector used once a week keeps chemically processed lowlights from feeling brittle. Buy from the official seller on Amazon or Sephora to be safe
- For at-home glazing, a 8oz professional demi gloss that you can dilute with 1 tablespoon of water for lighter deposits
- Color-safe daily shampoo, choose an 8oz sulfate-free option like color-safe shampoo to preserve lowlight tone
- A silk pillowcase queen size under $30. It cuts morning frizz and helps color last longer
- A heat protectant spray. Apply before any thermal tool, especially when styling colored hair
- For quick root touch-ups, a tinted root spray in your shade
- A pack of 10 demi-permanent color tubes for small salon-style touch-ups at home
- A professional wide tooth comb to distribute glosses and low-effort lowlights without breakage
Low Lowlights for Curly Hair That Stay Defined
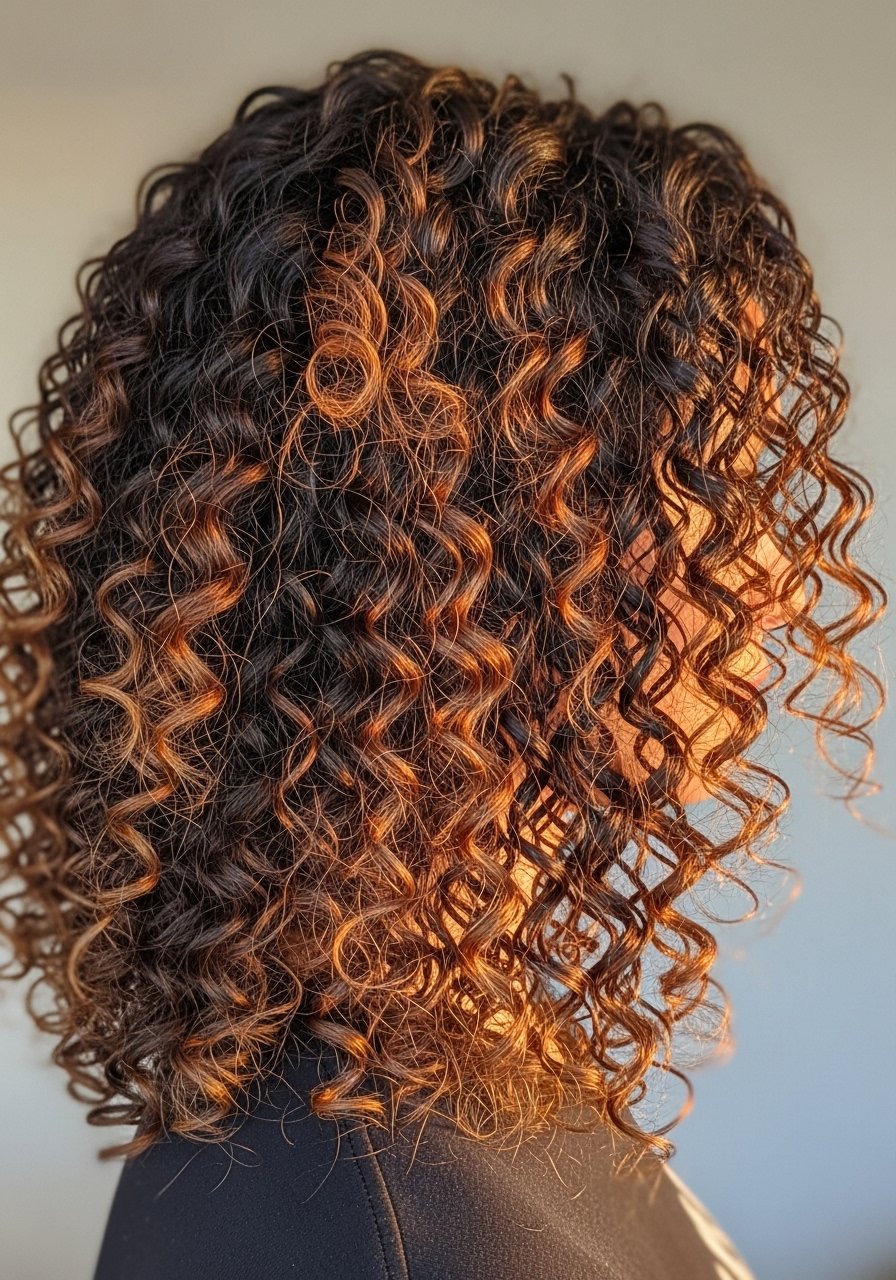
Curly hair loves dimension, but heavy lowlights can flatten curl definition. I request thinner, more frequent lowlight pieces and avoid depositing on the core of the curl. For Type 3A to 3C, your colorist should work with soaking wet curls and paint on stretched ringlets so the final curl shrinks into the lowlight rather than pulling it out. A common mistake is saturating curls with too much product after coloring. For maintenance, a leave-in cream under a light gel keeps the lowlighted curls defined. If you are doing this at home, use a 10-volume developer and never lift curls with bleach over previous color without a salon consult.
Quick Lowlight Touch-Ups at Home That Don’t Look Boxy
If you want small touch-ups at home, go demi or semi-permanent and process for 10 to 15 minutes only. Work in 1/4-inch vertical slices at the crown where contrast is most obvious. The mistake is slapping a darker dye all over the mid-lengths to "blend." That makes everything flat. Also avoid overlapping darker dye onto recently lightened ends. If your hair has been bleached previously, pause and book a salon consult because lifting over certain lightened layers risks breakage. Keep a bottle of developer in 10- or 20-volume and a timer. Clean application and short processing are the keys.
Glossing and Toner Tricks After Lowlights for Lasting Shade
Toner after lowlights prevents unwanted warmth and keeps the darker pieces clean. I tend to pick ash or neutral glazes and leave them on for eight to ten minutes. For warm lowlights that need cooling, dilute toner 1:2 with water and strand-test for two minutes increments. A lot of people leave toner on too long in hopes it will "fix" color; that only deposits too much pigment. If your lowlights are paired with prior bleach, do not use strong toners without a professional check. If you want a quick at-home fix, a clear gloss refreshed every four to six weeks makes lowlights read richer and reduces color-fade.
Salon vs Home Note and Damage Warning for Multi-Process Looks
If your hair has multiple processes, like previous allover bleach and now lowlights, this is where mistakes happen. Lifting bleach over previous color is a salon job, not a kitchen experiment. If you are committed to going lighter or adjusting depth drastically, book a color correction or accept it will take multiple sessions over months. If you do attempt DIY color, always perform an allergy patch test and avoid overlapping dyes. Bond builders help, but they do not undo structural damage. If your ends feel fragile after a session, trim them and space chemical services by at least six weeks.
What I Wish Someone Told Me Before Trying Lowlights
Most stylists agree, the trickiest part of lowlights is placement. People assume darker pieces should be hidden, but strategic lowlights around the face, part, and crown create natural contour. A mistake I made once was requesting "as dark as possible" hair pieces, which read heavy and aged me. Start subtle. If you are stretching salon visits, go for root shadowing and a gloss instead of fresh lowlights every appointment. Also, do not overuse purple shampoo on lowlighted brown hair. A friend asked why her hair felt like straw. She had been using purple shampoo every wash for six months. Swapped to once a week and it came back.
The Mistakes I Made So You Don’t Have To
Heat without protection and overlapping processes were my two biggest errors. I once flat-ironed damp lowlighted hair and fried the mid-lengths. Apply a heat protectant before any iron over 300F and let hair dry fully. Also, going darker to "fix" brassiness almost always ends up uneven unless you use proper sectioning and timing. If you ever feel unsure about a multi-step color change, book the salon consult. Remember, trims are part of color upkeep because no product permanently repairs split ends. Occasional trims keep the lowlights looking intentional.
Frequently Asked Questions
Q: Can I add lowlights to hair that has been bleached?
A: You can, but approach carefully. Darkening bleached lengths is usually safe as a deposit-only process, but lifting bleach over previous color is risky. If the bleached hair feels fragile, a salon correction over multiple sessions is safer. Use a bond builder like Olaplex No. 3 hair perfector weekly during the process.
Q: How often will lowlights need touching up?
A: It depends on contrast. Root-shadowed lowlights can go 10 to 12 weeks. Face-framing low pieces usually need refresh every 8 to 10 weeks if you want them crisp. Micro lowlights might be worth a salon touch-up only every 12 weeks since they blend more softly.
Q: Is a gloss necessary after lowlights, or can I skip it?
A: A gloss is not mandatory, but it evens tone and adds slip so pieces lie together. If you skip gloss, expect slightly more brassy or uneven reflection where lowlights meet previous color. A quick at-home demi-gloss every 4 to 6 weeks keeps the shade calibrated.
Q: Can I do lowlights at home without breaking my hair?
A: Yes, if you stick to demi-permanent or semi-permanent dye and short processing times like 10 to 20 minutes. Avoid overlapping onto recently bleached ends and do a strand test. For any multi-process correction or large tone shifts, see a professional.
Q: Will lowlights hide gray hair effectively?
A: Low-placed darker pieces help blend grays, especially with a root shadow. For stubborn gray coverage, single-process permanent color at the root is often needed. If you prefer softer blending, ask for lowlights woven near the part and temples and consider a demi-permanent root refresh every 6 to 8 weeks.