
If your braids loosen by day three or your edges ache by the second week, this list is for you. These are the latest hair braids protective styles I actually wear, with timing, cost sense, and the real upkeep they demand. Picks run from quick DIY styles you can do in under 30 minutes to full installs that are worth a salon appointment. Mostly good for Type 3 and 4 textures, a few styles work great on 2A to 3B with adjustments. Budget ranges from under $20 for accessories to $150 for a professional install.
Knotless Box Braids For Protective Styling
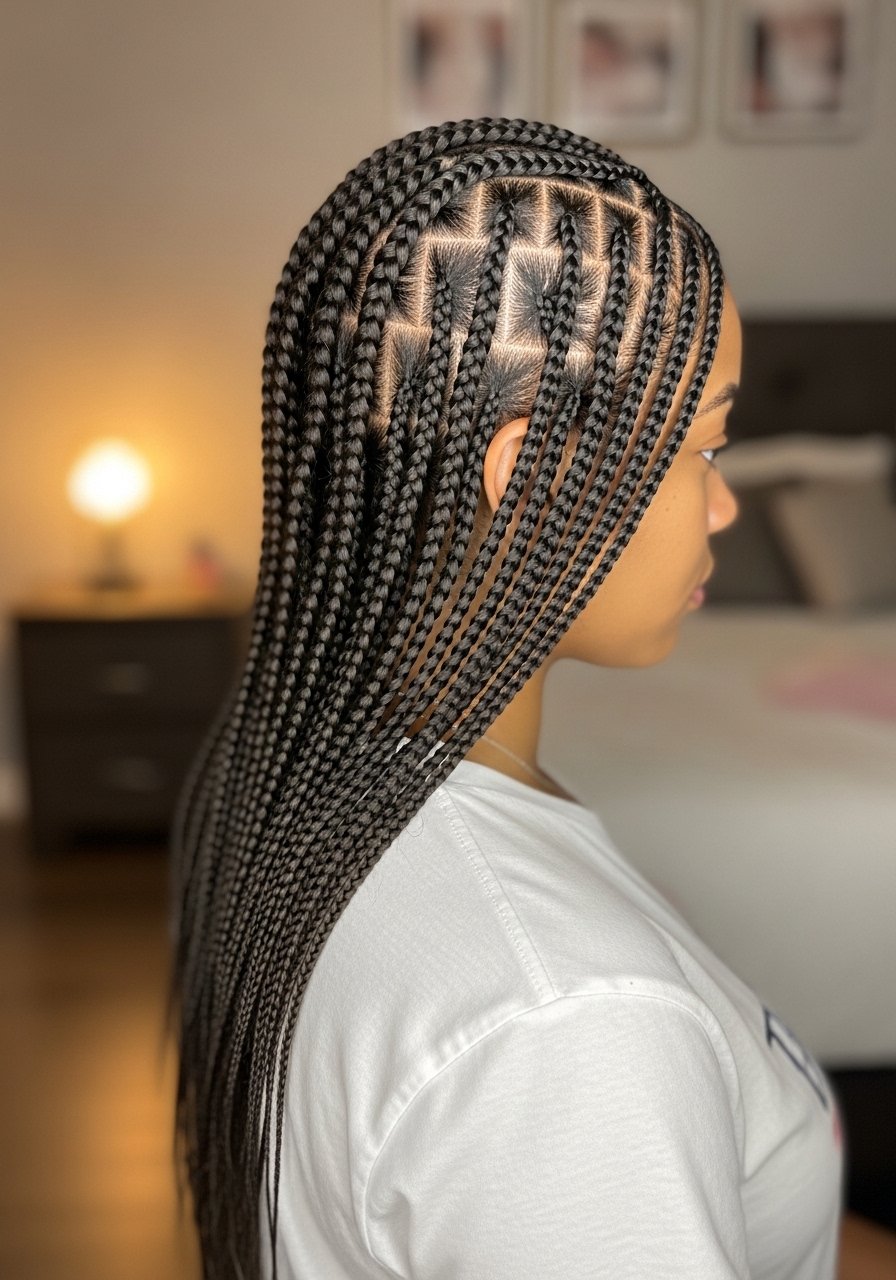
Knotless box braids cut down tension at the root because the hair is fed in gradually, not knotted at the scalp. I do 1.5 cm partings for thin edges and 2 cm for thicker hair, which usually gives me 60 to 80 braids on mid-back length. If you DIY, grab 6 to 8 packs of pre-stretched Kanekalon, or book a stylist for the install because a full head can take six to eight hours. A common mistake is pulling too tight at the hairline, which causes breakage. Refresh with two spritzes of a diluted leave-in spray, a 1:4 ratio of leave-in to water, and sleep on a silk pillowcase to protect the style.
Feed-In Cornrows To Low Bun For Fine Hair
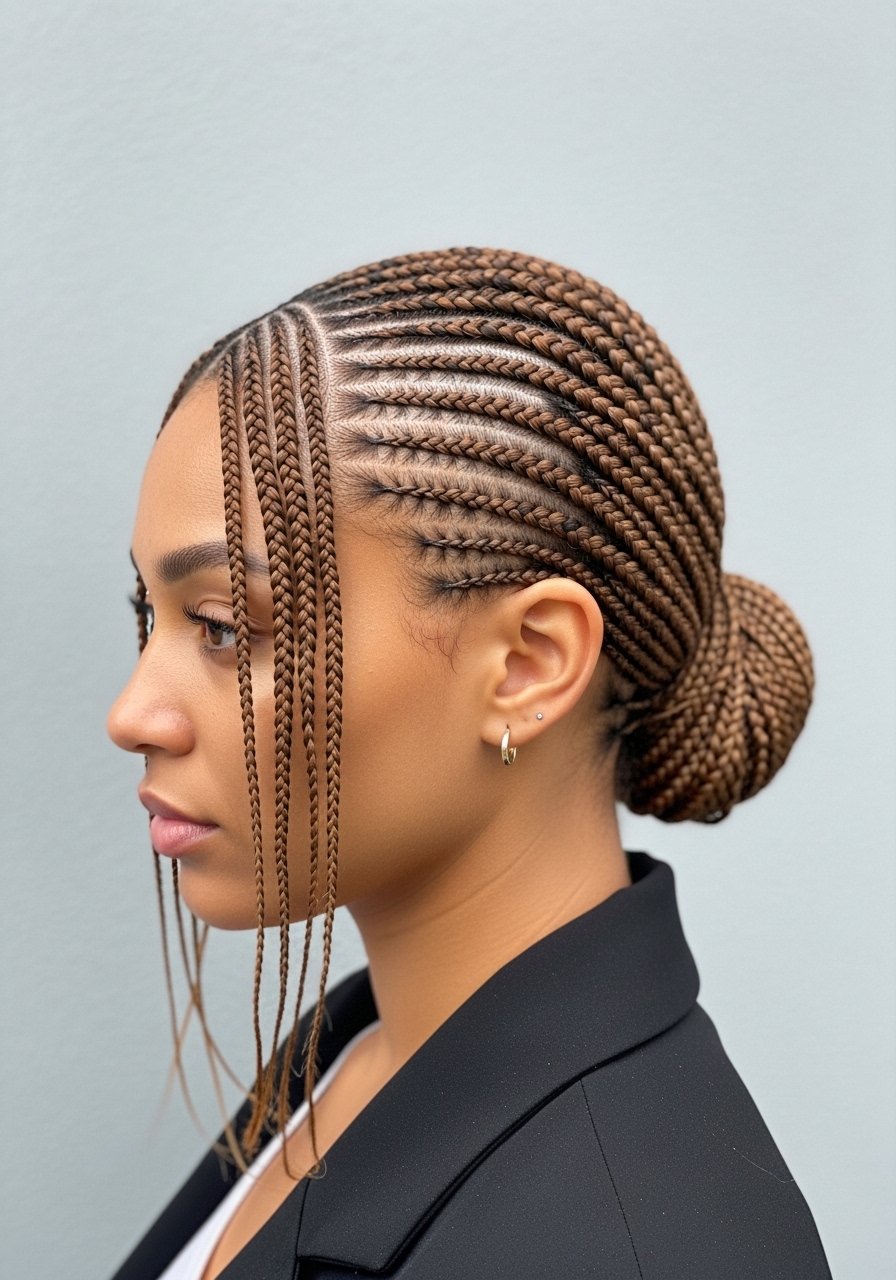
If your hair is fine, traditional cornrows can pull your edges out. Feed-in cornrows distribute tension because new hair is added as you braid. I do six rows across the scalp for shoulder-length hair and stop adding extensions two inches from the ends so the bun sits light. Use a small amount of water-based edge control worked in with an old toothbrush for one to two minutes to set the hair, not to glue it. This is a great DIY if you can part straight. If you get scalp tingling, unbraid a row and loosen the base immediately. For smoothing before styling, remember heat protectant before any iron over 300F.
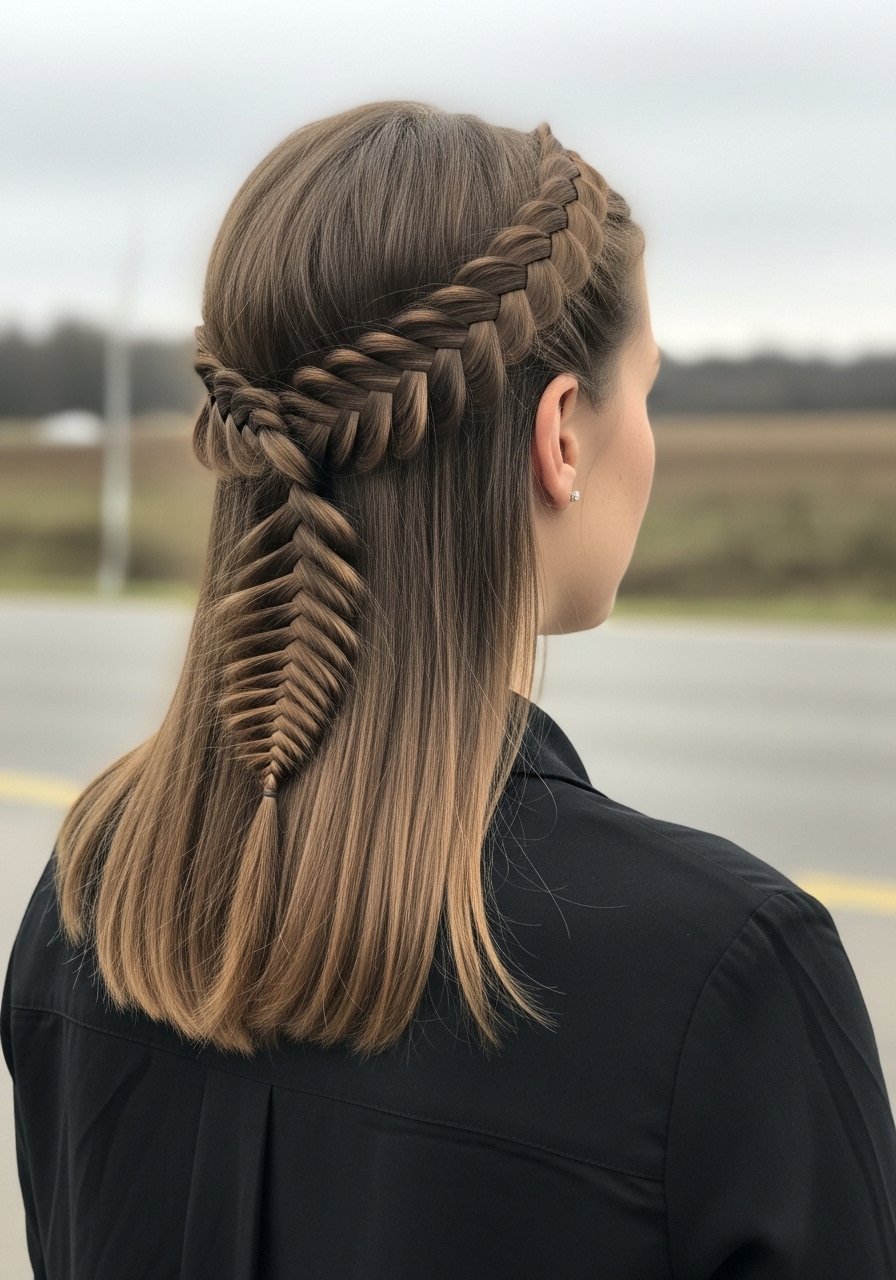
Fishtail Crown Braid For Shoulder-Length Hair
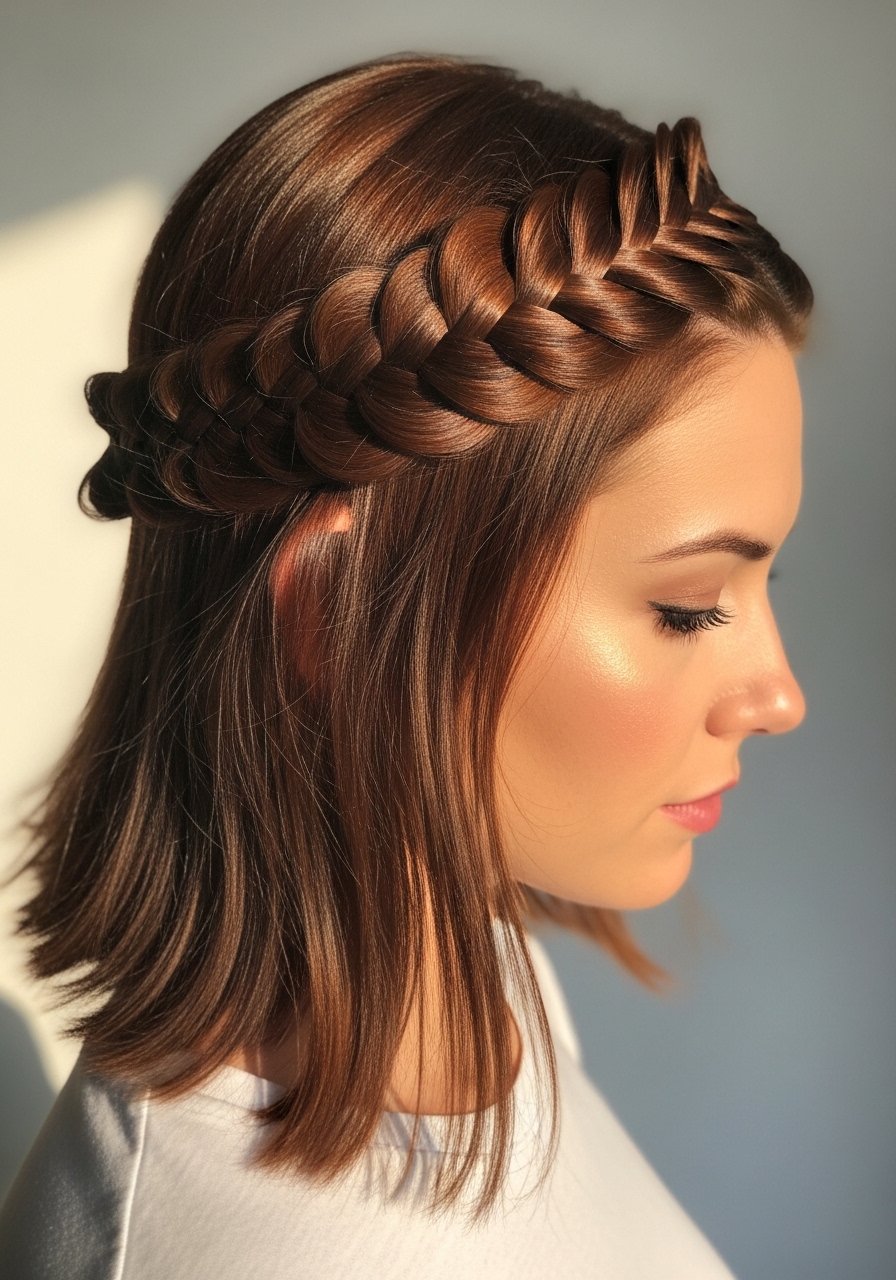
A fishtail crown braid looks elevated but is surprisingly low strain if you keep the parting sections to 1/4 inch. For shoulder-length hair I split into three vertical sections, then create the fishtail with thin strands every 20 to 30 seconds so the braid sits flat. It takes me twenty to thirty minutes once I have the sectioning right. Most people overuse heavy pomades at the root, which makes the braid slip by day two. Instead I use a pea-sized amount of matte cream along the braid and secure with small snag-free elastics. This is perfect for 2B through 3C hair after a quick texturizing spray.
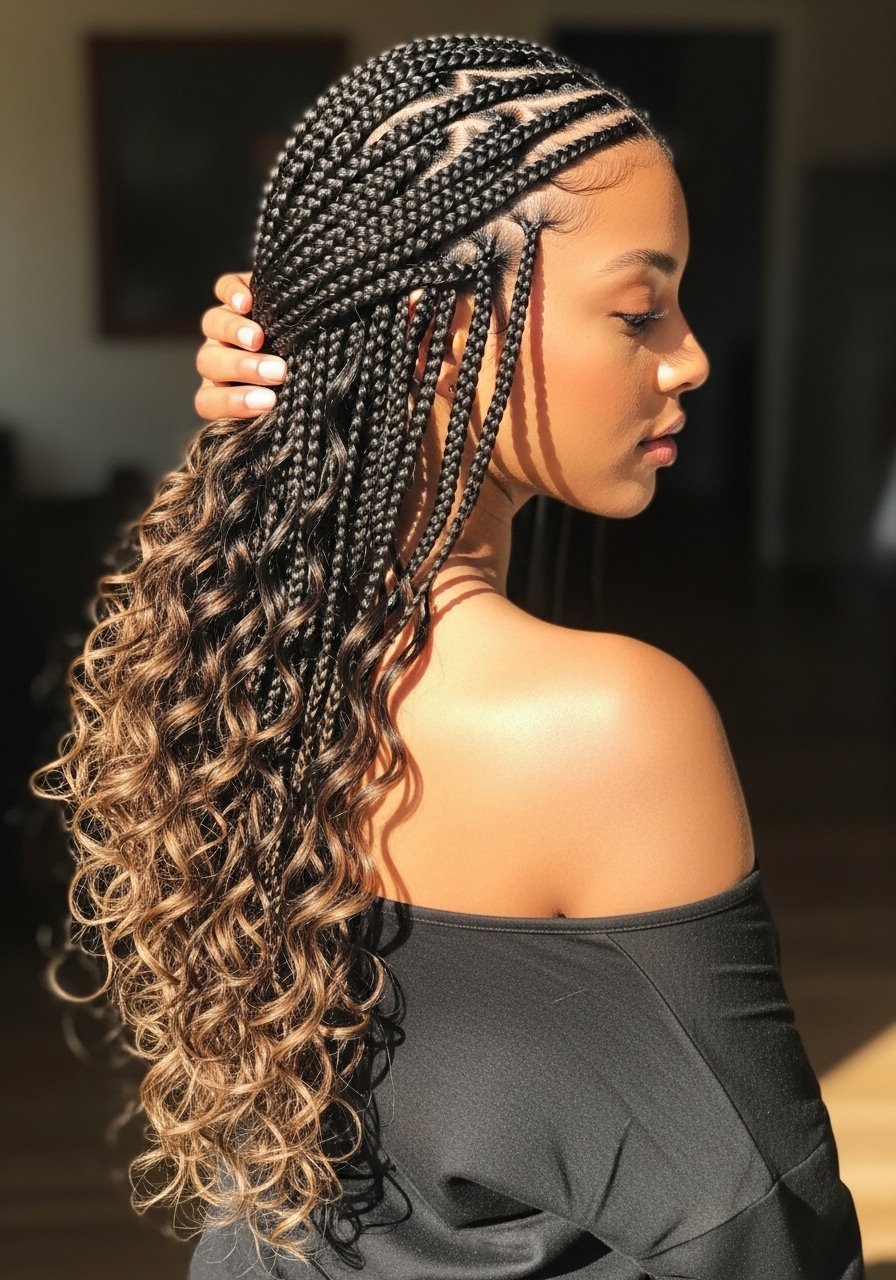
Boho Box Braids With Beads For Long Hair
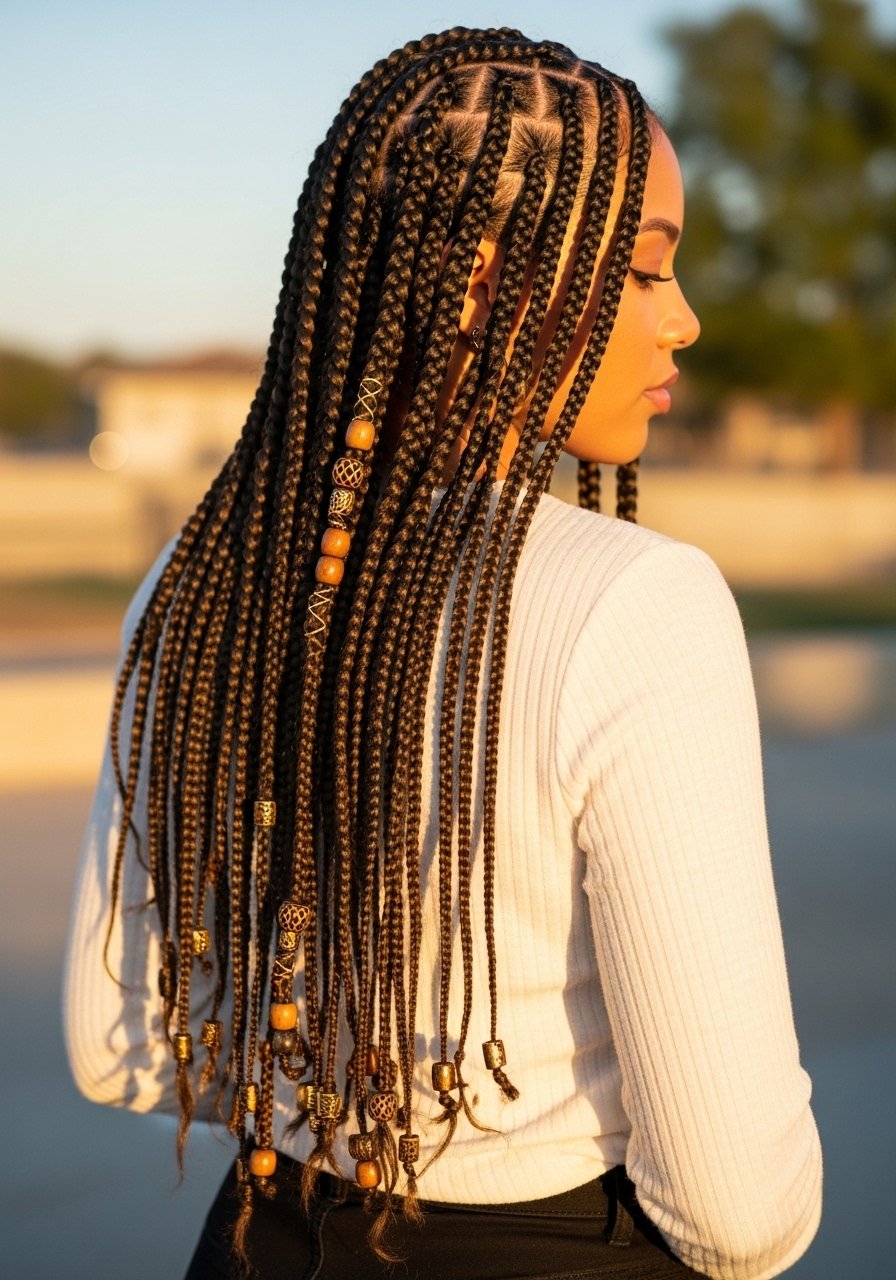
Boho box braids are less uniform than full box braids and they age better when you want a lived-in look. I mix three braid sizes, tiny for the front and medium through the crown, which keeps weight distributed and avoids scalp soreness. For waist-length hair I stop synthetic hair at 14 inches to reduce pulling, and I add beads only to a third of the braids to control overall weight. A mistake I made once was adding too many beads, then needing a neck brace feel for a week. These last six to eight weeks with light cleansing between sessions.
Ghana Feed-In Braids For Edge Definition
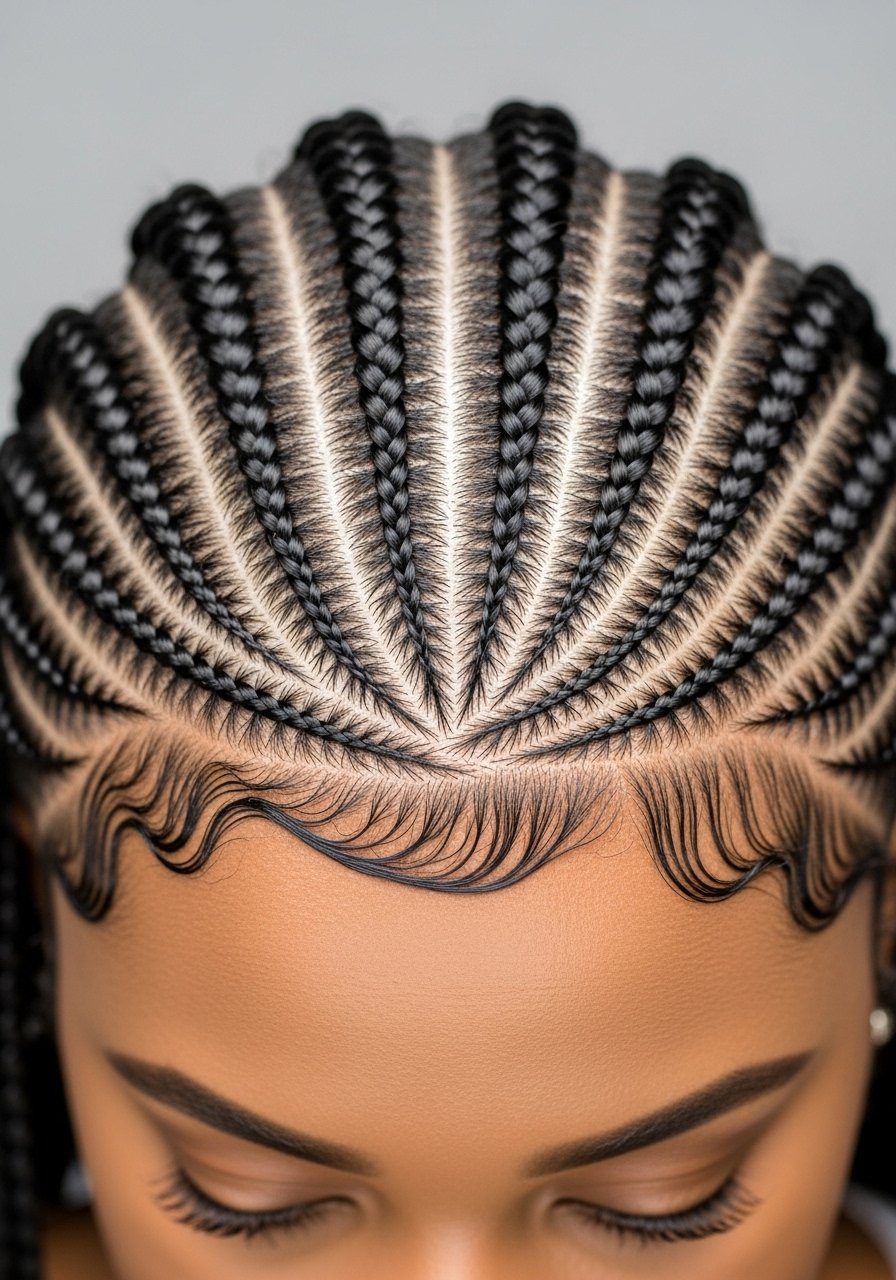
Ghana braids give a sculpted look and hold up well for heatless workouts. I usually do four larger rows and two smaller rows framing the face, using a tablespoon of lightweight oil applied along the scalp once a week to keep itching away. The error most people make is using too much product at the root, leading to buildup and flaking. Wash your scalp with diluted shampoo every two weeks while keeping the braids intact. If your scalp is very sensitive, try a scalp oil patch test first.
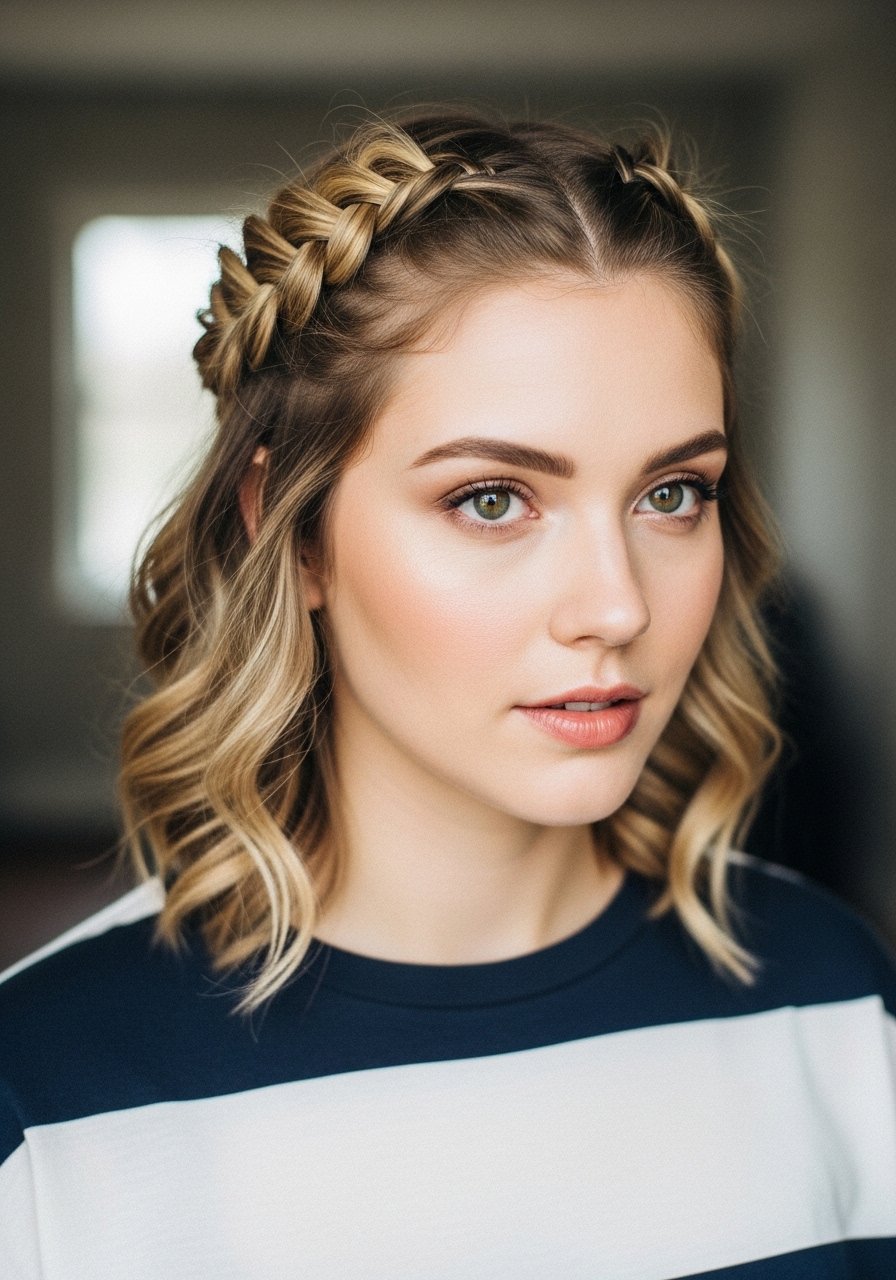
Ladder Braid Half-Up For Wavy Hair

The ladder braid lifts hair off the face without heavy tension, which is why I do it during humid months. It is not a heavy protective style but it protects ends from friction when you wear a jacket or backpack. I create four ladder rungs on each side using 1/2-inch sections and secure with one small elastic behind the crown. If you must heat-style the ends first, apply heat protectant before any iron over 300F. This takes me 10 to 15 minutes and pairs well with a light salt spray to keep the braid separated.
Rope Twist Halo For Short Natural Hair
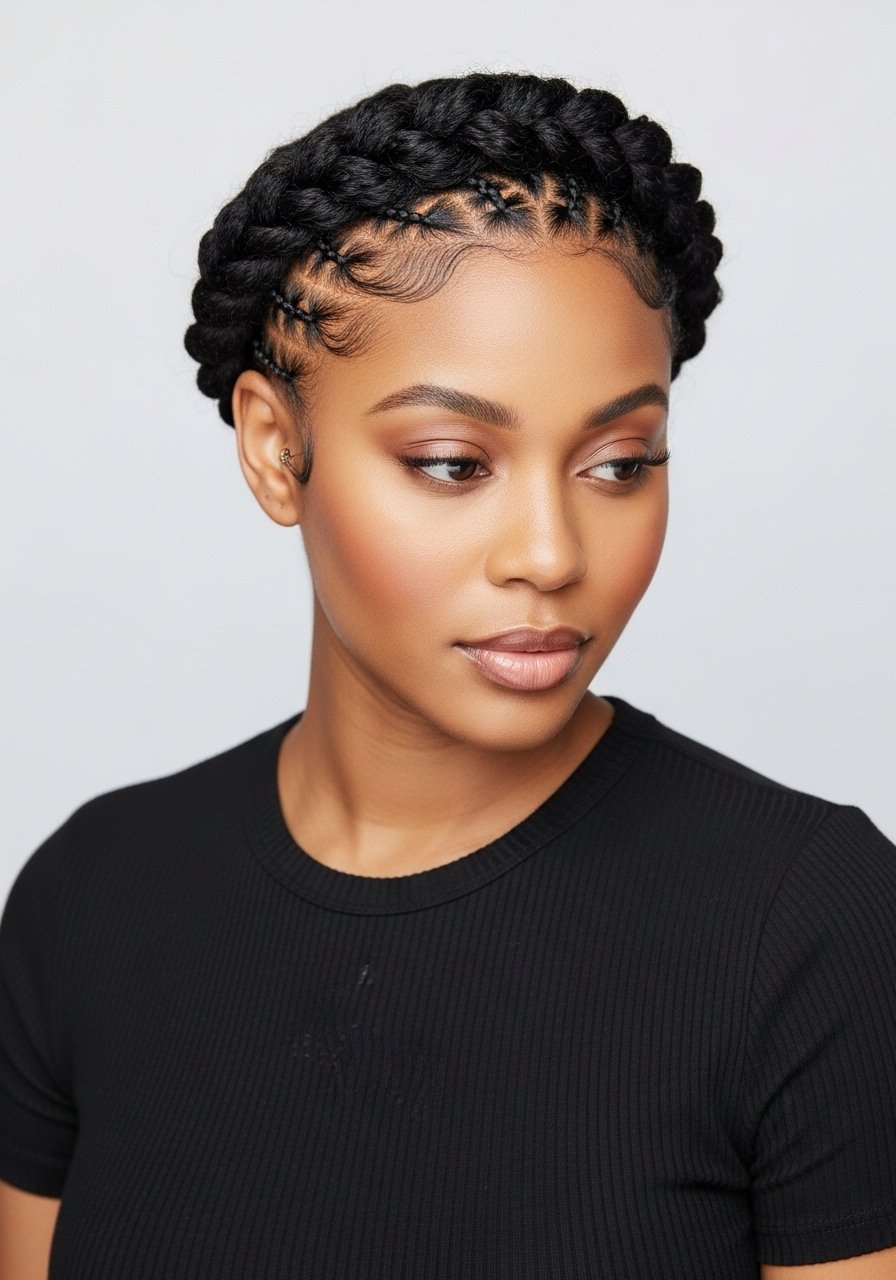
For shorter naturals, a rope twist halo is a gentle protective option you can sleep in. I split the crown into five sections and twist each one with a light hand to avoid flare. If you have 3 to 4 inches of length, the halo will sit nicely with small pins hidden under the twist. A frequent mistake is twisting too tightly which creates breakage at the perimeter. I refresh mine at week two with a light mist of leave-in, then smooth the edges with a pea-sized amount of curl butter. This style is great for reducing manipulation without committing to long-term extensions.
What I Actually Keep For Braids And Protective Styling
- Honestly the best $30 I spend in any year, Olaplex No. 3 Hair Perfector used once a week smoothed my damaged ends after an at-home bleach mistake. Buy from the official seller on Amazon or Sephora to avoid counterfeits
- For installs, pre-stretched kanekalon braid hair 24-inch in three packs covers a full head for most people
- Small snag-free elastics for securing feeds without breakage, in a 100-count pack
- Edge control brush kit for smoothing baby hairs without overworking them
- Satin bonnet and silk pillowcase set because sleeping on cotton is why braids frizz fast
- Lightweight coil hair oil, 2 oz for weekly scalp soothing and itch control
- Gold hair cuffs and wooden bead kit for finishing touches that do not add much weight
- Spray bottle for diluted leave-in mix because a 1:4 leave-in to water mix is how I refresh without buildup
Halo Fishtail Pull-Through Braid For Formal Looks
The pull-through fishtail gives presence without heavy installation. On mid-back length hair I make six small ponytails down the back, split each pony and loop them through to build the pull-through, then wrap into a halo. It takes me 30 to 40 minutes and looks like a salon updo. A trap is using too much hairspray at the start which stiffens the ponytails and makes the loops hard to hide. Instead I use a light flexible spray and pin with U-shaped pins. This is best for 1B to 3B hair that holds structure.
Dutch Milkmaid Braids For Easy Updos
Milkmaid braids are the fastest way to get a statement updo without heat. I part down the middle and create two Dutch braids with 1/2-inch sections, which keeps the braid neat and reduces flyaways. On shoulder-length hair the whole thing takes 12 to 16 minutes. The usual mistake is braiding too loosely which causes the finished style to droop within hours. Tighten each stitch gently and anchor with two long bobby pins crossed under the braid to lock it in. This is a great gym-to-drinks transition for wavy textures.
Fulani Feed-In Braids With Beads For Curly Hair
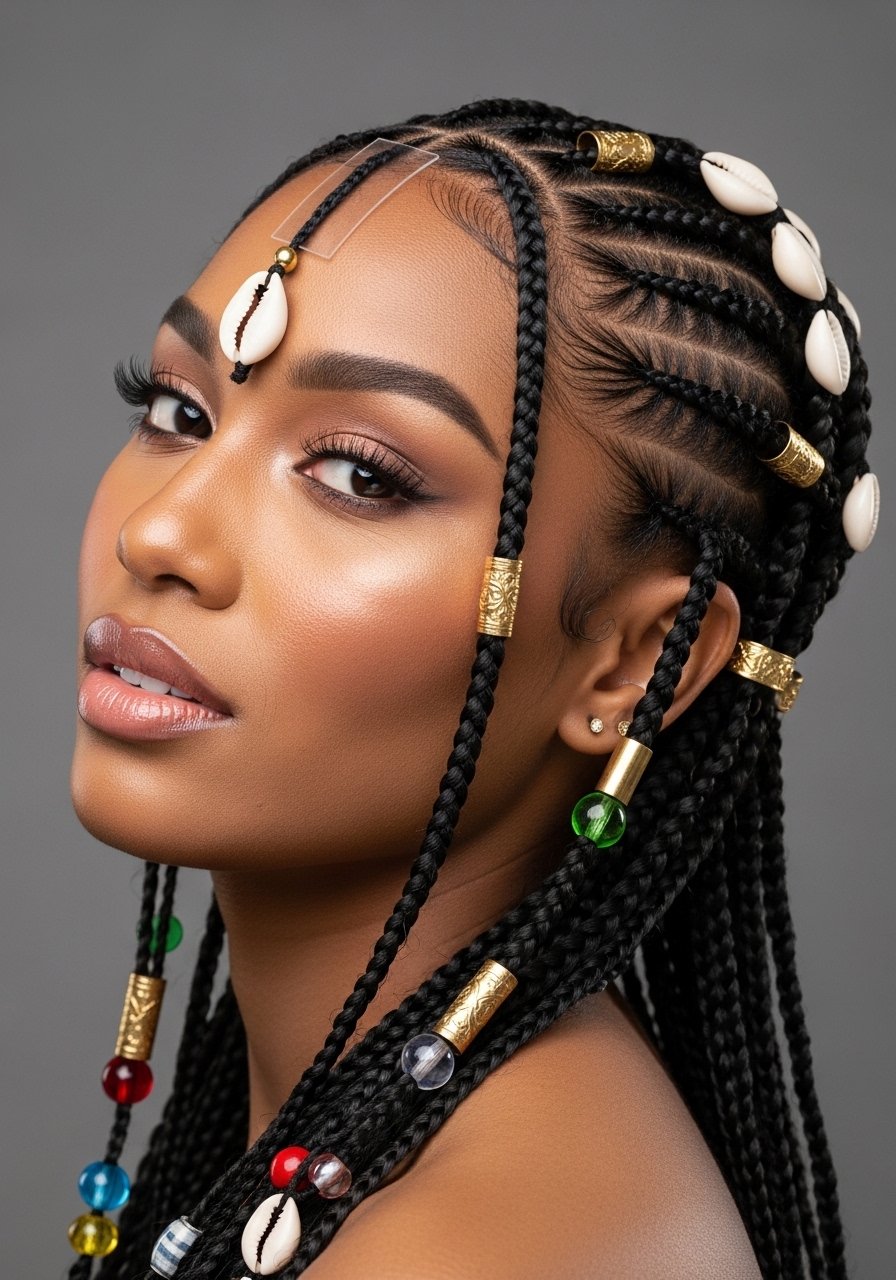
Fulani braids with beads keep the scalp breathable while offering style longevity. I space the feed-ins with a 1.2 cm interval across the crown and leave the ends curly rather than fully braiding them, which reduces overall weight. Wash the style gently every ten to fourteen days by diluting shampoo in an applicator bottle and rinsing at the scalp only. If you have colored hair, remember bleaching over previous color is risky. I bleached my own hair last winter trying to save $200. Three months later I paid $400 to fix it. Olaplex No. 3 saved what was left.
Invisible Side Braid For Grown-Out Pixies
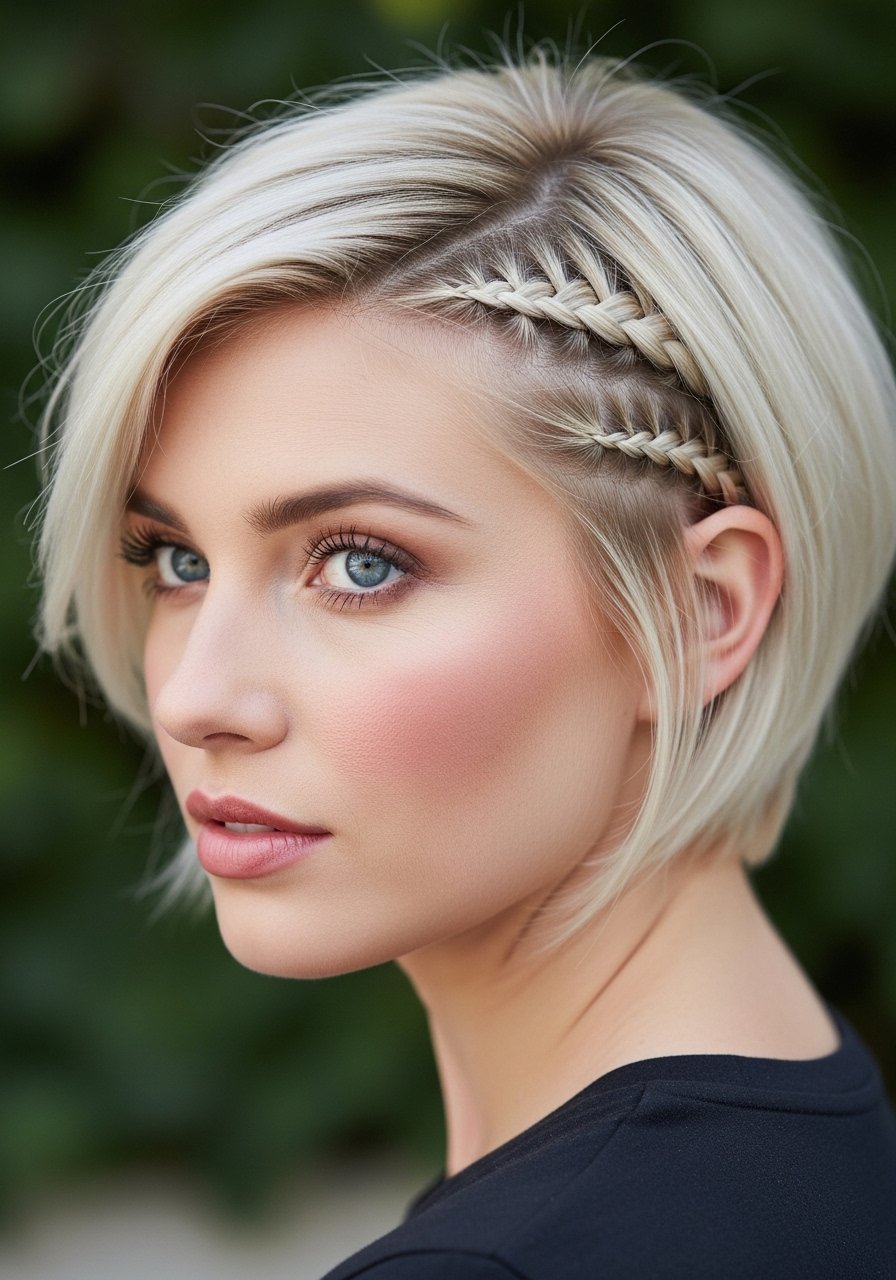
When your pixie is growing out, an invisible side braid is the secret fix. Use 1/4-inch sections along the hairline and keep the braid tight and flat. I do this in five minutes with a light gel to control baby hairs. A common misstep is using thick gels which flake. Instead use a water-based gel applied with fingers, then blend edges with a toothbrush. This trick saves multiple trims and is great for 1A to 2B textures transitioning to a lob.
Jumbo Box Braids For Quick Protective Install
Jumbo box braids are a fast protective install and easier to remove than small braids. On shoulder-length hair I use 12 to 16 braids per row which usually totals 20 to 30 braids, making installation two to four hours. Keep length to 14 inches or less to avoid neck strain. A big mistake people make is sleeping without a satin bonnet during the first night, which causes major frizz. Moisturize the scalp weekly and avoid heavy oils at the root to prevent buildup.
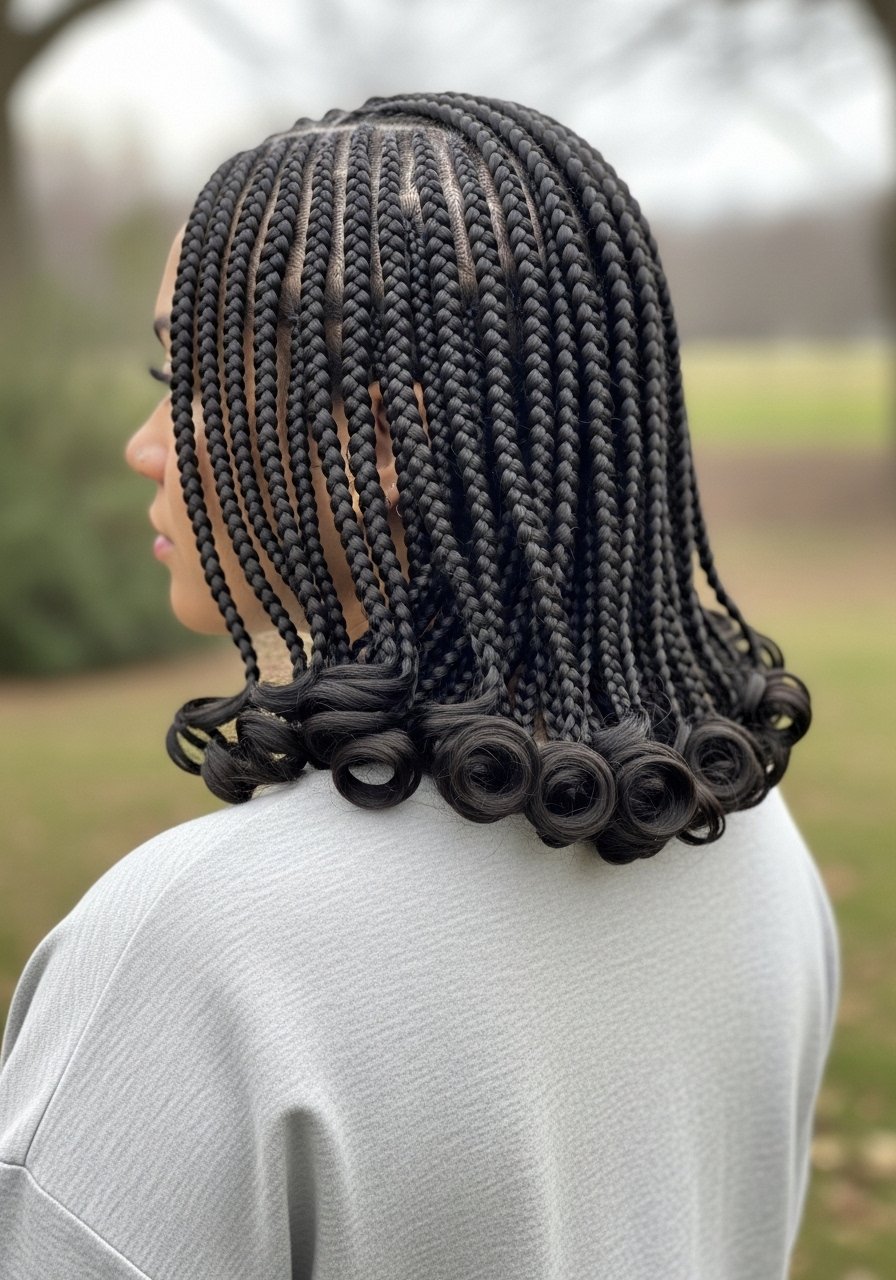
Knotless Goddess Braids With Curly Ends
Goddess braids with curly ends give the protective benefits of knotless installation while leaving movement at the tips. For 3C to 4B hair I anchor the feed-in until two inches from the end and then unravel to curl the tips, using flexi-rods to set for 30 minutes if I want tighter curls. A frequent error is leaving undone ends untreated, which can get fuzzy. Lightly seal the unraveled sections with a whipped butter and avoid daily manipulation. Also remember that hair grows about half an inch a month at most, regardless of what biotin gummies promise you. Patience and low tension are the real answers.
What I Wish I Knew Before Braiding More Often
- Heat protectant goes on damp hair, not dry. The cuticle is more open and the product actually absorbs. A popular heat protectant spray is compact and useful when you smooth edges before braiding
- Grab a satin bonnet and silk pillowcase set for braid sleep. It stops friction and preserves parting neatness
- Hair grows about half an inch a month at most, regardless of what biotin gummies promise you. The way to keep length is reduce breakage with gentle installations and weekly bond-builder treatments like Olaplex No. 3
- If your scalp is reactive, do a two-day patch test with any new oil or pomade before using across the whole head. Tiny reactions under a braid multiply fast
- Drugstore braid hair is fine for testing looks. For longer wear invest in pre-stretched synthetic hair from the official seller on Amazon to avoid tangles and returned sacks of knotted hair
Frequently Asked Questions
Q: How long should I keep a protective braid install in?
A: For most knotless and box braid installs, six to eight weeks is the practical range. Keep an eye on new growth at the root and scalp health. If your edges feel tender, remove sooner. A mid-run refresh of the front row can extend wear without full removal.
Q: Can I wash my scalp with braids in?
A: Yes, dilute a gentle shampoo in an applicator bottle and massage the scalp lightly. Rinse thoroughly and pat dry. Washing every ten to fourteen days keeps buildup away without loosening most feed-in styles.
Q: Are braid extensions bad for thinning edges?
A: They can be if installed too tightly or left in too long. Use larger partings around the hairline, opt for knotless methods, and avoid heavy length beyond 14 inches to reduce tug. If you notice thinning, undo the front rows and give the perimeter two to three months of rest.
Q: What is the safest way to add beads and cuffs?
A: Add beads only to a subset of braids so weight stays balanced. Clamp beads on over a small twist of braid or use rubber-lined beads that do not compress hair. Avoid metal cuffs at the very root.
Q: Can I color my hair under braids?
A: Coloring under braids complicates upkeep and risks uneven results. If you want color, do it before a long protective install and allow at least two weeks for the hair to settle. If you are lifting previous color, that is a salon job. If you try it at home you risk breakage and long repair bills.