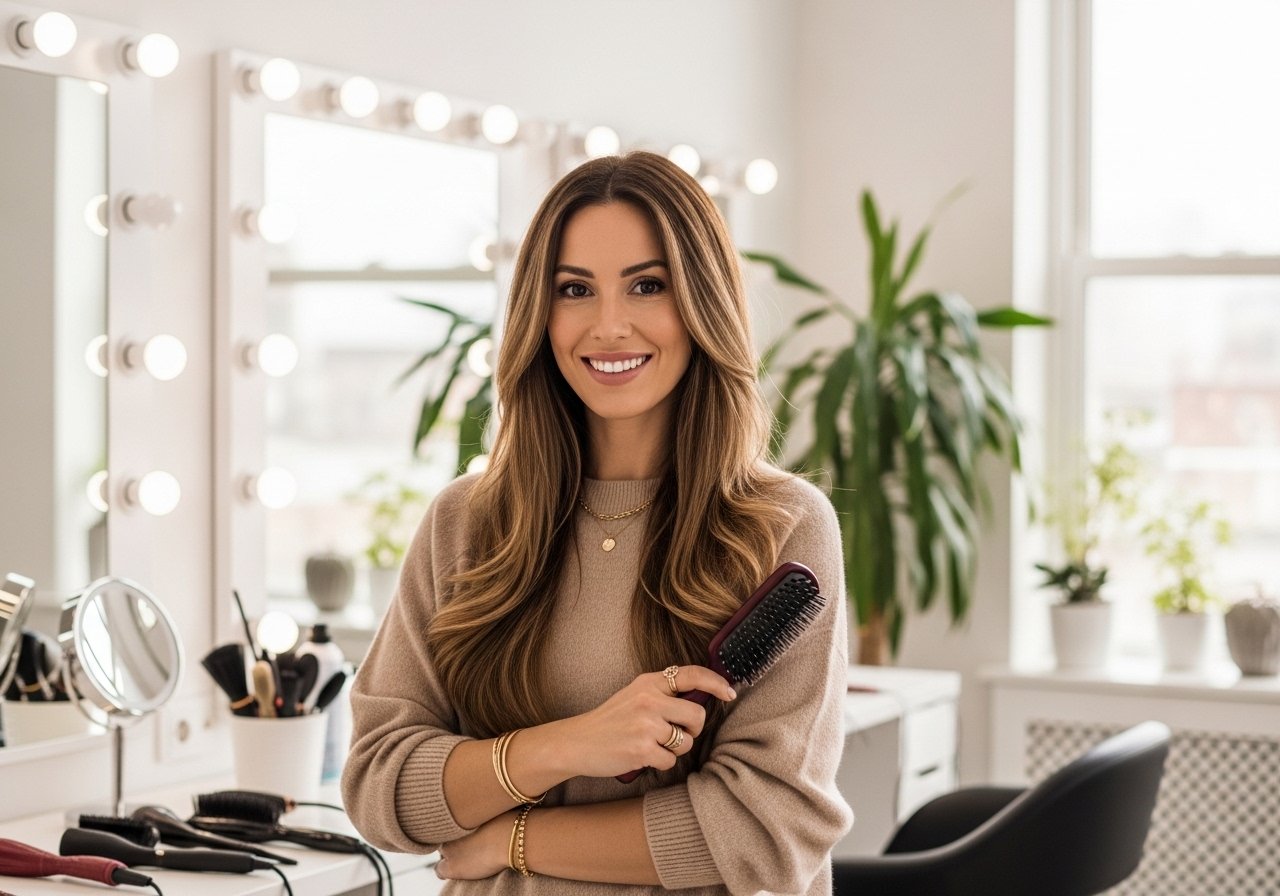
If your curls look defined for five minutes after styling and then frizz out by lunch, this list is for the impatient, product-wary person who actually does their own hair. I have blown $200 on a botched color and learned to fix what I can at home, and I will tell you exactly what to try first and what to stop doing. Most of these takes are under 30 minutes, some need one tool splurge, and a few are better booked at the salon.
These ideas mostly serve wavy to coily hair, from 2A loose waves through 4C coils, with notes when something only suits a handful of textures. Skill level ranges from quick DIY to a style I recommend a stylist for, and budgets run from under $10 for elastics to one tool around $300.
Heatless Overnight Curls With a Robe Tie
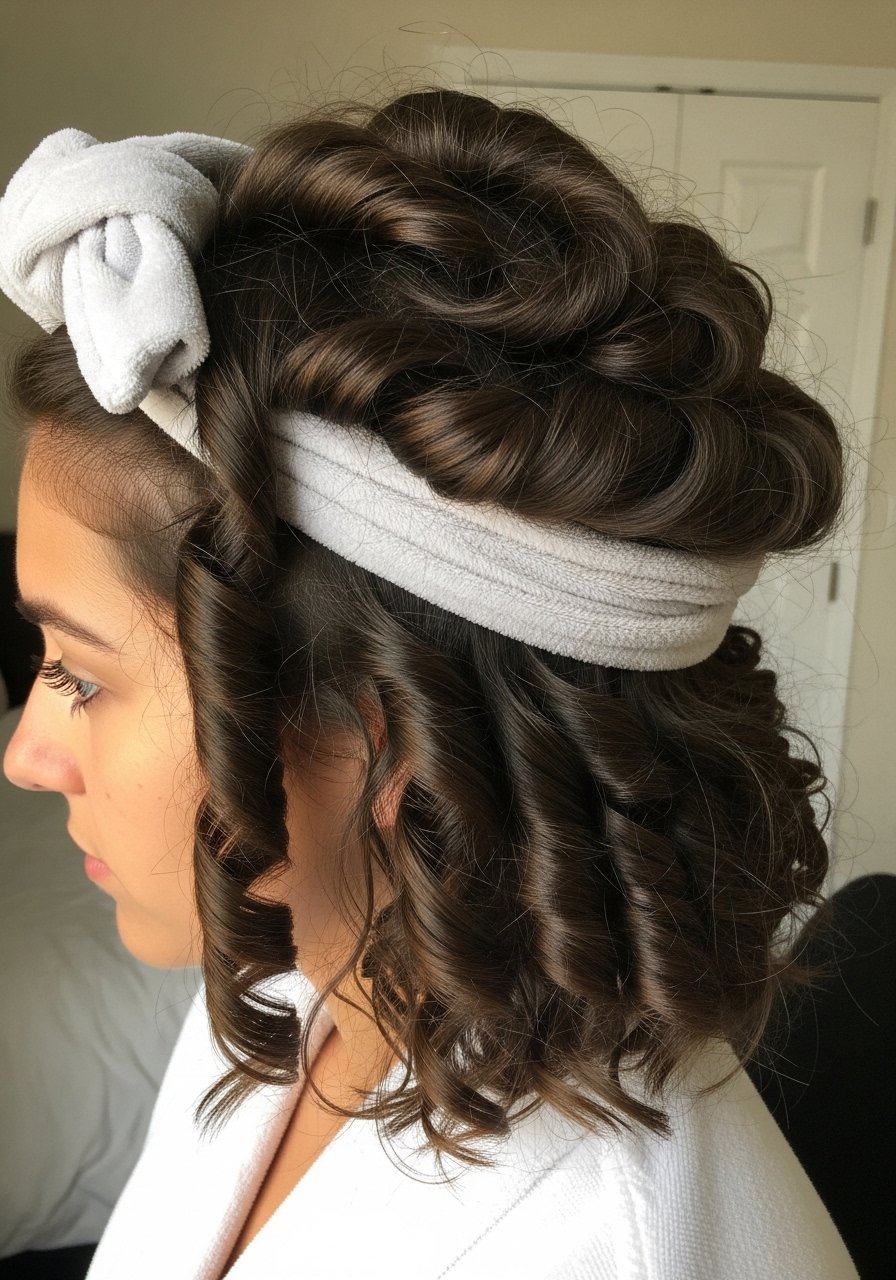
I started doing robe-tie curls after one winter of brittle heat damage. Split hair into four to six even sections, wrap each around the robe sash, and sleep on it. Wake up, untie and separate with fingertips, and you get bouncy curls without heat. For fine waves use three sections, for thick curls go up to eight. A microfiber towel or t-shirt wrapped under the sash reduces friction and keeps frizz low, try microfiber hair towel. Common mistake, people leave hair soaking wet and get a limp result. Aim for hair at damp, not dripping. This is DIY friendly and cheap.
Pineapple Method To Save Second-Day Curls
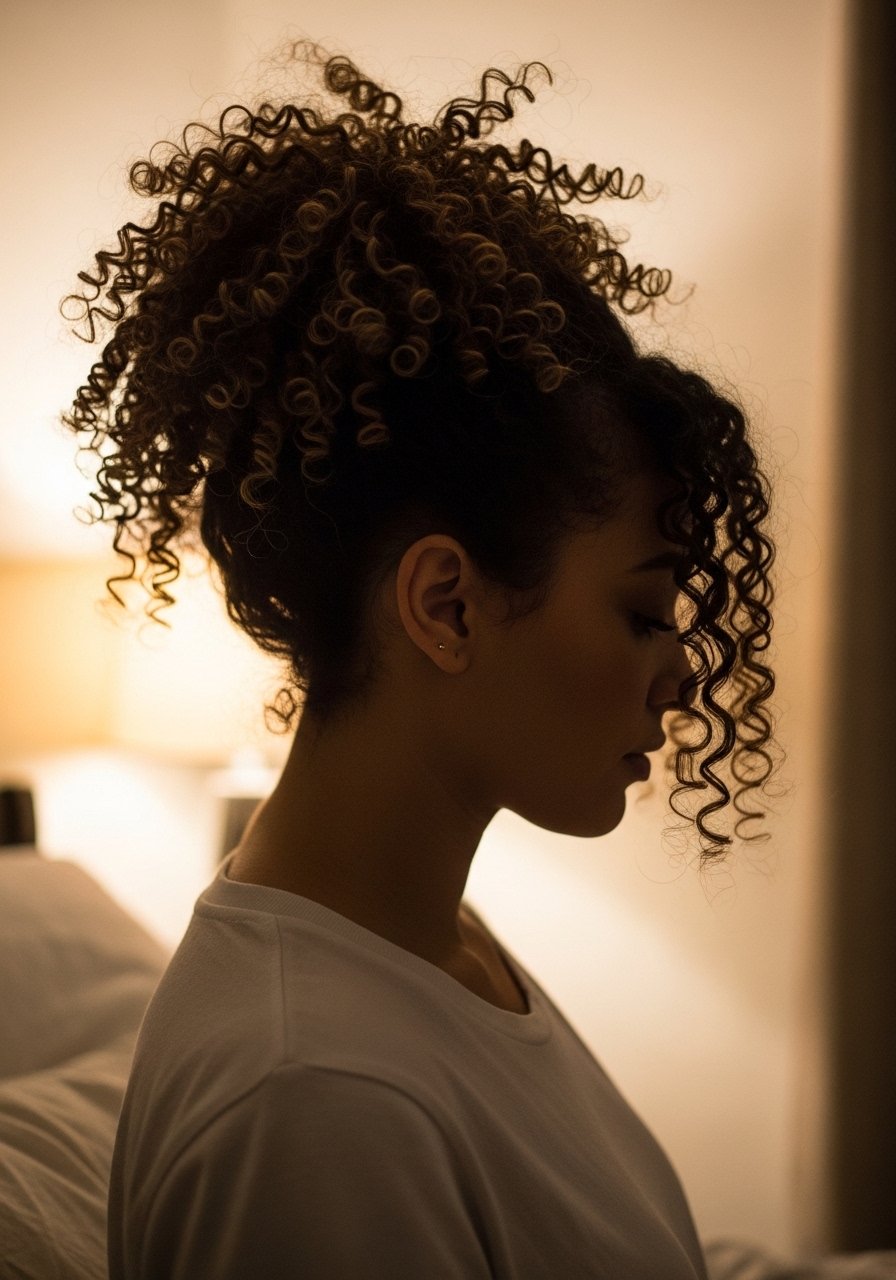
If your second-day curls always flatten, try the pineapple. Gather dry or mostly dry curls into a high loose ponytail using a silk scrunchie, sleep on a silk pillowcase, and you often get better shape on day two than fresh out of the shower. My curls looked great on TikTok and like wet noodles by 11am. Finally figured out it was the gel-only routine. Added a leave-in cream underneath and it changed everything. Use a silk scrunchie like silk hair tie set to avoid denting. Common mistake is tying too tight which crushes root volume. Works for 2B through 4A textures.
Sleek Low Bun With Heat Protectant and Light Gel
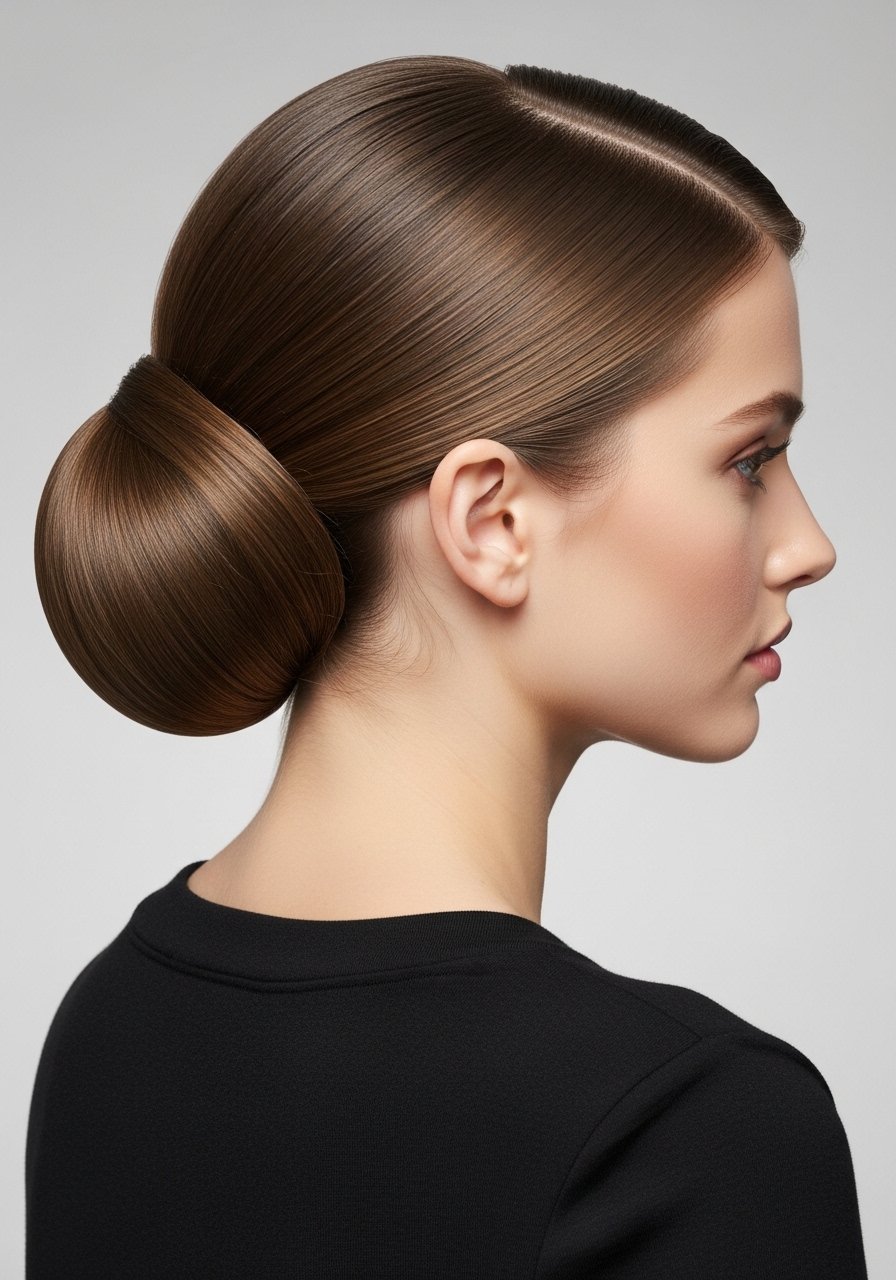
For a polished look that hides growing roots, smooth damp hair with a pea-sized amount of smoothing cream, blow dry on low while using a boar bristle brush, then lock the style with a light gel and a low bun. If you flat iron first set the iron between 300 and 340 degrees for medium hair textures. Most heat protectants you spray on dry hair before flat ironing barely work. They need to absorb into damp or just-dried hair to actually shield the cuticle. Try Color Wow heat protectant applied to damp hair. Common mistake, people use too much gel at the roots and get a greasy look. This take is fast, under 15 minutes for shoulder-length hair.
Large Twist Out For Type 4 Coils That Reduces Frizz
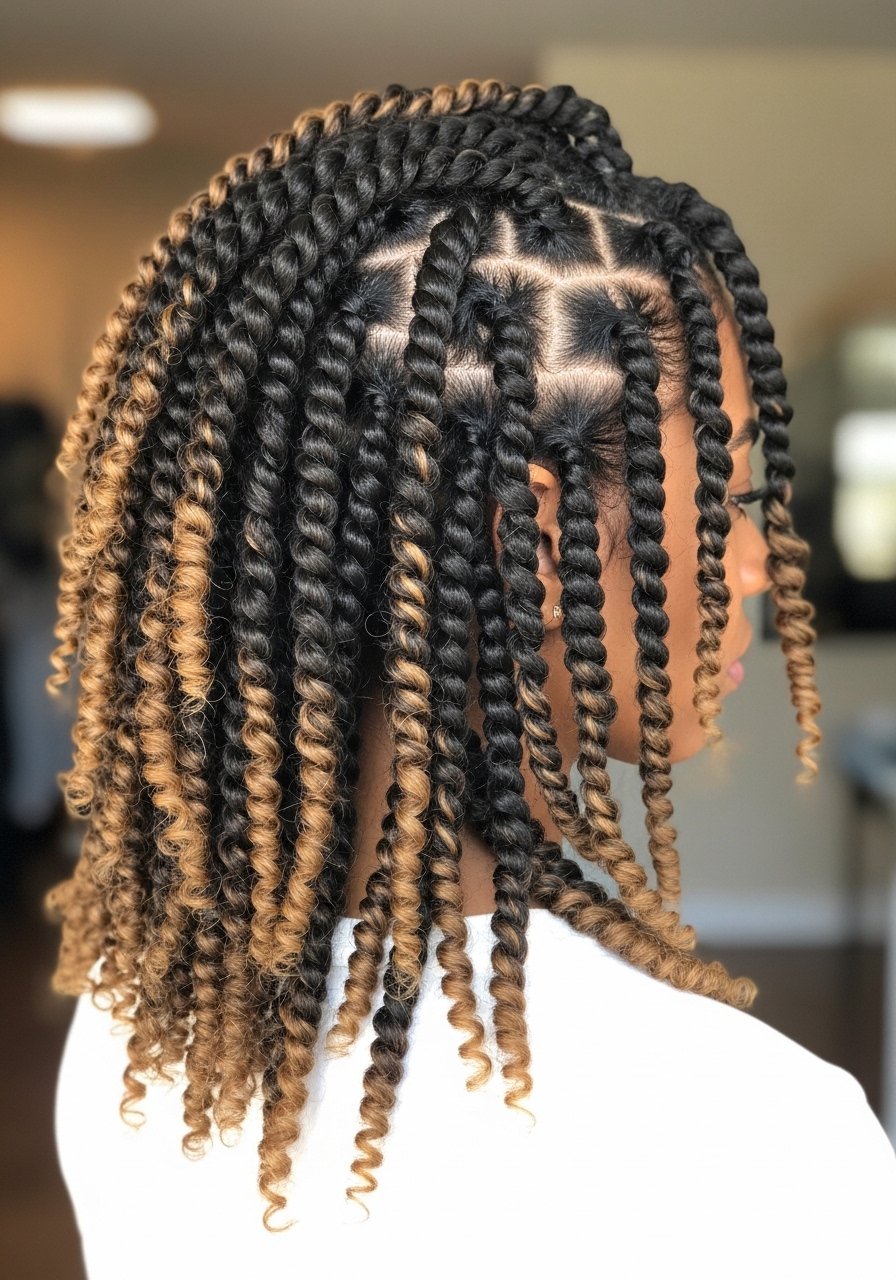
If your wash day feels endless, try a large twist out to shorten styling time and keep definition. Work on clean, conditioned hair in eight to twelve sections. Apply a generous leave-in, two pumps of oil, and then a cream-based styler on each twist. I use SheaMoisture Curl Smoothie for the cream layer. Let twists air dry or sit under a hooded dryer for 20 minutes if you need speed. A common mistake is doing dozens of tiny twists which doubles time and creates frizz. This method keeps length and is ideal for 4A to 4C hair. If your hair is fragile, monthly bond builder treatments can help before attempting large twists.
Face-Framing Money Piece Highlights You Can Touch Up

Money piece highlights brighten the face without a full dye job. For heat-sensitive hair, book the first application. For modest maintenance, you can refresh with a demi-permanent shade at home but do an allergy patch test first. Use a low-lift box dye for subtle touch-ups and a gloss at the salon if you want shine. A common mistake is lightening too small a slice which looks harsh on release. Aim for one to two sections per side, thin at the top and wider at the jawline for a flattering frame. If you bleach, do not lift over previous dark dye alone at home. This is an at-home tweak or a salon job depending on the lift needed.
The Four Step Wash Day That Cuts Time For Coily Hair

I pared my wash day to four actions that actually matter. Pre-poo with oil for 20 minutes, shampoo with an 8oz sulfate-free clarifying shampoo to remove build-up, deep condition for 20 minutes under a warm cap, and detangle with a wide-tooth comb while conditioner is in. For damaged hair I use a bond builder weekly on damp hair for 10 minutes before conditioning. A common mistake is washing every day. Stretch to twice weekly when you can and you will save time and moisture. This routine cuts my session from three hours to about 75 minutes for dense coil patterns.
What I Actually Keep in My Natural Hair Kit
- Honestly the best $30 I spend in any year, Olaplex No. 3 hair perfector used once a week helped my split ends look less ragged. Buy from the official store on Amazon or grab it at Sephora to avoid fakes
- For daily drying, microfiber hair towel under $15 cuts blow dry time and frizz
- For smoothing before heat, Color Wow heat protectant, apply to damp hair and let it sit 60 seconds before heat
- For coils, Briogeo Don't Despair Repair mask 8oz deep condition once weekly when my hair feels dry
- A set of clear elastic hair ties for bubble ponytails and braids, stash several so you do not pull one too tight and break strands
- Silk pillowcase queen size cut my morning frizz noticeably
- Boar bristle paddle brush for smoothing, I use it on damp hair with leave-in to distribute oils
- Hair donut foam bun maker for slick buns, cheap and lasts
- Claw clip set for quick half-ups, buy sturdy ones to avoid snapping
- Wide-tooth comb for detangling in conditioner, cheaper and better than fighting with a brush
Curtain Bangs Framing For Round Faces Without the Forehead Gap

Curtain bangs soften a round face by drawing the eye down the center, not across. Ask a stylist to start longer and feather as needed, or if you trim at home cut in small increments while your hair is dry. A common mistake is cutting too short in one go. Styling trick, use a bit of dry shampoo at the roots to add lift and keep bangs from laying flat. For product control try lightweight dry shampoo spray applied two inches from the scalp. These bangs suit 2A through 3C textures best; fine hair needs more root volume.
Pancaked Crown Braid To Make Thin Hair Look Fuller
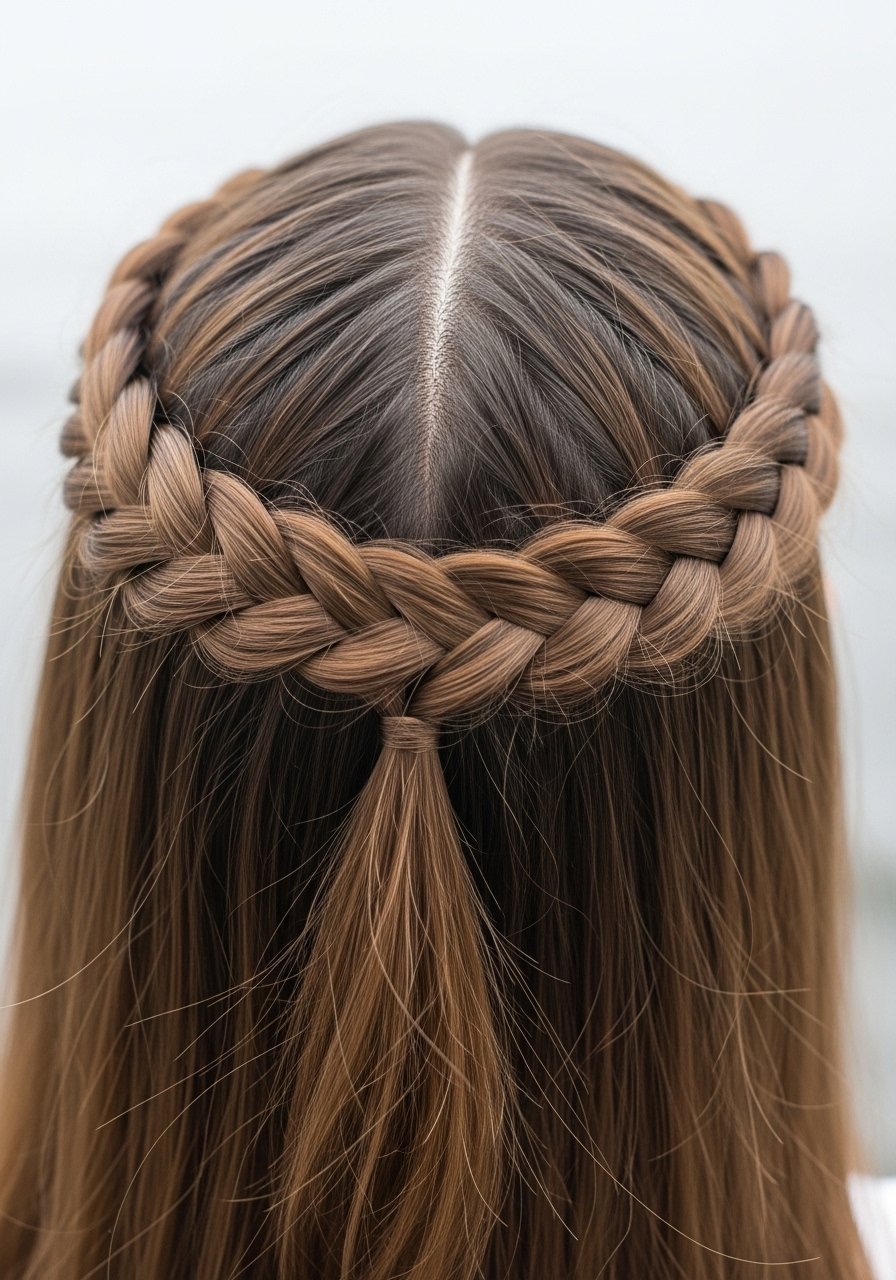
If your part shows more scalp than you like, a crown braid that is pancaked can add the illusion of density. Do a Dutch braid around the head in three sections, then gently pull each loop outward to widen it. I start with two nail-width partings and add hair only from the top section so the braid sits higher. A common mistake, adding too much hair from underneath which flattens the crown. Use volumizing spray sparingly at the roots before braiding. This style is great for 2B through 3C hair and works on finer textures with backcombing.
Bubble Ponytail With Elastic Spacing For Long Hair
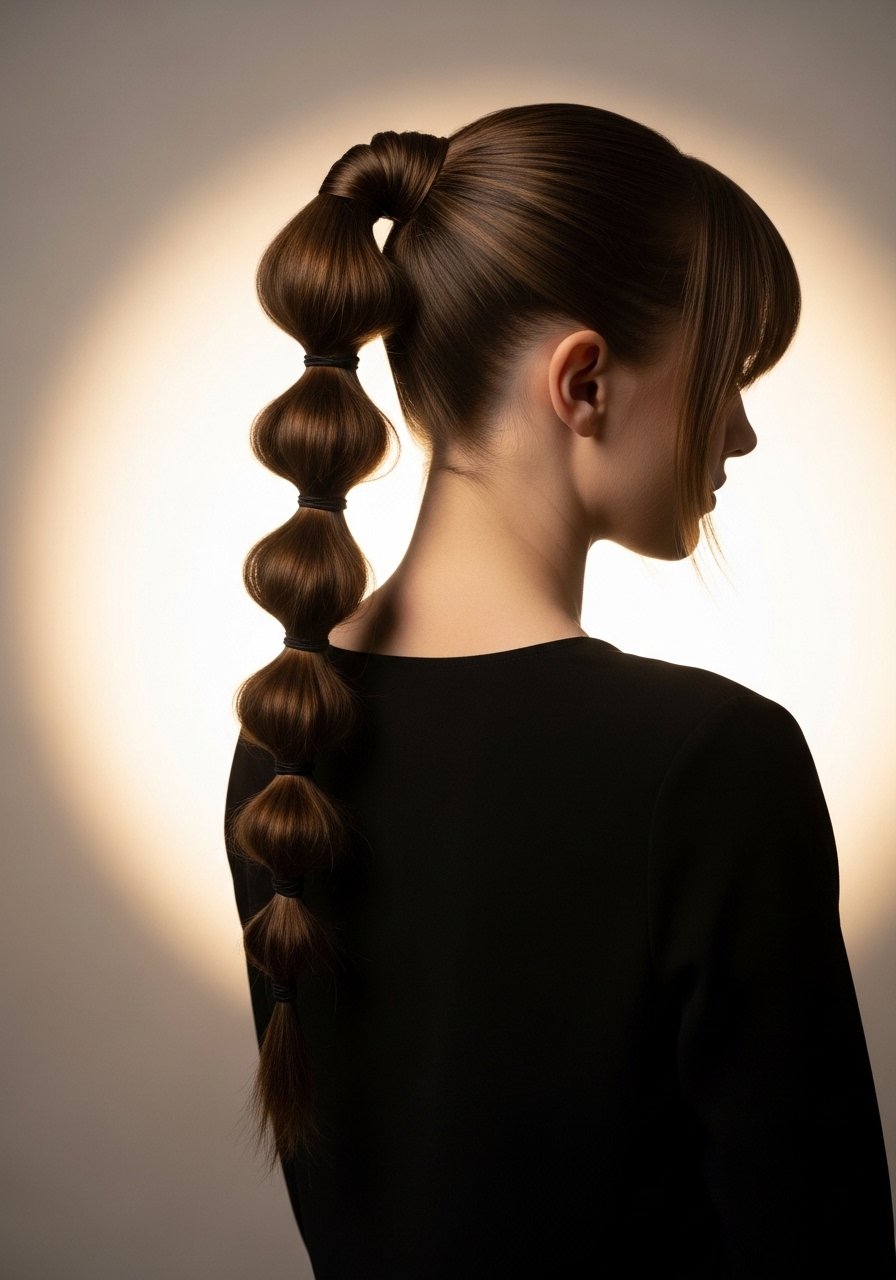
Bubble ponytails are low effort and very forgiving. Tie a base ponytail, then add elastics every two to three inches depending on length. Between each elastic pull the hair gently to create the bubble effect. For fine hair, pancake the bubbles lightly to add width. Clear elastics work best because they do not snag and are discreet. A common mistake is using thick elastics that cause dents. This takes under five minutes and is good for protecting ends on windy days.
Short Wolf Cut With Wispy Layers For Movement

The wolf cut is a layered shag that gives movement without daily heat styling. The trick is to keep choppy layers on top and longer lengths underneath so the hair reads thick without bulk. For fine hair, ask for more texturizing near the ends. If you want the textured look without a trip to the salon, try a texturizing spray like sea salt texturizing spray and work it in at the roots. Common mistake, over-thinning which creates limp zones. This cut plays well with 1B through 3B textures.
Sock Bun For a Smooth Classic Updo
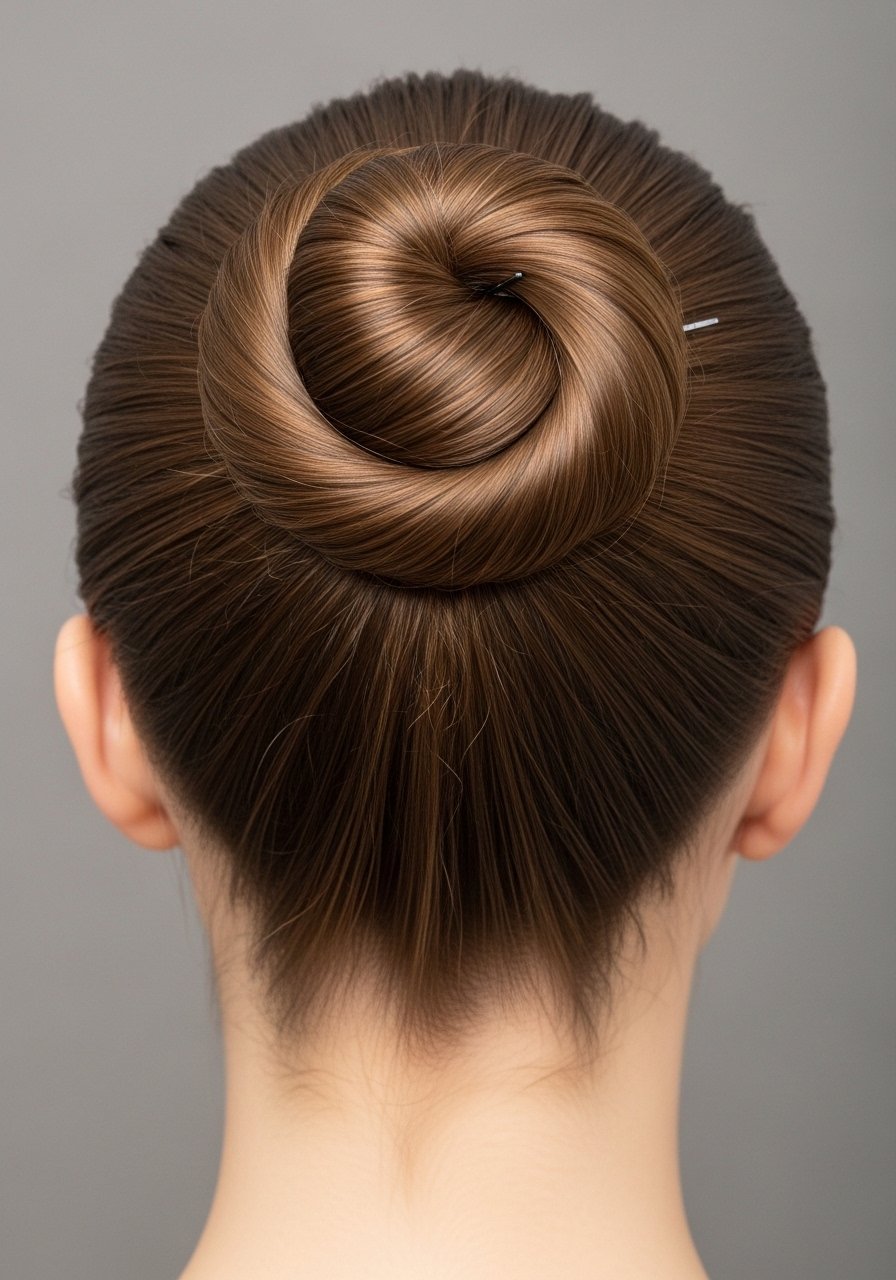
The sock bun gives a perfect rounded shape and hides messy ends. Pull hair into a high ponytail, tuck a foam donut wrapped in hair, and secure with pins. For extra smoothness, use a small amount of smoothing cream before tying. A common mistake is using the sock or foam uncovered which looks odd. Make sure the hair fully covers the tool. This style is fast, under 10 minutes, and works on medium to long hair. If you have very short layers, use bobby pins to cinch stray bits.
Flat Twist Out For Shingled Definition On 3A To 4A Hair

Flat twists are a protective styling method that gives a stretched, defined result when untwisted. Section hair into six to eight panels, apply a leave-in and a light gel on each panel, then flat twist. Let dry fully before releasing. I use the LOC method for these, leave-in then oil then cream to lock in moisture. A common mistake is releasing too early and getting frizz. This style is low manipulation and helps retain length when done weekly.
Half Up With Mini Claw Clips For Fast Volume
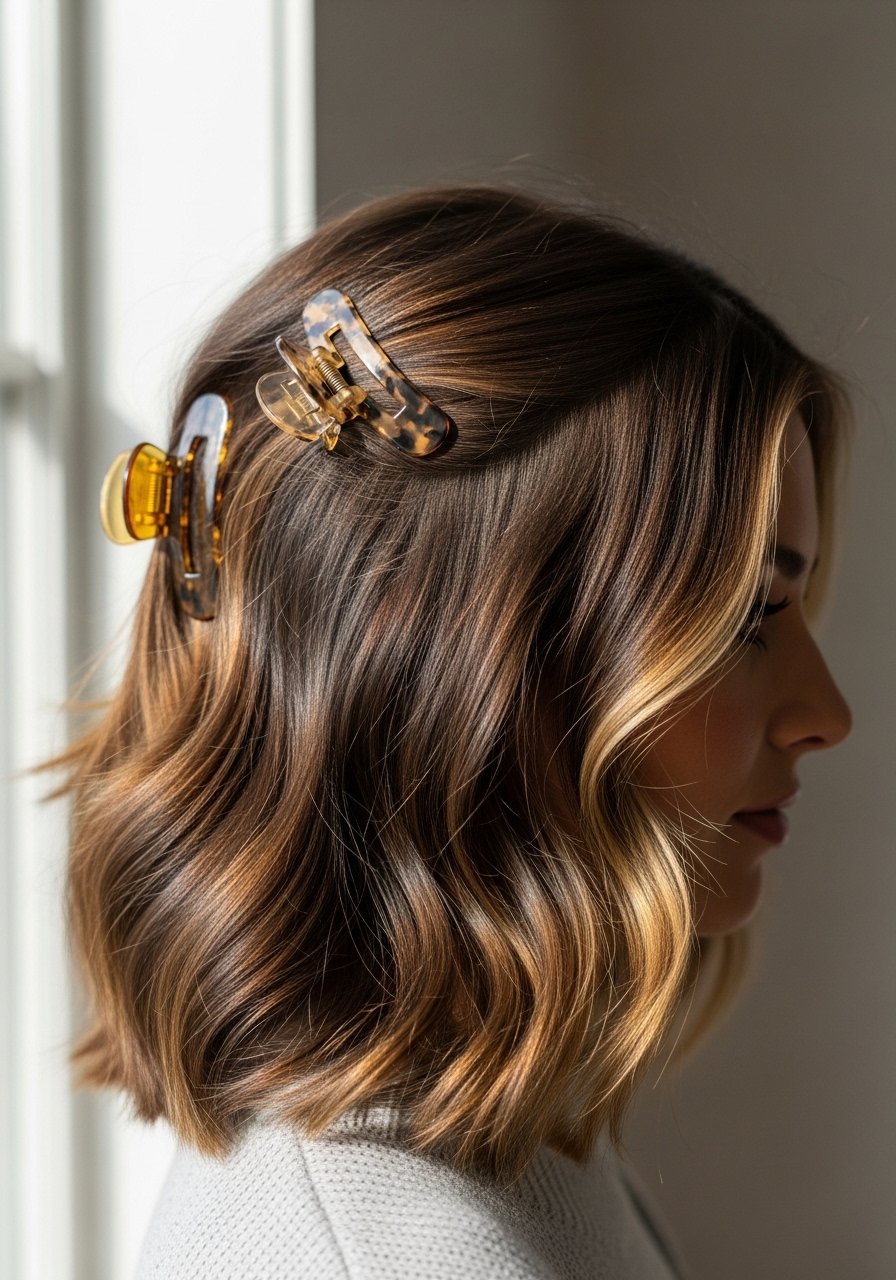
Mini claw clips are back in and for good reason. Twist two top sections and secure with clips for instant lift and a bit of 90s nostalgia. If your hair is slippery, roughen the spot with a little texturizing spray first. A common mistake is clipping too low, which flattens the crown. Use clips with teeth that grab and avoid decorative ones that slip. This trick is a go-to when I need a quick, low-damage lift.
Flexi Rod Overnight Waves For Defined Heatless Curls
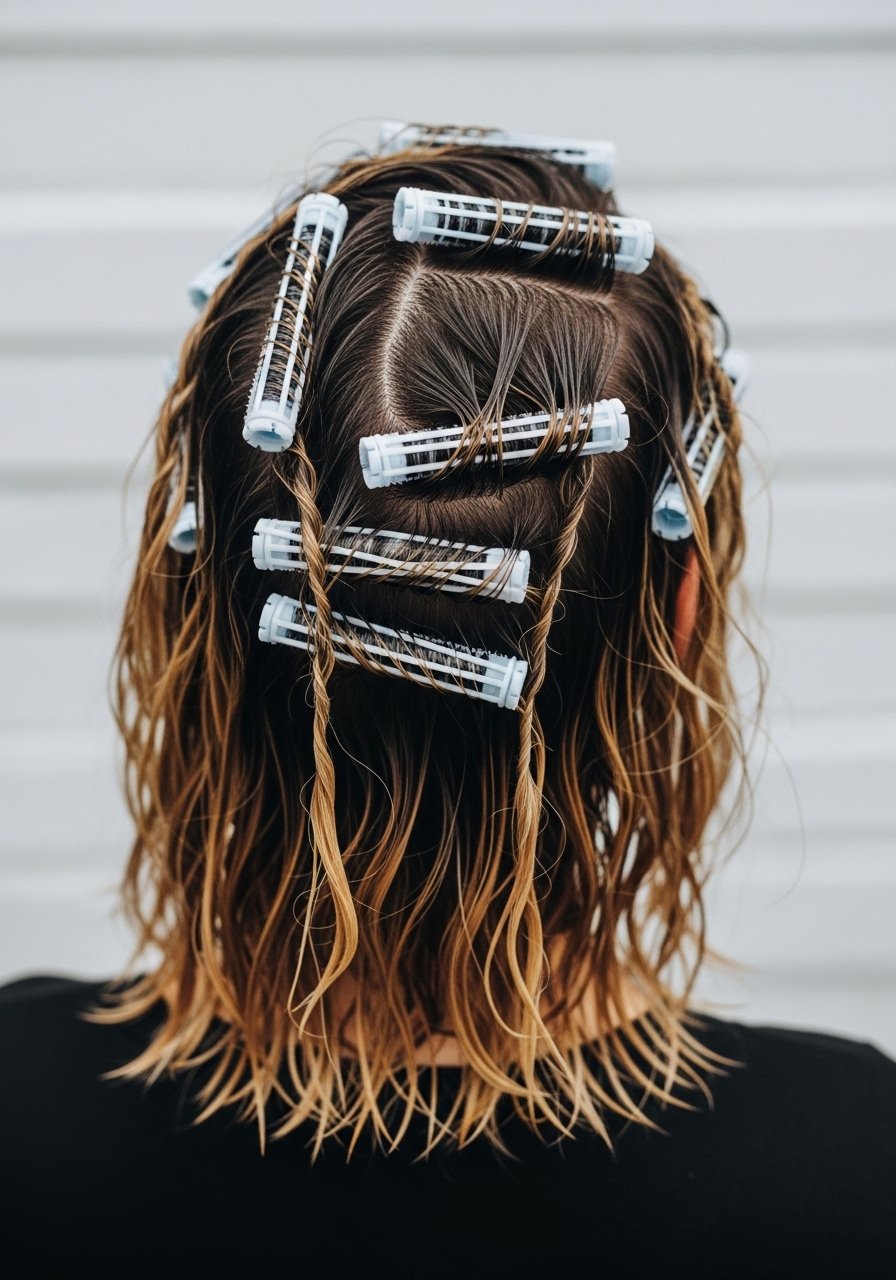
Flexi rods are the fastest way to get consistent defined curls without heat. Work on damp hair in medium sections about one inch wide for tighter curls, two inches for looser waves. Wrap hair around the rod, bend ends to secure, and sleep. The next morning let hair fully dry before removing to avoid frizz. For best results, apply a light gel while damp and a few drops of oil on the ends after release. Common mistake, using too-large sections which gives uneven shrinkage.
How Small Habits Cut My Styling Time
- Heat protectant goes on damp hair, not dry. The cuticle is more open and the product actually absorbs. Try Color Wow heat protectant and let it sit 60 seconds before using hot tools
- Grab a microfiber hair towel for $12. It cuts your blow dry time by a third and stops frizz before it starts
- Hair grows about half an inch a month at most, regardless of what biotin gummies promise you. The thing that helps length retention is reducing breakage with a silk pillowcase queen size and weekly bond treatments
- Drugstore shampoo is fine. Where you actually need to spend money is conditioner and bond builders. Olaplex No. 5 conditioner 250ml is worth grabbing from an authorized seller
Frequently Asked Questions
Q: Can I use Olaplex No. 3 if my hair is not damaged, or will it make it worse?
A: You can use Olaplex No. 3 on hair that is not visibly damaged. It will not "over-repair" hair but may leave fine hair feeling heavier if you overuse it. Try once every two weeks and judge by how your ends respond. Buy from the official store on Amazon or at Sephora to avoid counterfeits.
Q: How often should I use purple shampoo to avoid brassiness without drying out my hair?
A: Once a week for most people keeps tones in check without over-drying. If your hair is very porous reduce to every other wash. Follow with a deep conditioner for 10 to 20 minutes and skip purple shampoo the same week as a clarifying treatment.
Q: Is the Dyson Airwrap worth the price or are there cheaper tools that do the job?
A: If you style daily and have thick hair, the Dyson heats and shapes faster and can be a time saver. For occasional styling, a midrange tool offers similar looks for less money. Also consider classic tools like a $30 round brush for blowouts, the expensive tool is not mandatory.
Q: How do I stop my curls from flattening by midday?
A: Sleep with the pineapple method on a silk pillowcase and layer a leave-in cream under gel when styling. Also avoid heavy oils at the root which weigh curls down. Refresh with a little water and a fingertip of curl cream rather than reapplying full product.
Q: Can I bleach over previously dyed dark hair at home?
A: No, lifting bleach over existing dark color is one of the fastest ways to cause breakage. This is a salon job because it often requires multiple sessions and professional products. If you try at home accept it may take months to reach the result safely.
Q: What is the real difference between a leave-in and a curl cream and do I need both?
A: A leave-in mostly hydrates and detangles, curl cream adds hold and definition. Use a lightweight leave-in first, then a curl cream for structure. If you are trying to cut down on product, swap your heavy leave-in for a lighter one and keep the cream for definition.