If your curls look defined the moment you finish styling them and frizz back into a triangle by the time you sit down at your desk, this is for you. I have been there, constantly testing techniques until something actually held beyond a commute. Below are nine natural hair hairstyles I actually do on my own hair, with the tricks, products, and real timing that make them repeatable.
These ideas skew toward Type 2B through 4A hair, shoulder length to mid-back. Most styles take between 10 and 45 minutes, and about half can be done under $40. A couple ask for a small tool splurge. Most are DIY friendly and I note when a salon visit is worth it.
Heatless Overnight Curls With a Robe Tie
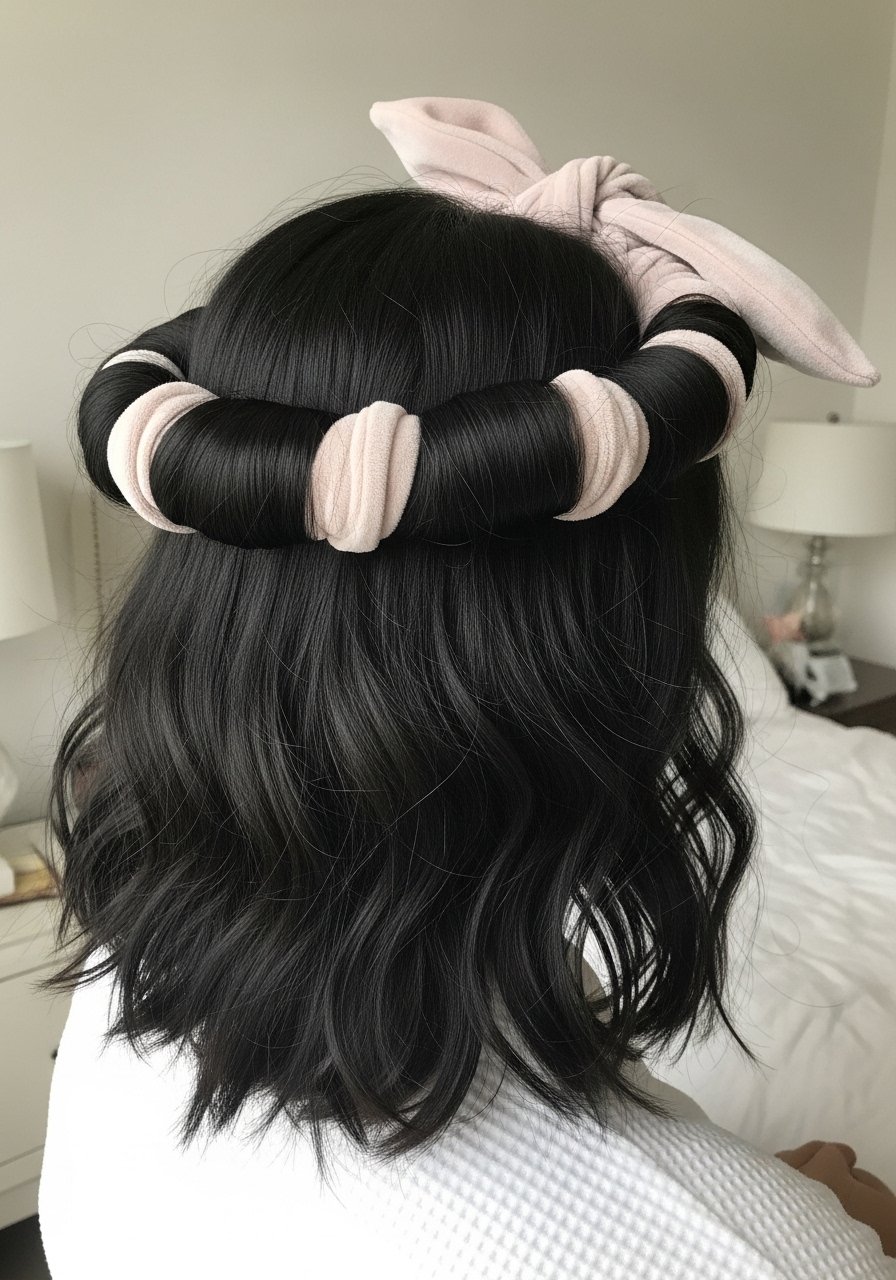
This is my go-to when I want curls without styling heat or expensive tools. Work with damp hair, split into six sections, and wrap each around the robe sash, twisting until snug. Two spritzes of lightweight mousse through the sections before wrapping helps the pattern hold, and I leave it for eight hours or overnight. It works best on 2A to 3B hair, or 3C hair stretched first with a banding step. Budget is tiny, under $10 for a sash and $10 for a travel-size mousse. A common mistake is wrapping while hair is dripping wet, which makes the core stay damp and leads to a frizzy cast. If you sleep with any tool on your head, cover the pillow with a silk or satin case to cut friction.
Pineapple Night For Curl Memory

If second-day definition is your holy grail, try the pineapple. Gather dry or nearly dry curls into a high loose ponytail with a scrunchie on top of the head and tuck long front pieces in so they do not crease. For 3A to 4A textures this keeps the curl pattern intact and reduces root flattening. I add one light mist of a curl refresher and rake a dime-size amount of curl cream through the ends before tying up. My curls looked great on TikTok and like wet noodles by 11am. That is what happened until I learned to sleep with a silk bonnet and protect the crown. Avoid elastic that digs in, and do not overly twist the ponytail or you will get a permanent crease.
Defined Wash-and-Go With LOC Layering

Wash, condition, detangle gently, then use the LOC method to lock in definition. On damp hair I apply a leave-in, follow with a cream, and finish with a light gel, working section by section with a wide-tooth comb. For medium density 2C to 3C hair I do 8 to 12 panels, finger-scrunch after gel application, and diffuse on low for about 10 minutes using a cool shot for 30 seconds per panel to set. Use 80/20 product placement and focus heavier product on mid-lengths and ends, not the roots, to avoid weighing the hair down. Budget runs from $15 to $35 depending on creams and gels. A mistake I see is applying everything to towel-dried hair that was aggressively rubbed, which seals the cuticle and blocks product pickup.
Finger Coils That Work For Tight Coils
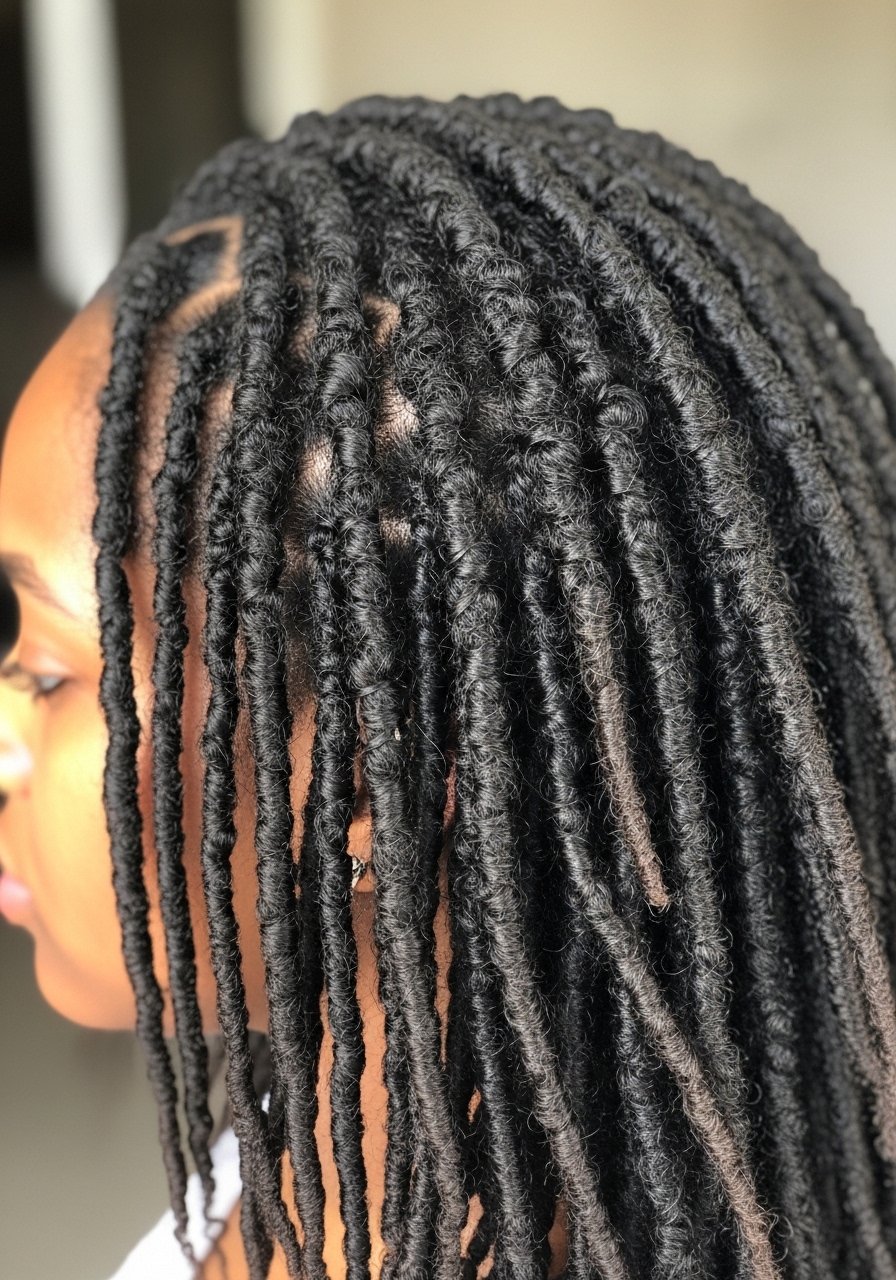
Finger coils are the neatest way to get uniform definition on 4A hair when you want a polished look without daily rework. Work with damp hair and a moisturizing gel-cream combo. Take 1-inch sections, apply a pea-sized amount of product, then coil around your finger from root to tip. Plan on 30 to 60 minutes depending on length and density. For maintenance, pineapple at night and refresh with two to three sprays of a lightweight water-based refresher in the morning. Watch out for using too much gel. If your coils go crunchy and break by mid-day, you are using too much product per section. Finger coils are DIY friendly, but for very long 4A hair, a helper makes the process much faster.
Sleek Low Bun With a Claw Clip

This is what I do on mornings when I want quick polish without the fuss. Smooth damp hair with a light gel or cream, gather low at the nape, twist into a coil and secure with a claw clip so the coil sits snugly. It is great for 2B through 3C hair and even relaxed 4A if you slick the perimeter first. Prep takes about five to ten minutes. A common error is placing the clip too high which creates a loose, falling style. For heat styling ahead, remember heat protectant before any iron over 300F and let the product absorb into slightly damp hair for a minute first. If you have sensitive scalp skin, avoid pulling too tight at the same anchor points every day.
Diffuse for Root Lift On Fine Curls

Fine curl patterns hate flat roots. Flip your head forward and diffuse on medium heat and medium speed, keeping the dryer moving in circular motions and aiming the airflow at the roots for about 3 to 4 seconds per section. Finish with a cool blast across the crown for 20 to 30 seconds. For fine 2A to 3A hair I use a salt spray sparingly at the roots to add grip, then a very small amount of lightweight oil on ends only. Time is 12 to 20 minutes depending on density. If you over-dry, the hair goes brittle. Also, if you have color, I buy heat tools that let me control the temperature and always use a protectant that penetrates damp hair.
Halo Twist Half-Up For Frizz Control
When humidity is the enemy, wrap a halo twist. Take two front-to-back sections, twist and pin each around the head to form a ring, then smooth with a touch of cream to lay flyaways. Works best on 2C to 3C hair and helps control frizz without heavy product. I spend 10 to 15 minutes on this and it holds through a commute if pinned properly. A common mistake is using pins that do not grip textured hair. Use U-pins pushed in at opposing angles. For people with shorter front layers, add small invisible elastics to anchor the twist before pinning. This is a simple DIY styling technique and not a salon-only look.
What I Actually Keep On Hand For Natural Hairstyles
Olaplex No. 3 hair-perfector 3.3 oz, used weekly for bond strength, buy from the official store on Amazon or grab from Sephora to avoid counterfeits.
Microfiber hair towel under $15, cuts dry time and stops surface frizz.
A silk pillowcase queen size under $30, worth it for second-day styling.
Wide-tooth detangling comb inexpensive and essential for wet detangling.
Flexi rods set for heatless shape, budget $12 to $20.
Lightweight mousse travel size for heatless methods and wash-and-go hold.
Medium-sized claw clip for quick upstyles, under $10 at drugstores too.
Diffuser attachment universal check compatibility with your dryer model.
Banding To Stretch Shrinkage

Banding is the best way I have found to avoid constant shrinkage on 4A and 4B hair without heat. After a leave-in, section the hair into 6 to 10 panels, then wrap soft bands every 2 inches down each section from root to tip. Leave for three to six hours or overnight. It stretches the hair for styling and reduces tangling when you need a sleeker look. The cost is basically zero if you use fabric bands. A mistake is using rubber bands that cut the hair. For longer hair, use more bands at shorter intervals. If you must use heat later, remember to apply a protectant that absorbs into damp hair first.
Banana Clip For Instant Volume On Medium Length Hair

If your goal is visible lift in under a minute, the banana clip delivers for medium length 2B to 3B hair. Gather hair at the mid crown, spread the clip and secure so the hair fans out around it. It looks intentional rather than pinned up because the clip creates internal volume. Expect the effect to last until you sleep or wash. Clips are budget friendly at drugstores. The main mistake is clipping at the wrong angle which flattens rather than lifts. If your hair is fine, pad small sections with a bit of dry shampoo at the roots for extra grip.
What I Wish Someone Had Told Me About Keeping These Styles Wearable
Grab a microfiber hair towel for $12. It cuts your blow dry time by a third and stops the frizz before it starts.
Heat protectant goes on damp hair, not dry. The cuticle is more open and the product actually absorbs. Color Wow heat protectant is a styling-room favorite and worth trying.
Hair grows about half an inch a month at most, regardless of what biotin gummies promise you. The thing that helps length retention is reducing breakage with a silk pillowcase and weekly bond treatments like Olaplex No. 3.
Band tools and product placement matter. Use the idea of 80/20 product placement and put most product on mid-lengths and ends, not the scalp. Small technique shifts like that save product and make styles last longer.
Frequently Asked Questions
Q: Can I use Olaplex No. 3 if my hair is not damaged, or will it make it worse?
A: You can use Olaplex No. 3 as a weekly treatment even on hair that is not visibly damaged. It will not make healthy hair worse. For fine hair, use a small amount and rinse thoroughly so you do not weigh the hair down. Buy from the official store on Amazon or Sephora to avoid counterfeits.
Q: How often should I really use a clarifying shampoo without stripping color?
A: Once every two weeks for most people, and once a month if hair is color-treated and dry. If you use heavy styling products weekly, clarify every 10 days until product build-up is gone, then drop back. Follow with a deep conditioning step to restore moisture.
Q: Is the heatless robe tie method safe overnight for fragile or long hair?
A: Yes if you use soft fabric ties and sleep on a silk pillowcase. Avoid metal clips or hard tools in the wrap. If your hair tangles easily, set the style for only six hours the first few times to test how your hair reacts.
Q: What is the difference between a leave-in and a curl cream, and do I need both?
A: A leave-in is lighter and primes the hair for moisture. A curl cream adds definition and weight. For many 3A to 3C patterns, layering both in the LOC order gives more hold and better second-day styling. If your hair is fine, skip the cream or use a pea-sized amount.
Q: How often should I deep condition when I wear twist or banded styles regularly?
A: Deep condition once a week if you are heat styling often or using chemical processes. If you are doing mostly protective styles like banding, every 10 to 14 days is usually enough. Over-conditioning can make hair limp, so watch the texture after a mask and adjust.