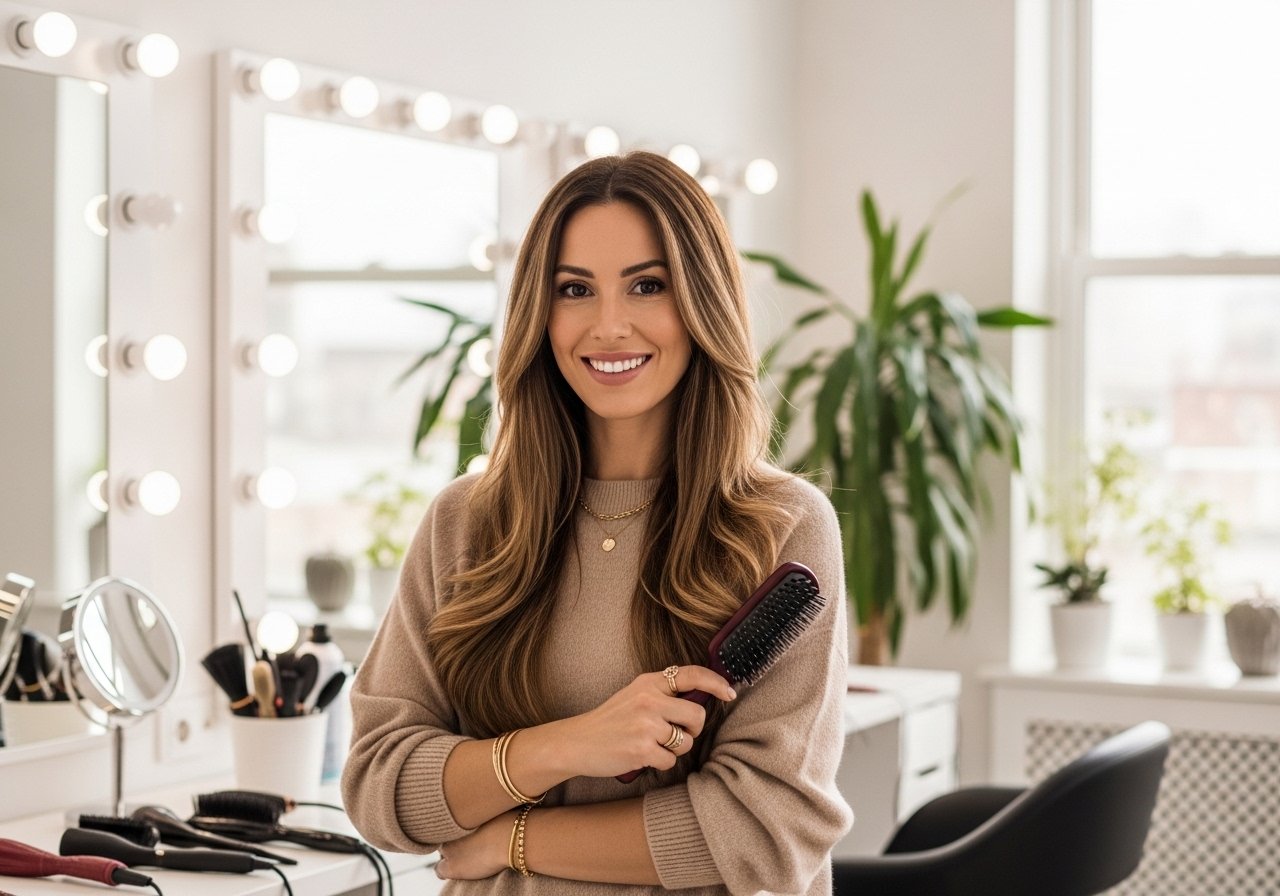
I was tired of doing my hair every morning and watching the ends split three weeks later. These braids are the protective styles I actually keep for a month or more, depending on how gentle I am with sleep and how often I moisturize. They work for a range of textures, from loose 2C waves with extra grip added, up to thick 4A coils with slightly larger parts. Expect 45 minutes to six hours depending on the style and whether you DIY or book a braider. Most are under $60 for tools and hair, with one splurge option for premium synthetic fiber.
Knotless Box Braids for Low-Tension Wear
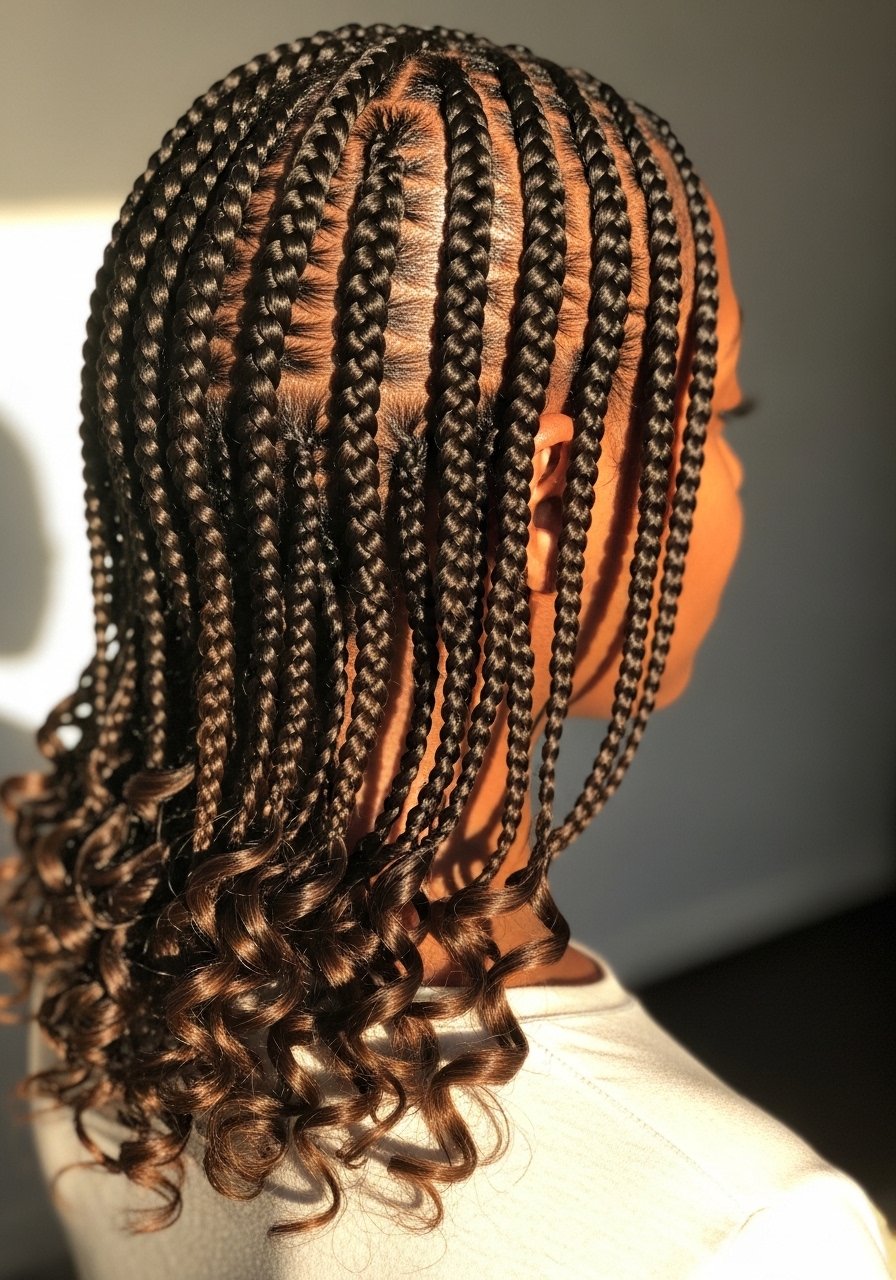
I switched to knotless box braids after my hairline started complaining from tiny tight knots. The feed-in start means less tension at the root, so the style lasts without that pulled look. For medium density, I do about 12 to 18 sections, each braid roughly thumb-thick, which gives two to three weeks of neatness before touch-ups. When adding Kanekalon hair, keep each packet under 100g and only add one extra 20g per row to avoid weight. I prep my natural hair with a light protein treatment and two spritzes of Olaplex No. 3 hair perfector the night before braiding, then seal with a few drops of Jamaican black castor oil at the ends. Common mistake, braiding too tight at the start, causes soreness and long-term thinning. If you feel sharp pain, ask the braider to loosen sections immediately.
Feed-In Faux Locs With a Soft Finish
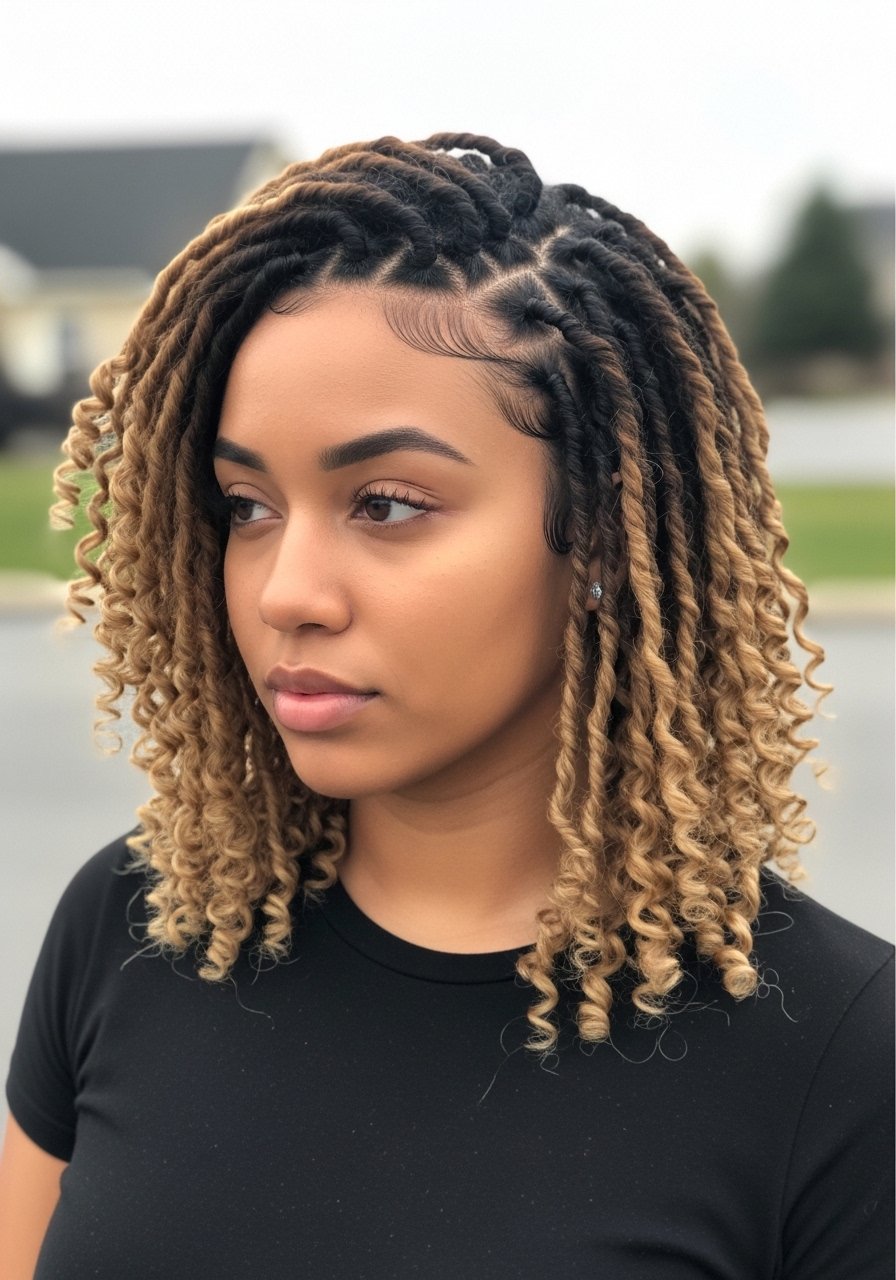
Faux locs are a real repair day for me when I want months of low-manage upkeep. I start with feed-in cornrows as the base and wrap pre-looped synthetic loc hair around the braid for a lighter, more flexible weight. Pick pre-stretched kanekalon labeled as heat-resistant if you plan to seal ends with a hot water dip, and always test a small piece first. For shoulder-length hair I use 18 to 22 sections, which balances install time and longevity. The thing people forget, synthetic fibers wick product differently than natural hair, so mix a water-based leave-in and a tiny amount of oil instead of slathering on heavy creams. If your scalp is sensitive, avoid glues near the hairline and skip the hot water seal that can shrink the locs too much.
Cornrow Ponytail That Survives the Gym
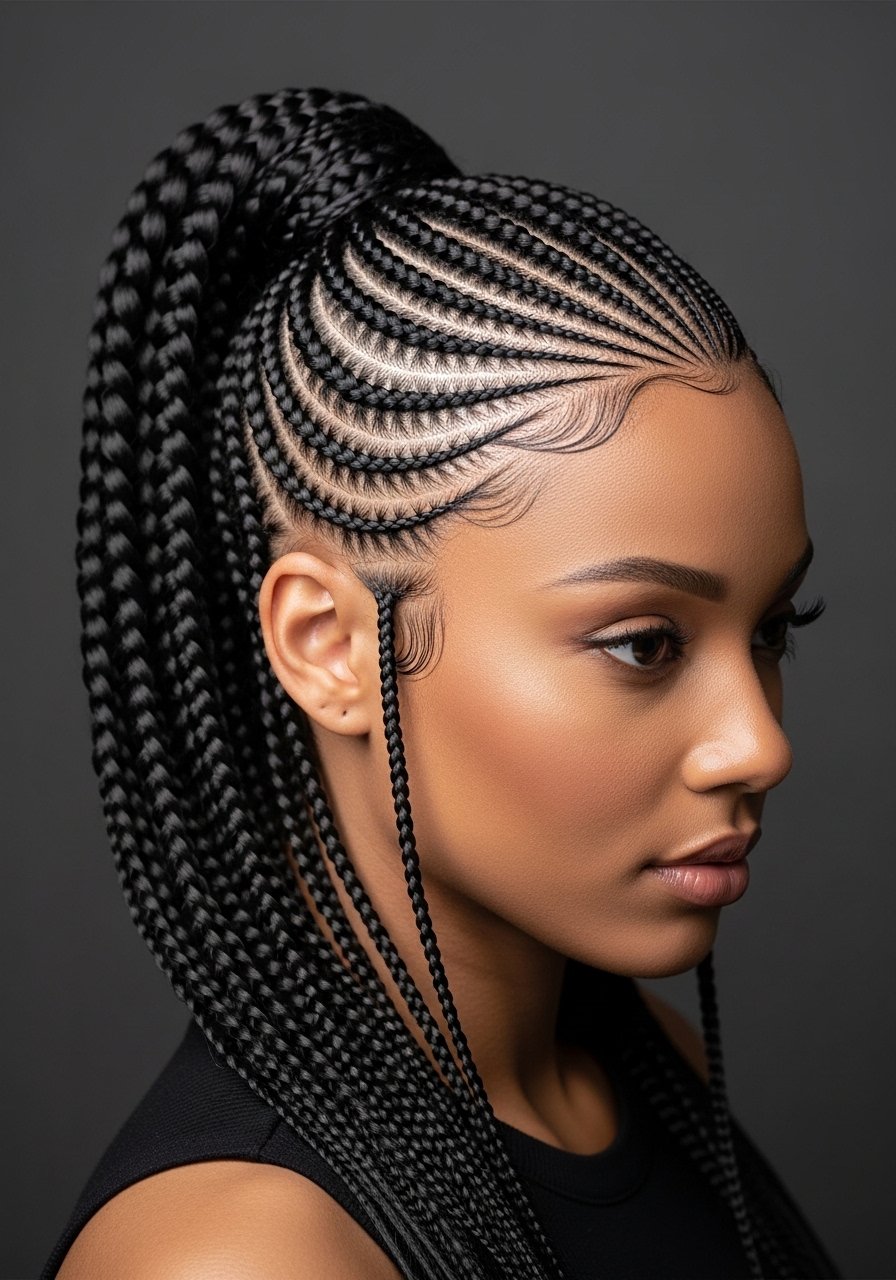
This is my go-to when I need something sporty and protected but not boxed-in. Cornrows are braided flat to the scalp and gathered into a ponytail or halo. For active days, eight to twelve cornrows keep the head balanced and reduce tugging during movement. I smooth edges with two pea-sized dabs of a firm edge gel, then wrap the finished pony with a satin scarf while cooling for 10 minutes to set the shape. A mistake people make is using too much gel, which flakes or stiffens the cornrows. If you sweat a lot, rinse with diluted shampoo every 10 to 14 days and condition the scalp to avoid buildup. Tight cornrows can cause traction, so keep tension moderate and undo any braid that feels numb.
Halo Braid Wrapped As A Protective Crown
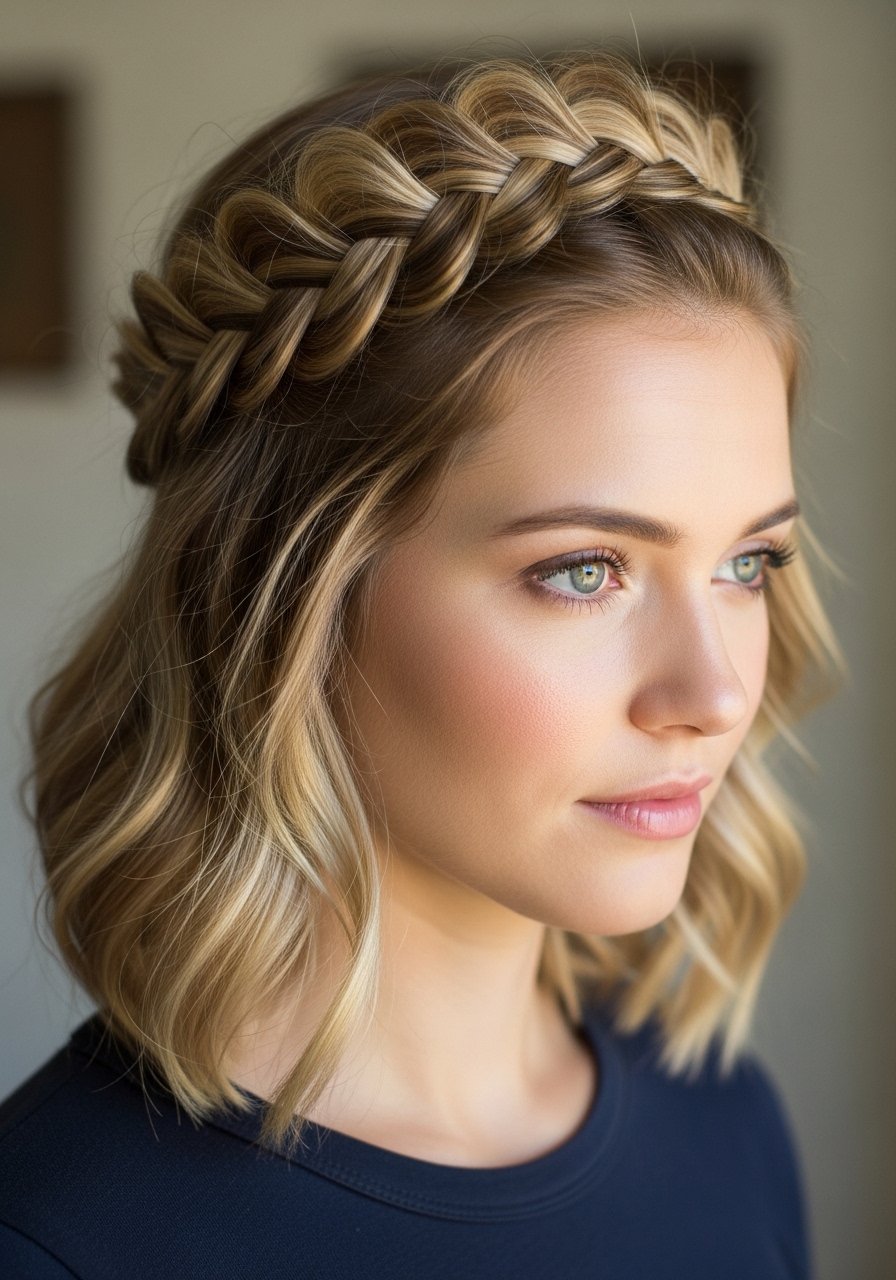
Halo braids feel elegant but are low-maintenance if done correctly. I section the top into a single wide horseshoe, about two inches from the part, and braid the section into a thick Dutch braid that wraps around and tucks under at the nape. For fine hair, tease the braid with a few backcombing strokes and add 10 to 15 grams of clip-in hair for volume. The result protects the ends and keeps face-framing pieces accessible. The common oversight is skipping scalp oil. I spritz tea tree diluted in water at the roots every week if my scalp gets itchy. This style is DIY-friendly with a mirror setup, but a stylist can make the braid neater and last longer.
Fishtail Lace Braid Half-Up For Loose Textures
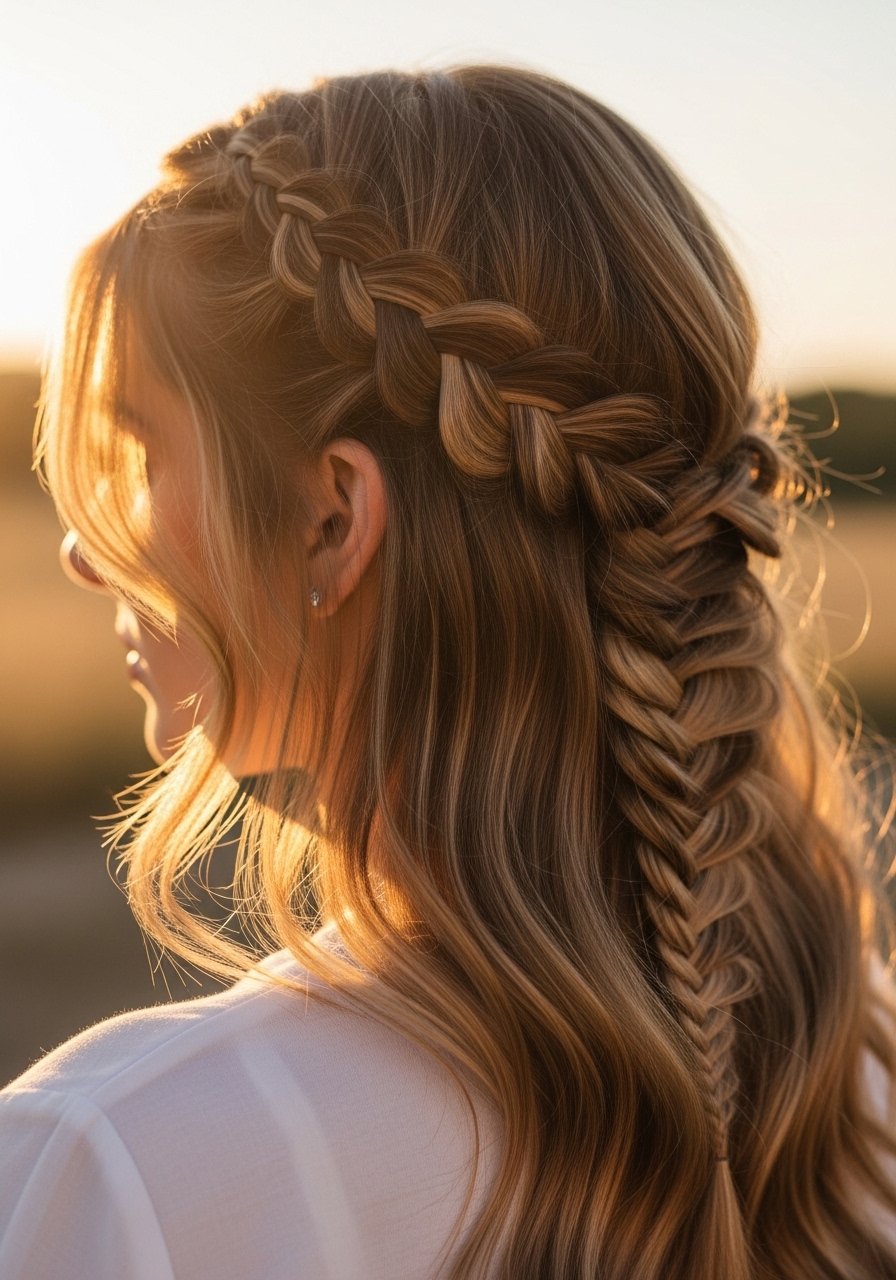
Fishtail lace braids look intricate but are forgiving on second-day hair. I pick up smaller lace pieces near the part, use finer sections than a regular fishtail, and keep the tension light so the braid sits comfortably for five to seven days. For 2A to 3B textures I mist with a light salt spray, then pull the braid a hair wider with two fingers to add lived-in volume. One trick others miss, use one to two spritzes of anti-frizz spray before pulling the braid, it softens flyaways without making the braid limp. This is a great salon-free option for fine hair because it does not require added extensions, unless you want extra thickness.
Ghana Braids That Double as Low-Heat Styling Prep
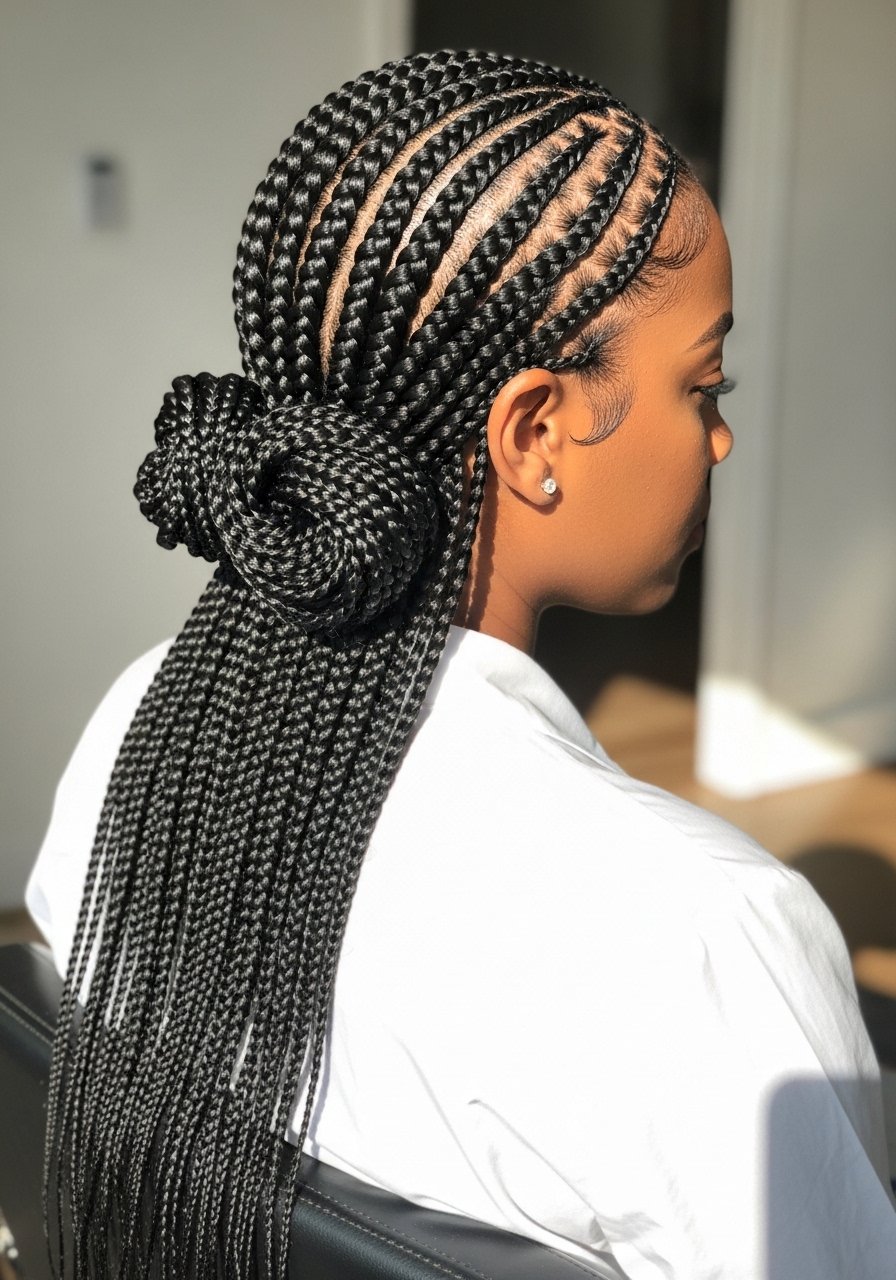
Ghana braids are raised cornrows that sit higher on the scalp, perfect if you want braided styles that also act as a heat-free straightening prep for textured hair. I use a medium-strength gel for smoothness, and for thicker 4A to 4C hair I create 8 to 10 sections, braid toward the crown, and tuck the ends into a low bun. If you plan on untucking later for a heat-free curly blowout, keep the braids in for 2 to 3 days only, long enough to relax pattern a little but not so long that roots mat. Common mistake, using non-breathable synthetic hair near the scalp causes sweat irritation. If adding hair, pick lighter synthetic fiber and rinse the scalp gently every 10 days.
Dutch Lace Braids Into a Low Bun for Office Weeks
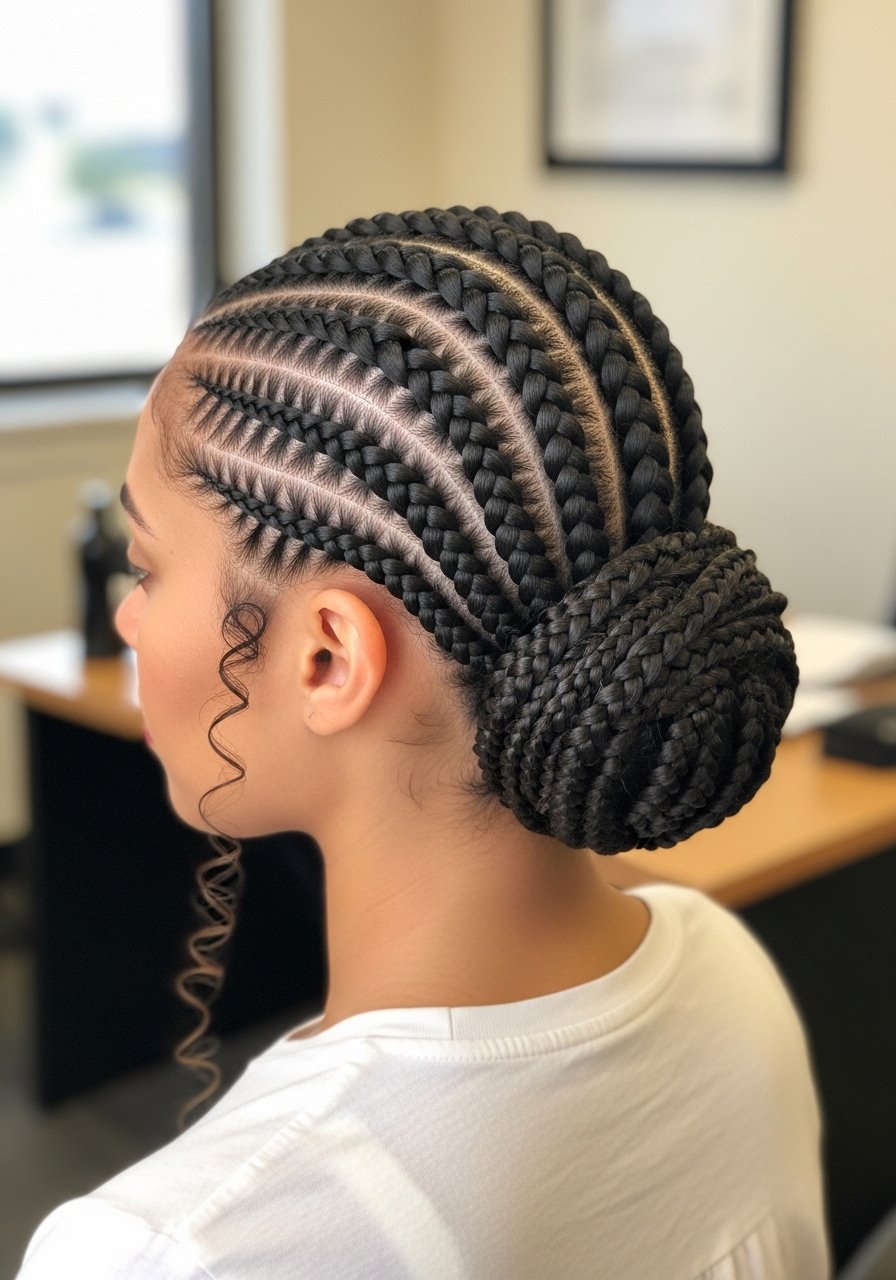
Dutch lace braids create a polished look that survives commutes and the dry office air. I start with a four-section parting across the crown, braid each side with Dutch technique, and join at the nape into a bun. For shoulder-length 3A hair, smaller three-quarter inch sections help the braid follow head shape and reduce bulk. I add a light leave-in while hair is damp, then two quick sprays of anti-frizz before braiding to keep pieces neat. If you sleep on this style, use a silk bonnet to avoid flattening the braids. This is a good in-between salon style, you can do it at home if comfortable with Dutch braiding, but a pro will shorten the install time and tighten symmetry.
Rope Braids That Hold on Shorter Lengths
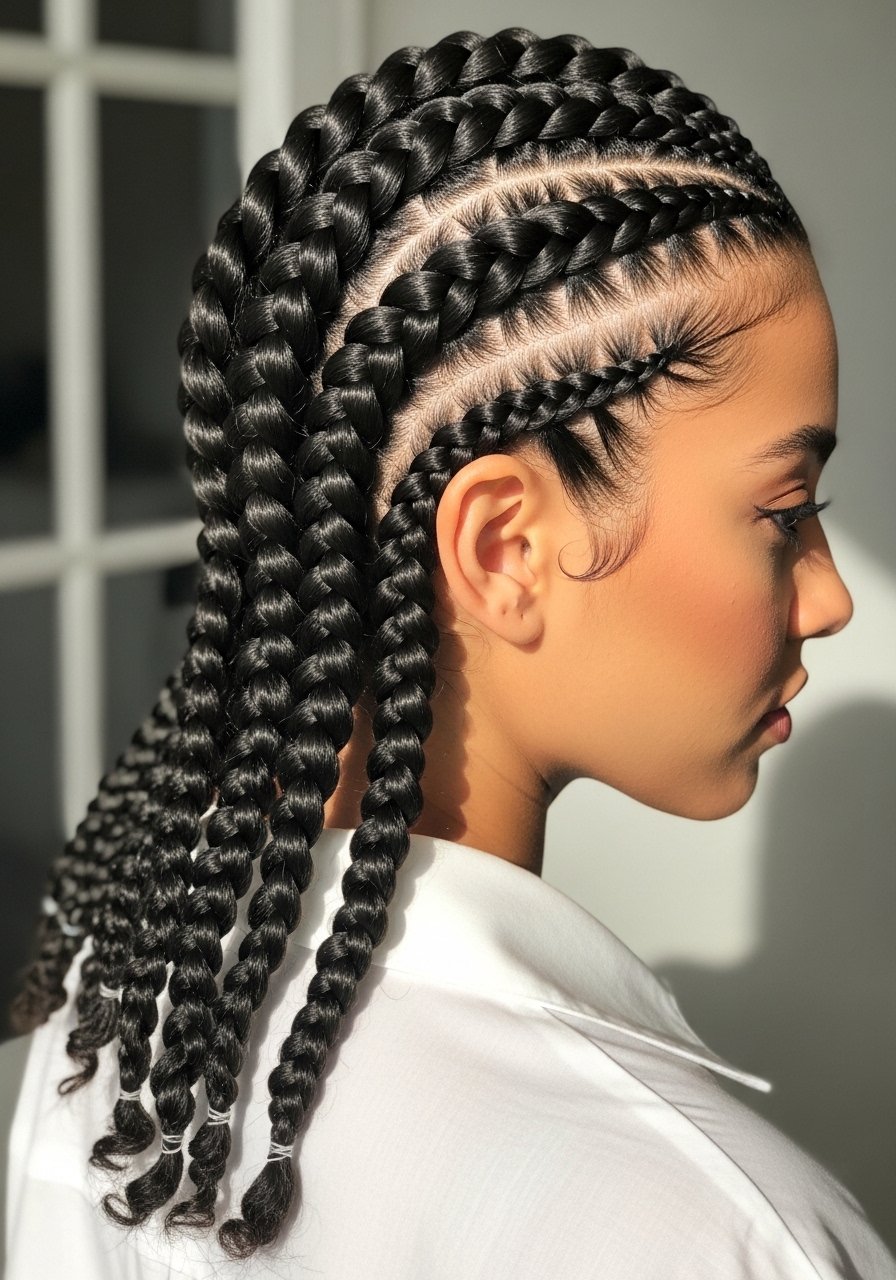
Rope braids are my answer when hair is too short for full box braids but I want a protective style. They work well on collarbone to shoulder lengths and are easier than they look. Divide hair into 10 to 14 small sections for medium density, twist each strand away from the face and then twist both strands together toward the face to lock the rope. A tiny dab of cream between palms before twisting keeps frizz down, but too much product makes the twist slip. If you plan to keep these a week or more, avoid heavy coconut oil at the roots which attracts lint. The DIY win here is speed, I can do a full head in about 45 minutes.
Senegalese Twists for Sleek, Long-Lasting Wear
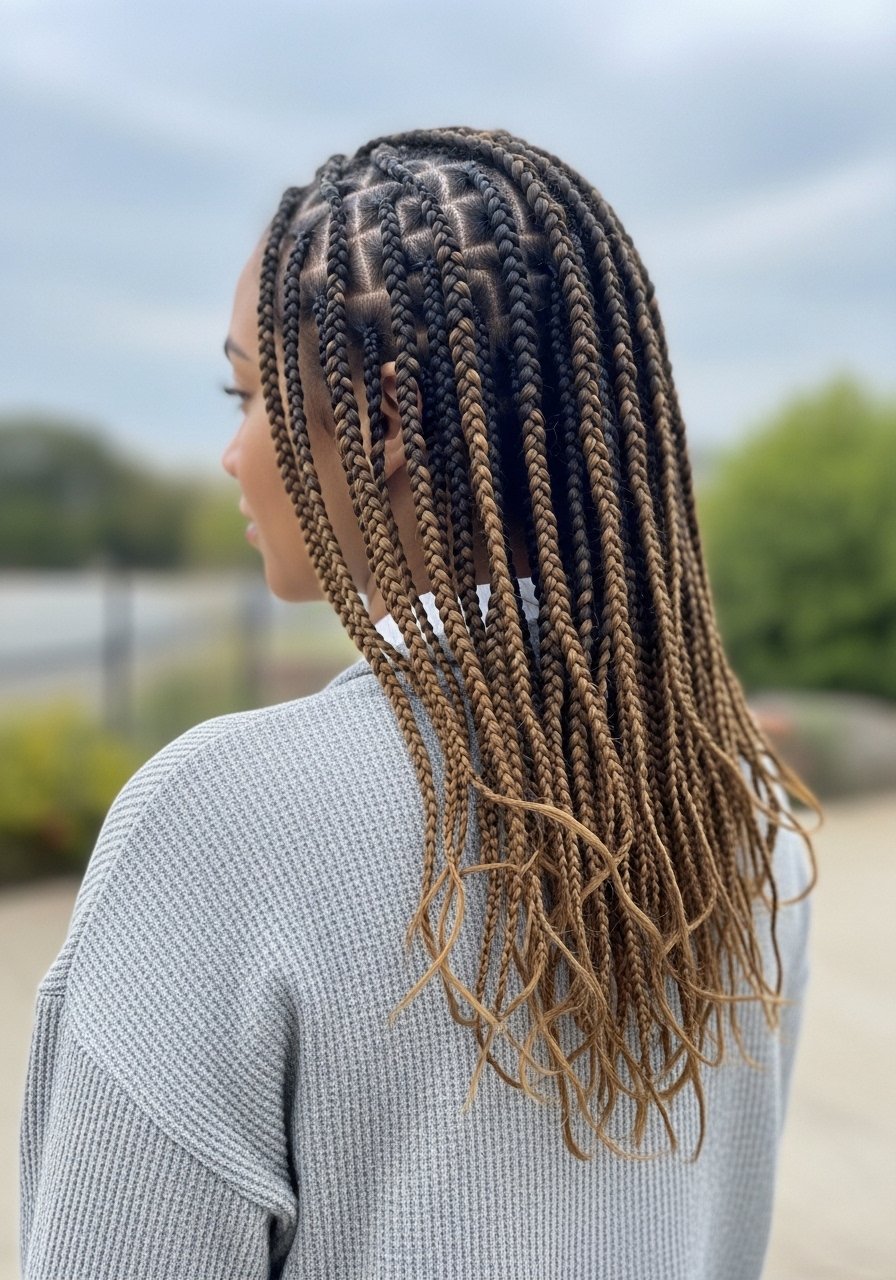
Senegalese twists are wrapped with a smoother finish than Marley twists, and they last. For a month of wear I choose 20 to 24 medium-sized twists when my hair is mid-density. When adding synthetic hair, keep the added weight under three or four ounces total to avoid a heavy pull. These twists benefit from an initial protein-lite deep condition the week before install, not right before. A mistake people make is over-moisturizing the twists during the first two weeks, which loosens the wrap. If your scalp gets itchy, an apple cider vinegar rinse diluted 1:4 helps without undoing the twist. When removing, take your time to avoid breakage where the natural hair meets the synthetic.
Boho Beaded Braids for Texture and Expression
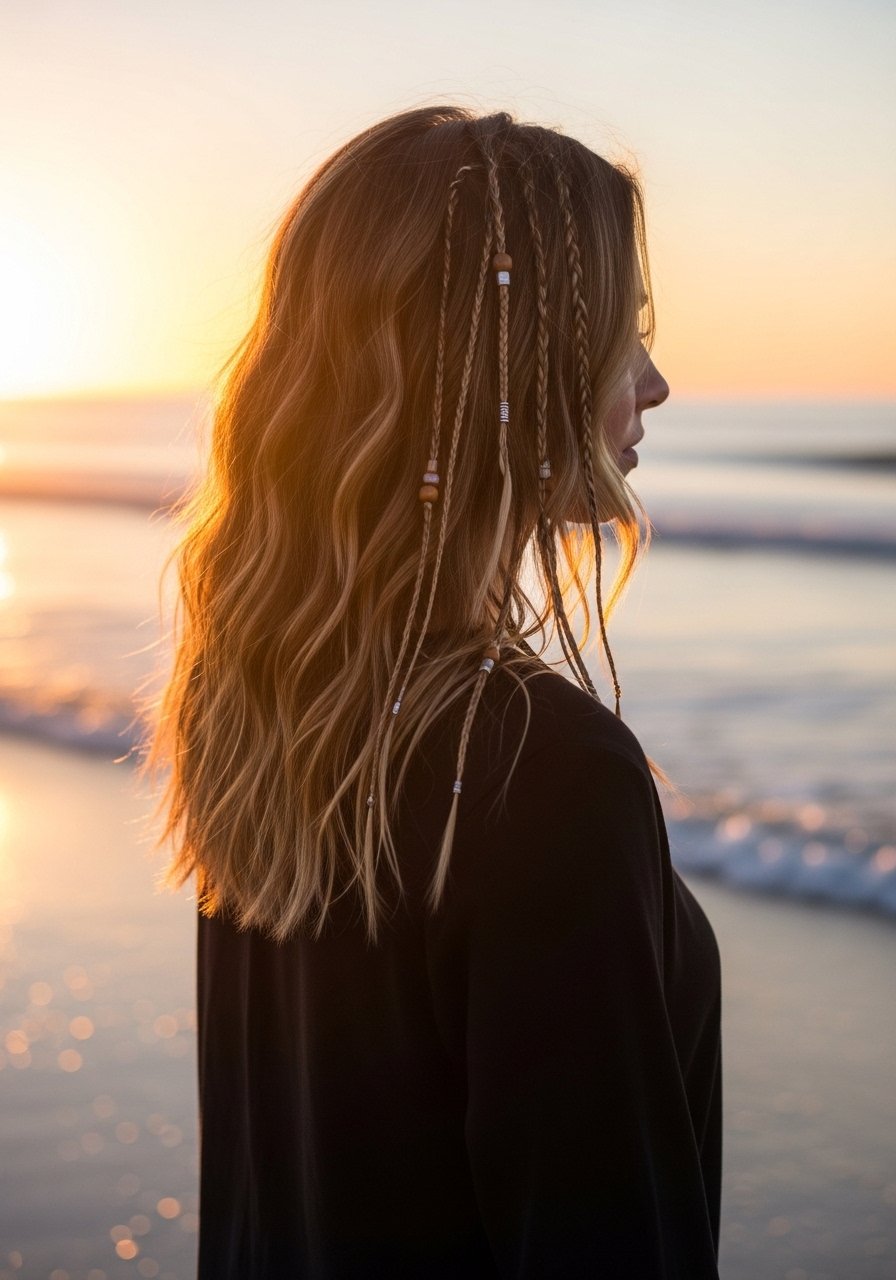
If you like a playful look that still protects ends, add beads and micro braids in selective spots. I do three to five thin accent braids around the face and crown, bead the ends with one to two medium beads per braid, and leave the rest of my hair loose or in large protective twists. This works well on 2B to 3C textures where the loose hair keeps the look soft. Use a rubber bead with a tiny knot or crimp the bead slightly so beads do not slide off in sleep. Try one bead per braid at first, too many beads make the style heavy and can cause breakage. This style is easy to DIY and quick to take down, which makes it a fun weekend option.
Milkmaid Braids Reworked for Fine Hair Hold

Milkmaid braids have a vintage vibe but can be protective if done loosely. For fine hair I do two slightly teased braids, each about three quarters of an inch, wrap them over the crown and pin with bobby pins that anchor into the teased base. The tease gives grip without pulling. Many fine-haired people skip the teasing, then add zero pins and wonder why the braids fall out. If you have low density, add a small 10g weft under the braid only where you need volume. Avoid pins that are too smooth, look for textured grip types, or use a little hairspray at the root where the pin sits.
Ladder Braid With Curled Ends for a Protective Half-Up
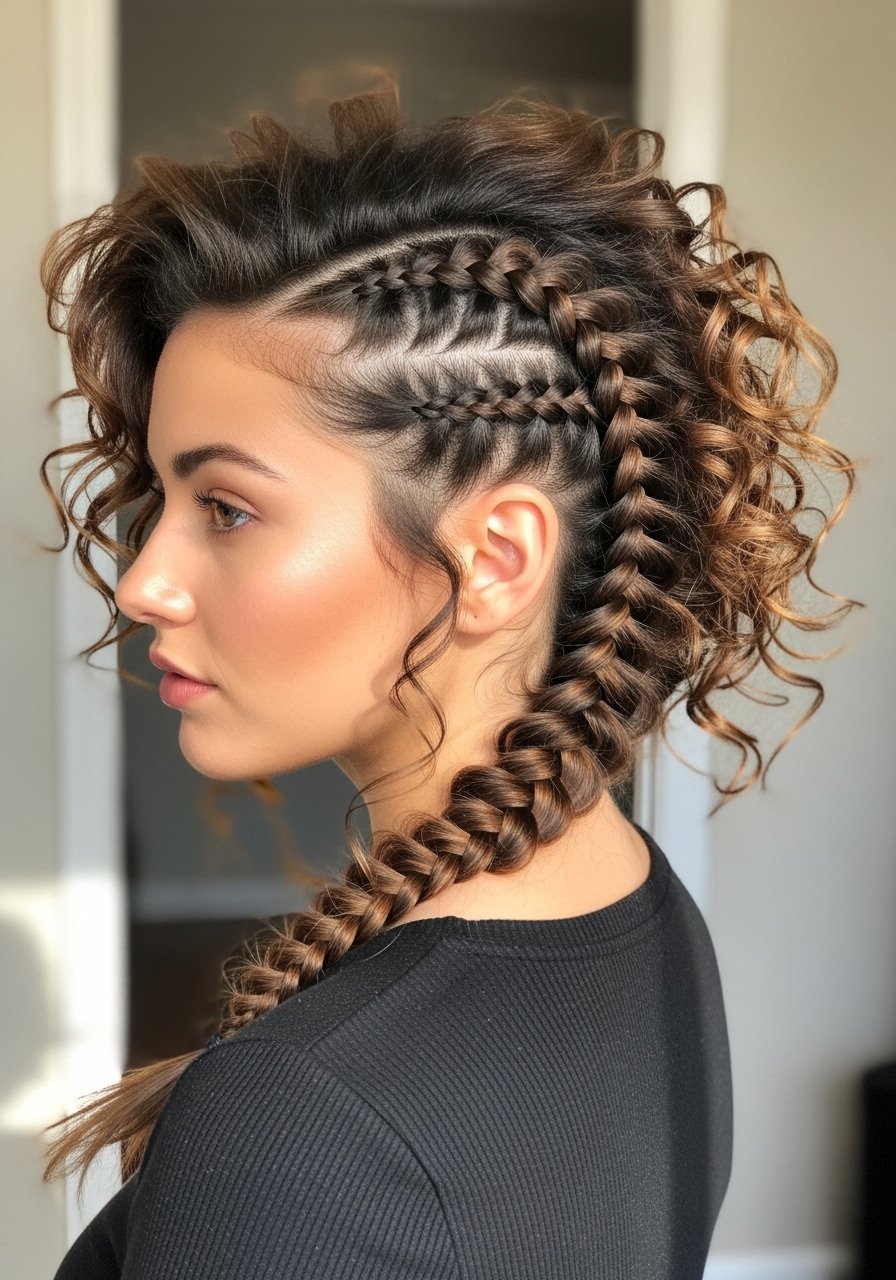
Ladder braids create a cascading effect and keep most of the length protected. I pick three or four vertical sections, weave each with a lace technique that lets strands fall through for a ladder effect, and curl the ends gently with a 300F barrel if needed, using a heat protectant beforehand. For curls that hold after braiding I use a light mousse before braiding and a two-pin anchor at the base. People forget to test heat tools on a small section, which can scorch porous extensions or fragile ends. If you have very delicate ends, skip the iron and use flexi rods overnight instead.
Knotless Goddess Braids With Soft Curled Tips
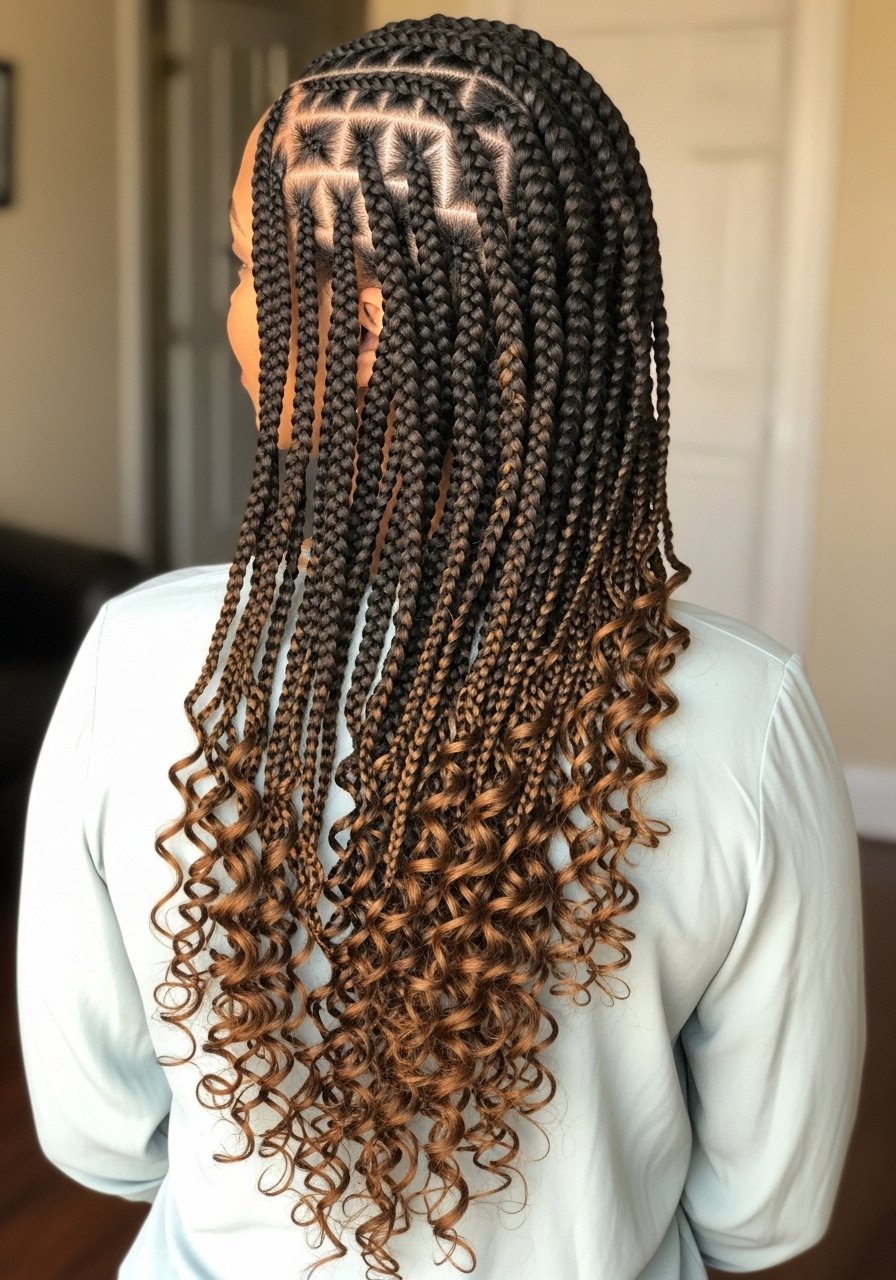
Goddess braids are a chunkier knotless braid variant that look elevated but protect the hairline. I section into larger parts, usually 8 to 12 depending on density, and keep each braid thick enough that the weight feels even. To get the soft curled tips I leave the last two inches unbraided and use small flexi rods overnight on the extensions, or dip synthetic ends in hot water if they are heat-safe. I always tell friends, if you have a tender hairline do not make the root starts too tight. This style pairs beautifully with the weekly bond treatment from the shopping list if your natural hair is color-treated.
What I Actually Buy for Braided Protective Styles
- Honestly the one thing I will not skip is a decent braid hair packet. Kanekalon synthetic braiding hair 100g comes in multiple colors and I buy two to three packets depending on length
- For prepping the natural hair, Olaplex No. 3 hair perfector 3.3oz used once a week fixed the brittle ends after my kitchen-bleach disaster. Buy from the official store on Amazon or grab it at Sephora to avoid counterfeits
- A set of stainless steel rat-tail combs for neat parts, about $8, makes the difference between sloppy and salon neat
- A pack of smooth bobby pins and textured grip pins for anchoring buns, keep both on hand
- A satin bonnet set under $20, I use one nightly to protect braids and stop frizz
- A crochet latch hook tool for feed-in styles and quick crochet installs, ~ $10
- Edge control gel with firm hold in a small jar, a pea-sized amount smooths edges without flaking
- Flexi rods pack for curling synthetic ends without heat
- A moisturizing leave-in spray 8oz for weekly scalp spritzes, lightweight and water-based
- If you want a tool splurge, the Dyson Airwrap is available on Amazon, also sold at Best Buy. It dries and styles without extreme heat but watch for third-party sellers
The Braiding Mistakes I Learned the Hard Way
- Don’t install the heaviest synthetic hair at the root, it invites breakage. Keep extra weight toward the midshaft and ends
- Heat protectant goes on damp hair before any iron over 300F, so if you plan to smooth ends with a flat iron, apply it while hair is nearly dry
- Hair grows about half an inch a month at most, regardless of what biotin gummies promise you. Protecting the midshaft and ends prevents breakage and helps length retention
- If your scalp flakes under braids, try a diluted apple cider rinse or a tea tree scalp oil applied with a cotton swab, not sprayed on all over
- When in doubt, loosen the part or the root. Comfort beats a perfect photo if you want your style to last more than a few days
Frequently Asked Questions
Q: How often should I wash my scalp with braids in?
A: Every 10 to 14 days is a practical window for most braided protective styles. Use a diluted sulfate-free shampoo applied directly to the scalp and rinse well, then follow with a light conditioner on the mid-lengths only. Over-washing can loosen braids sooner than you expect.
Q: Can I use Olaplex No. 3 while my hair is in extensions or braids?
A: Yes, you can apply Olaplex No. 3 to your natural hair before installing extensions. It needs a 10 to 30 minute hold time to work best, so do it the night before. If you already have braids with added synthetic hair, focus Olaplex on the natural parts and avoid soaking the synthetic fiber.
Q: My scalp itches under braids, what helps without taking them out?
A: Lightly spritz a diluted witch hazel or tea tree solution on a cotton ball and dab around the part lines. Heavy oils can trap sweat and make itching worse, so stick to water-based sprays for the first two weeks. If itching is intense or you have sores, loosen or remove the offending braid and see a specialist if it does not calm.
Q: How tight is too tight for braids?
A: If you feel pins-and-needles, numbness, or the scalp hurts for more than a day, the braids are too tight. Tight tension over time contributes to traction-related thinning. Ask for a redo or loosen the start of the braid at the hairline.
Q: Can synthetic braids cause an allergic reaction?
A: Some people react to fiber glues or the synthetic fibers themselves. Do a patch test, leave a small braid attachment on for 24 hours and watch for redness or itching. If you suspect an adhesive reaction, avoid glues and choose feed-in methods that do not use adhesive.
Q: How do I remove braids without losing hair?
A: Detangle at the ends first, clip the braid above where the natural hair begins, and gently unravel. Use a wide-tooth comb and a detangling spray if needed. Rushing removal can lead to breakage where the natural hair meets extension hair.
Q: Are there cheaper alternatives to salon installs that still look good?
A: Yes, styles like the halo braid, milkmaid braids, and rope braids are very DIY-friendly and inexpensive. If you want extension-based styles like full knotless box braids or faux locs and are unsure about technique, budget one salon session to learn the parting and tension for next time.