I have ruined at least two formal hair looks by trying to make them too tight. These low updos are the opposite, built to survive a commute, a humid walk, or a long meeting without looking like you tried too hard. They work best on mid-back long hair through waist length, from straight 1B to loose 3C curls, with notes for denser 4A textures. Most styles take five to 20 minutes and under $40 in tools, with two ideas that deserve a salon touch if you want the sleek finish.
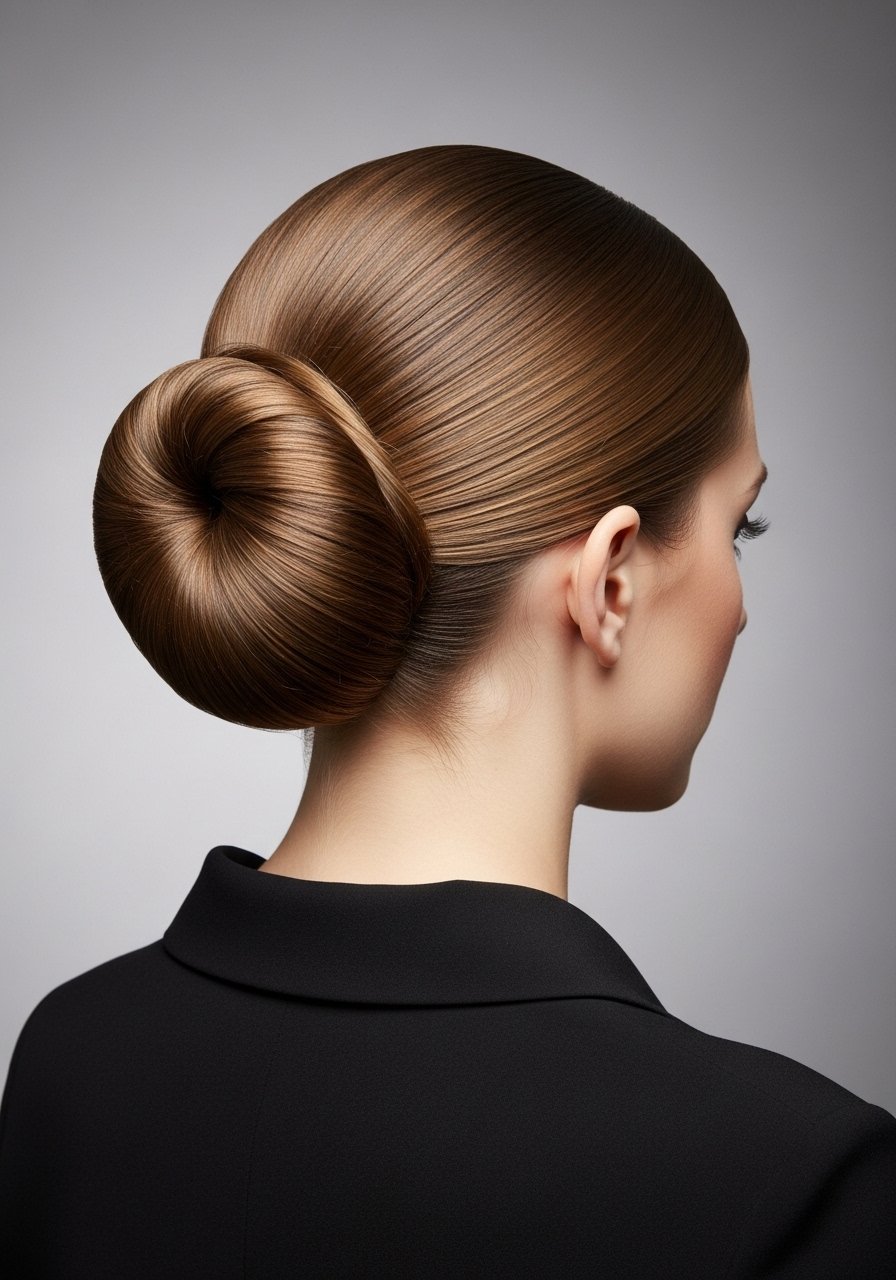
Low Sleek Chignon For Straight Or Slightly Wavy Hair

If your hair is straight or 2A wavy and you want something that reads professional without a tablet of hairspray, smooth the hair with a paddle brush, use about two spritzes of a strong hold smoothing spray, and roll the ends into a 2-inch-wide chignon. I usually section hair into three horizontal bands before gathering, it cuts bulk and prevents that sad triangular shape at the nape. Use a thin no-slip elastic and three long bobby pins to anchor the roll. A common mistake is pinning only the outside and leaving the inside loose. If you plan to iron the front edges, stop at 300F and always apply a heat protectant first. For an at-home finish, a tiny bit of shine serum on the ends tames flyaways, but avoid the roots if your scalp gets oily.
Twisted Low Knot With Face-Framing Pieces For Wavy Hair

This is my go-to when my waves are a little greasy and I do not want a full wash. Split the hair into two sections, twist each toward the back in 1.5-inch sections until you have two ropes, then wrap them into a loose knot at the nape and pin with U-pins. For medium density hair it takes about six U-pins. If your waves are 2B to 3A, mist a texturizing spray while hair is damp and scrunch lightly so the twists hold without being slick. The mistake is over-smoothing the face pieces. Keep them soft and use a single drop of lightweight oil on the ends only. This is a true DIY, salon not required.
Low Braided Chignon For Long Thick Hair
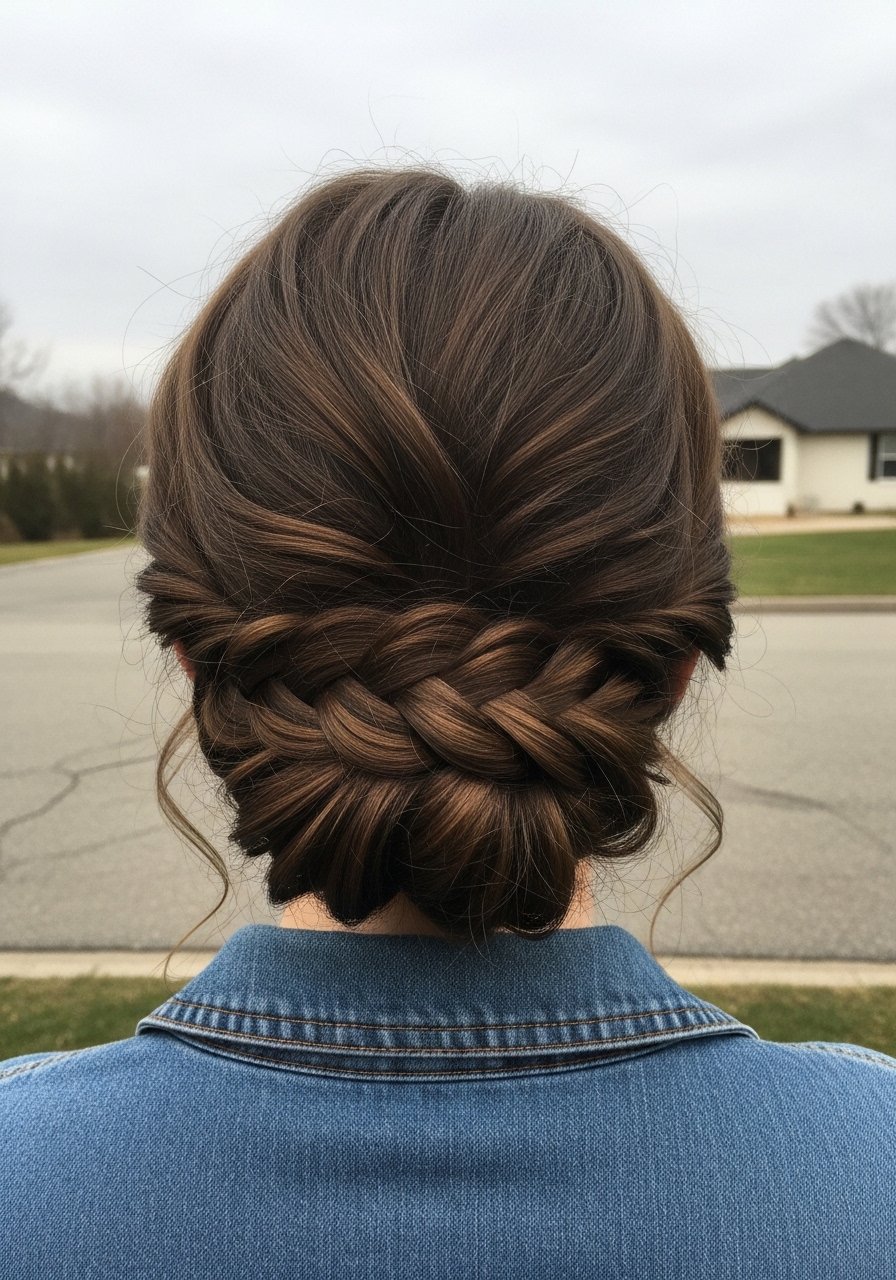
When your hair has density, a single braid turned into a chignon handles the volume without making your neck sore. Start by detangling with a wide-tooth comb, then create a 1.5-inch box section at the crown to smooth the top. Braid the rest in three sections down to the ends, secure with a snag-free tie, then coil the braid into a low chignon and pin every 2 inches with long pins. For 3A curls I add one pump of curl cream before braiding so the braid stays defined. Common frustration this solves is the bulbs of hair poking out, which happens when you skip the initial smoothing section. If your hair is colored, avoid heavy oils at the roots to prevent slip and sliding.
Low Messy Knot With Claw Clip For Fine Hair
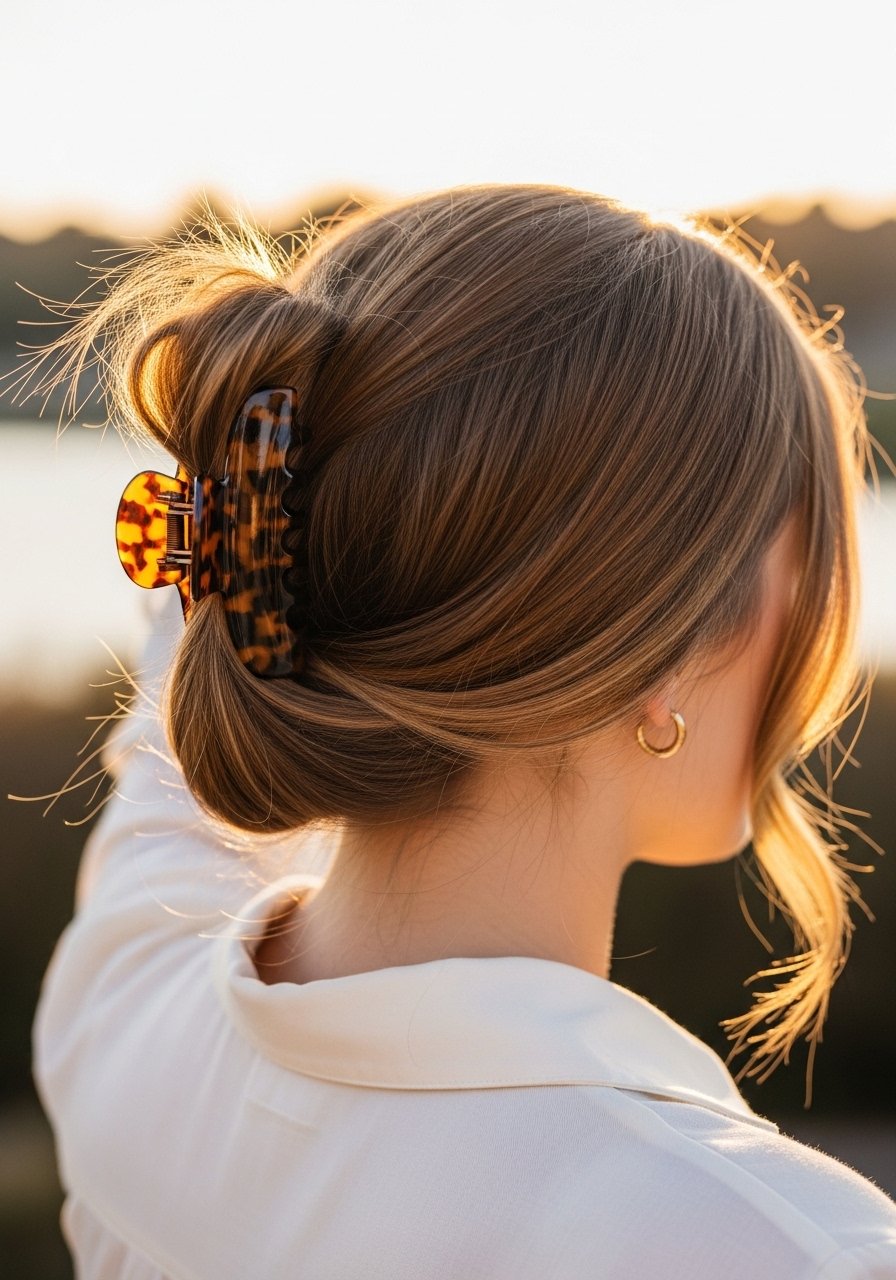
If your hair is fine and elastics just slip, a claw clip is a lifesaver. Gather hair as if making a low ponytail, twist the length once, then loop it up and secure with a medium clip so the knot sits at the nape. I tell friends to use two clips if they have longer hair. The trick is to push the clip in so teeth catch both the scalp-side hair and the twisted section. Spray a little dry shampoo at the roots first for grip. Time wise this is one of the fastest options, under five minutes. It looks intentionally messy, so do not try to make it perfect, and if your scalp is sensitive avoid clips with sharp teeth.
Low Pony With Wrapped Strand For Sleek Edges
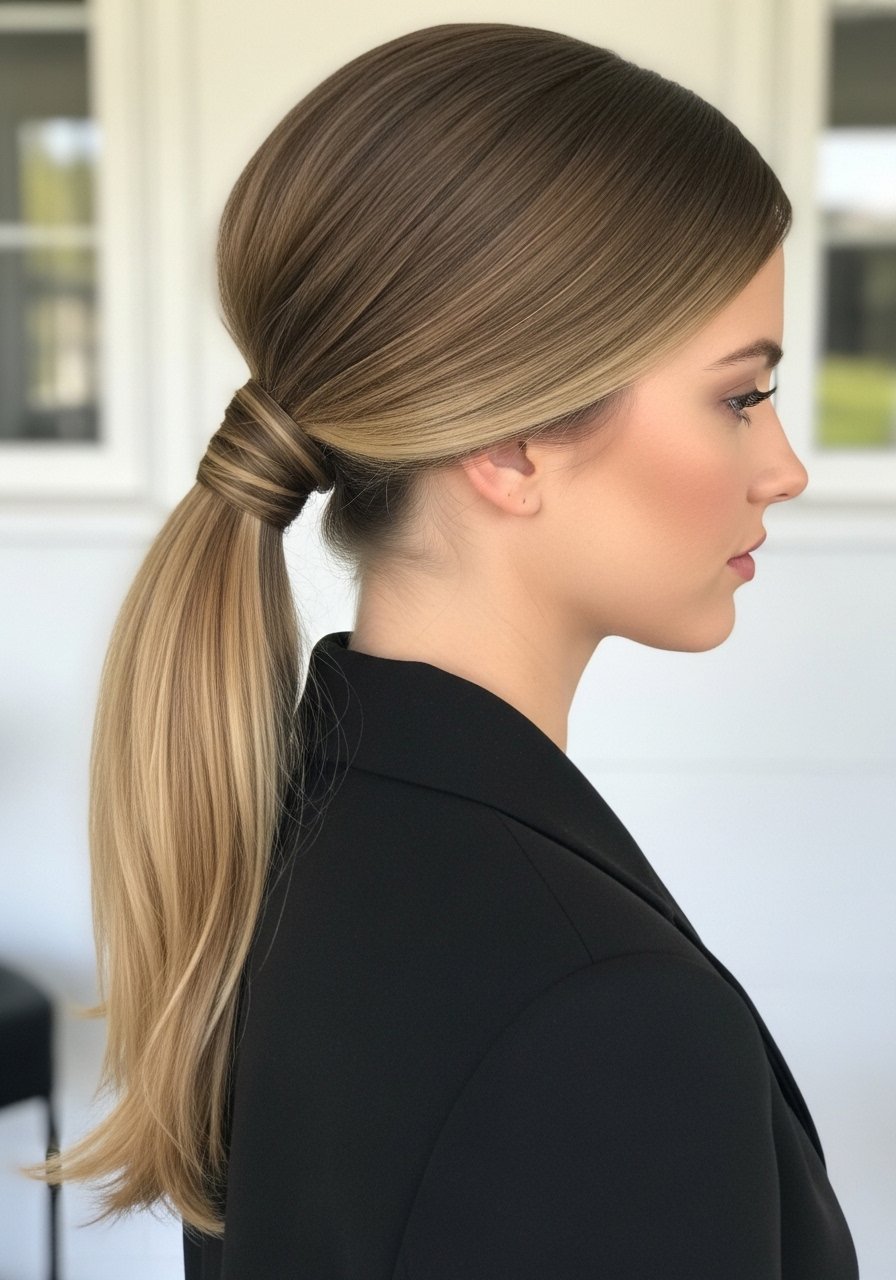
There is nothing wrong with a ponytail and a wrapped strand makes it look curated. After securing a low ponytail with a small elastic, take a ½-inch section from the underside, wrap it around the band twice, and pin the end under the pony with a discreet pin. For straight through lightly wavy hair, run a boar bristle brush from roots to ends for smoothness, then blast with a cool shot for hold. Common mistake is wrapping too much hair and ending up with a chunky chunky wrap. Keep the wrap ½ to 1 inch wide for balance. If you use a flat iron to tame the top, keep it at or below 300F and use a spray heat protectant first.
Sock Bun At The Nape For Voluminous Round Shape
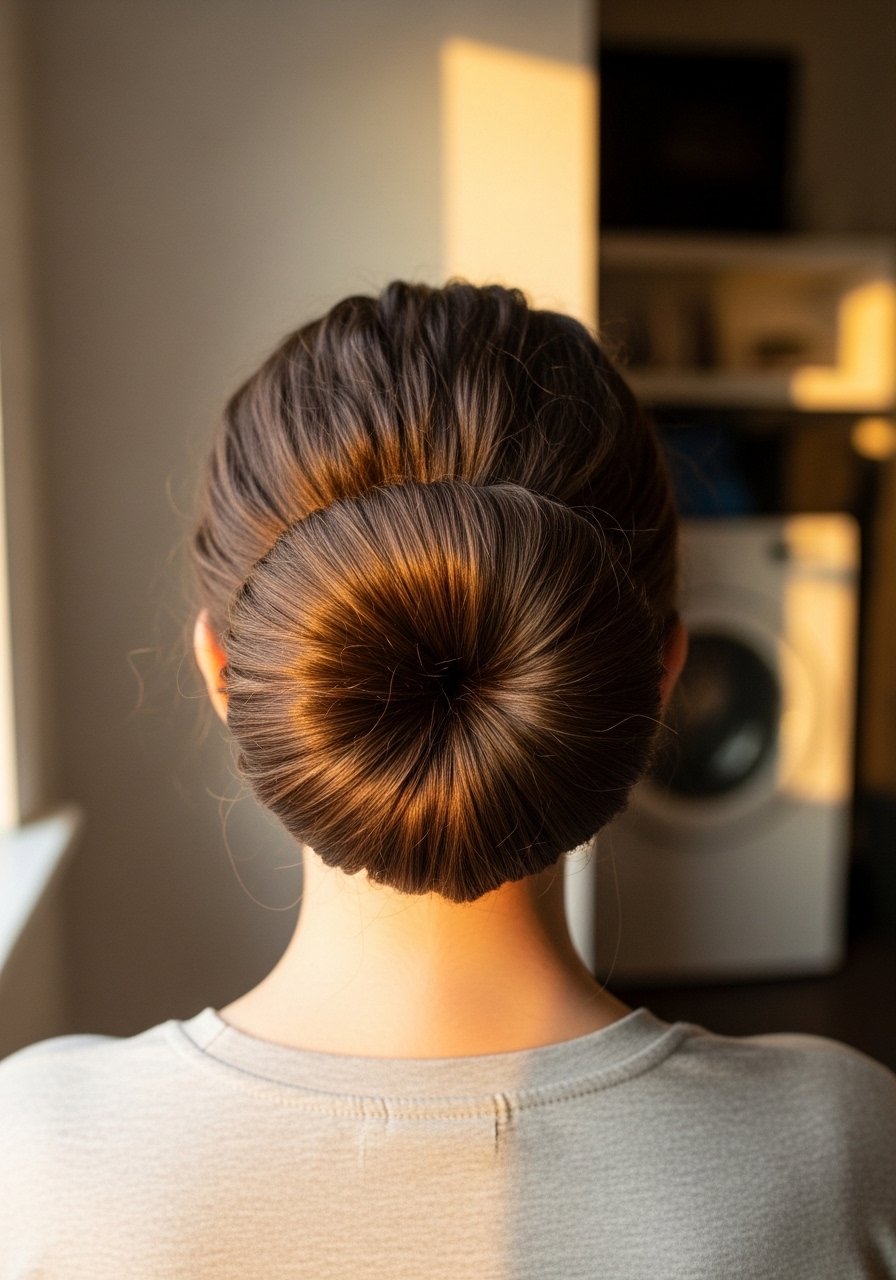
For days when your ends need hiding but you still want volume, the sock bun is honest and repeatable. Slide hair through a donut-style foam tool, spread the hair evenly, then roll the tool toward the nape until it sits flat. Use 4 to 6 long pins around the base depending on hair weight. If your hair is colored or fragile, put a hair sleeve or thin cotton between the foam and the hair to avoid friction. People overuse hairspray on top and forget to secure the underside, which makes the bun collapse mid-day. This is great for medium to thick hair and a solid DIY alternative to expensive volumizing services.
Low Side Twist For Curly And Coil Textures
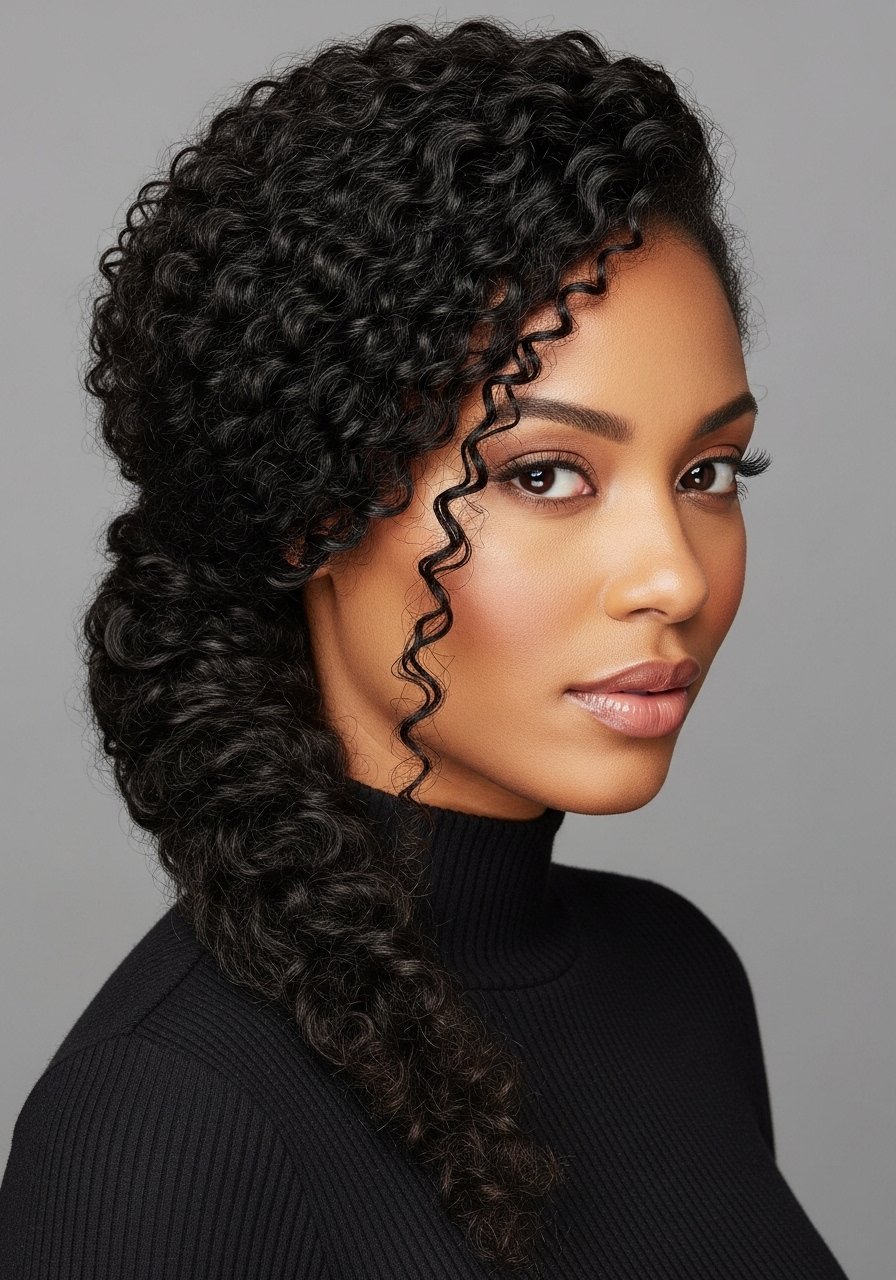
For tighter textures 4A and 4B, a low side twist keeps the coil pattern intact without heavy product. Work with gel or edge control only on the front edges if you like slick sides, but keep the twist itself lightly moisturized with a cream to avoid crunchy feel. Divide hair into two large sections, twist each toward the back in 1-inch sub-sections, then secure the two twists into a single low knot at the side with a fabric-wrapped elastic. The common frustration this fixes is losing curl definition when you try to smooth too much. This is mostly DIY but if you want a perfect slick finish, a professional can ghost the edges with a tiny amount of heat and product.
What I Pack In My Low Updo Emergency Kit
- The short list I actually keep in my bathroom drawer, not a sponsored kit
- Olaplex No. 3 hair perfector 3.3 oz, once-a-week for breakage control. Buy from the official Olaplex store on Amazon or Sephora to avoid fakes
- A pack of snag-free hair elastics. They last forever and do not crease hair like cotton ties
- A medium tortoiseshell claw clip. Cheap, reusable, the quickest styling shortcut under five minutes
- A boar bristle paddle brush (~$18). Use it to smooth hair into low shapes without flattening the crown
- Microfiber hair towel wrap for faster styling when you are fresh out of time
- A small pack of long bobby pins. I count on eight for most low updos, twelve for thicker hair
- A lightweight anti-humidity spray for frizz control, applied before blow dry for best results
Low Braided Rope Knot For Second-Day Hair
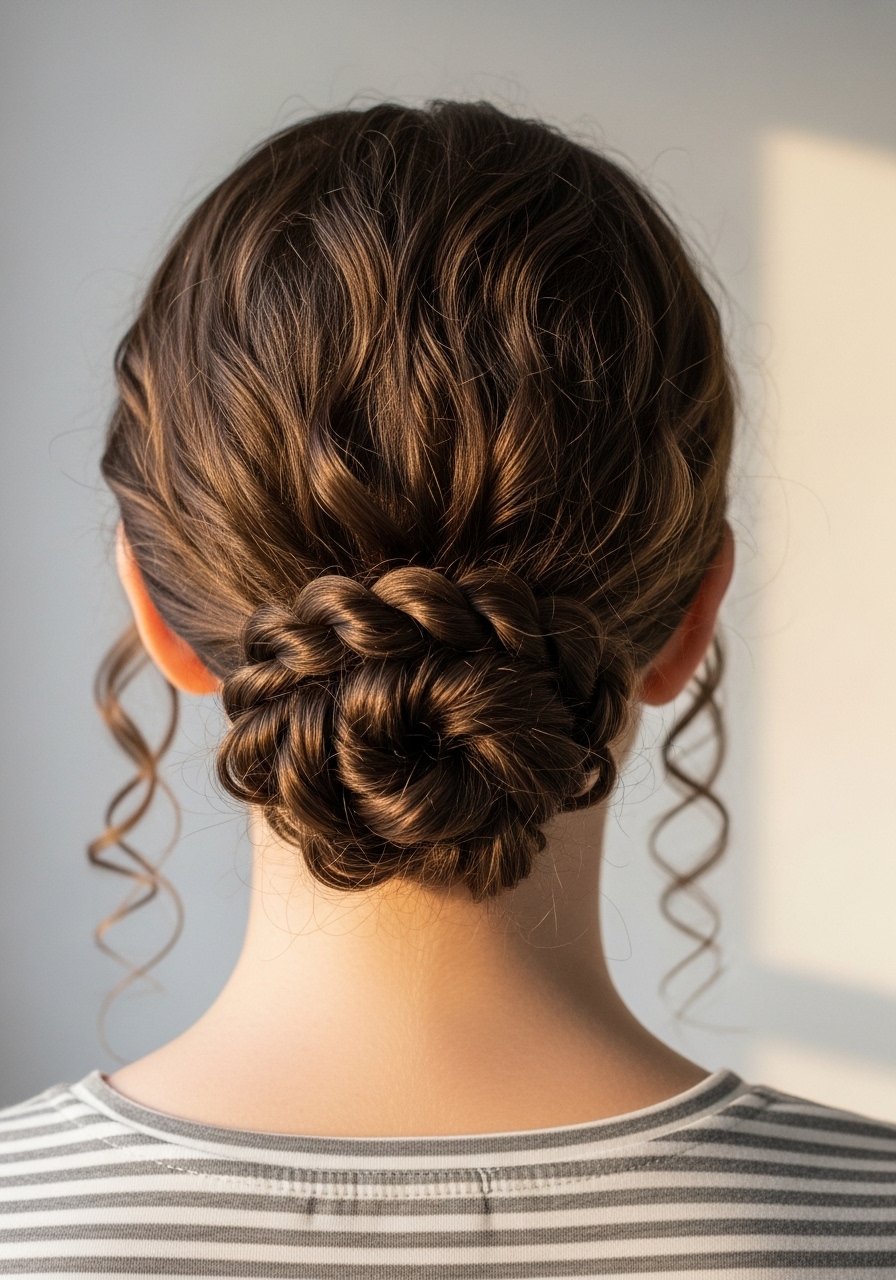
Second-day hair often holds styles better than fresh. For a rope knot start by splitting hair into two even sections, add a tablespoon of texturizer between your palms and run it through the lengths, then twist each section away from your face and wrap them around each other toward the nape. Coil the finished rope into a knot and pin. For 3A curls five to seven pins usually do it. This solves the problem of slippery fresh hair and gives shape that lasts through an evening. If your scalp is oily, a touch of dry shampoo at the roots before you style helps the elastic not slide.
Low Wrapped Fishtail For Romantic Texture

A fishtail tucked into a low bun delivers laid-back romance without being formal. Section the hair for a 1-inch fishtail at the base, then wrap the finished braid into a low bun and secure with pins every 1.5 inches. If your hair is fine give the braid one spritz of salt spray before braiding to create tooth. People often start this with unbrushed hair and end up with an uneven fishtail. Brush lightly, then separate strands as you braid for a controlled textured look. This is an easy DIY for medium length to long hair and looks especially good on faces that benefit from soft side pieces.
Low French Twist For Smoother Formal Looks
A French twist reads classic and lasts when you pin it properly. Gather hair as if making a low pony, then twist the length up vertically while tucking ends into the roll. Secure with long pins placed along the seam, and finish with a light mist of spray. Use warm air from a blow dryer over the top for 10 to 15 seconds after pinning to set it subtly. The most common error is using too few pins and relying on spray alone. This is one style where a professional can get a cleaner roll; at home practice with extra pins until you find the sweet spot.
Low Knotted Headband Tuck For Shorter Long Hair

If your length skews shoulder to mid-back, the tuck method with a wide fabric headband makes a low updo possible without much pinning. Place the headband over hair, twist the lengths behind it into a low knot, and tuck the remaining ends under the band. This is forgiving for shoulder-length layers that escape a classic bun. A common frustration it eases is needing pins when your hair is too short to coil. Use a soft non-slip band and avoid heavy gels which will make the band slide.
What I Wish I Knew Before Trying Low Updos More Often
- Heat protectant is for damp hair first, not right before ironing. The product absorbs better and actually protects. Try a lightweight heat protectant spray and let it dry for 30 seconds before any hot tool
- If you have curly or coily hair, twist or braid the lengths first to avoid breaking the pattern. The LOC method works here, apply leave-in, then oil, then cream for sealed definition
- Use the 80/20 product placement rule. Put roughly 80 percent of leave-in or heavy cream on the mid-lengths and ends, 20 percent near the roots to avoid limpness or greasiness
- Buy one good pack of long bobby pins and you will use them forever. A 100-count pack of long pins is the only thing I restock yearly
- Swap gel-only routines for a cream under a light gel if you want hold without crunchy texture. That change fixed my second-day updos faster than anything else
Frequently Asked Questions
Q: Can I do these low updos with heavy layers and still make them look neat?
A: Yes, but you will need more pins and possibly small elastic anchors. Create a small under-pony where layers are shortest, then tuck longer pieces around that base. For very choppy layers consider a headband tuck instead of a full bun.
Q: How often should I use a bond builder like Olaplex No. 3 if I style with heat twice a week?
A: Once a week is plenty for protection and maintaining strength. Overdoing protein can make hair feel stiff. Buy from the official Olaplex store on Amazon or retailers like Sephora to avoid counterfeits.
Q: My low bun always falls out by noon. What am I doing wrong?
A: You are probably relying on the elastic alone. Anchor the bun with two long pins crossing under the knot, and add one pin above to lock the shape. Dry shampoo on day two gives extra grip if the hair is slippery.
Q: Will these styles work on Type 4 textures without heat?
A: Absolutely. Twists, rope knots, and side tucks are all heat-free friendly. Use cream-based moisturizers to keep the coils soft and a few pins to secure bulk. If you want a sleeker edge, a tiny amount of heated edge control can be done carefully, but avoid high heat near fragile roots.
Q: Can I sleep in these low updos or will they crease my hair?
A: Loose knotted styles with silk scrunchies are fine to sleep in. Avoid tight elastics at the nape every night because they cause breakage. A silk pillowcase or scarf reduces friction if you plan to leave a style overnight.
Q: What basic tools should I buy first for low updos on long hair?
A: Start with a pack of long bobby pins, a medium claw clip, snag-free elastics, and a boar bristle brush. Add a donut or foam bun for extra volume if you like fuller shapes.