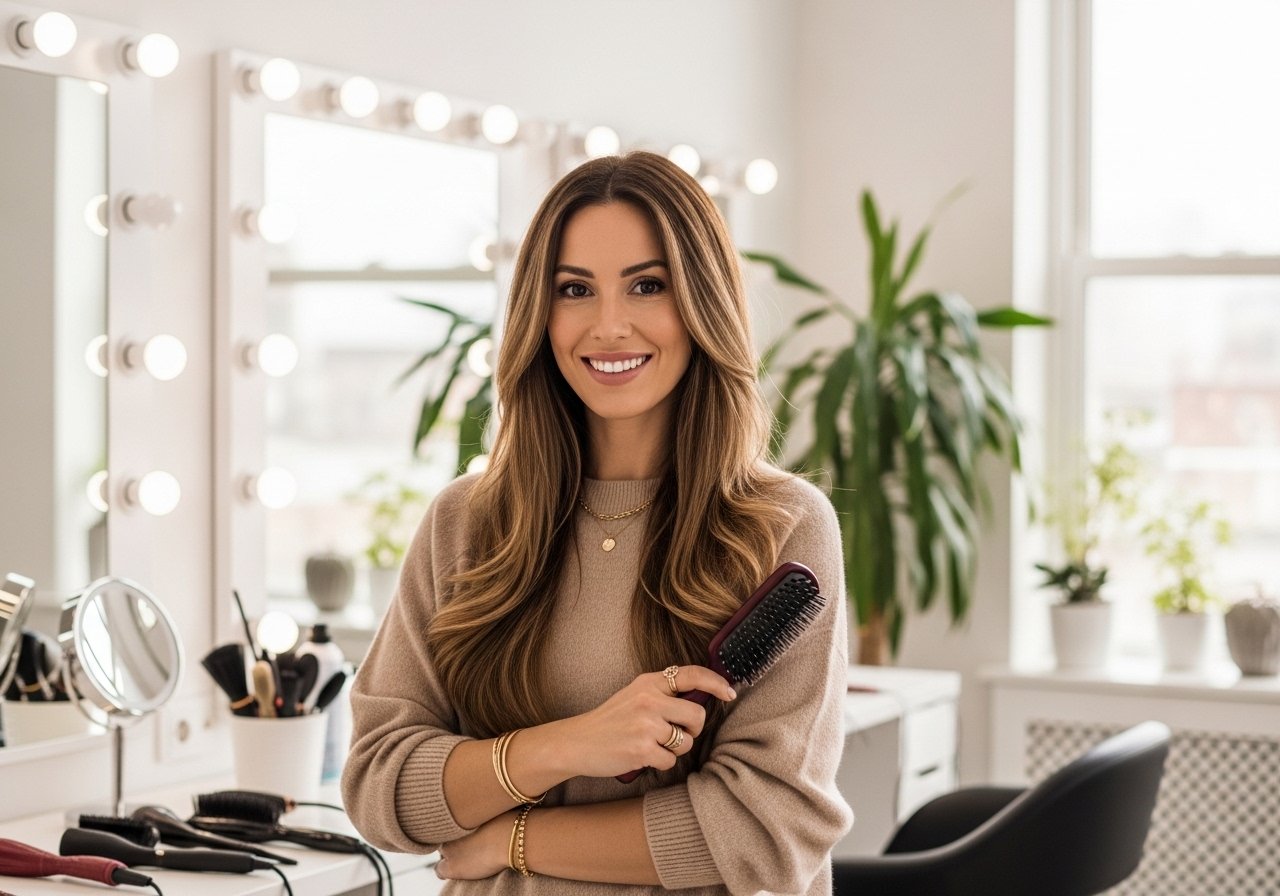
I once paid for a salon trial and watched the bun sag under humidity minutes before the ceremony. After too many ruined pictures I learned which pins, product amounts, and prep steps actually hold through a full puja, dhol, and reception. These looks lean toward medium to very thick South Asian hair, shoulder to mid-back length, and most take 20 to 60 minutes depending on detail. Budget ranges from under $30 for pins and powder to a $120 tool splurge if you want a specific dryer or curling set. Many are DIY friendly, a couple are worth booking if you plan heavy extensions or complex temple jewelry.
Classic Low Bun With Fresh Gajra
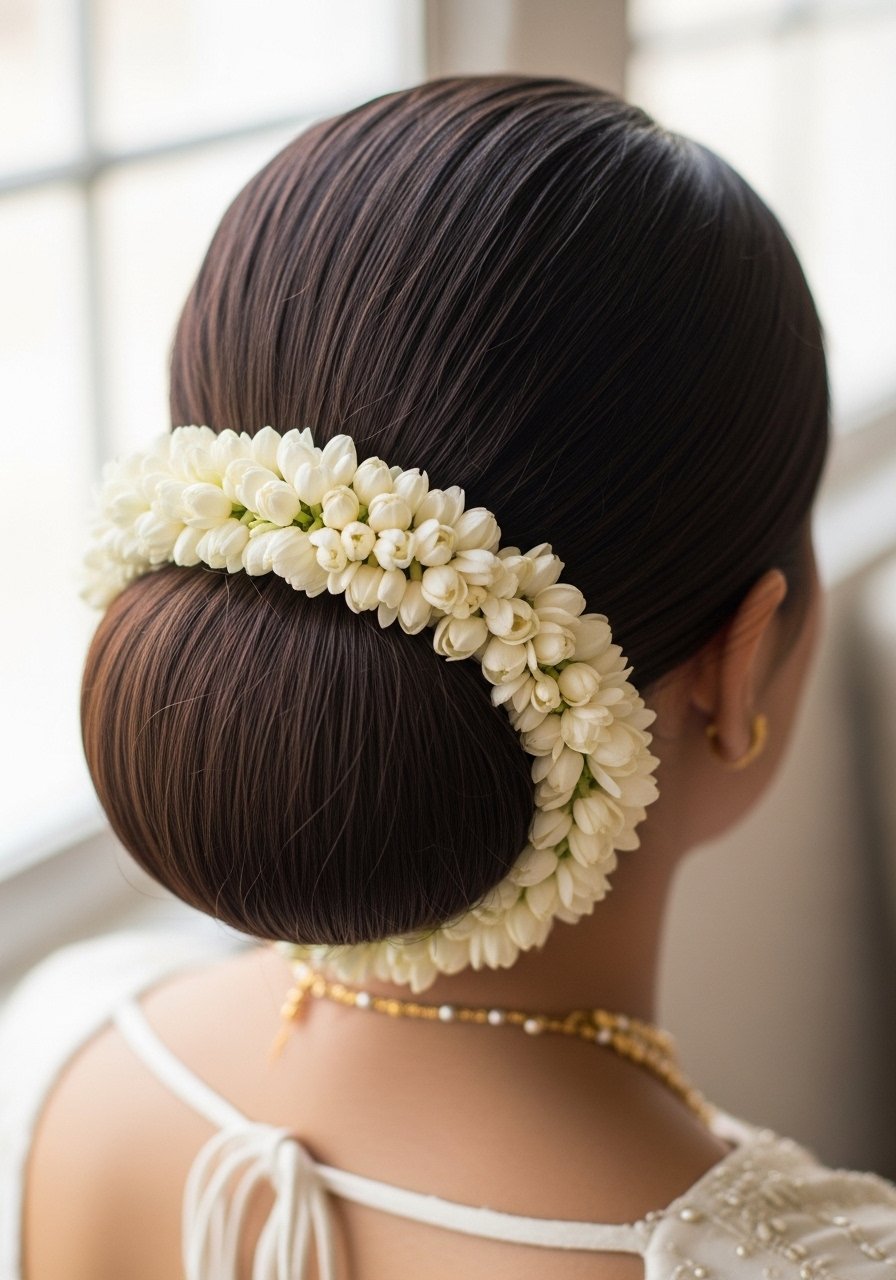
The classic low bun survives tears, rain, and a thousand selfies if you prep right. Start on towel-dried hair with two spritzes of texturizing spray and 1 pump of lightweight cream into the ends. Blow-dry briefly on medium to set shape, then flat iron the ends at 300F for a clean finish, apply heat protectant before any iron over 300F. Section into three panels before twisting the bun so it sits flat against the nape. Use 10 to 12 long bobby pins crossing in an X to lock each twist, and finish with three firm pumps of strong-hold hairspray. If your hair is fine this will need a foam donut for volume. Fresh gajra likes slightly damp perfume, so keep scents away from the flowers to avoid wilting.
Rope Braid Wrapped Bun For Thick Hair

If your hair is dense and heavy, a rope braid bun distributes weight better than a single twist. Work on dry hair with two pumps of grip serum through the mid-lengths only, leaving roots clean for traction. Split hair into two sections for a rope braid, twist each toward you, then wrap them counterclockwise into a bun and secure with 12 U-pins and 6 long bobby pins. The result sits flatter under heavy jewelry than a loose bun. Common mistake, pin everything in the same direction, which lets the bun droop. Salon vs DIY note, a stylist will hide the pin heads under the braid, but you can do it yourself with mirror checks. If you plan extensions, add them in three wefts under the crown for balanced weight.
Textured Messy Bun With Bridal Flowers
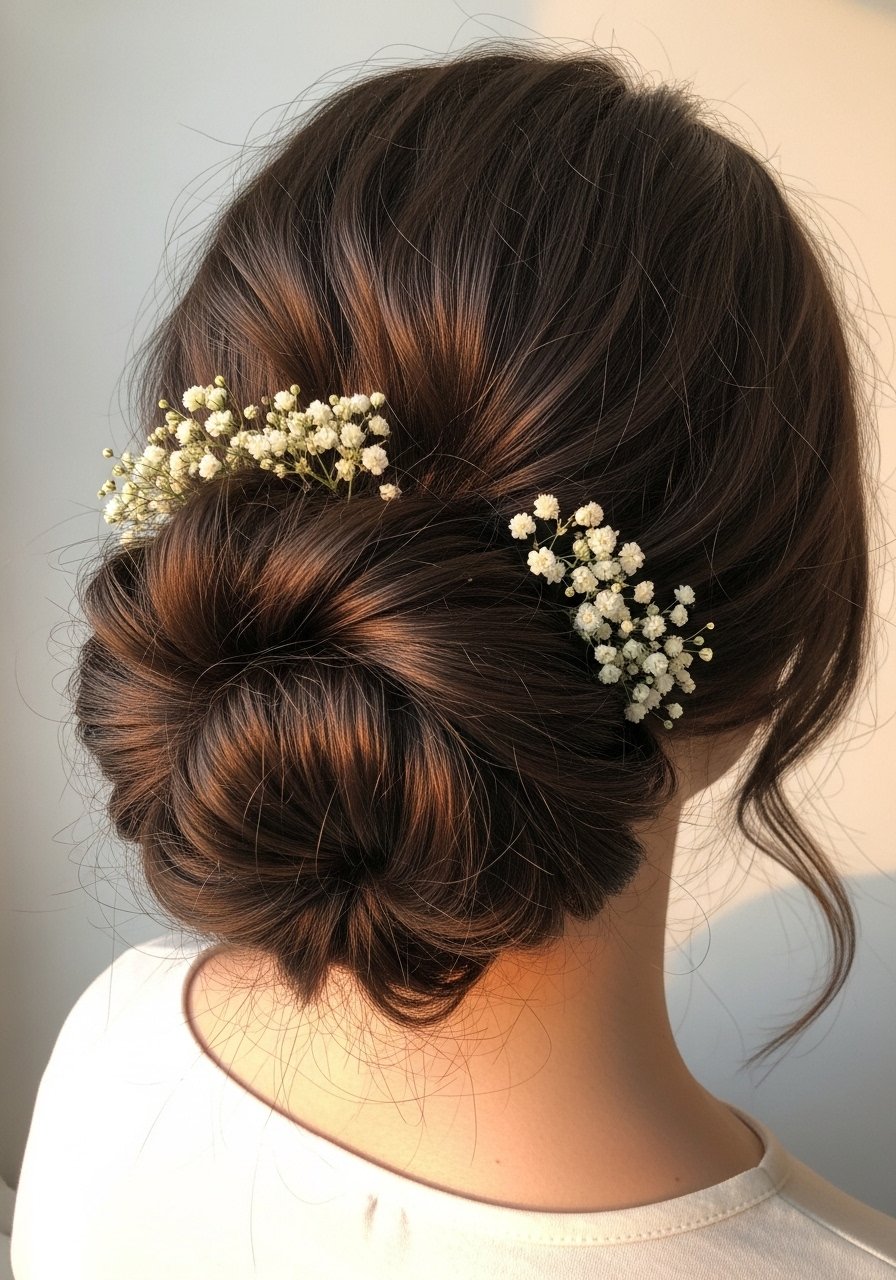
This is my go-to when my friend says she wants volume but not a perfect shape. Start with dry hair and a quarter teaspoon of salt spray spread through the mid-lengths for grit. Clip the top crown into three sections, lightly backcomb the middle strip for 1.5 to 2 inches of lift, then gather and twist into a loose bun, pinning with 8 curved pins to keep the silhouette soft. One to two floral clusters hide frizz and any missed pins. The problem this solves is stiffness from too much hairspray. Finish with a flexible hold spray so the flowers can move. If humidity is the enemy, pair this with an anti-humidity treatment before styling.
Sleek Side-Swept Knot With Maang Tikka
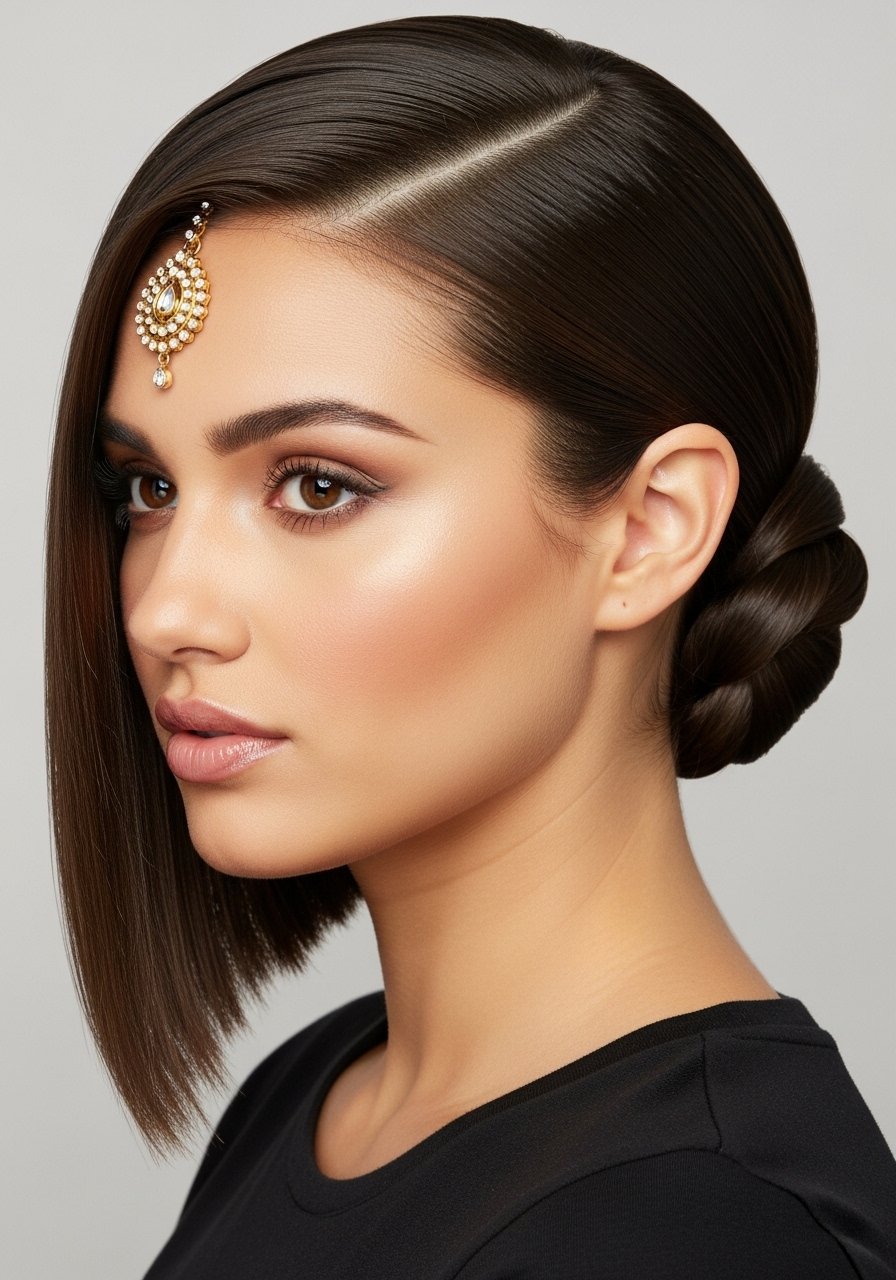
For brides who want clean lines to show off temple jewelry, this knot keeps the hairline slick and the tikka centered. Use a dime-sized smoothing cream at the roots and then a small boar-bristle brush to direct the hair into a deep side part. Flat iron the hair on low heat if needed, remember apply heat protectant before any iron over 300F. Gather the side section and twist into a tight knot, tuck the end and anchor with 7 to 9 long pins. Common mistake is overloading product at the ends, which makes pins slip. Keep product placement 80/20, mostly at roots and mid-lengths for hold and shine. Salon note, ask for hidden comb attachments if your hair is very fine so the tikka stays centered all ceremony long.
Braided Crown With Jewelled Pins
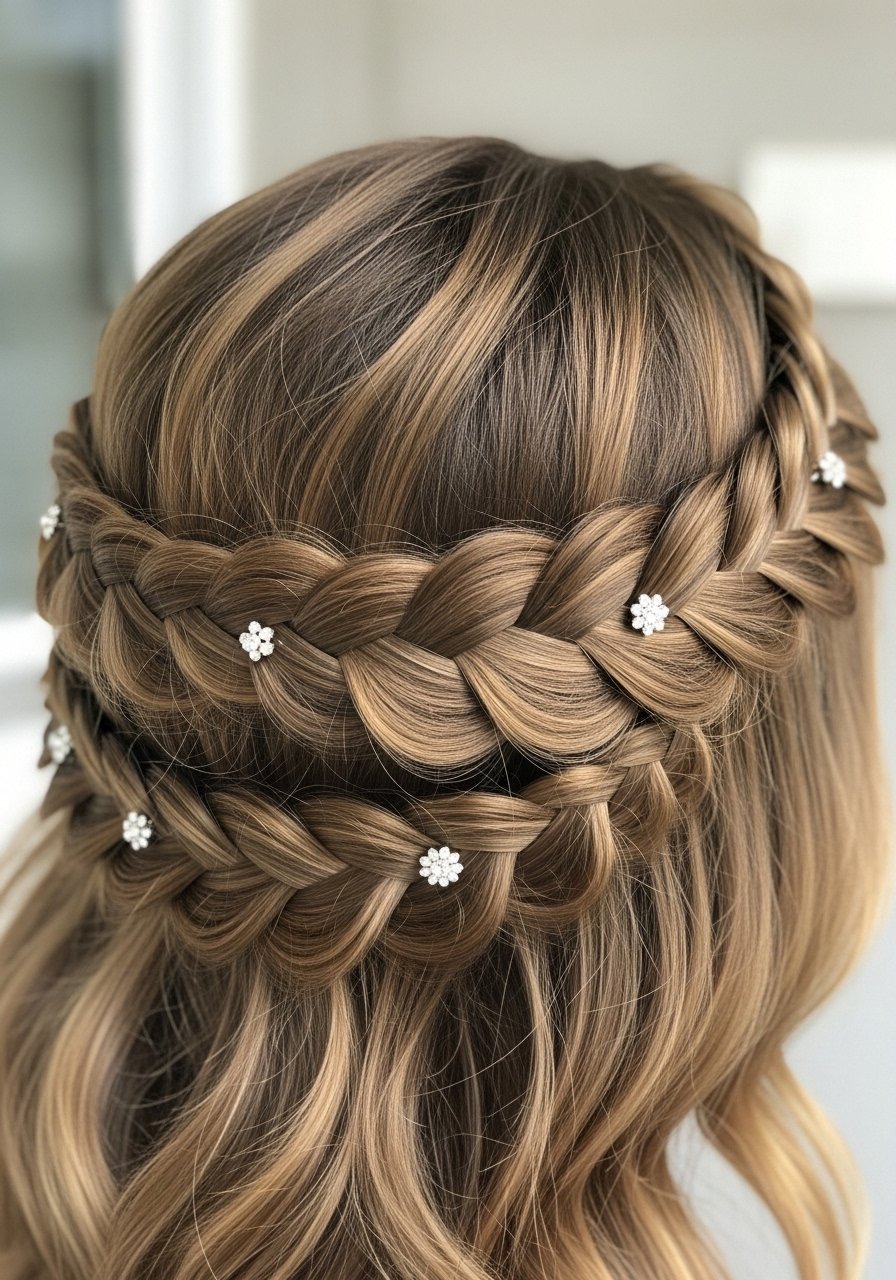
Crown braids read bridal and stay comfortable for long pujas. Start with slightly dirty hair or two spritzes of dry shampoo at the roots for grip. Do a Dutch braid from one temple to the other, keeping sections roughly 1 inch wide and switching hands with each cross to maintain tension. Pin the braid under itself with 8 to 10 U-pins and add jewelled pins every 3 to 4 inches for sparkle. If you have tight curls, stretch each section with a 1-inch iron on low after a light oil so braiding is cleaner. This style fixes the problem of hair in the face during rituals and is a great choice if you do not want a heavy bun.
Twisted Low Chignon For Fine Hair
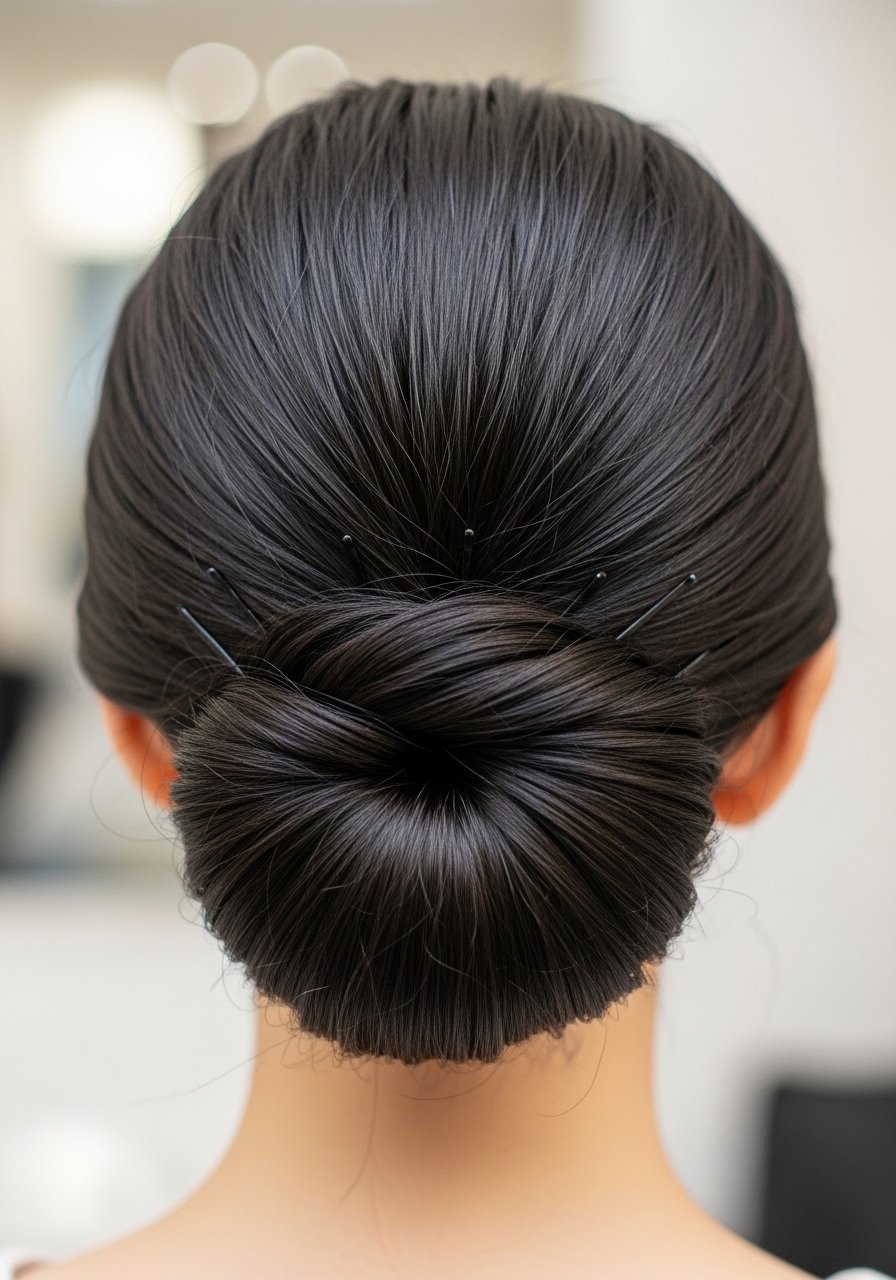
Fine hair needs structure. I use a small foam pad under the crown for lift and a dry texturizing powder lightly at the roots. Divide hair into four sections, twist each section clockwise and pin the ends into the pad in a star shape, using 12 small bobby pins hidden inside. Too many people over-brush and lose grit, so work with a comb only where needed. Add a smoothing balm the size of a rice grain to tame edges without weighing the chignon down. If you want the look fuller without bulk, clip-in single wefts at the base in two spots. Allergy note, test any adhesive weft or tape 48 hours before the wedding.
High Bouffant Bun For Long Hair
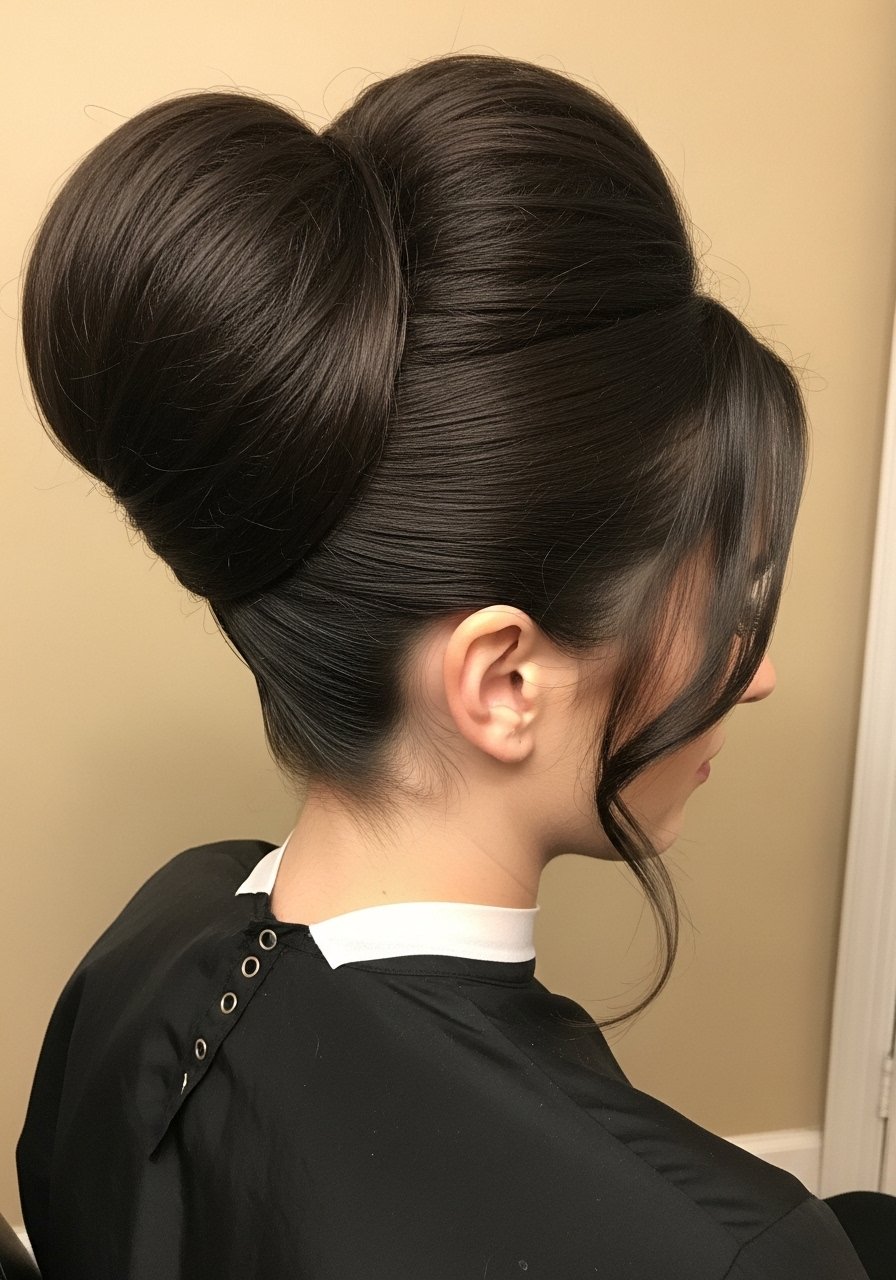
If your lehenga needs a dramatic silhouette, this one gives height without looking overdone. Section a 2.5 inch crown strip and backcomb in 1 inch increments for a 3 inch lift, smoothing the top lightly. Gather the rest into a high pony and use a large donut if your hair is heavy. Wrap the pony into a full bun and pin with 12 to 15 pins distributed evenly. Finish with two to three firm pumps of strong-hold spray and a lightweight serum on the ends only. The main failure mode is over-smoothing which kills volume, so leave tiny face-framing pieces and finger-comb them after the spray sets.
What I Pack For An Indian Bridal Hair Kit
- Honestly the things I actually bring, packed in a clear pouch. Long bobby pins in a 100-count pack, I go through 40 to 60 during a full bridal set
- For grip and volume, texturizing powder (~$10). Two taps at the root and it holds the bun under weight
- Strong-hold hairspray in a travel can. Three short bursts around the finished style, not a spray-and-go
- Hidden support pieces, a large foam donut for volume, and single weft clip-in extensions for length or coverage
- Small tools kit, U-pins and curved pins in mixed sizes, and a boar-bristle brush for smoothing
- For last-minute smoothing, a travel bottle of lightweight smoothing serum and a mini heat protectant spray. Buy Olaplex and K18 from the brand storefront on Amazon or at Sephora to avoid fakes
Fishtail Side Bun With Statement Flowers
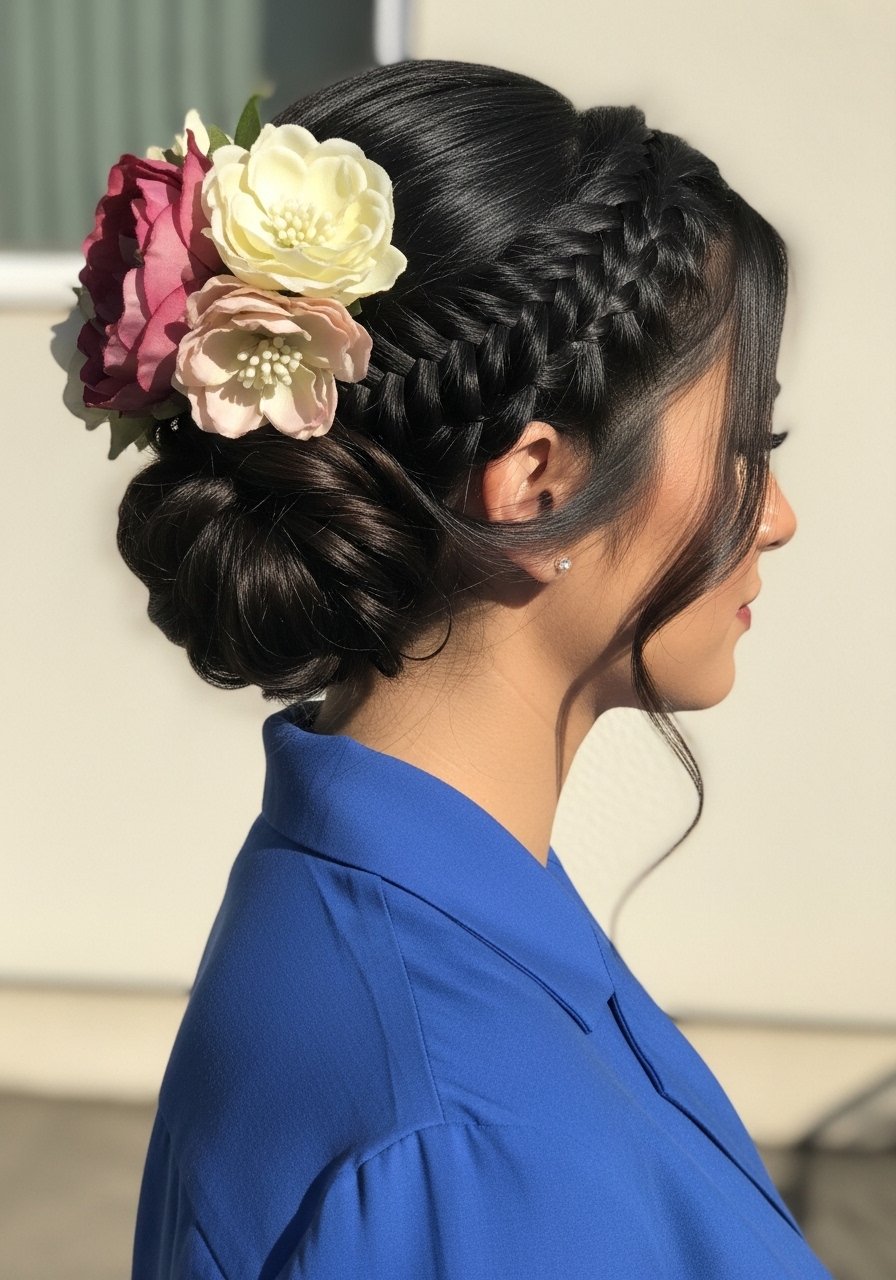
A fishtail side bun reads romantic and photographs beautifully. For medium to thick hair, split into two even sections and take 1/2 inch strands for each cross to get that neat woven look. Braid tightly for 6 to 8 inches, then wrap into a side bun and pin with 8 to 10 long pins. The specific detail most articles skip, alternate pin angle so pins lock against each other instead of lying parallel. I usually add one pump of texturizing spray while braiding to keep the strands separated on photos. Floral accessories are heavier near the ear, so add an extra pin or a hidden comb beneath the flowers to carry the weight.
Modern Low Knot With Clip-In Extensions
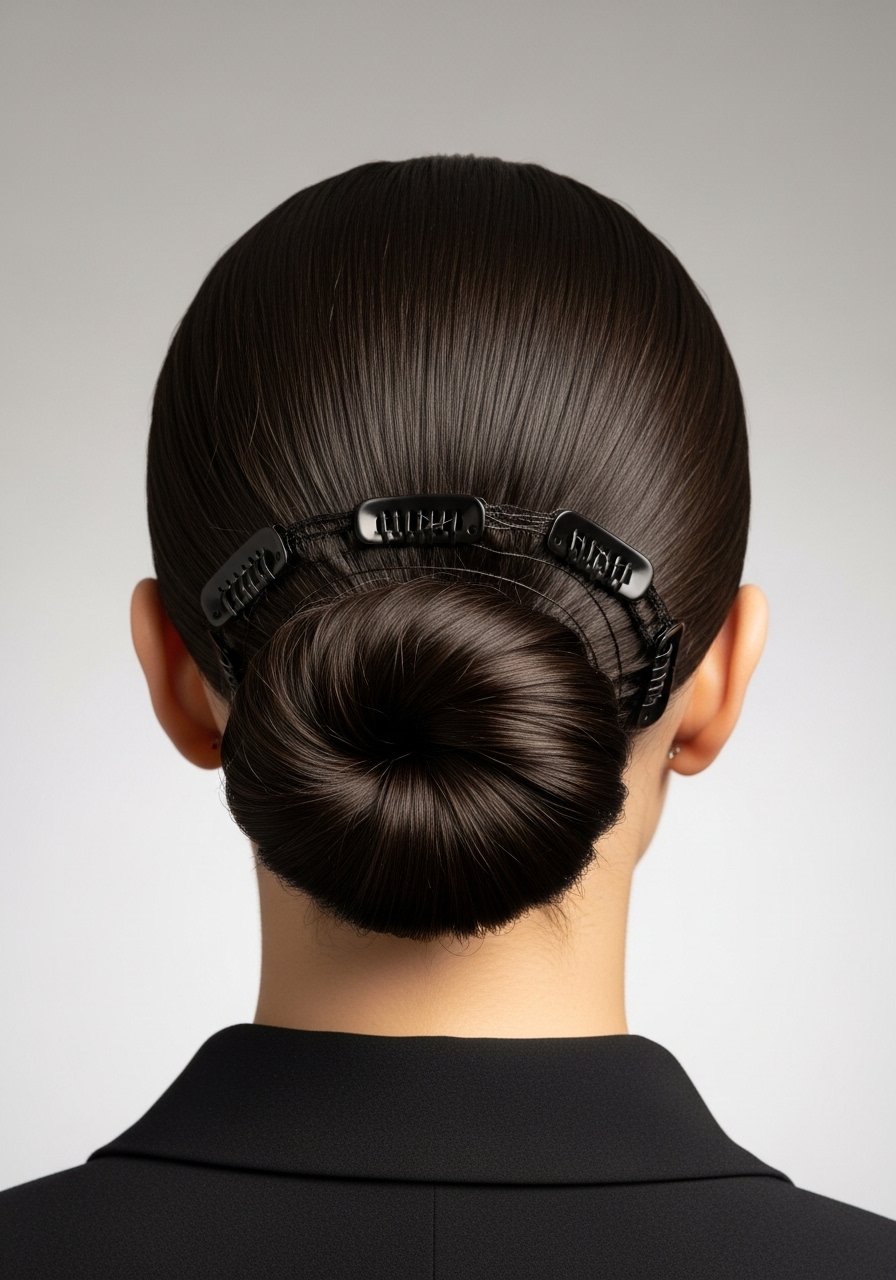
Clip-in extensions save a DIY wedding when hair is thin or short. Insert three wefts at the nape spaced evenly, pin them flat, then form a low knot by looping the pony twice and tucking ends. Use 10 pins to secure the knot and two small combs anchored under the wefts for safety. Watch the total weight, more is not better; too many wefts and the hairstyle droops during dancing. If adhesive bonds are used test for allergy 48 hours earlier. For stretch and blend, I run a wide-barrel iron at 300F over the extensions only, always apply heat protectant before any iron over 300F. Most brides are surprised how natural a single 16-inch weft can look when pinned correctly.
Bridal-Day Tricks I Learned The Hard Way
- Heat protectant goes on damp hair before any hot tool is used, not dry. Most heat protectants you spray on dry hair before flat ironing barely work. Try a thermal protect spray sprayed twice on damp lengths
- Pack a small kit with mixed-size bobby pins and U-pins. You will lose pins, plan for 40 to 60 per client
- Hair grows about half an inch a month at most, regardless of what biotin gummies promise you. If you need length for the photos, extensions are the answer, not last-minute supplements
- Use product placement wisely, keep heavy serums off the roots. The 80/20 trick of most product at mid-lengths and ends keeps the hair light and pins effective. A lightweight smoothing serum in dime size works wonders
- Bring a silk scarf or pillowcase for post-ceremony touch-ups. A quick wrap protects the hair before changing into reception outfits, and a silk scarf takes up no room
Frequently Asked Questions
Q: Can I do these updos myself the morning of the wedding?
A: Many can be done DIY with practice, especially the low bun and twisted chignon. If you are adding heavy jewelry, extensions, or a complicated crown braid, schedule a trial or book a stylist for the day. Practice twice, once with the exact products you plan to use.
Q: How many bobby pins do I actually need for a full bridal set?
A: Expect to use 40 to 60 across hair, veil, and accessories. Larger buns take 10 to 15 each. Bring mixed sizes so you are not stuck holding the structure together with pins that are too short.
Q: Will extensions damage my natural hair if I wear them for one day?
A: Temporary clip-ins are low risk when anchored properly and not left in too tightly. Avoid adhesive tapes or keratin bonds on the wedding day unless tested beforehand, and remove extensions gently after the event. If you have scalp sensitivity check with a stylist and patch test adhesives 48 hours in advance.
Q: How often should I pre-treat hair before the wedding day?
A: One to two months before, reduce clarifying shampoos and focus on weekly bond builder treatments if hair is damaged. Trim split ends three weeks out. Heavy conditioning the week before can make styles slip, so switch to lighter conditioning three to five days before.
Q: Can I use these styles with curly or coily hair textures?
A: Yes, but techniques change. For tight curls, stretch 4 to 6 inches with a low-heat set or twist-out before styling. Braids and buns hold extremely well on denser textures, which is why many of these looks work beautifully on 3A to 4A hair with adjusted pin counts and product amounts. If you are unsure, do a trial with your actual hair texture to test hold and pin placement.