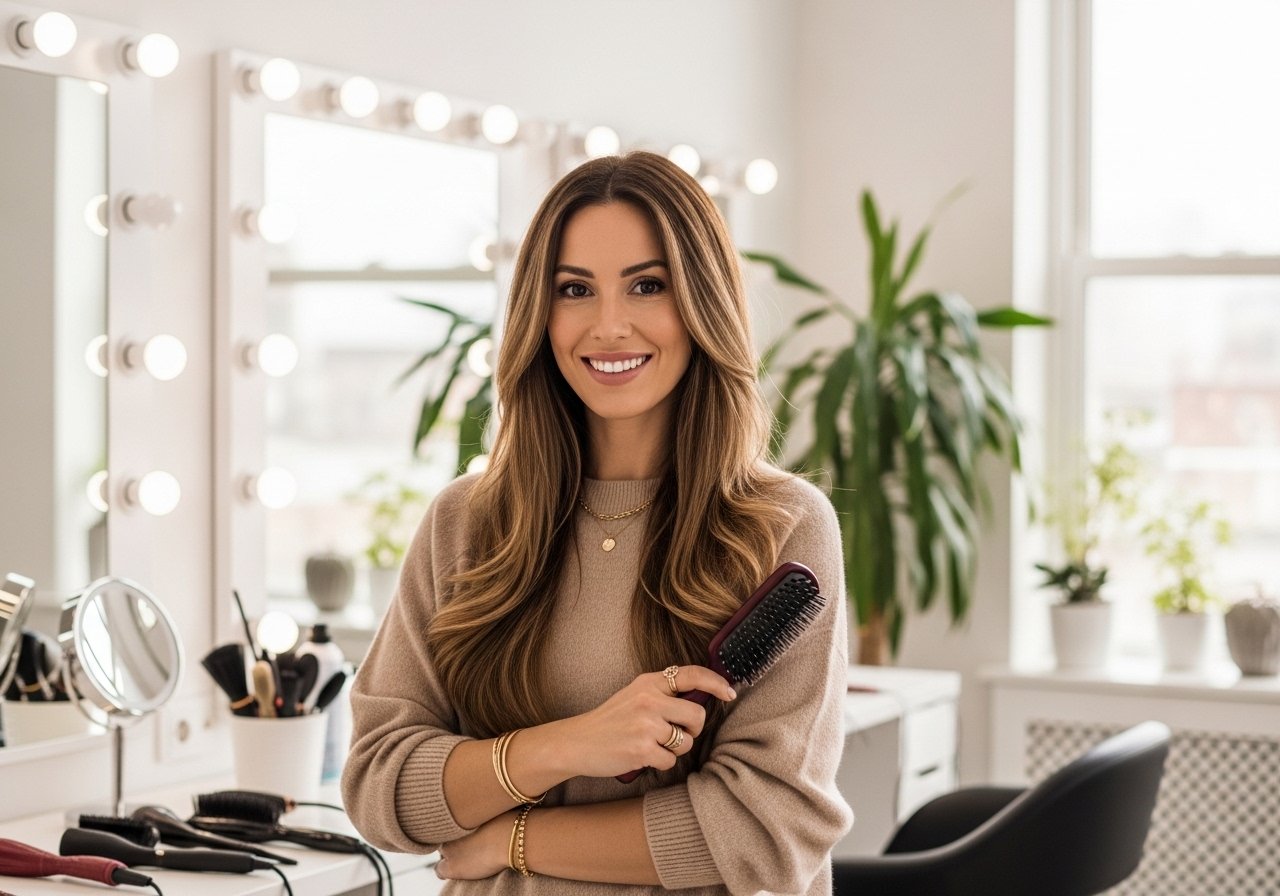
If your bangs separate into a forehead gap by noon or they make your long hair look heavy, this is for you. I tested curtain bangs, blunt fringes, micro-bangs, and a dozen styling tricks across my own mid-back length hair. Most of these looks are low-maintenance once you learn one or two small hacks, and a few need a salon cut the first time. Expect options that work for 2A waves, fine straight hair, and even curlier 3A to 3C types with a few adjustments.
These ideas mostly serve straight to wavy 1B through 3C hair, shoulder length or longer. A few are adapted for thicker curls and coily textures with notes. Most looks can be done at home with basic tools in 10 to 30 minutes, a couple need a salon visit every 8 to 12 weeks. Budget ranges from under $20 for a good clip to a $40 splurge on a bond-repair mask.
Curtain Bangs Grown Out, Soft And Face Framing
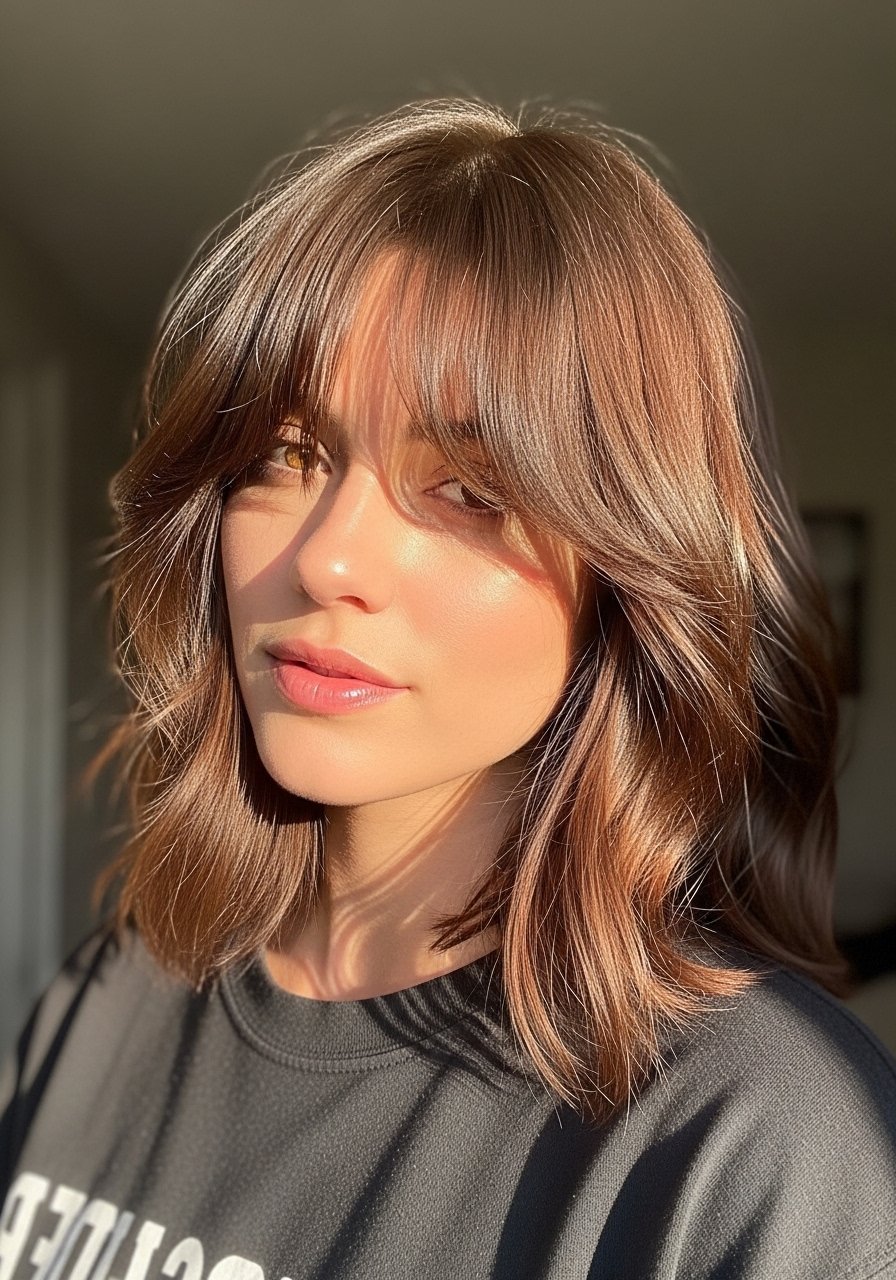
The whole reason I keep coming back to curtain bangs is how forgiving they are on long hair, they hide a wide forehead without looking heavy. For fine to medium 2A through 2C hair, dry-cutting in long vertical slices and point-cutting the ends gives the feathered look. If your bangs gap in the middle, the fix is tiny: take 1/4 inch off the very center, then texturize two thin vertical slices on each side. Two spritzes of a light styling spray like Bumble and bumble Thickening Dryspun Texture Spray and a 330F flat iron pass on the outer curve keeps them soft. Common mistake is cutting bluntly when the hair is wet. Wet hair shrinks less predictably. Salon versus DIY, start with a stylist if you fear the first cut. Heat note, always use a heat protectant if you iron over 300F.
Side-Swept Bang With Long Layers For Round Faces
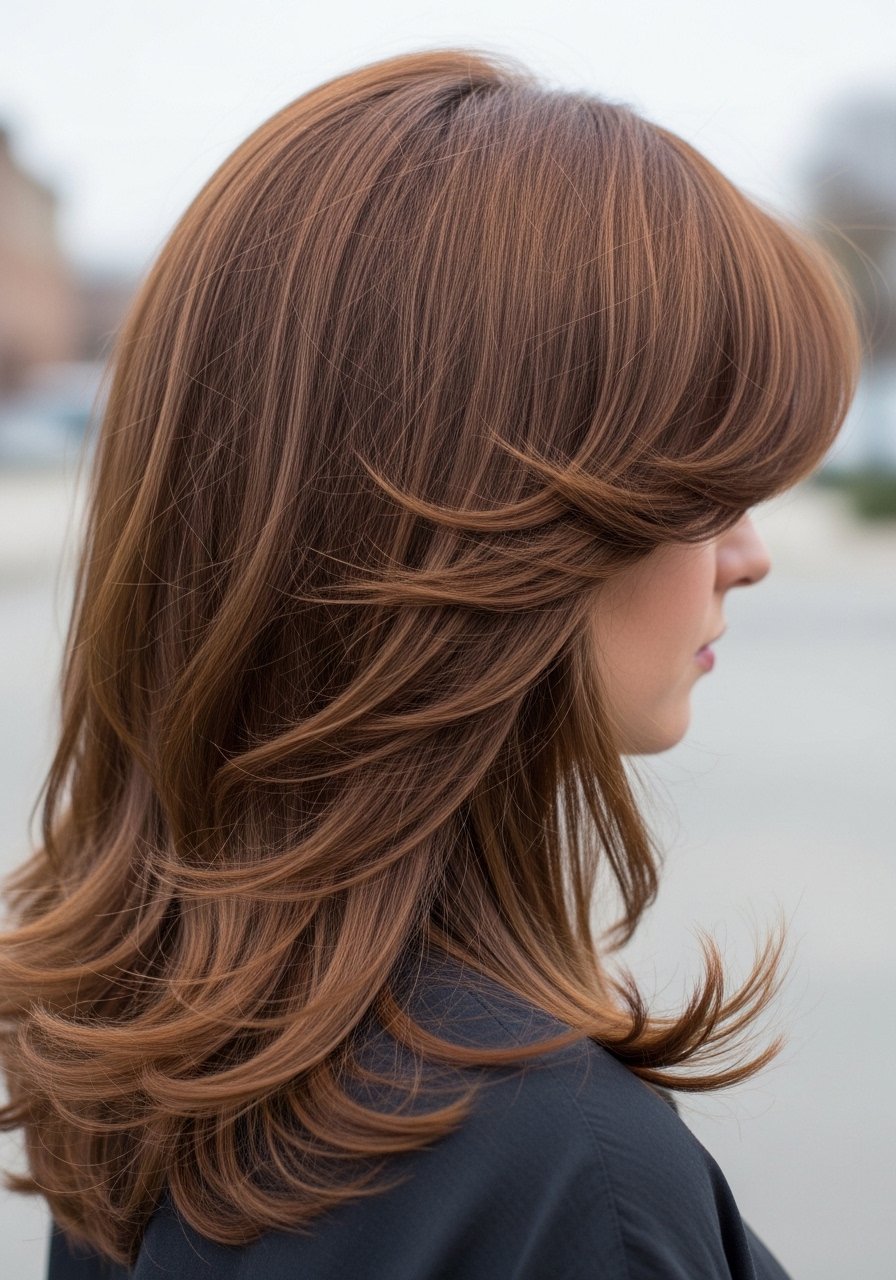
If your face reads round and you want the illusion of length, side-swept bangs blended into long layers are the cheat code. Ask for a side part that begins just off-center and for the bangs to be cut at a 45 degree angle when dry. For medium to thick 2B through 3A hair, I use a 1-inch round brush and a blow dryer on medium heat, pulling the bang across the brow for one pass at 300F equivalent airheat. A small amount of Moroccanoil Treatment Light smoothed through ends controls frizz without weighing the faceframe down. Common frustration this solves is bangs flipping up or sticking out at the temple. DIY tip, clip the hair where the part sits and trim tiny amounts until the sweep sits at cheekbone level. If you have cowlicks, a quick salon reshaping helps more than daily fiddling.
Blunt Fringe With Long Sleek Hair For Straight Types
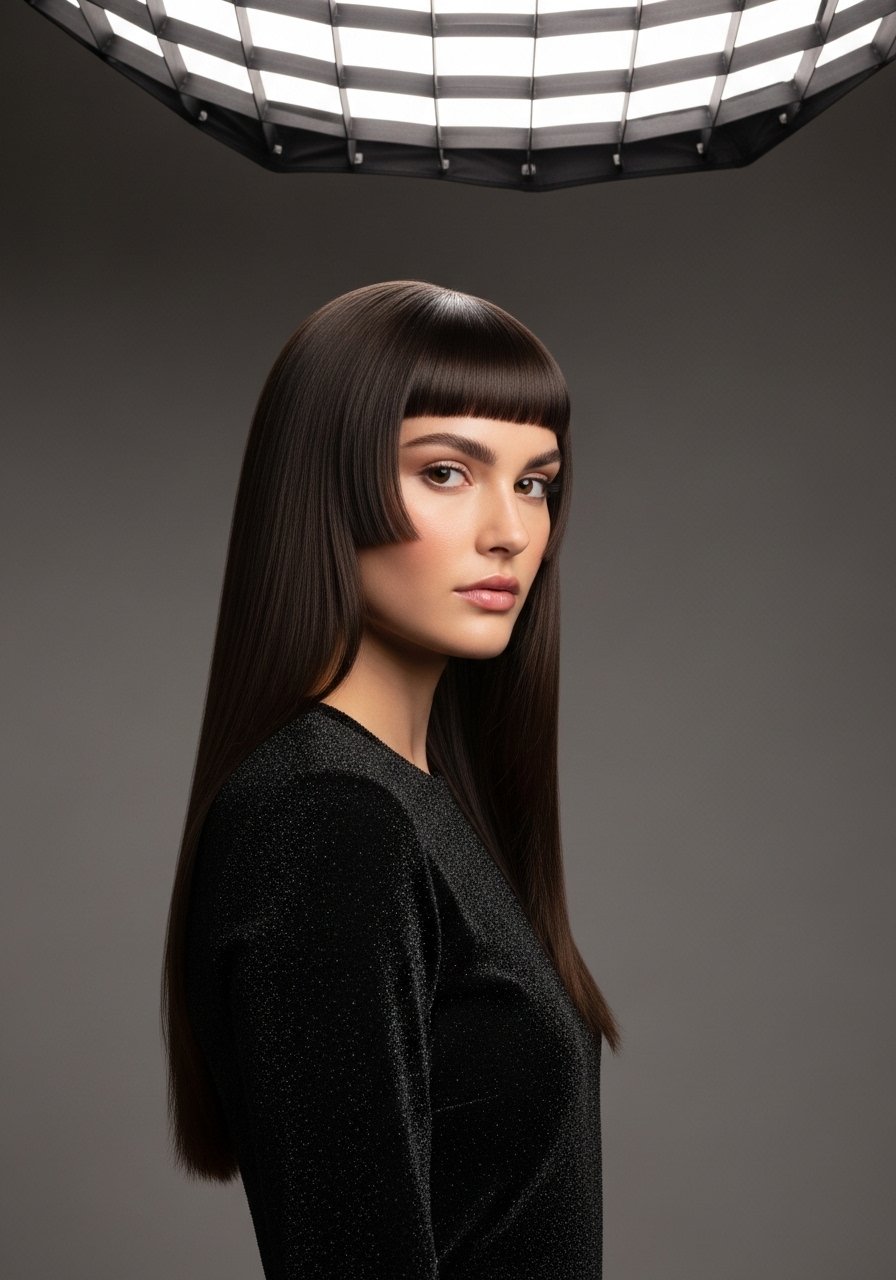
Blunt bangs read bold with long straight hair, but they require commitment. This works best on stick-straight 1A to 1B hair or relaxed 1C textures. The trick is sectioning. Cut the fringe in one horseshoe-shaped section, then take vertical 1/8-inch point cuts at the ends to avoid a helmet effect. For daily styling, a single pass with a 1-inch flat iron set to 320F keeps the edge crisp. A pea-sized amount of Redken Frizz Dismiss Oil Serum through the ends fights static without greasing the roots. Common mistake, trimming too much dry weight. Blunt bangs show grown-out stage quickly, so plan trims every 3 to 4 weeks. If you color your bangs, allergy patch test the dye and book a pro for bleach-over-dye situations.
Wispy Micro Bangs Paired With Long Layers For Thick Hair
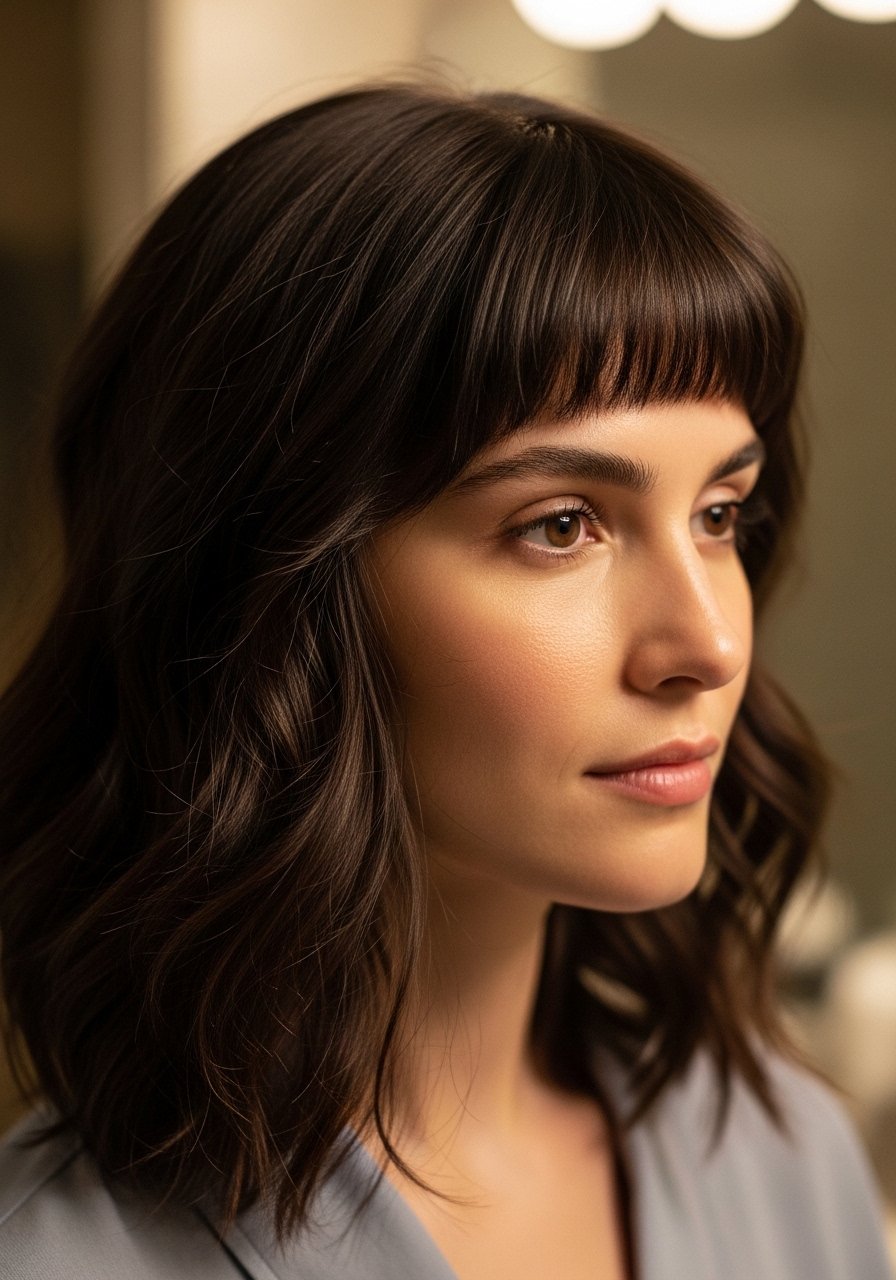
I know micro bangs sound risky, but thin, wispy pieces can actually lighten a heavy long haircut for very thick hair. For 3A to 4A dense textures, ask the stylist to razor out weight in the first inch and cut the micro bangs dry into vertical feathered slices. One styling trick I learned the hard way is to never use heavy oils at the root. Instead, two light pumps of a silicone-free serum on the mid-lengths tames the frizz while keeping the micro fringe airy. A common mistake is expecting micro bangs to lie flat on second day hair. They need a quick restyle with fingers and a small round brush for 30 seconds in the morning. Salon-level maintenance is higher, expect trims every 3 weeks.
Money Piece Face-Framing Highlights With Long Bangs

Want bangs to pop? A money piece is about strategically lightening the front face frame, it makes curtain or long side bangs read brighter without a full head color. Works on medium to thick 1B through 3B hair. If you go lighter, remember to buy a bond builder for at-home upkeep and warn your stylist if you had previous color. I usually ask for a +4 to +6 lift in the face frame and soften the line with a root-smudge to avoid a harsh band. After color, I do Olaplex No. 3 once a week to keep the ends intact. Olaplex No. 3 Hair Perfector used for 20 minutes before shampooing has saved my highlighted ends after bad color attempts. Buy from the official seller on Amazon or Sephora to avoid counterfeits. Common mistake, trying to DIY heavy lift over dark dye. That is a salon job.
Braided Bangs For Long Hair That Stay Put

If your bangs keep falling into your eyes during work or workouts, a little braid is subtle and protective. This is great for 2A to 3A hair and medium density. Section the bang into three equal thin pieces, French or Dutch braid across the hairline using a dab of lightweight cream to keep flyaways tamed. I hold the braid with a clear elastic and hide the tail behind an ear with a bobby pin. This also protects the ends of the bangs overnight if you sleep with them braided. Common misstep, braiding too tightly. Leave some slack so the braid breathes and does not cause traction. Works salon-free and is perfect for travel days.
Heatless Robe Tie Bang Shape For Second-Day Hold

When I need my bangs to keep shape without reaching for the hot tools, I loop small 1-inch sections around a soft robe sash and sleep on it. This works for 2A to 3B hair. Use tiny sections, no more than six passes across the bang area, or it looks bulky. Apply a pea-sized amount of leave-in cream before wrapping, so the hair sets. In the morning, gently unloop and separate with fingers. My curls looked great on TikTok and like wet noodles by 11am. That was because people used gel only. Adding a light cream first makes the robe-tie shape hold longer. This is a pure DIY approach and saves heat damage. Damage note, if your hair is fragile, avoid tension while wrapping.
Sleek Blowout With Rounded Bang Ends
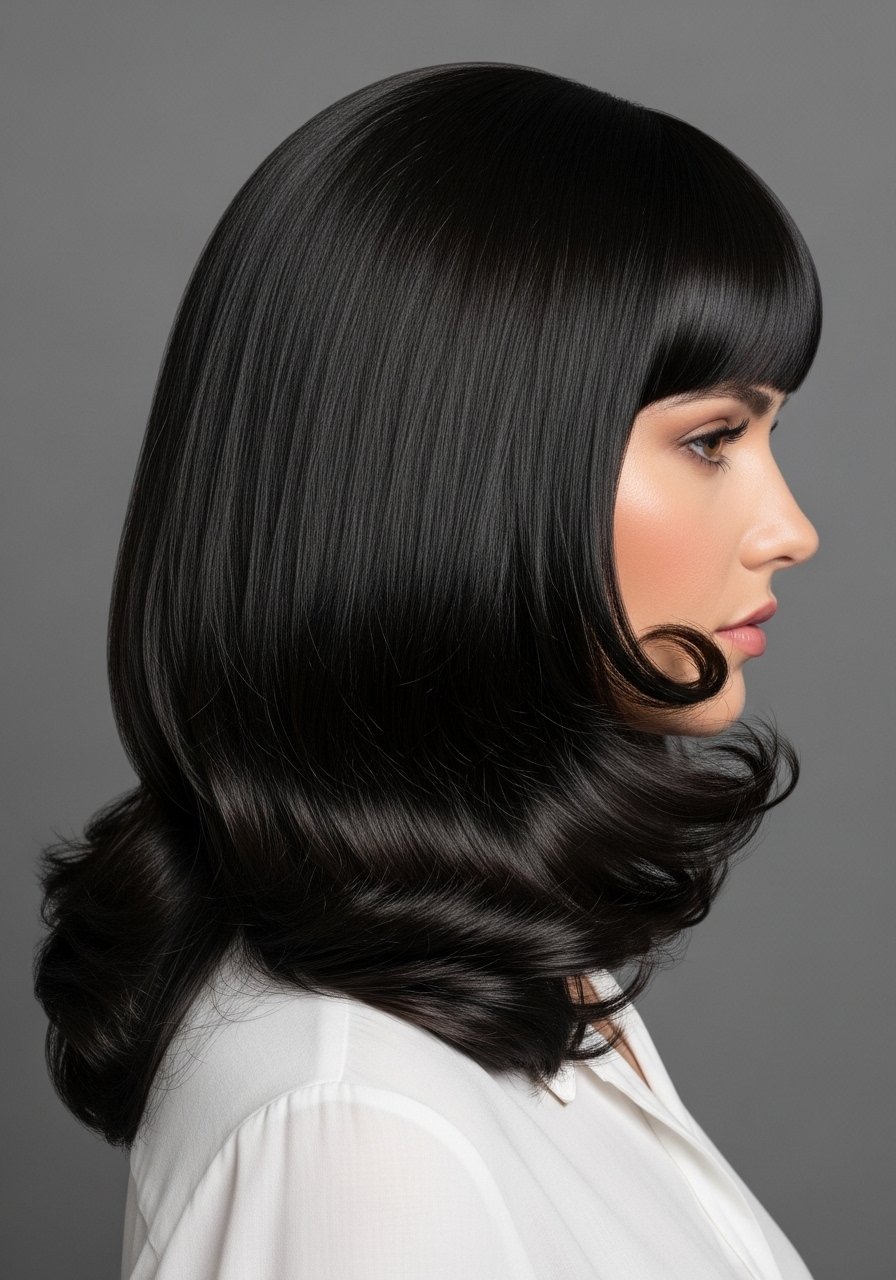
A polished blowout is the easiest way to make bangs read intentional, not accidental. For fine to medium straight hair, use an 80/20 product placement rule, meaning a small amount of smoothing cream at the mid-lengths and ends, and a heat protectant at the roots. I blow-dry bangs with a 1.5-inch round brush, 2-second pulls, and a cool shot to set the bend. If you have a powerful dryer, keep air temperature to medium so you're not frying the hair. I run a tiny sliver of Color Wow Dream Coat through the very ends to lock humidity out for three days. Common error is overloading roots, which makes the bangs flat. Pin them up and let them cool before releasing for longer hold.
Beachy Textured Curtain Bangs With Salt Spray
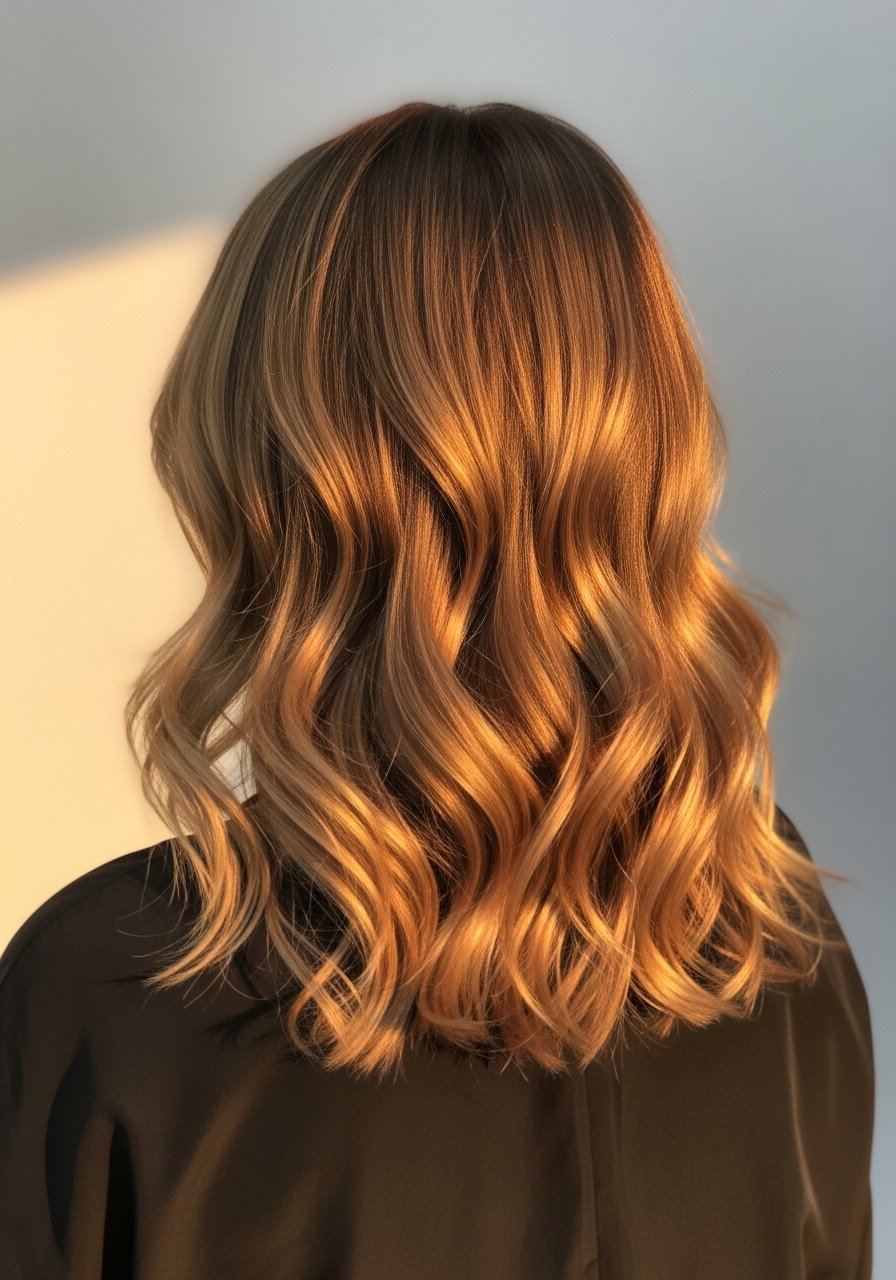
If you want that undone, lived-in vibe, salt spray plus a light cream is the combo. For 2B to 3A hair, I spritz salt spray on damp bangs, scrunch the fringe for three pulses, then diffuse for two minutes just to set. A dime-size of curl-enhancing cream applied to the mid-lengths keeps the texture from going crunchy. Swap heavy mousse for a lighter spray if your hair is fine. Trend swap, people are moving on from sticky gels to cream-first layering. Mistakes I see, too much salt spray and brittle ends. Use once or twice a week, not every wash, and follow with a weekly deep conditioner if you color or bleach.
Curtain Bangs Cut For Curly Hair Using The LOC Method
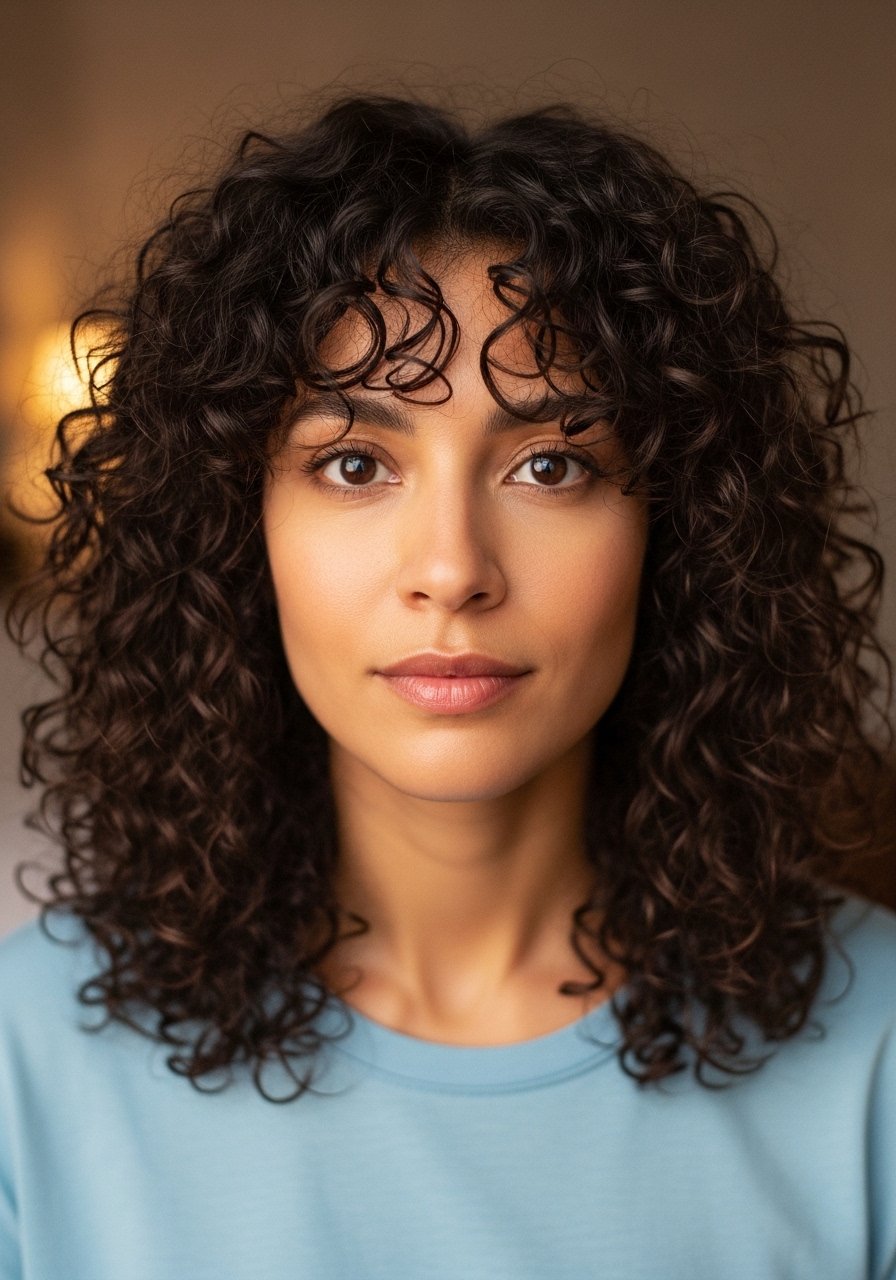
Curly curtain bangs are possible if you respect shrinkage. For 3A to 3C hair, cut bangs dry in curl clumps, letting each curl sit where it wants. Styling uses the LOC method, applying leave-in, oil, then cream to the bang section only, which keeps the front defined without weighing down the long curls. My curls looked great on TikTok and like wet noodles by 11am. That used to happen to me until I layered product. A common frustration is bangs that puff into a halo. To avoid that, only apply product to the front two inches and scrunch lightly. DIY is doable if your clump pattern is predictable. If not, a stylist who cuts dry is worth the cost.
Grown-Out Bangs Tucked Behind The Ear For Lazy Days
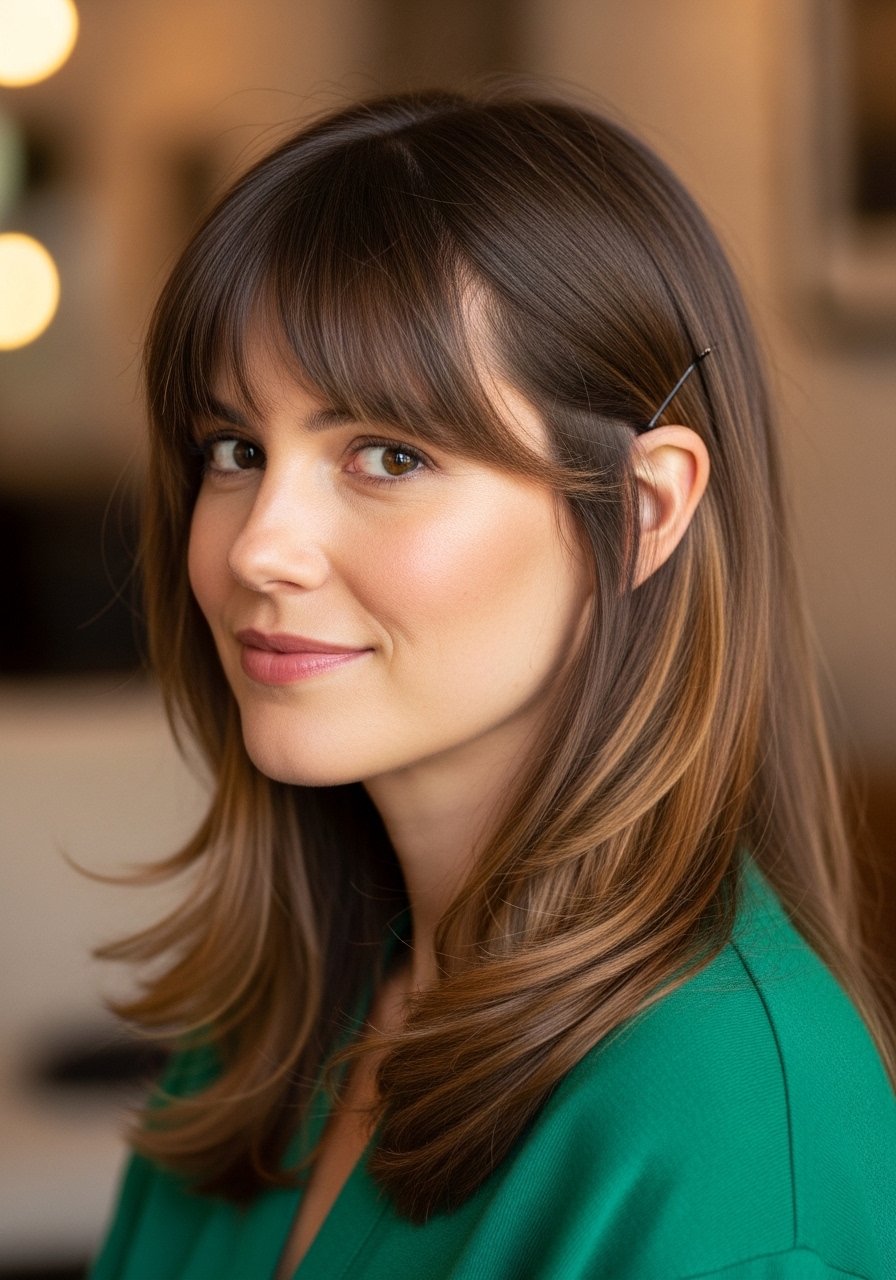
When bangs hit that awkward in-between stage, tucking them behind the ear keeps the style readable while you wait for a trim. This works for most hair types, especially fine to medium 1B through 2C textures. The trick is a tiny hold of texturizing paste at the roots to keep them from sliding out. If your bangs are oily, dry shampoo at the root helps. Hair grows about half an inch a month at most, so plan trims accordingly instead of aggressive home snips. This is a no-salon quick fix that buys you two to three weeks before a proper reshaping.
Peekaboo Color Under The Bang For Subtle Flair
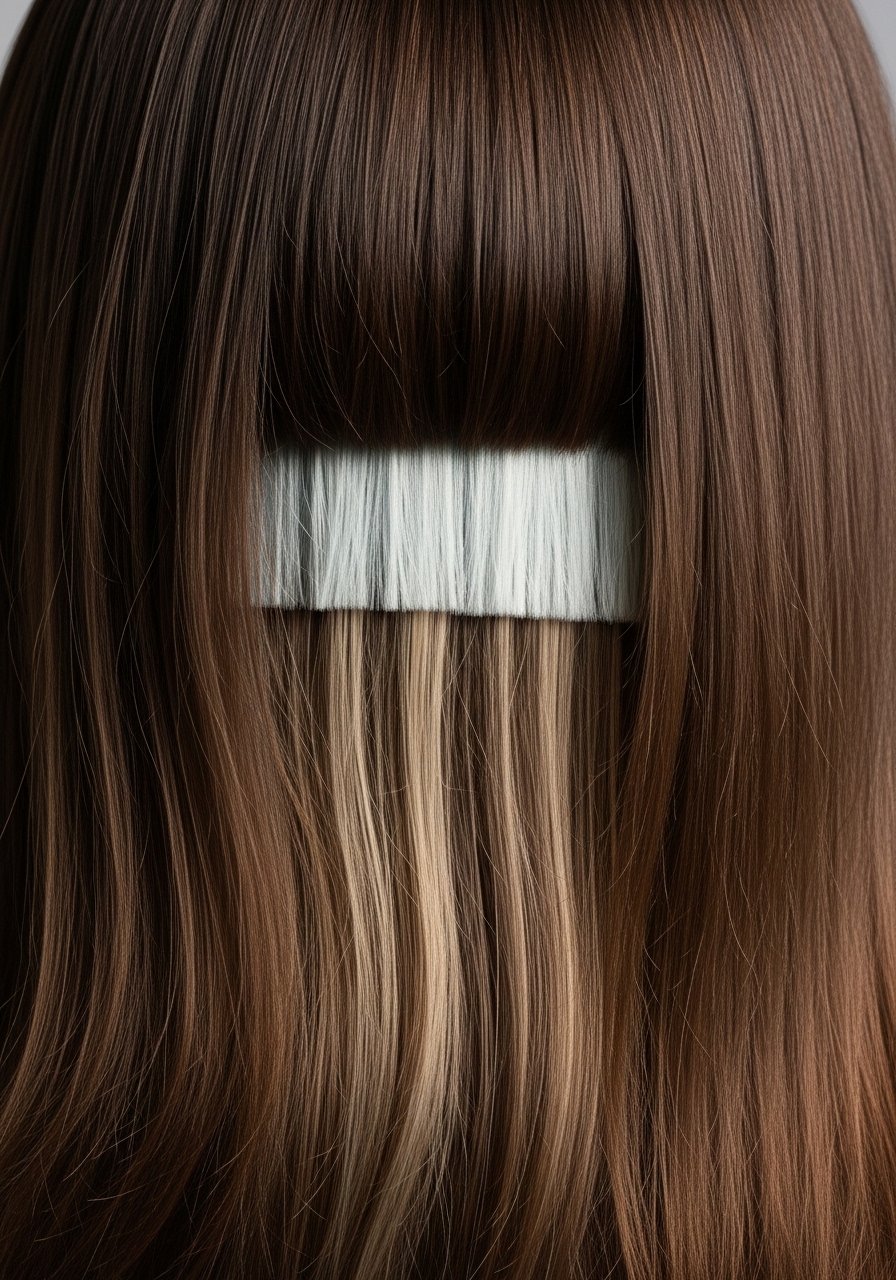
If you want a statement without a full head color, adding a peekaboo strip under the bangs gives swing without commitment. Works on 1B through 3B hair, but be cautious if you have dark base color. Ask your colorist for just a +2 to +3 lift under the bang and a soft blend so the strip peeks out with movement. At home, refresh this with a color-depositing conditioner every 4 to 6 washes. Damage note, any lift is lightening, so factor in bond-building and deep conditioning. This is a fun salon-only tweak unless you are experienced with foiling.
Bang-Forward Ponytail With Face-Framing Curtain Pieces

For busy days, the ponytail with bangs forward is instant polish. Work for straight to wavy 1B through 3A hair. Use a drop of smoothing cream through the ponytail and two finger-width pieces of the curtain bangs left loose to soften the face. Secure with a snag-free elastic and wrap a strand around the base to hide the band. Common mistake, making the pony too tight which pulls the bangs and flattens the top. Leave volume at the crown and keep the pony low if your hair is long. This is salon-free and travel-friendly.
What I Actually Keep In My Bangstyle Long Hair Kit
- A reliable clarifying shampoo for occasional buildup, 8oz bottle, I use it monthly to reset for styling, clarifying shampoo (~$12)
- A lightweight leave-in cream that plays nice with bangs, 6oz, I apply palm-sized dime amounts to mid-lengths and ends, leave-in cream
- Olaplex No. 3 Hair Perfector 3.3 oz, I do this weekly after color or heat stress. Buy from the official seller on Amazon or from Sephora to avoid fakes
- A small ceramic flat iron, 1-inch plates, temperature control so you can keep it at 320 to 330F for bang shaping, 1-inch flat iron
- A pack of clear elastics and no-metal bobby pins, travel size, essential for braids and tucks, clear hair elastics
- A silk pillowcase queen size, under $25, it cut my morning frizz noticeably, silk pillowcase
- Color-depositing conditioner for touch-ups on peekaboo or money pieces, use every 4 to 6 washes
- A soft robe sash for the heatless wrap trick, no-slip fabric, I sleep with this twice a week when I need shape without heat, soft robe sash
- A lightweight texture spray for curtain separation and hold, 5oz, spritz once at the roots and two at the ends, texture spray
The Small Tricks That Keep Curtain Bangs From Looking Overdone
- Heat protectant goes on damp hair before any hot tool, not dry. The cuticle is more open and the product actually absorbs. A lightweight heat protectant spray is a must if you iron over 300F
- Grab a microfiber hair towel for $12. It reduces dry time and stops frizz before you style, especially useful when bangs are slightly damp
- Hair grows about half an inch a month at most, so schedule trims instead of attempting big fixes at home. Small repeat trims keep the bangs living with the rest of the hair
- If your bangs get greasy fast, use a little dry shampoo at the root and avoid powders on the length. A travel dry shampoo is perfect for touch-ups
Frequently Asked Questions
Q: How often should I trim curtain bangs to keep the shape?
A: Every 8 to 12 weeks is typical for curtain bangs if you want the soft parted look. If you prefer a crisp edge or you have fine straight hair that shows grown-out regrowth fast, plan for trims every 6 to 8 weeks. Small tweaks beat big evening trims.
Q: Can I cut curtain bangs at home without wrecking them?
A: You can, but cut dry and small. Trim no more than 1/4 inch at a time and point-cut vertically at the ends to avoid a blunt line. If you have an uneven part or cowlicks, a salon dry cut is safer. Worst mistake is cutting a heavy blunt fringe while the hair is wet.
Q: Will curtain bangs work with curly hair?
A: Yes, with adjustments. Cut curly bangs dry in clumps and use the LOC method for styling so the front stays defined. Expect shrinkage and plan the length slightly longer than you think. If your curl pattern is tight and unpredictable, see a stylist who cuts for curls.
Q: How often should I use Olaplex No. 3 on highlighted bangs or money pieces?
A: Once a week usually does the trick for maintenance after lightening. Use it for 20 minutes before shampooing. It smooths the appearance of stressed ends until you can get a trim. Buy from the official seller on Amazon or grab it at Sephora to avoid counterfeits.
Q: My bangs flip funny at the temple. What am I doing wrong?
A: Most likely you are applying too much product at the root or drying them flat without a cool shot. Try a single pass with a round brush and finish with cool air to set the bend. If cowlicks persist, a stylist can reshape the root direction with subtle point cuts.