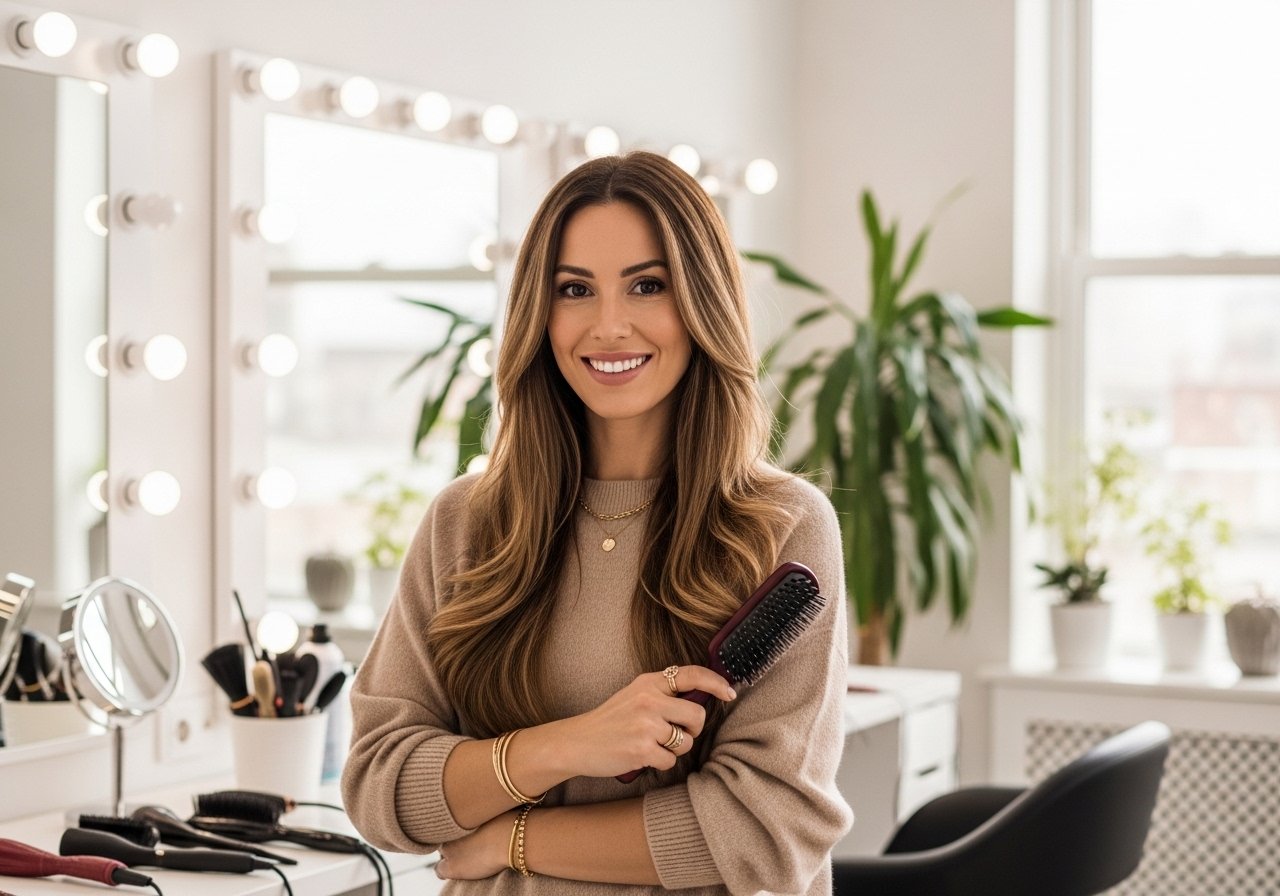
I got face-framing layers because my stylist said they would "open up" my face. Two days later I poked the front pieces and wondered if anyone else over-layered them. Since then I have learned which long hair layers actually behave in real life, how to style them without an hour in the bathroom, and when to say no to another round of thinning shears.
These ideas are aimed at straight to wavy 1B through 3C hair that sits shoulder-length to waist. Expect beginner to intermediate styling skills, most takes five to twenty minutes. Budget ranges from under $20 fixes to a one-time $150 splurge for a precise cut or tool. A few of the color tips are salon-only notes.
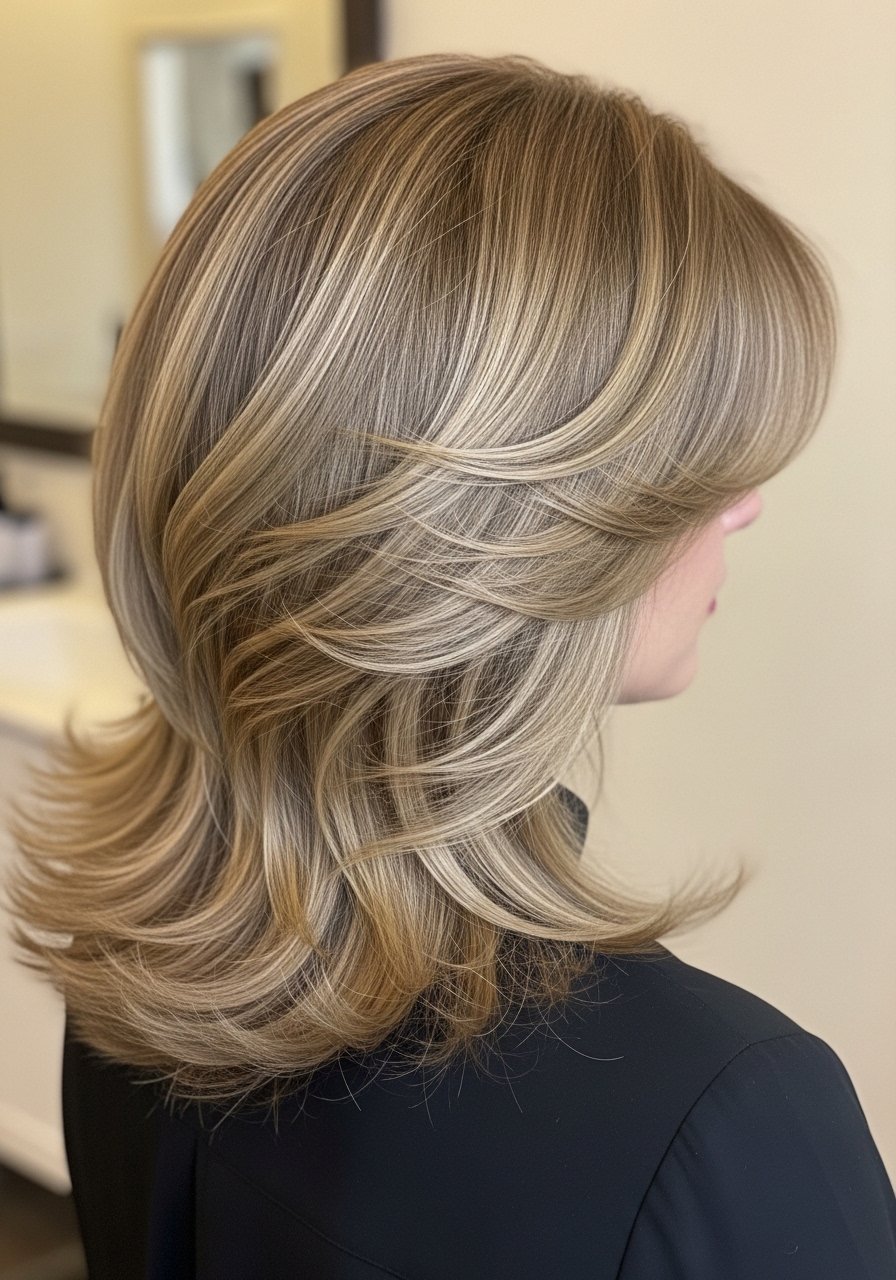
Face-Framing Curtain Layers for Oval Faces
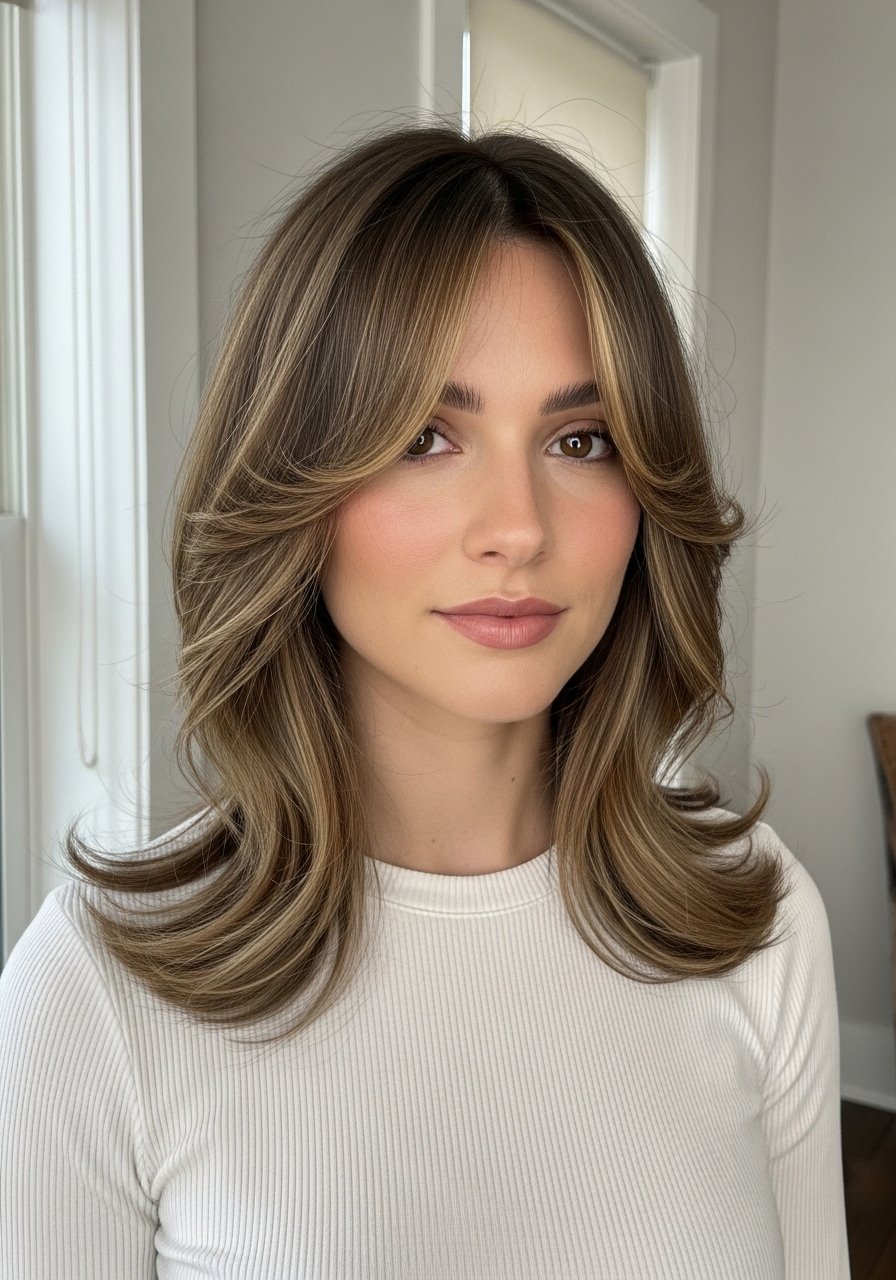
If your face is longer or oval, curtain-like face-framing layers give the illusion of width without chunky bangs. Ask your stylist for two to three graduated slices starting at cheek level, tapered with point-cutting so the pieces bend, not stick out. On wash day, I run a pea-size of leave-in through damp hair and set the front sections with a 1-inch barrel curling iron at about 320 F for one to two seconds just to flip them away from the face. Heat protectant goes on first, always. The mistake I see is over-thinning the front, which disappears after one wash. This is a smart DIY hold, but get a pro if you want the initial shape precise.
Long Shag Layers That Avoid the Triangle Effect
The long shag is a layered haircut that keeps length while removing weight from the top, which stops that flattened crown and voluminous ends triangle. For looser curls or waves, I ask for long interior layers, roughly four to six sections starting at temple level and stepping down in length. Styling is quick: apply a nickel-size cream, then two pumps of curl gel and use the LOC method to lock it in. The usual error is razoring every layer, which creates frizz. Salon cutting is preferable for shags because the layering angles matter, but a careful trim at home can maintain it between visits.
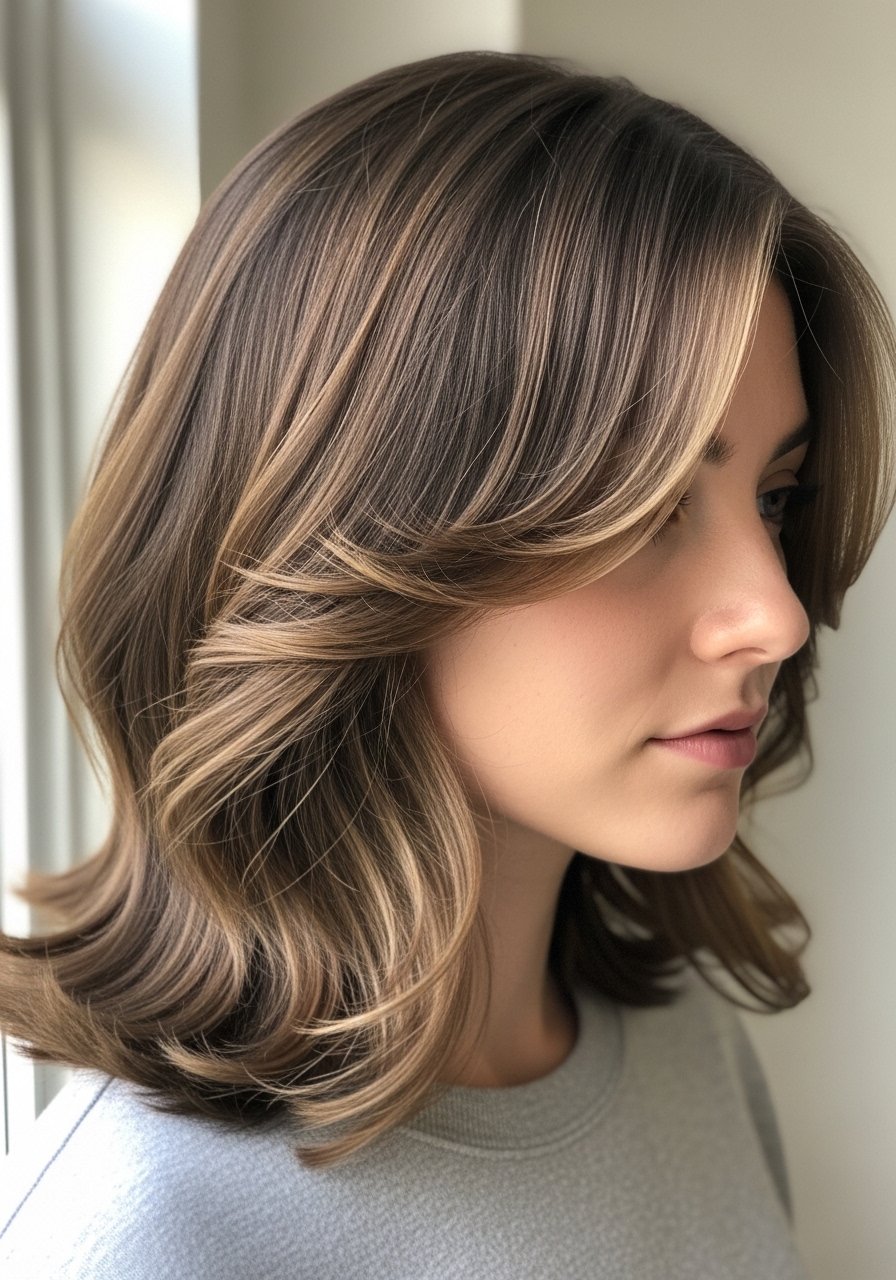
Soft V-Cut Layers for Fine Long Hair
Fine hair needs layers that add movement and the illusion of density without removing bulk at the ends. A soft V-cut keeps weight towards the middle and ends so the hair still reads long. Tell your stylist to keep the first face-framing layer low, around collarbone, and avoid chopping at eye level. On my fine days I use two spritzes of volumizing spray at the roots, then a 1.5-inch round brush blowout on medium heat for 90 seconds per section to get lift. Too much slicing at the ends is the common mistake. This is DIY-maintainable between every 12 to 16 weeks, and the cut stretches the most with minor trims.
Money Piece Face-Framing Highlights You Can Touch Up

A face-framing money piece brightens the face without a full color change. If you want to touch these up yourself, use a baby foil method with one to two slices on each side and a 10 volume lift for four to six minutes depending on your base. Patch test for scalp sensitivity first. The trade-off is maintenance, expect a six- to eight-week refresh if you want the contrast crisp. I keep mine subtle so root regrowth blends, and I always warn friends: lifting over existing dark dye is risky. If you have previously colored hair, book the salon to avoid breakage.
Long Layers for Thick Hair That Still Look Sleek
Thick hair can end up too heavy or too blunt with long layers. The trick is to remove internal weight rather than chopping visible lengths. Ask for vertical slicing through the interior and weight left at the ends to preserve a smooth silhouette. I use a pebble-size of smoothing oil on damp ends only and a paddle brush while blast-drying on medium heat, moving the nozzle for about 6 to 8 seconds per one-inch section for a polished finish. A common mistake is over-thinning the ends, which causes frizz. This cut is a salon job if you want it to sit right off the chair.
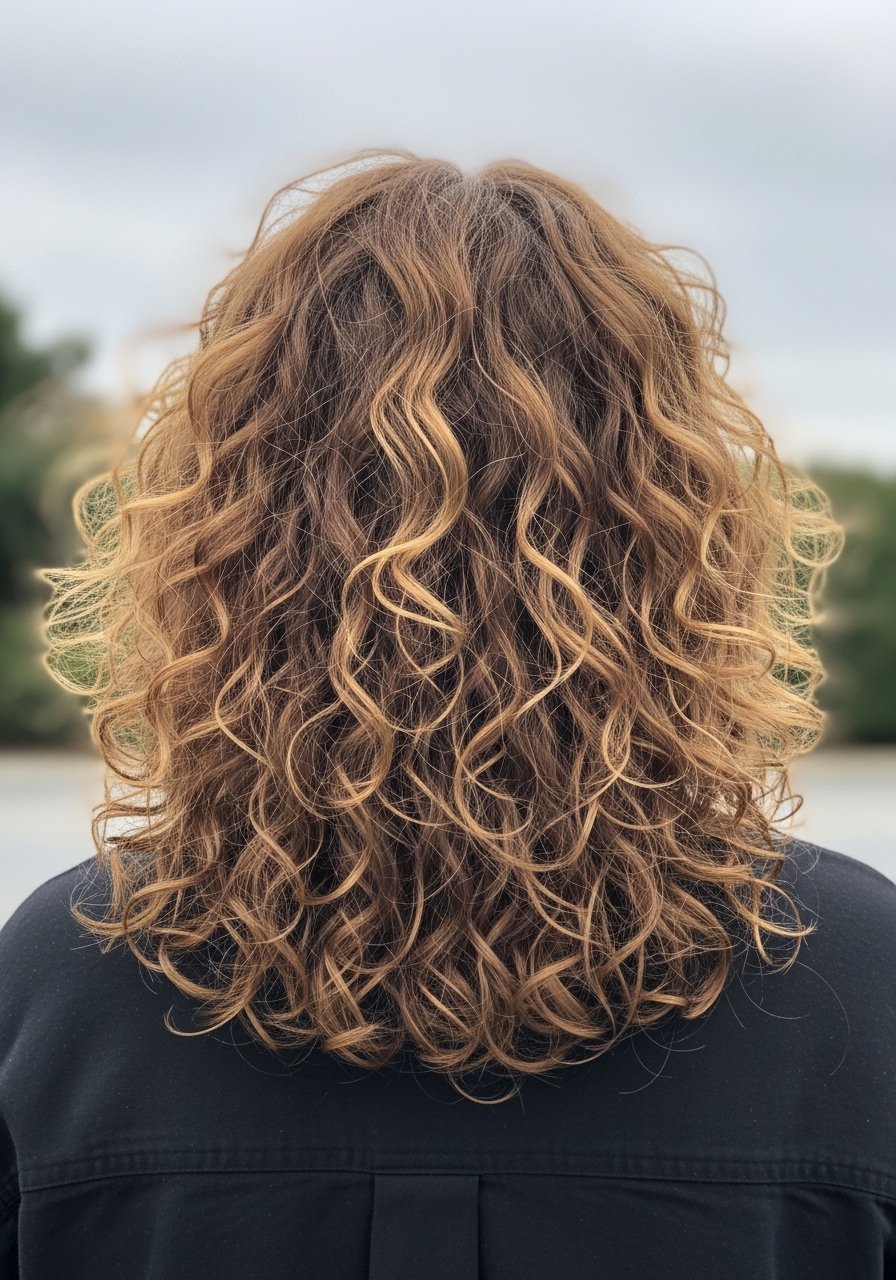
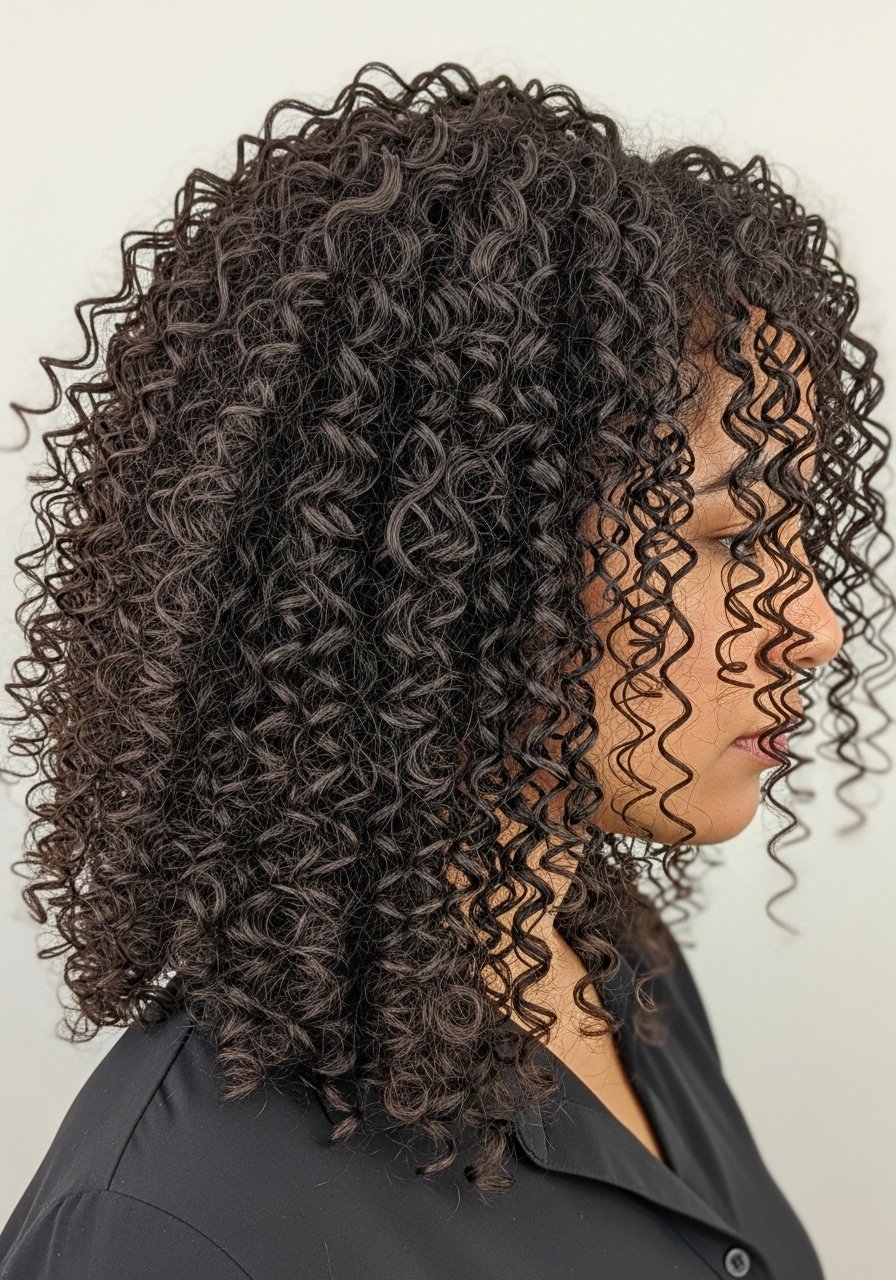
Layered Ends for Curly Long Hair That Keep Shape
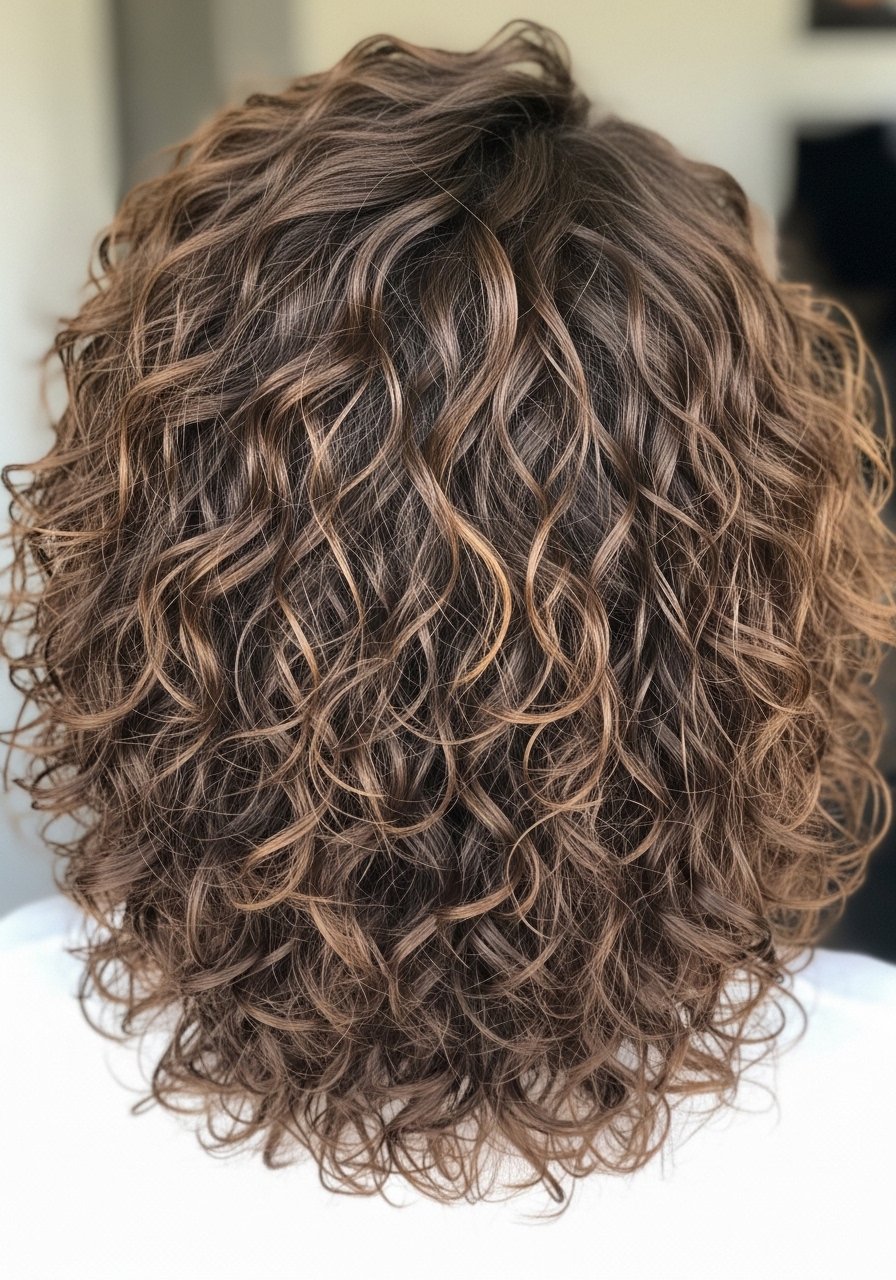
Curly hair needs layers that preserve curl pattern. Ask for long layers that are cut dry, section by section, so the stylist sees how each curl sits. I had my hair freshly cut that way and it saved me hours of detangling. On styling days I apply a walnut-sized leave-in, then two dime-sized scoops of curl cream into each quadrant, scrunch, and plop for 20 minutes. Avoid point-cutting curls when dry, because it can make the ends look frizzy. Dry cutting at the salon is the gold standard here, do not try complex curl layering at home unless you are experienced.
Feathered Face-Framing for Round Faces Without Adding Width
For round faces, the goal is to elongate visually, so feathered layers angle down and away instead of fuller pieces around the cheeks. I ask for long face-framing pieces that start a bit lower than the cheekbones and are feathered with a 45-degree angle. In styling, I sweep those sections with a flat iron at 320 F for one pass away from the face and finish with a pea-size of lightweight oil on the ends. The mistake is cutting chunky pieces that sit at cheek height. This is a precise cut, a salon visit is worth it the first time.
What I Actually Keep in My Long Layers Kit
A small curated list of products and tools that kept my long face-framing layers looking intentional, not messy. Everything here worked on my long wavy to straight hair and the picks are the items I repurchased.
- Honestly the best $30 I spend on maintenance. Olaplex No. 3 Hair Perfector 3.3oz once a week fixed my brittle ends. Buy from the official Olaplex store on Amazon or Sephora to avoid counterfeits
- For daily volume at the roots, dry shampoo spray under $10 does the trick without residue
- For heat protection before any iron over 300 F, Color Wow Pop and Lock heat protectant 6oz gives real shielding
- A mid-size 1.25-inch curling iron for soft face-framing waves, set to 320 to 350 F depending on hair density
- Wide-tooth detangling comb for wet curl sectioning, under $8
- Silk pillowcase queen under $30, I sleep on it every night
- Boar bristle paddle brush to distribute oil down long layers without breakage
- Claw clip large for quick half-up pieces that keep face-framing layers out of the way
- Leave-in conditioner spray 8oz for detangling and daily protection
- Split-end trimming scissors for small at-home dusting, used only on dry hair
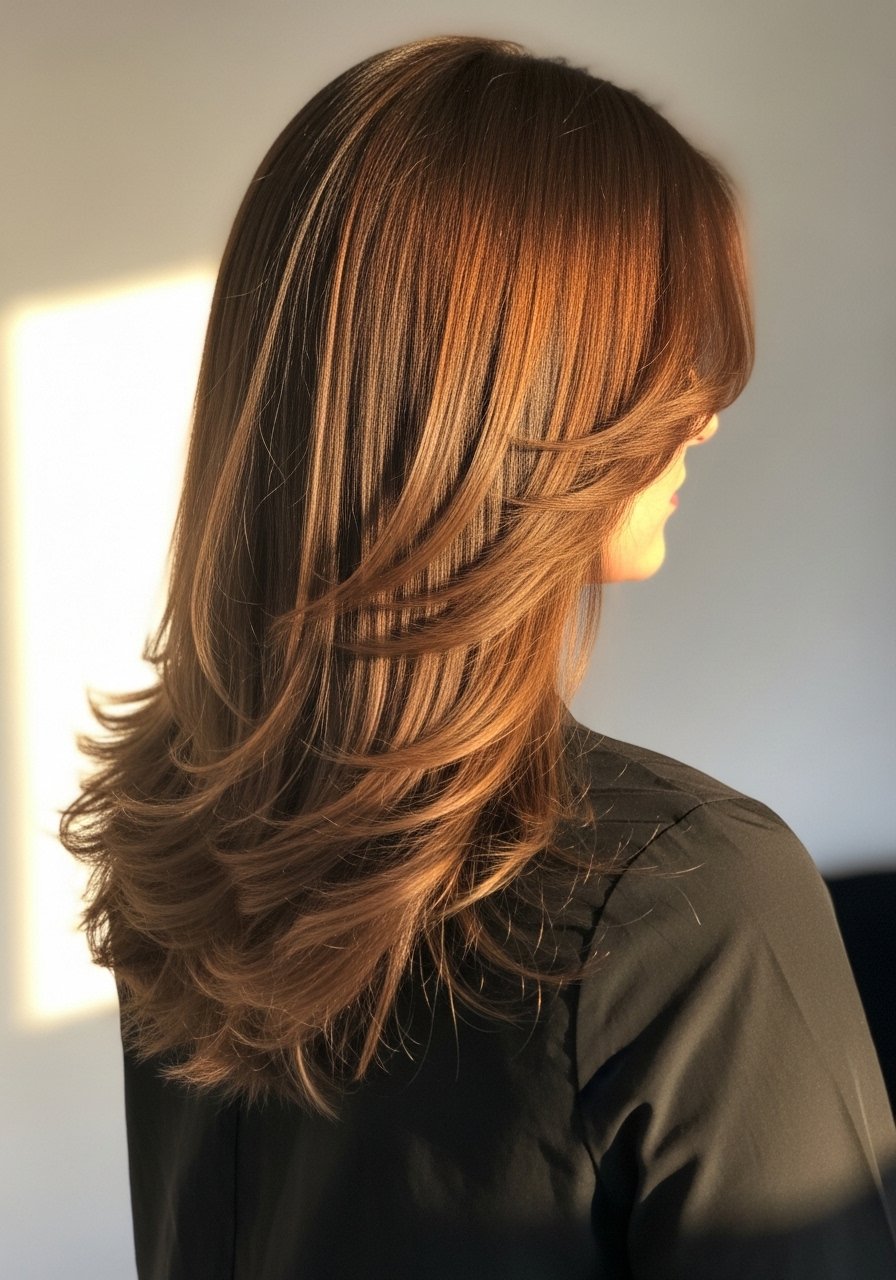
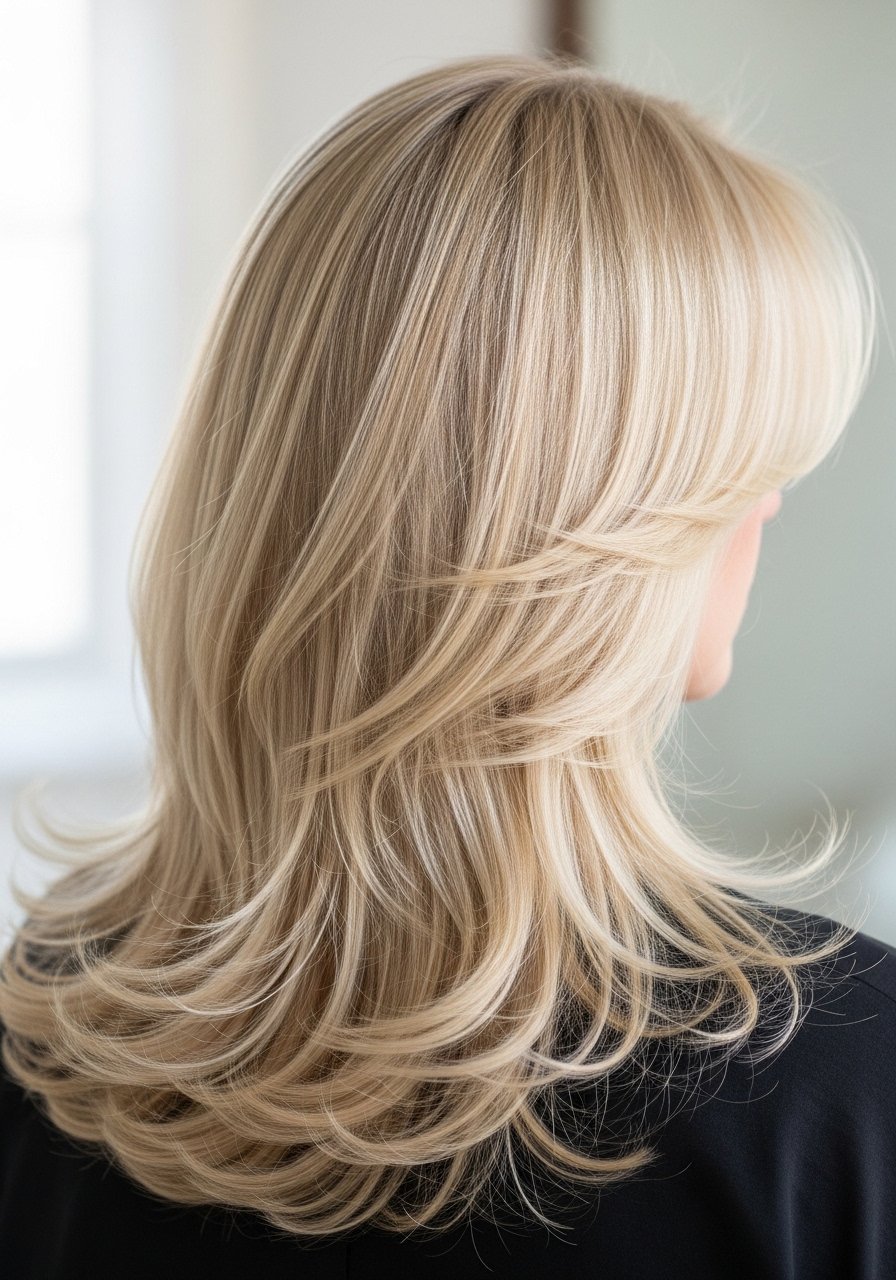
Blunt Long Layers for a Glossy Finish
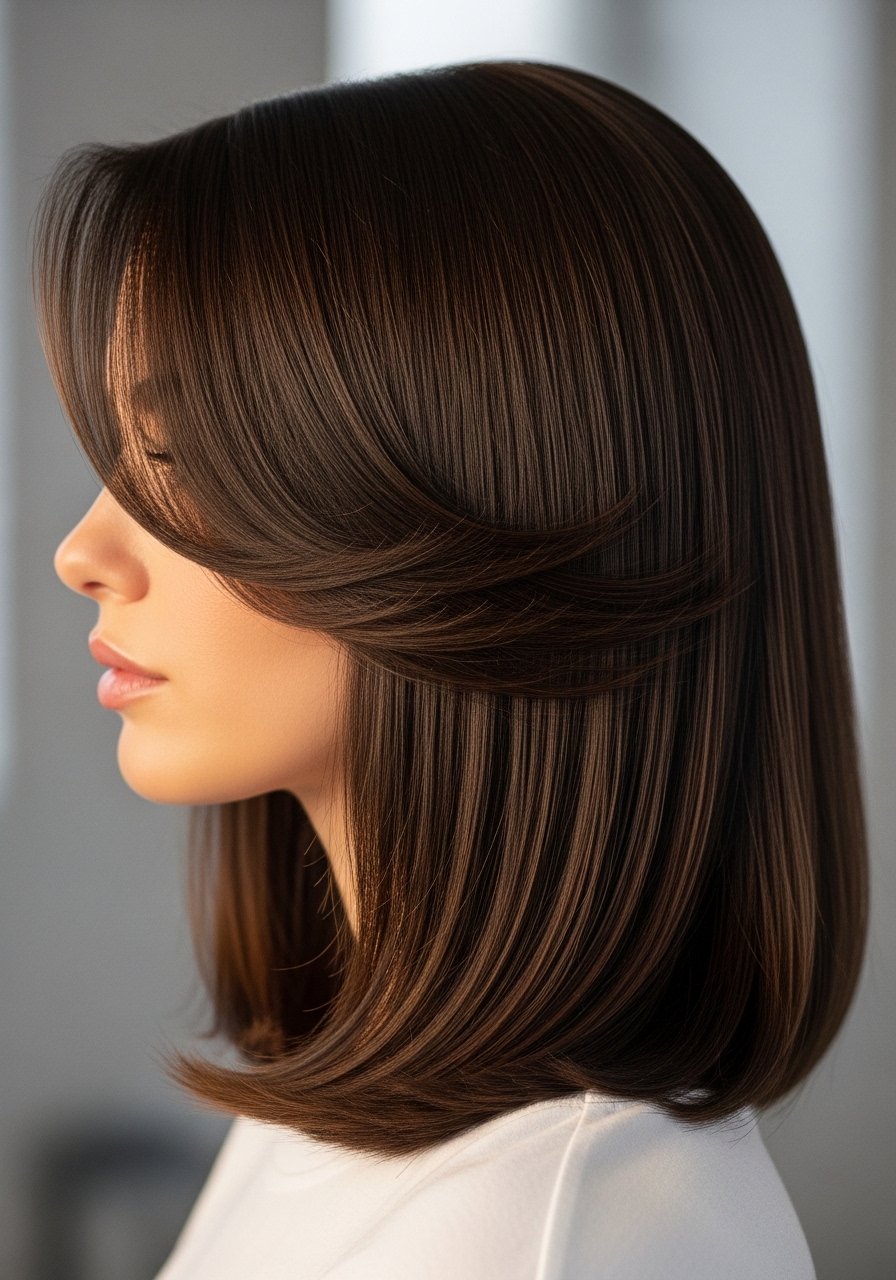
Blunt long layers read as polished because the weight makes ends look fuller. I keep one blunt long layer that frames the face and blends into the rest. After I wash, I apply a quarter-size of smoothing cream on damp hair and blow-dry with a round brush, finishing with a flat iron set near 320 F, two slow passes max. Always use heat protectant first. The typical mistake is flattening the hair by over-straightening at high heat. This cut is easy to maintain at home as long as the initial precision cut was done well.
Layering Long Hair With Bangs Without Losing Length

Long bangs that blend into layers can freshen your face without sacrificing length. I tell my stylist to start the bangs at eyebrow length and angle them into longer layers using slide-cutting to avoid a hard line. Styling takes just 90 seconds: round brush the bangs away from the face on medium heat and finish with a dab of light hold cream at the tips. One mistake is creating a heavy fringe that needs constant trimming. If you want low maintenance, keep the bangs longer and blended.
Layered Face-Framing for Thick Curly 4A Hair
Type 4A hair benefits from shorter face-framing layers that reduce bulk and let the curls fall forward. On my friend with coils, the stylist cut the front in two to three graduated sections while dry, so each curl sits naturally. For styling, use the LOC method with a generous leave-in cream, then seal with a light oil. One frequent error is cutting 4A hair wet then expecting the same shape when dry. Always cut curls dry for predictable results, and avoid scissors with too much point cutting which makes the edges fuzzy.
Texturizing Long Layers for Natural Movement
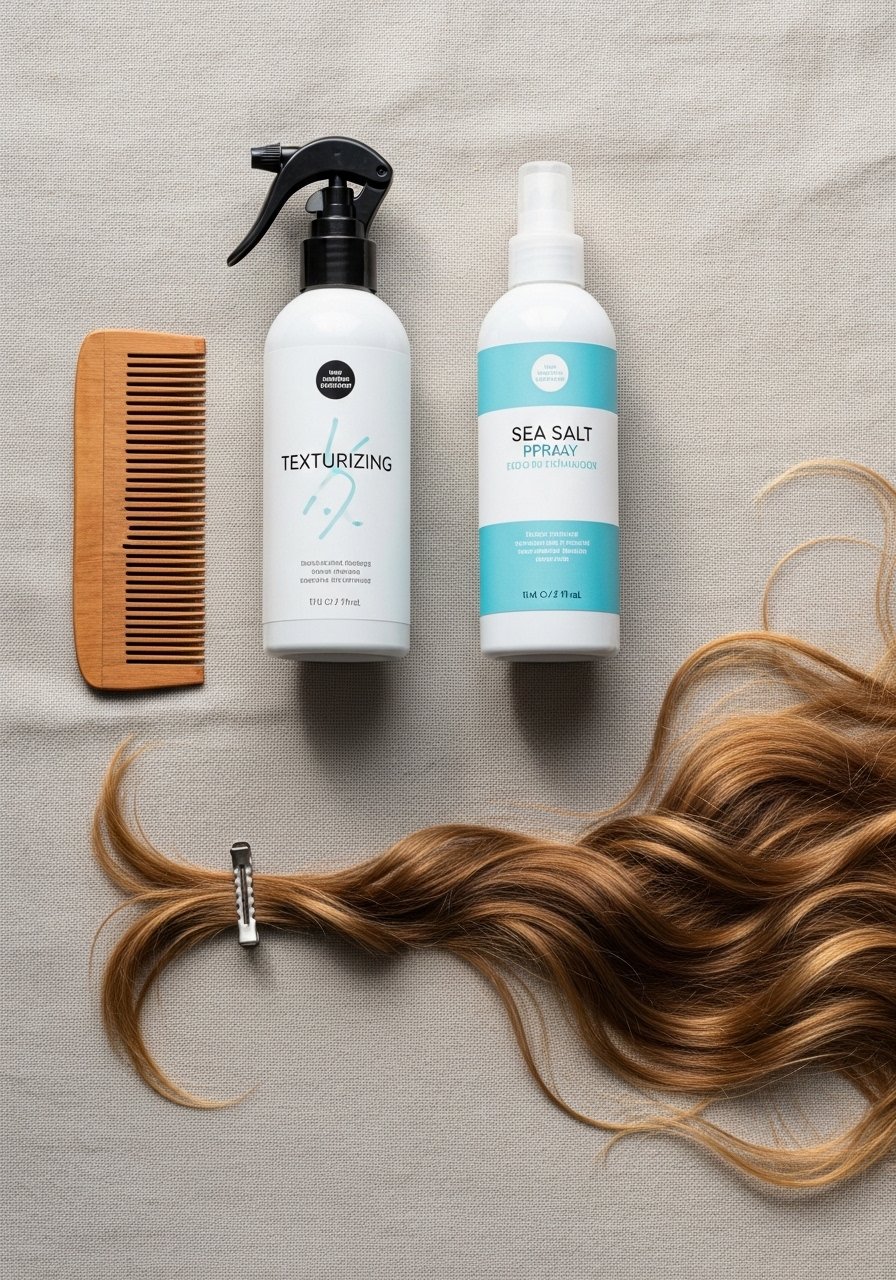
If your layers look flat, a little texture is the secret. Use a spritz of texturizing spray at mid-lengths and ends, then rake through with fingers. For long hair I divide into four sections, spray two pumps per section, and scrunch briefly. The 80/20 product placement rule helps here, place most product mid-length rather than at the scalp to avoid weighing roots down. Too much salt spray makes hair crunchy, so start light. This is one of the easiest at-home tweaks that makes layered cuts actually move instead of sit like dead weight.
Face-Framing Layers for Long Hair After Bleach
Bleach demands caution. If you are lightening the face-framing pieces, remember lifting over existing color increases breakage risk. Most stylists agree to do color correction in stages rather than aggressive single sessions. If you must try a touch-up at home, use a low-volume lift and limit processing time, and follow with a weekly bond builder like Olaplex No. 3 to reduce fragility. Always patch test for allergies and never lift over previously bleached strands without a salon consult. The safety note: heat on recently bleached hair needs to be very low and limited.
The Tools That Keep Face-Framing Layers in Place
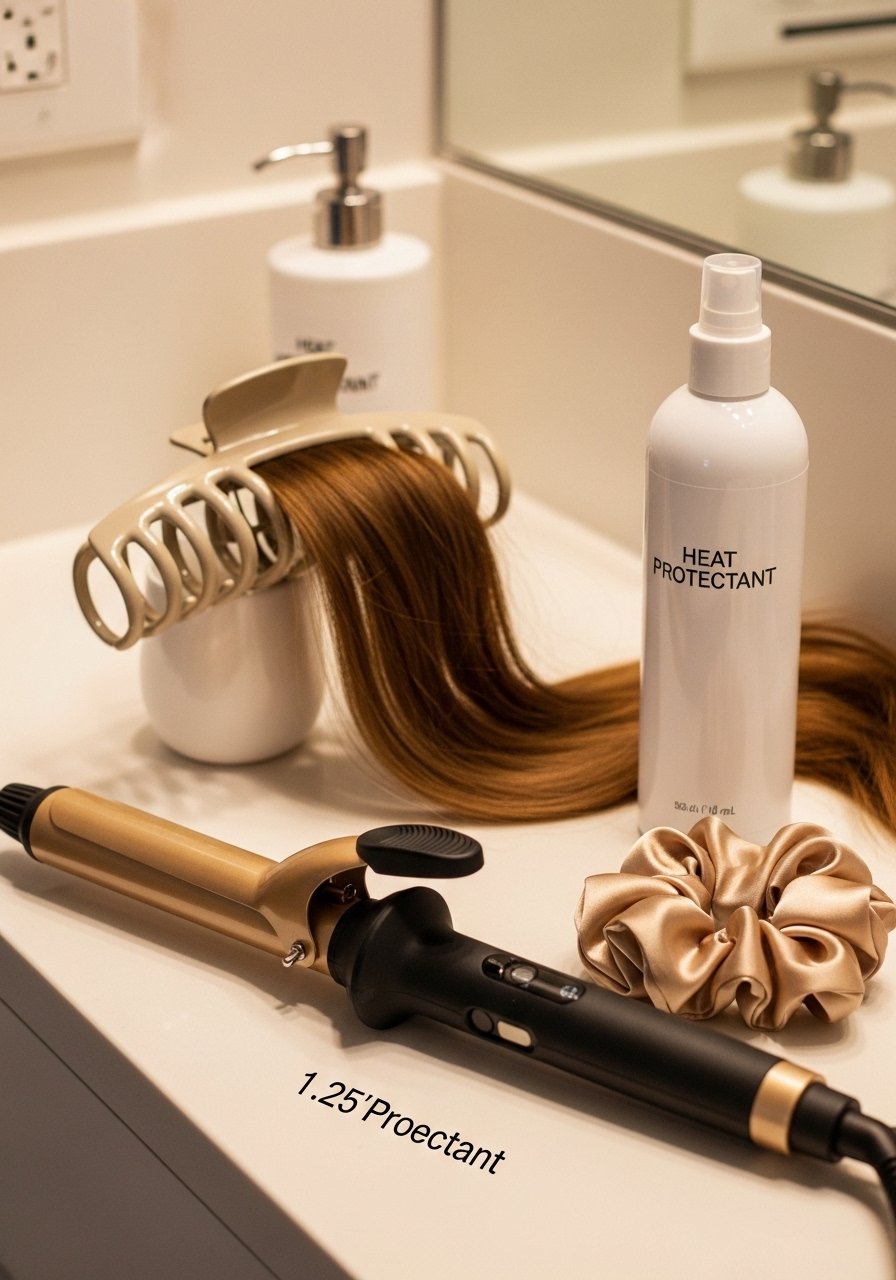
A few tools matter more than 10 different sprays. My everyday kit is a medium-barrel curling iron for soft bends, a large claw clip for quick half-ups, and a silk scrunchie for sleeping so the face-framing pieces do not crease. For blowouts I use a round brush and a vented paddle for speed. The Dyson Airwrap is nice if you style often, but a $30 1.25-inch iron hits the same look for weekly styling. Protect heat-sensitive layers with a product made for 300 F plus. The mistake is buying every gadget; pick two tools that work for your routine and get good with them.
Before You Ask for Layers, Read These Truths About Face Framing
- Hair grows about half an inch a month at most, regardless of what biotin gummies promise you. The real win is reducing breakage
- Most people apply leave-in to towel-dried hair, then wonder why it does nothing. Apply on damp, not sopping, hair and use heat to help it absorb
- If you have low porosity hair, warm up your product with a hot towel or a short diffuser on low so it penetrates
- Heat protectant must go on before any iron over 300 F. Color Wow Pop and Lock heat protectant 6oz is what I keep in my bag
- Watch for counterfeit Olaplex and K18 on marketplaces, buy from the brand store on Amazon or from Sephora/Ulta when in doubt
Frequently Asked Questions
Q: How often should I trim face-framing layers to keep the shape?
A: Trim every 10 to 12 weeks if you like a crisp line. If you prefer softer, grown-out layers, push it to 14 weeks. Dusting split ends at home helps stretch the salon visit, but avoid reshaping at home unless you are confident.
Q: Can I cut my own long layers at home without a stylist?
A: You can maintain and dust ends at home, but initial shaping, especially face-framing that needs precise angles, is best done by a professional. A small at-home trim is fine for removing 1/4 to 1/2 inch. One wrong slice and the front loses balance.
Q: Will layers make my thick hair look thinner?
A: Layers can remove bulk in targeted places and create a lighter silhouette without losing perceived thickness at the ends. Ask for interior thinning rather than chopping off lengths. Over-thinning the ends is the usual culprit for hair that suddenly looks sparse.
Q: How do I style face-framing layers to hide a high forehead?
A: Start the front layers slightly lower, around brow or lash level, and sweep them to the side with a low-heat round brush. A quick curl away from the face at 320 F for one pass softens the line and lowers the visual height.
Q: Can I use Olaplex No. 3 if my hair is not damaged, or will it make it worse?
A: It will not make healthy hair worse, but it is most noticeable on chemically treated or heat-damaged hair. Use it weekly if you heat style often, less if your hair sees minimal stress. Buy from the official store on Amazon or Sephora to avoid counterfeits.
Q: How often should I use purple shampoo on face-framing highlights without drying the pieces out?
A: Once every seven to ten days is a good starting point for moderate brass. If your hair is porous or already dry, reduce to once every two weeks and follow with a protein-free deep conditioner. Overuse is the number one reason highlights feel straw-like.