If you have ever touched up your own prom hair in a hotel bathroom and watched a chunk fall out, you are not alone. I have paid for salon fixes after DIY disasters, learned the exact heat settings that fry fine ends, and figured out which at-home tricks actually hold through dancing and humidity. These 15 easy updos for medium hair for prom are the ones I have tested on myself and friends, with real notes on time, tools, and the mistakes that ruin the look.
These styles work best on medium density hair, shoulder length to just below the shoulders. A few ideas adapt well to thicker hair if you pre-thin or add sections, and one or two suit loose curls through soft waves. Most takes 10 to 40 minutes, with three of them worth a 30 minute practice run. Budget ranges from under $20 for accessories up to $150 for an optional tool splurge. Try at home first unless you need drastic color or a tight lift.
Soft Low Chignon With Face-Framing Tendrils
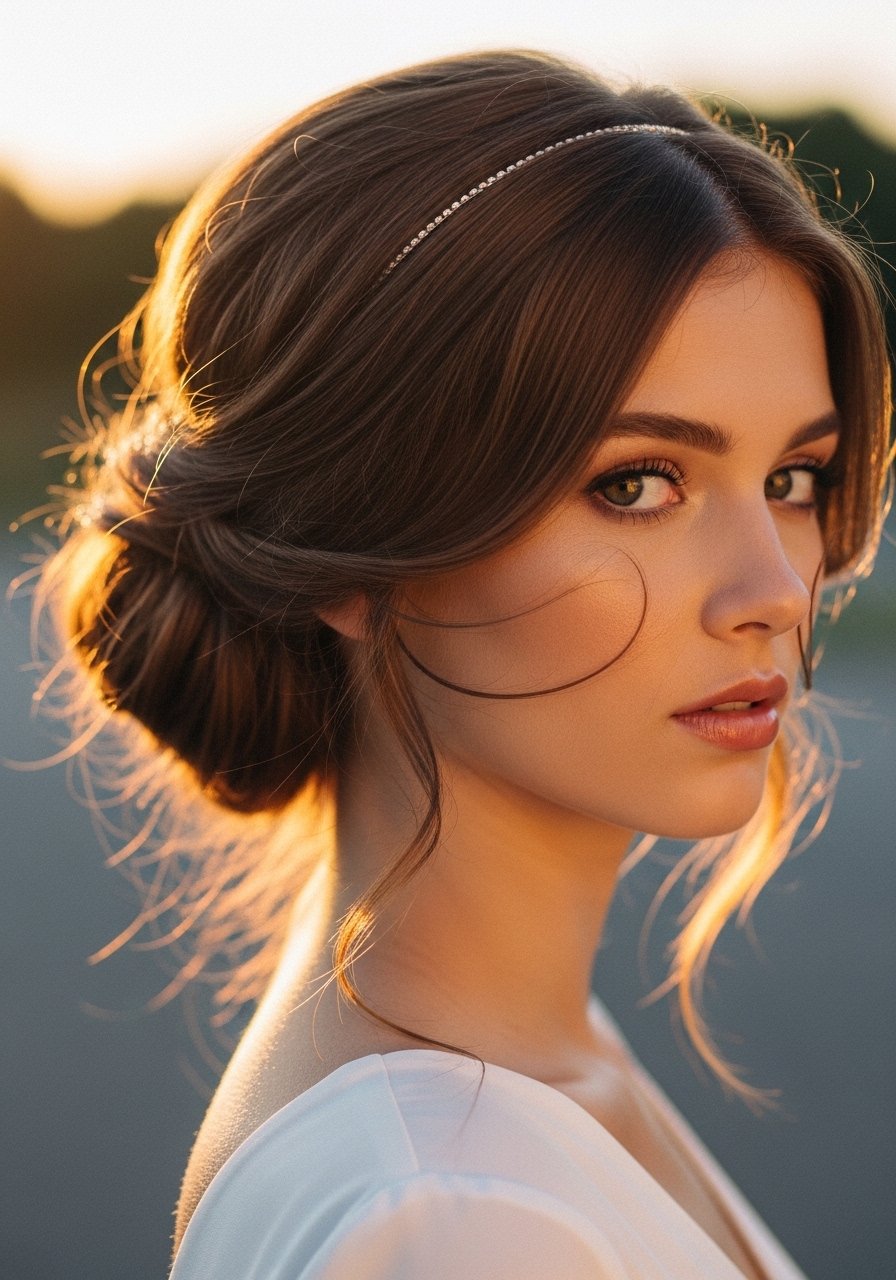
This is the classic prom fallback that looks expensive with almost no effort. Section hair into three horizontal parts before you work, clip the top two, and loosely twist the bottom third into a coil at the nape, pinning with a grid of bobby pins: I use eight pins for shoulder-length hair. If your hair is fine, two spritzes of a sea salt texturizer through damp hair gives grip. For thicker hair, pre-smooth the crown on low heat at 300 F and always apply heat protectant first. Common mistake, pulling the tendrils too thin so they singe while flat ironing. Salon note, ask for a softness finish not a lacquer job if you want movement.
Braided Crown That Hides Second-Day Oil
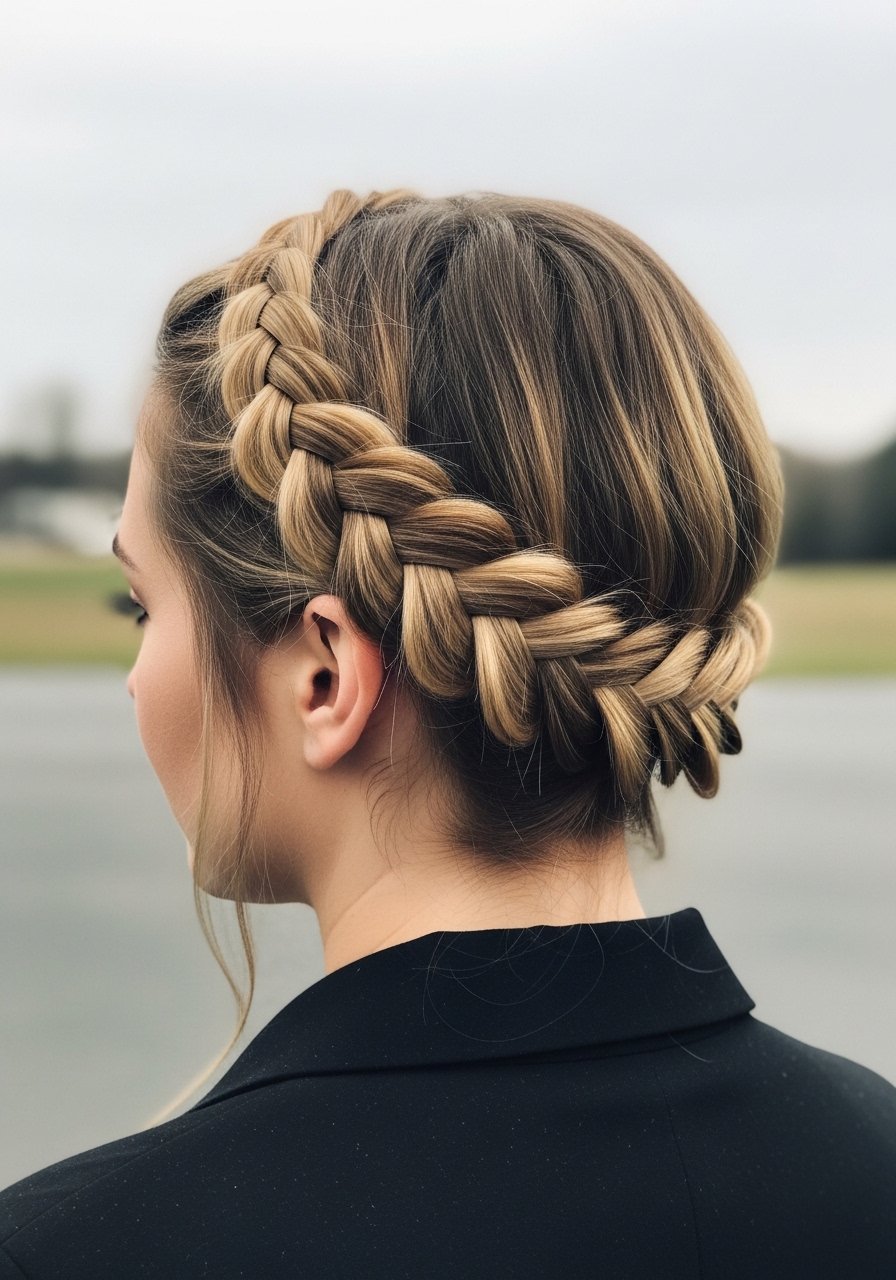
If you wake up with flat roots before prom, this braid hides oil and gives structure for hair that otherwise slips out of clips. Start with two Dutch braids from each temple, feed them into a loose crown and secure with pins every three inches. For shoulder-length hair do four to six sections total along the hairline for a fuller look. I tell friends to spray the underside with a light dry shampoo before braiding to add texture without dusting the visible hair. Mistake to avoid, braiding too tight at the start and creating a halo that makes your face look shorter. This is quick DIY that wears well through a long night.
Messy Top Knot With Wrapped Strand
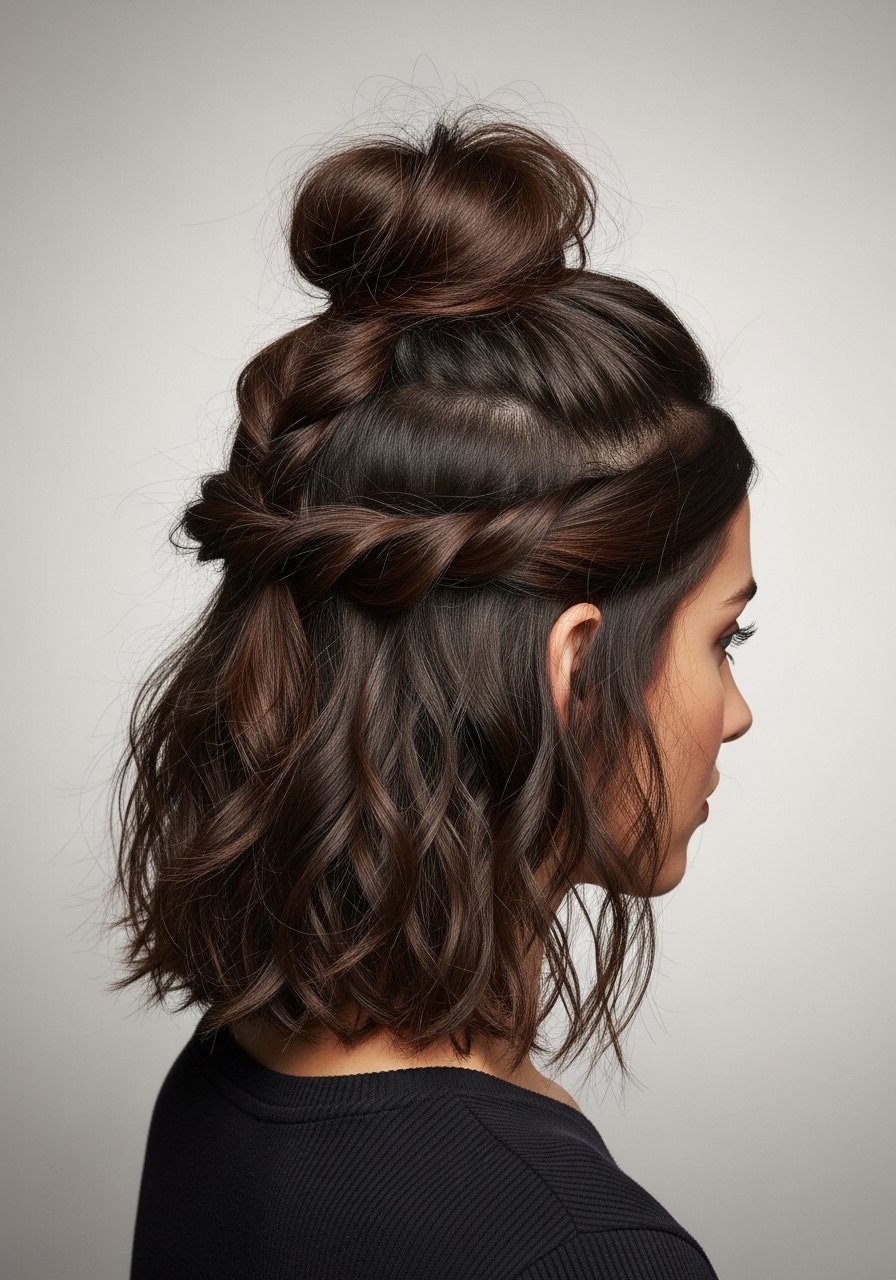
If you want height without a strict bun, this is the prom version that still looks intentional. Gather hair into a high pony, leave about 1.5 inches at the end, coil the pony into a loose knot and wrap the leftover strand around the base to hide the elastic. Two of my friends with 2B waves did this in 12 minutes flat. Use a medium hold spray so the knot softens instead of flattening. Common error, using a heavy wax that makes the knot greasy and clumpy. If your roots are slippery, add one pump of a styling paste at the base before tying.
Vintage-Inspired Rolled Bun
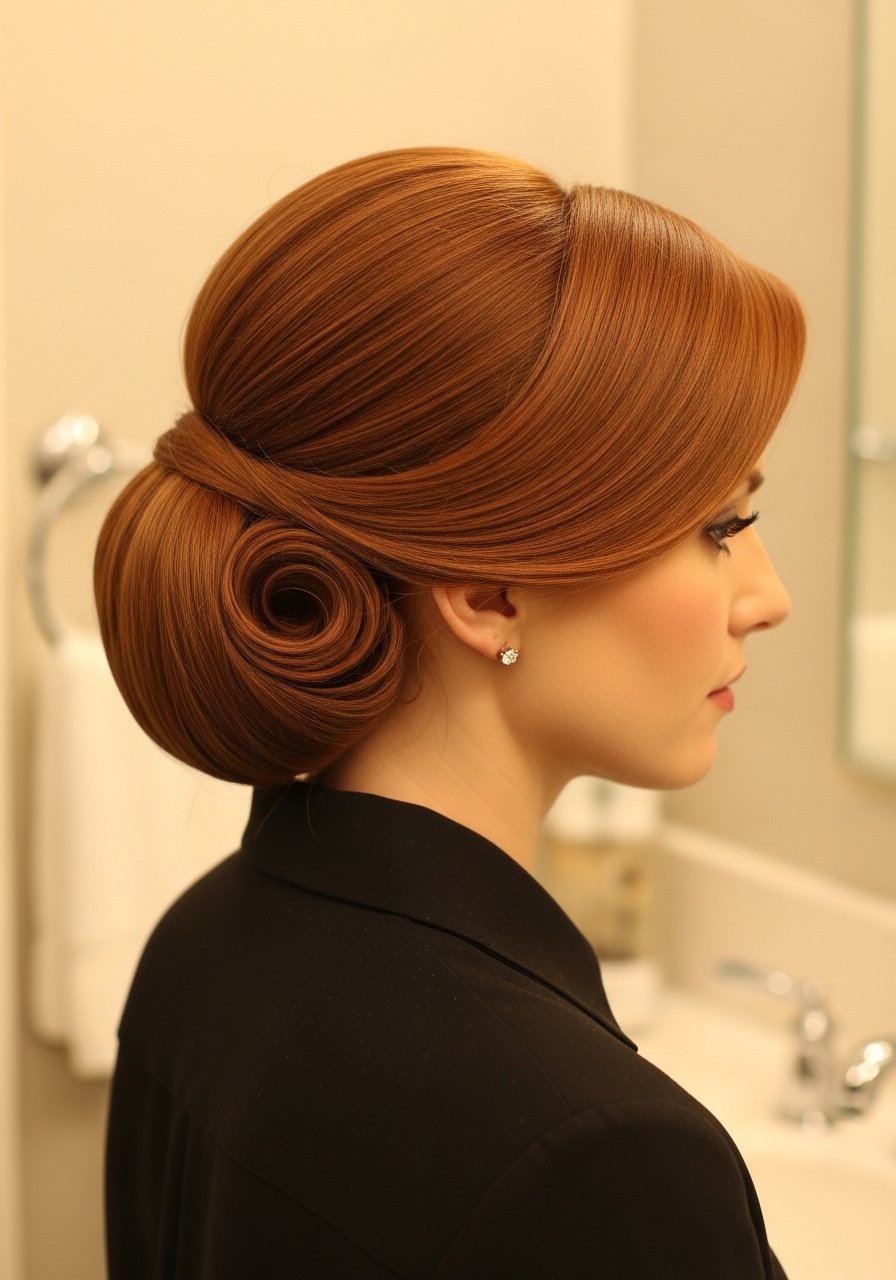
This 1940s roll gives a glamorous prom vibe without a full salon session. Create a clean center or deep side part, smooth the top with a boar bristle brush, then roll the ends under into a tuck at the nape and pin every two inches. For medium-thickness hair, two 1-inch sections at the front rolled inward create that signature shape. The secret detail most guides miss is backcombing a 2 inch section at the crown only, smoothing over with the brush to keep the shape but remove frizz. Heat warning, if you set curls first use 320 F on a 1 inch iron and a heat protectant.
Textured Half-Up Twist With Pearls
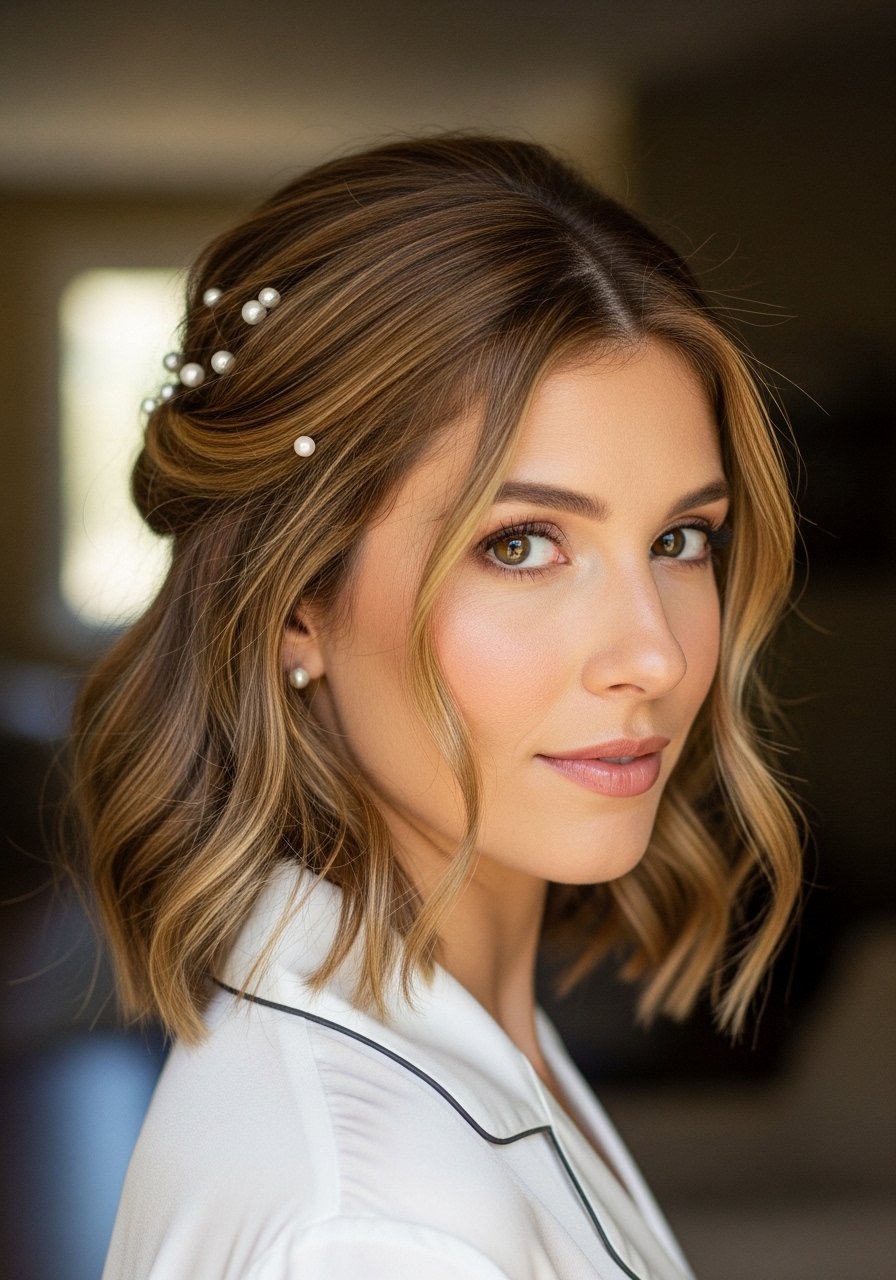
Half-up styles let you show earrings and keep hair off your face while keeping length. I section two front panels, twist them toward the back and secure with pins, adding pearl pins for prom polish. For texture, tease the crown just one finger width and mist with a salt spray for grip. If your hair is fine, use three pearl pins across the twist so it looks intentional. Mistake people make, using heavy serum on the lengths which makes pins slip. This is DIY friendly and looks better in photos than tight braids because it moves.
Rope Braid Low Pony Converted Into Bun
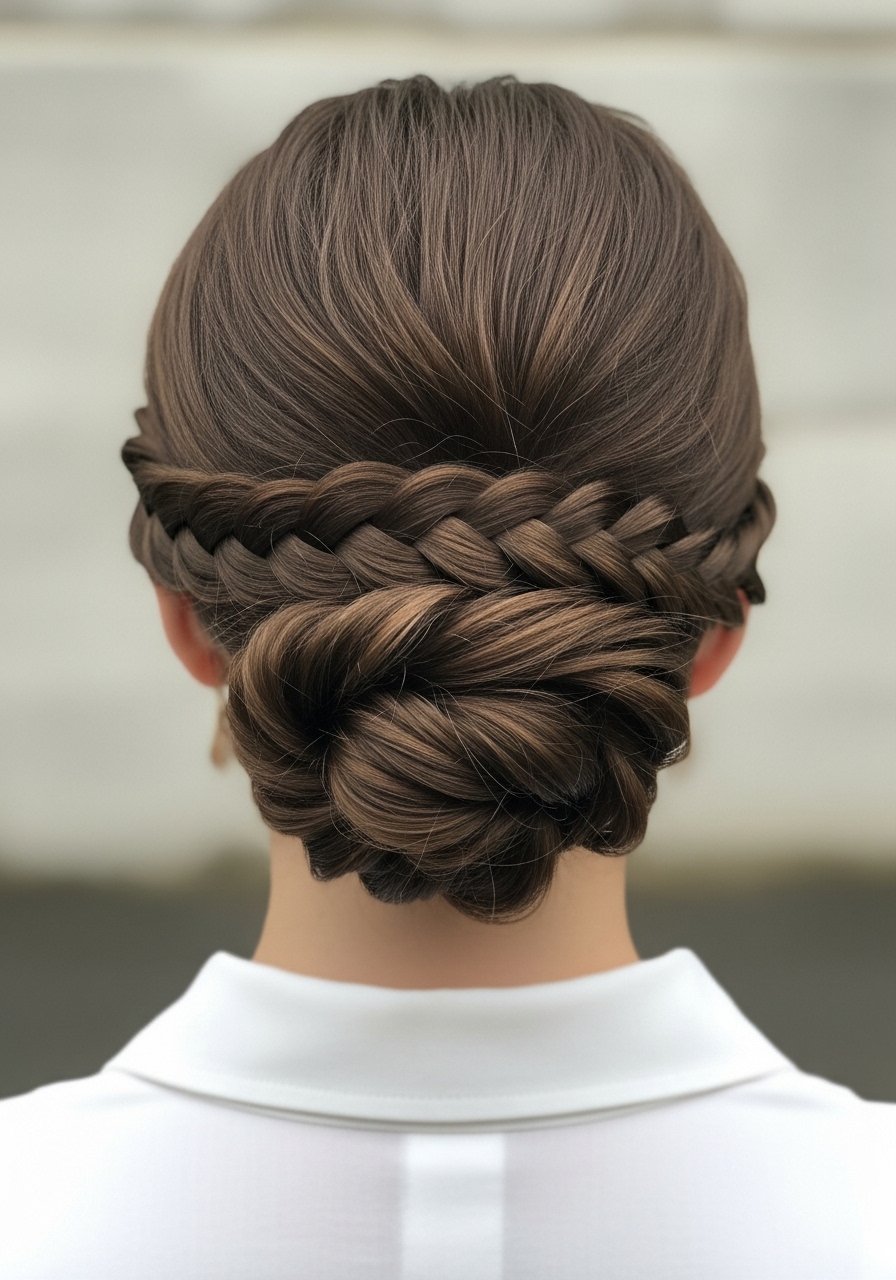
A rope braid gives a cleaner, twisted look and holds better than a plain three-strand braid in humid venues. Split hair into two sections, twist each section inward three full revolutions, then wrap them around each other. For shoulder-length hair, divide into three sections first at the crown so the braid reads longer. Convert the end into a small low bun and secure with six to eight bobby pins. Common mistake, skipping the initial smoothing step which causes flyaways. If you want extra grip, two sprays of medium-hold spray along the twists holds up through slow dancing.
Loose Fishtail Side Braid
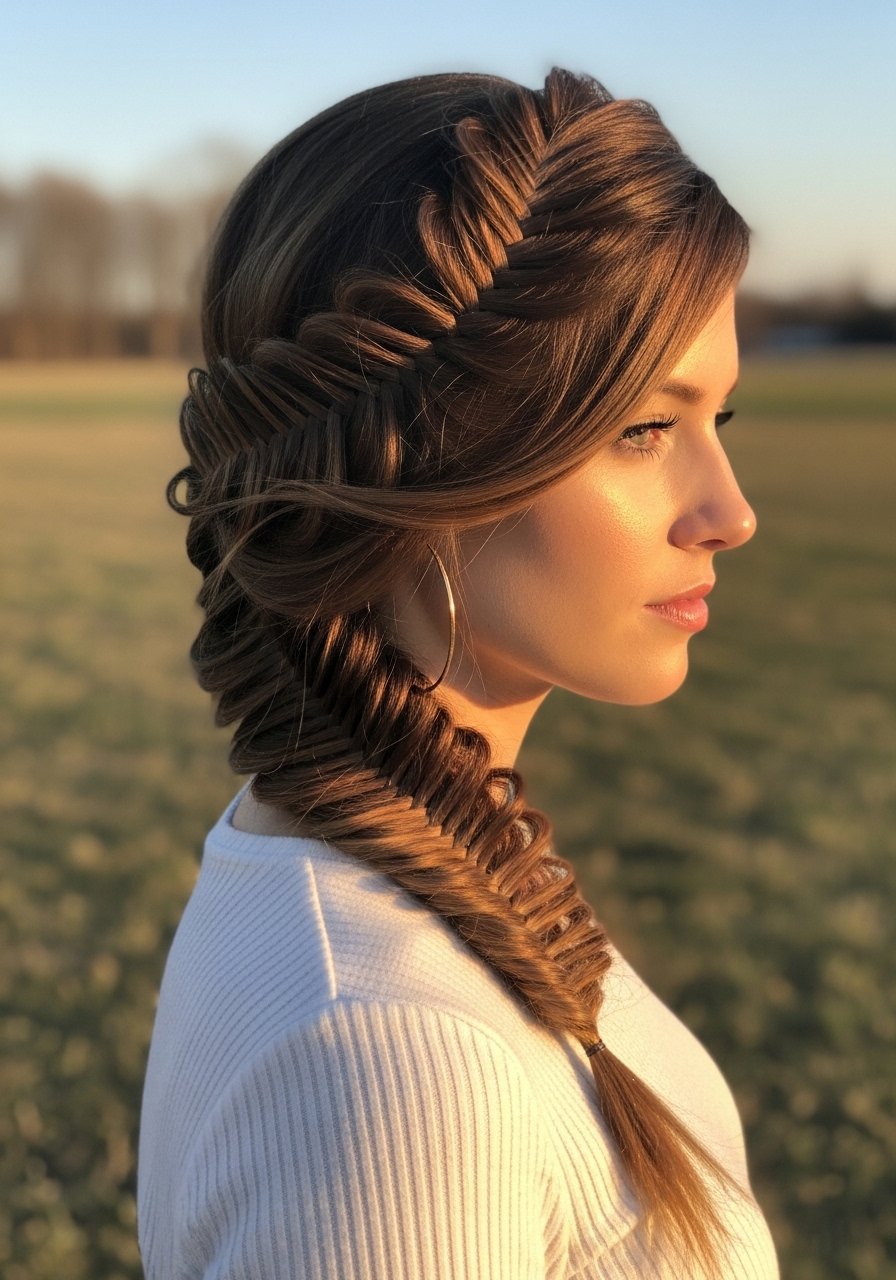
Fishtail braids look intricate but are forgiving if you pull pieces for volume. For medium hair, do a half fishtail from mid-shaft so the braid keeps length and movement. The small detail I use, mist the hair with water and one pump of light cream before braiding so the braid reads clean and does not puff. Time wise, this is 12 to 18 minutes. The mistake I keep seeing, over-tightening every inch which flattens the natural wave. If you want, add a tiny clear elastic then wrap a thin ribbon through the braid for a prom touch.
The Kit I Actually Pack for Prom Updos
- Honestly the things I reach for most nights out. Olaplex No. 3 Hair Perfector 3.3 oz. Use once weekly if your ends feel gummy, and buy from the official Olaplex store on Amazon to avoid counterfeits or grab it at Sephora.
- For texture, sea-salt texturizing spray 6 oz. Two spritzes is usually enough for shoulder-length hair.
- For smoothing and shine, lightweight heat protectant spray 6 oz. Remember heat protectant before any iron over 300F.
- Pins and grip, bobby pin mix 100 count. Use the matte pins for discrete holds.
- For volume, teasing brush and small round brush set. A 1.25 inch round brush is your friend for shaping.
- Night protection, silk-satin pillowcase queen size. Hair grows about half an inch a month at most, regardless of what biotin gummies promise you.
- For accessories, pearl hair pins 12 count. Affordable and they read luxe in photos.
- Backup tool, tourmaline ceramic 1 inch curling iron. Set to 300 F for fine hair and up to 350 F for coarse hair.
- Dry shampoo, matte dry shampoo 5 oz. Hidden roots saver when you need the style to start already textured.
Twisted Halo Braid for Round Faces
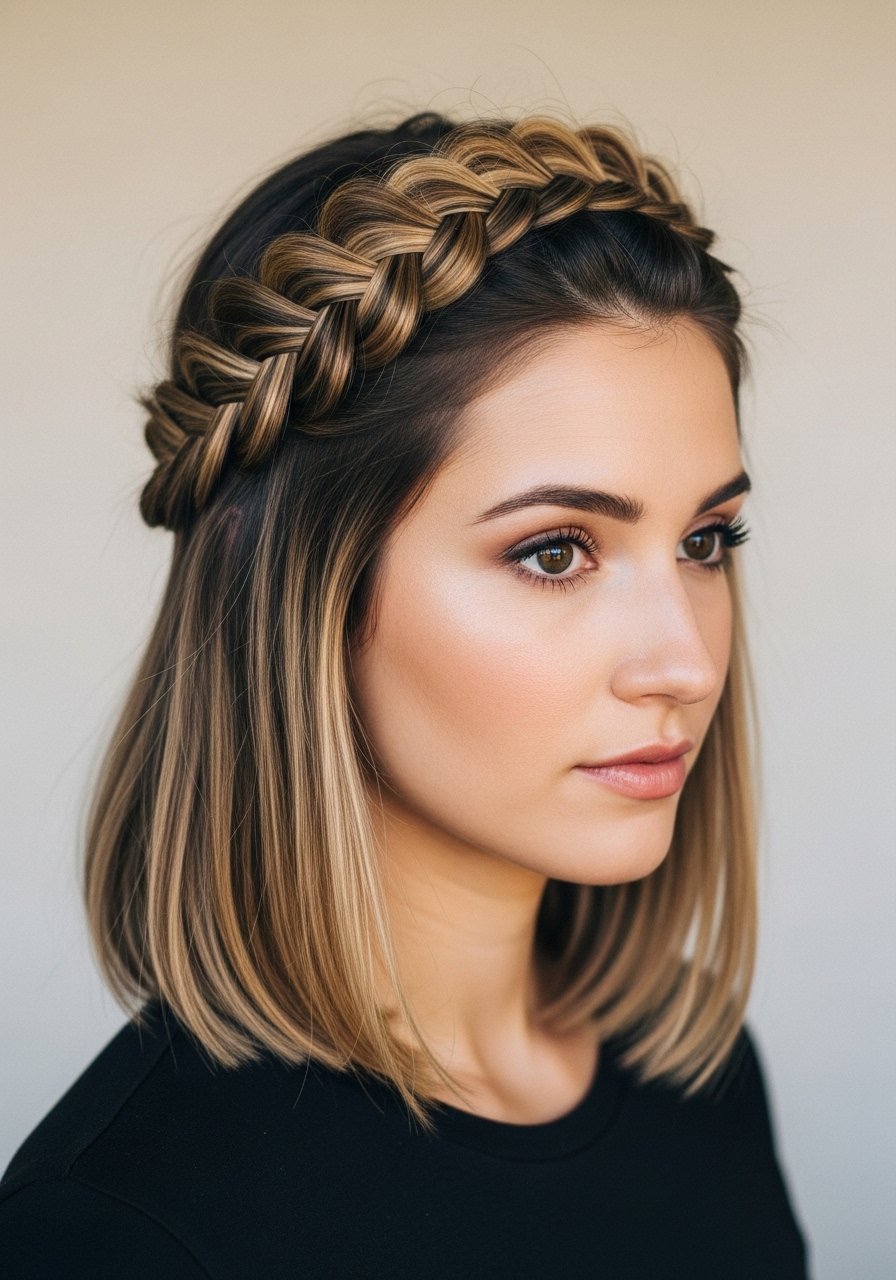
This braid lifts the face and elongates round shapes when you keep volume at the crown and leave a soft tendril at each cheekbone. Start with a front-to-ear section and twist toward the back, repeating on the other side and pinning under the opposite twist. For medium-density hair add a temperature-safe 1 inch iron set to 300 F to smooth only the outermost layer. The mistake is overteasing the whole crown which makes the style heavy and dated. If you want to make it last, dust the underside with dry shampoo before pinning.
Sleek Low Pony With a Wrapped Base
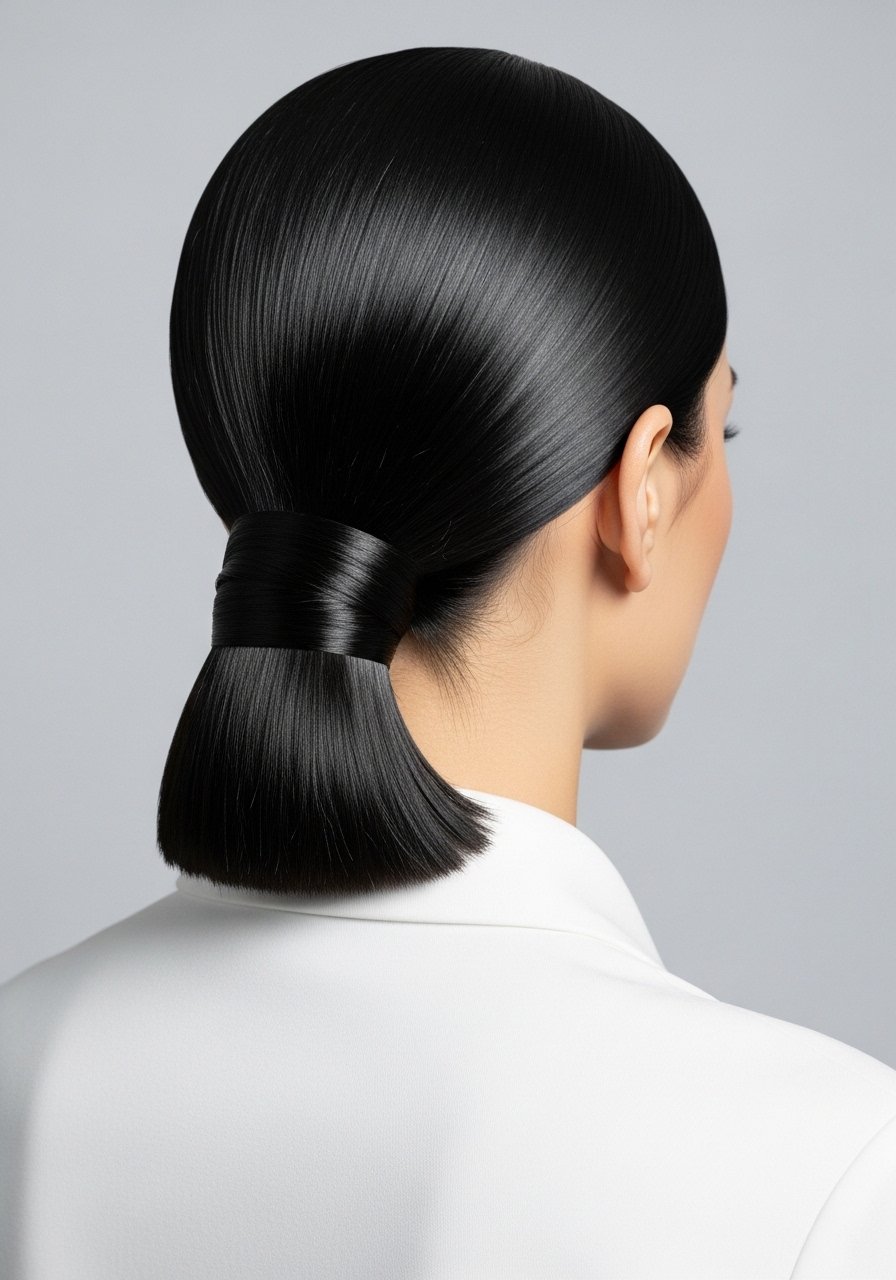
A clean low pony with a wrapped base reads modern and photographs well. Use a fine tooth comb and a few drops of lightweight serum on the lengths, then smooth roots and secure with a no-show elastic. Pull a one inch strand and wrap it around the elastic twice, pinning the end underneath. Heat note, if you smooth with a flat iron do the protectant-first rule and set the iron no higher than 320 F for medium hair. The common fail is using too much shine product which makes pins slip. This is one of the fastest prom looks, under 10 minutes.
Heatless Pin Curls for Long Medium Hair
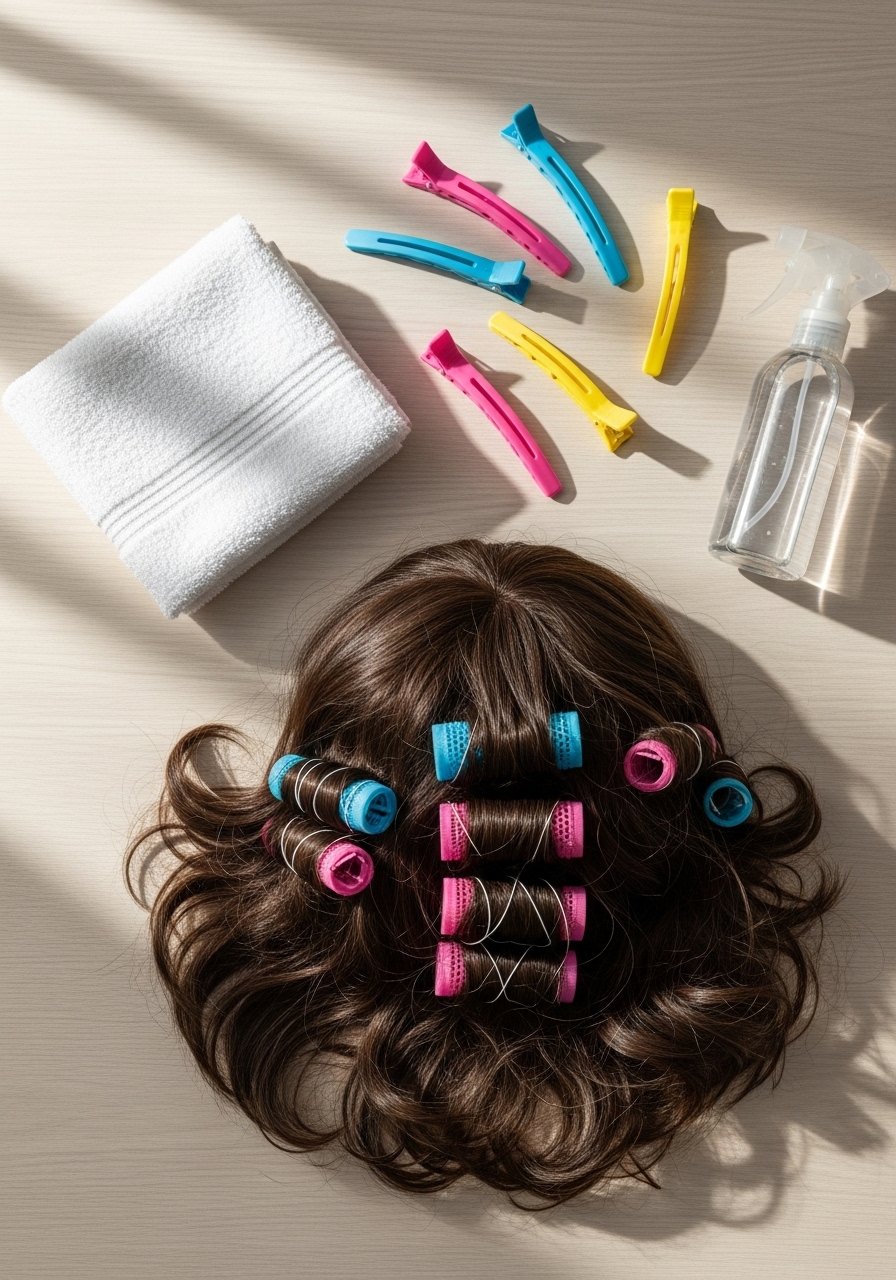
If you need curls that last without frying your ends, pin curls are the secret. Section hair into approximately one inch sections for tighter curls or two inch for softer waves. Roll each section toward the scalp and clip with foam clips, let sit three to four hours or overnight. For shoulder-length hair this creates bounce without heat damage. I pair this with a leave-in spray applied thinly at the start using the LOC method, leaving the oil step until the end. Common issue, leaving sections too large which yields weak curl hold.
Voluminous Half-Up With Teasing Shield
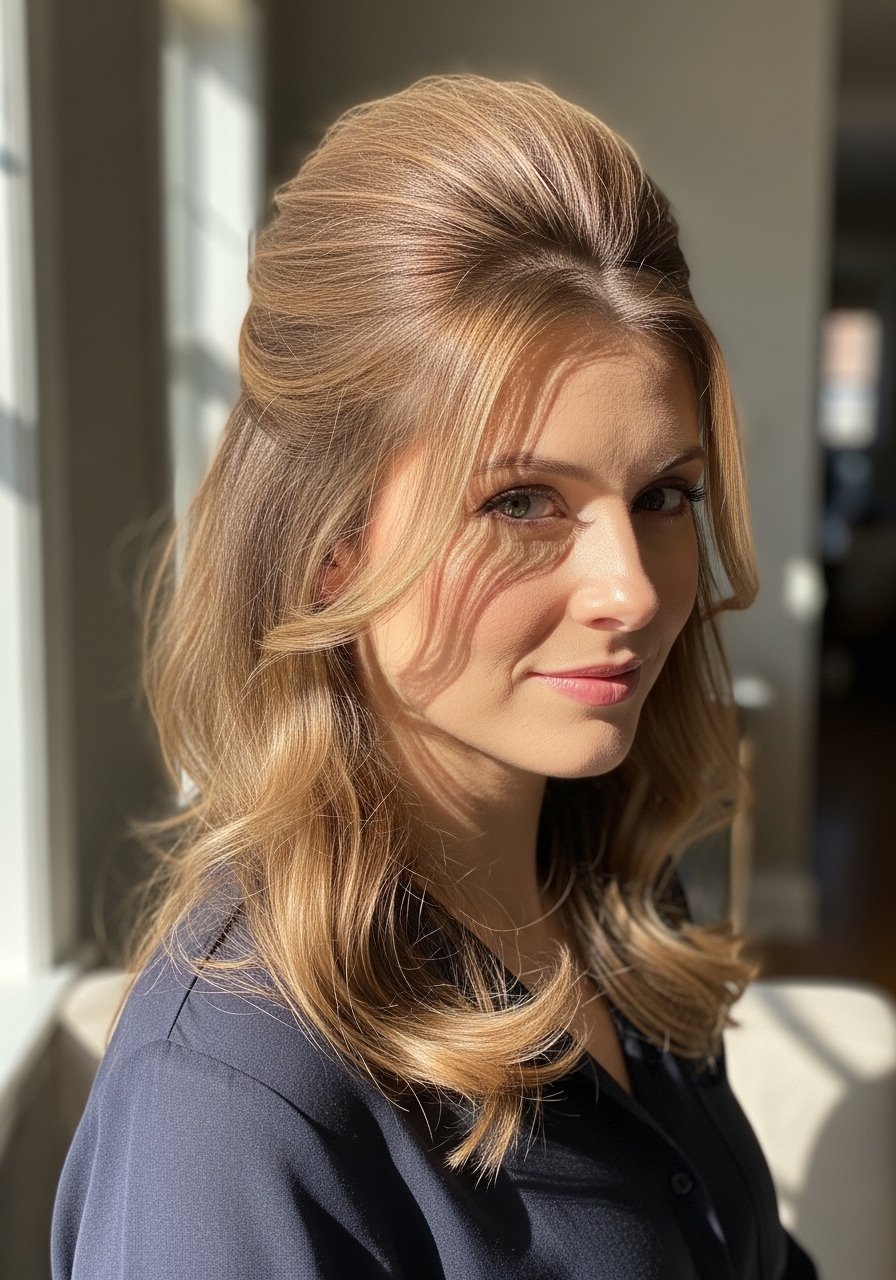
If you want height but not a full updo, this is the party style that withstands crowds. Take a 2 inch shield at the crown, backcomb gently into three short sections for durable lift, smooth the top layer over it, and pin. Leaving the rest of the hair in waves creates a romantic frame for the face. The detail I use, hold the teased section with a light mist and then blast with a 15 second cool shot from the blow dryer so the lift sets. Mistake, overteasing the entire crown which turns the shape into a helmet.
Low Knotted Bun With Hidden Bobby Pin Grid
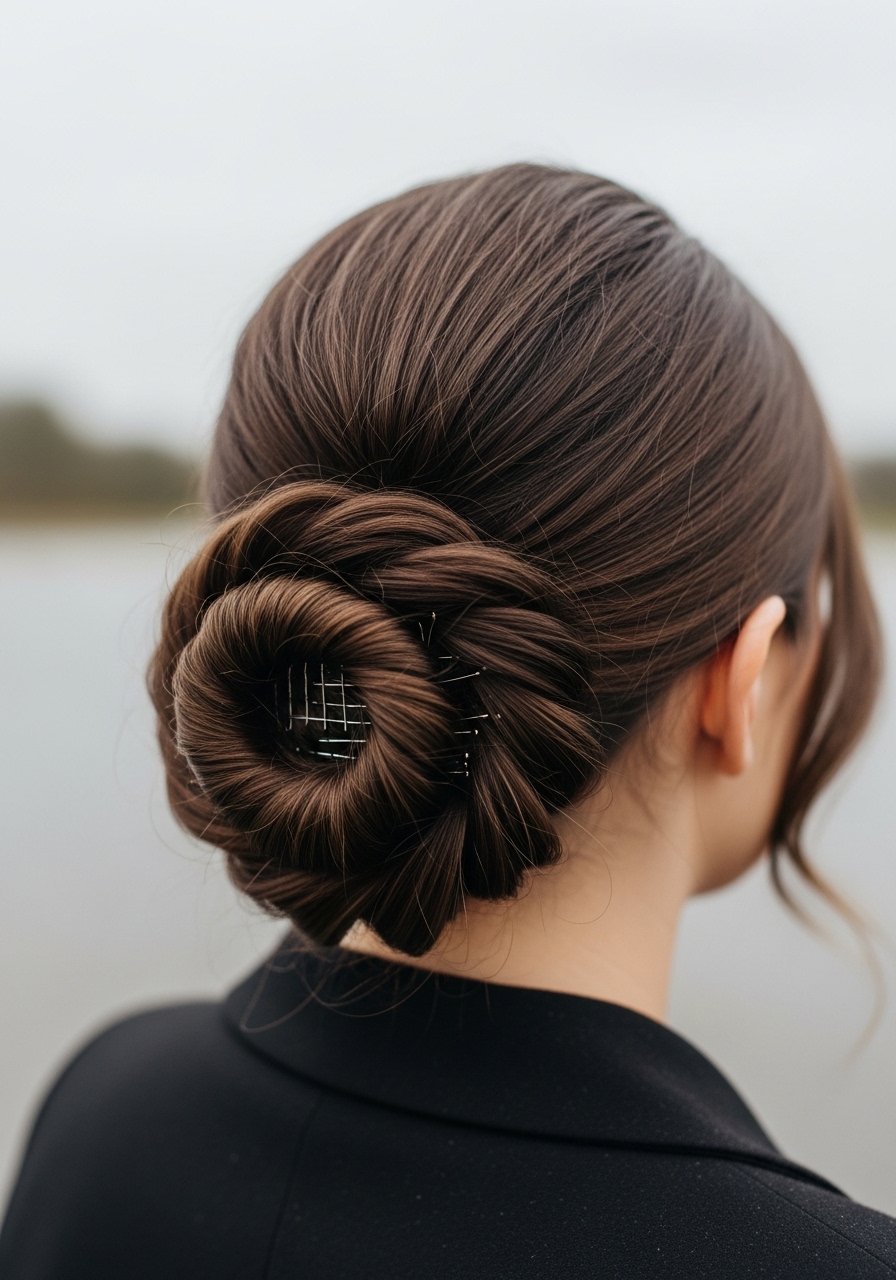
For weddings and long prom nights, security matters. After knotting the low bun, I slide in a small 5-pin grid under the knot and cross two pins in an X at the base. That grid is what keeps movement from loosening the knot. For shoulder-length hair expect to use seven to ten pins total. If you have fine hair, mist each pin with hairspray before inserting to add grip. Mistake, relying on decorative pins alone which tend to pop out. Salon vs DIY, a stylist will hide the grid more seamlessly but you can achieve the same hold at home with patience.
Dutch Braided Updo That Survives Dancing
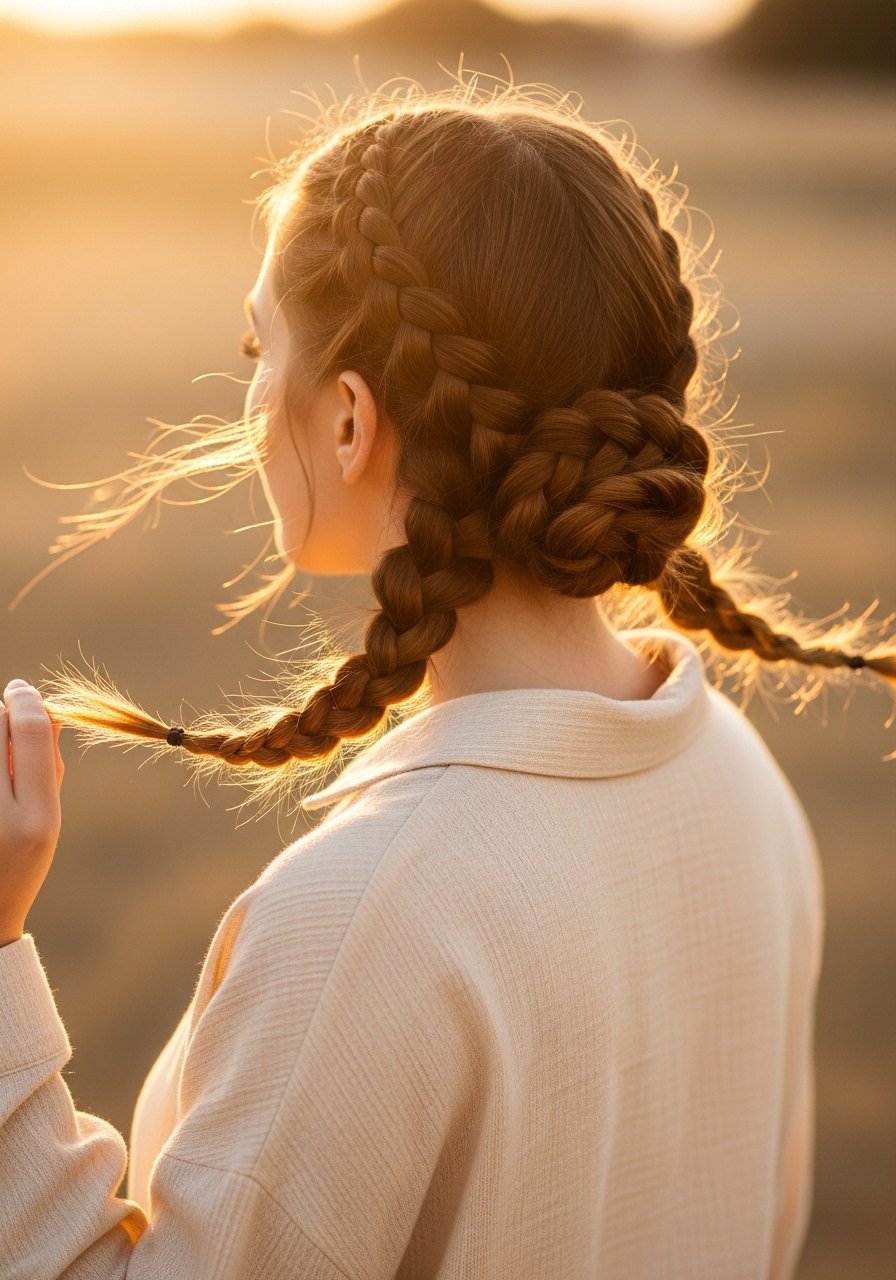
This is my go-to when I know I will be dancing hard. The inverted Dutch braids grab hair at the root and keep everything in place while giving that braided texture. Braid tight at first near the hairline, then relax the tension after three inches to keep the style from looking too flat. I finish by wrapping the braid ends into a bun and tucking them with pins. Common mistake, leaving the ends dry and frizzy. A single pass of oil on the tips before braiding keeps them neat without greasy roots.
Soft Chignon With Ribbon Tie
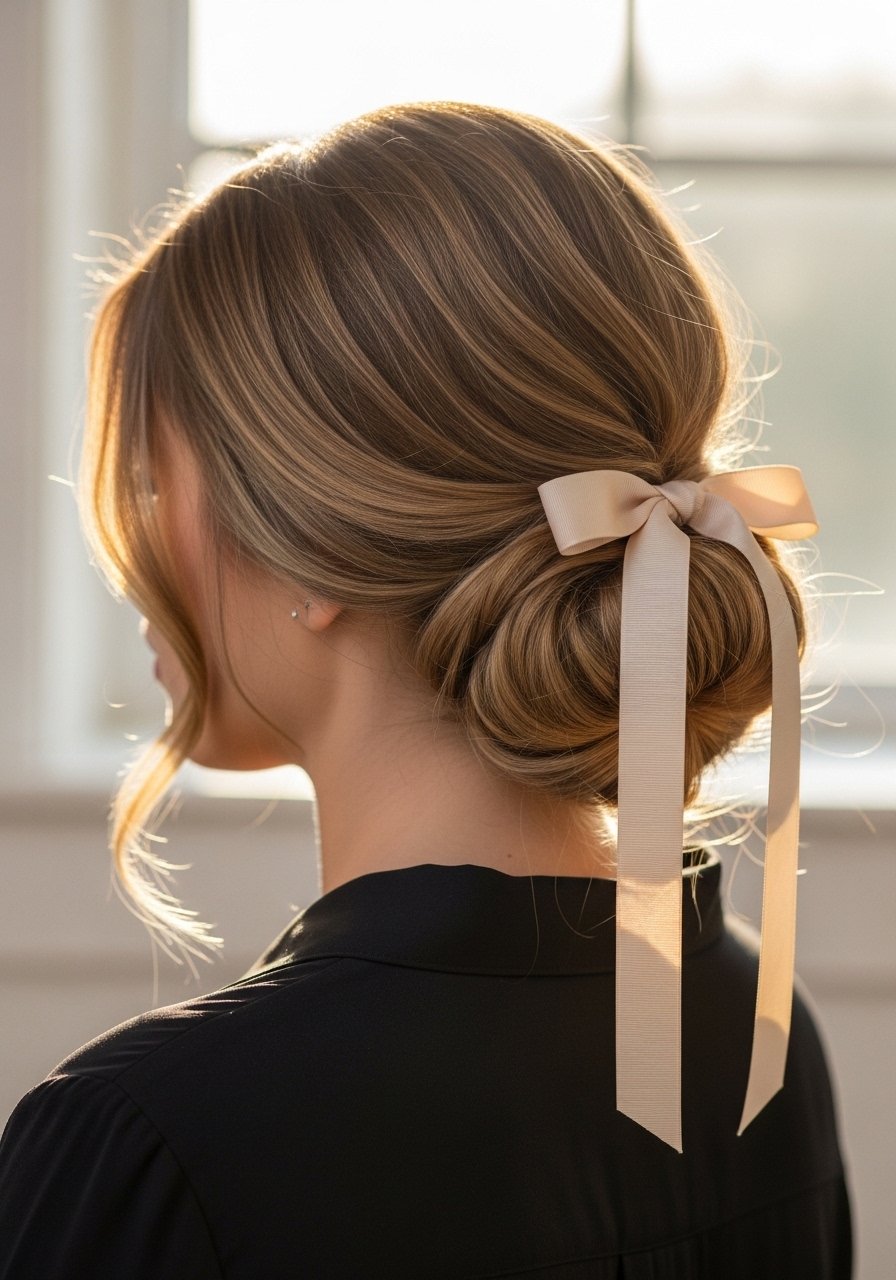
Tying a satin ribbon around a chignon turns a simple knot into prom-ready detail. I use a 1 inch ribbon, fold it in half and knot around the base, then tie a loose bow to avoid flattening the bun. For medium hair, keep the chignon loose so the ribbon sits naturally. The trick most guides skip, use a small spray of salt spray before tying to give the ribbon something to bite into so it does not slide. If you have scalp sensitivity, test the ribbon fabric against your neck to avoid irritation.
Faux Bangs Updo to Frame the Face
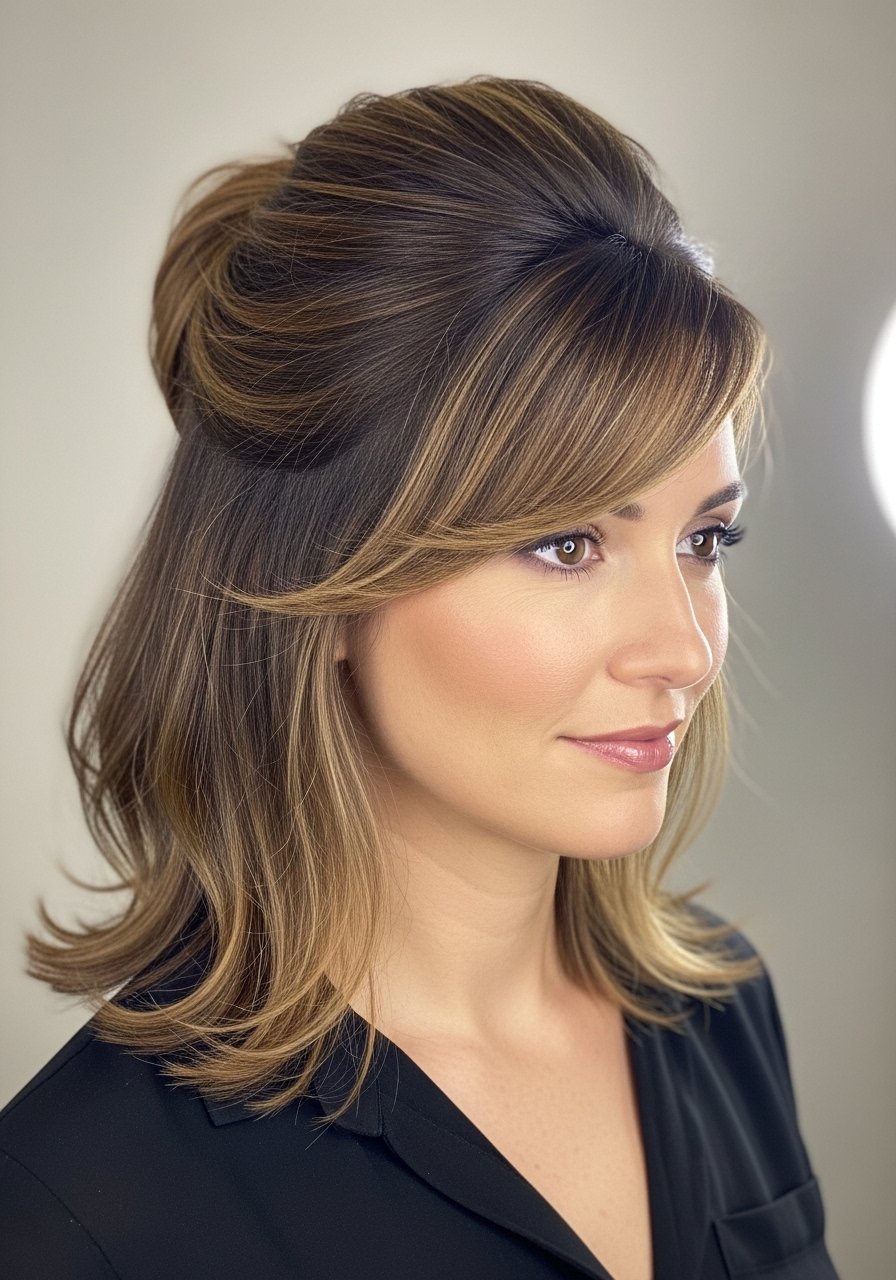
If you love bangs but do not want a cut, fake them. Pull a one inch front section, lightly backcomb the roots, and sweep it across the forehead, securing with a pin behind one ear. This frames the face without commitment and pairs beautifully with a low bun or half-up. For medium hair this takes under five minutes. Mistake, overflattening the faux bangs with heavy product which kills movement. If you plan a long night, bring a few pins and a travel size of lightweight powder to touch up lift.
The Little Things That Make Prom Updos Hold All Night
- Heat protectant goes on damp hair, not dry. The cuticle is more open and the product actually absorbs. Lightweight heat protectant spray 6 oz is what I use before any hot tool session.
- Grab a microfiber hair towel for $12. It cuts styling time and stops pre-style frizz so pins sit better.
- Hair grows about half an inch a month at most, regardless of what biotin gummies promise you. The thing that helps length retention is reducing breakage with weekly bond treatments like Olaplex No. 3.
- If you plan to curl before an updo, set the iron to 300 F for fine to medium hair and never skip the protectant. Heat over 300 F needs extra caution.
- Bring a small kit: three pins, three clear elastics, a travel hairspray, and a spare ribbon or small accessory. Replacing a popped pin mid-event is easier than redoing the whole style.
Frequently Asked Questions
Q: Can I use Olaplex No. 3 if my hair is not damaged, or will it make it worse?
A: You can use Olaplex No. 3 on hair that is not visibly damaged. It is a bond protector that smooths and temporarily strengthens the hair, it will not make healthy hair worse. Use once every one to two weeks as a precaution. Buy from the official store on Amazon or at Sephora to avoid counterfeits.
Q: How do I keep bobby pins from slipping on fine hair during an updo?
A: Spray the underside of the section with light hairspray or a small dry shampoo dusting before inserting pins. Use matte pins instead of shiny ones and cross two pins in an X for extra hold. Anchor pins into the hair not the scalp for better grip.
Q: What heat setting should I use when curling shoulder-length medium hair?
A: Start at 300 F for medium hair and test a small piece. Increase to 320 or 350 F only for very coarse or resistant hair. Always use a heat protectant applied to damp or just-dried hair as product absorption matters.
Q: How often should I practice a prom updo before the event?
A: One practice run one week before the event and a quick 10 minute touch rehearsal the day before is enough. If you are using heatless techniques, try them twice overnight to check how the pattern sets in your sleep.
Q: My hair gets greasy fast. Which style hides oily roots best?
A: Crown braids, twisted half-ups, and low knotted buns hide roots well. Pre-dust the roots with dry shampoo before styling to add texture. The braided crown specifically masks slickness and gives structure without extra product.
Q: Can I bleach my medium hair at home the week of prom?
A: Do not attempt major lifts at home right before prom. Lifting over previous color or heavy bleaching can cause breakage. If you must change color, book a professional and allow at least a few days recovery before heat styling. If scalp sensitivity or chemical questions arise, see a professional colorist.