The first time I tried a slick back ponytail for a job interview I used a dollar store gel and wound up with crunchy edges and a forehead rash. After months of testing gels, oils, and techniques on my own 4A hair and helping friends with 3A through 4C textures, I learned the difference between a ponytail that falls apart by lunch and one that actually lasts. Below are the slick back ponytail ideas I actually wear, with the product links that work in real life.
These looks work best for natural hair textures from 2C waves through 4C coils, shoulder length to mid-back. Most styles take five to 25 minutes, with one that needs a 45-minute braid setup if you want maximum hold. Budget ranges from under $10 for elastics to a splurge around $150 for a high-end tool. Almost everything here is DIY except multi-session color or a professional undercut.
Low Sleek Ponytail With Edge Gel and Boar Brush
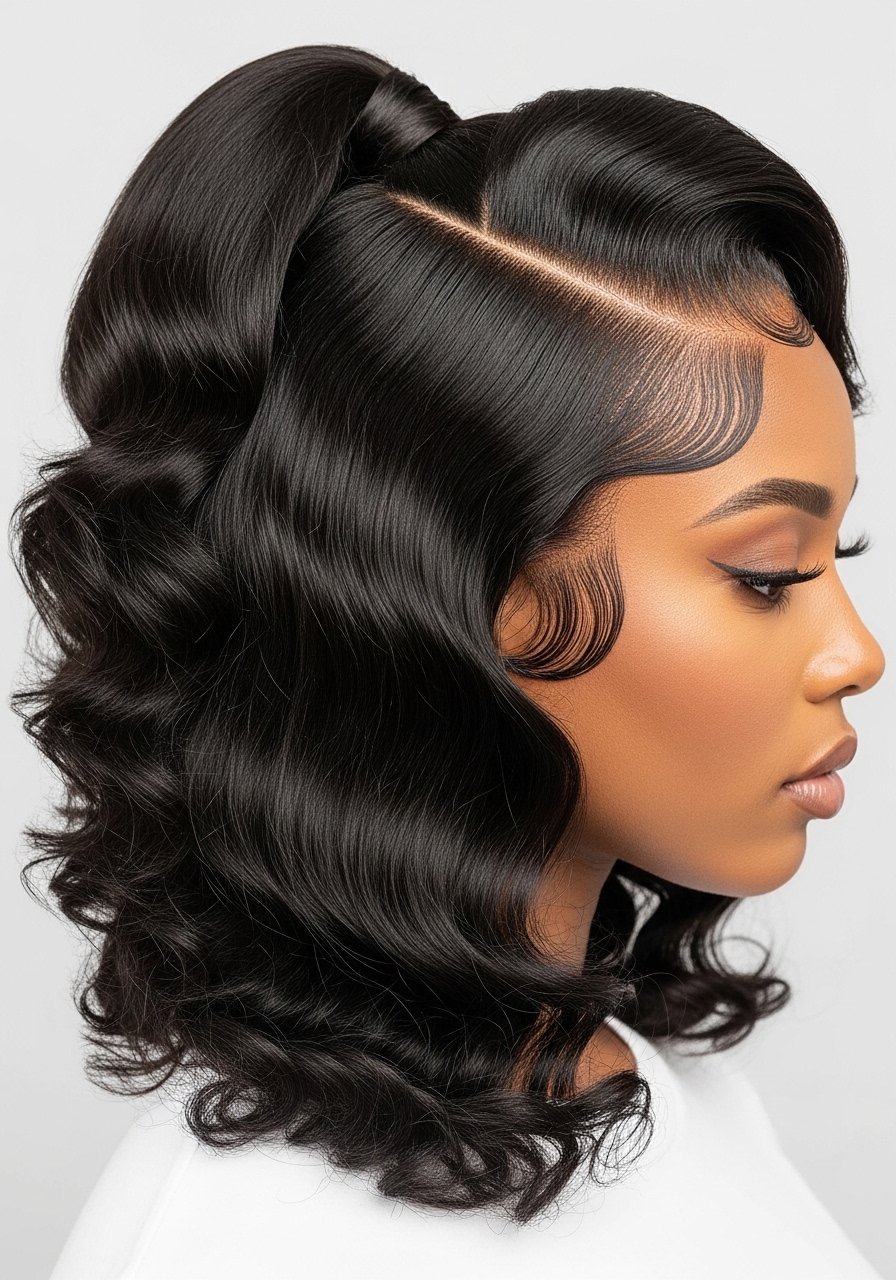
If your hair puffs up as soon as you step outside, the low sleek ponytail will save you from midafternoon frizz. For 2C through 4A hair, start with damp hair and apply two pea-sized drops of a water-based leave-in along the hairline, then brush with a boar bristle paddle brush to smooth from root to elastic. Two pumps of Eco Styler Olive Oil Gel on the edges, worked in with a small toothbrush, keeps them flat without that sticky cast. Use a satin scrunchie or wrap a 6-inch section of hair around the elastic to hide it. Common mistake, I used too much gel and the ponytail looked stiff. Less product and more brush technique wins. If you flat iron the hairline for extra sleekness, use a heat protectant and keep the iron under 350 degrees.
High Wrapped Ponytail Using Clip-In Extension
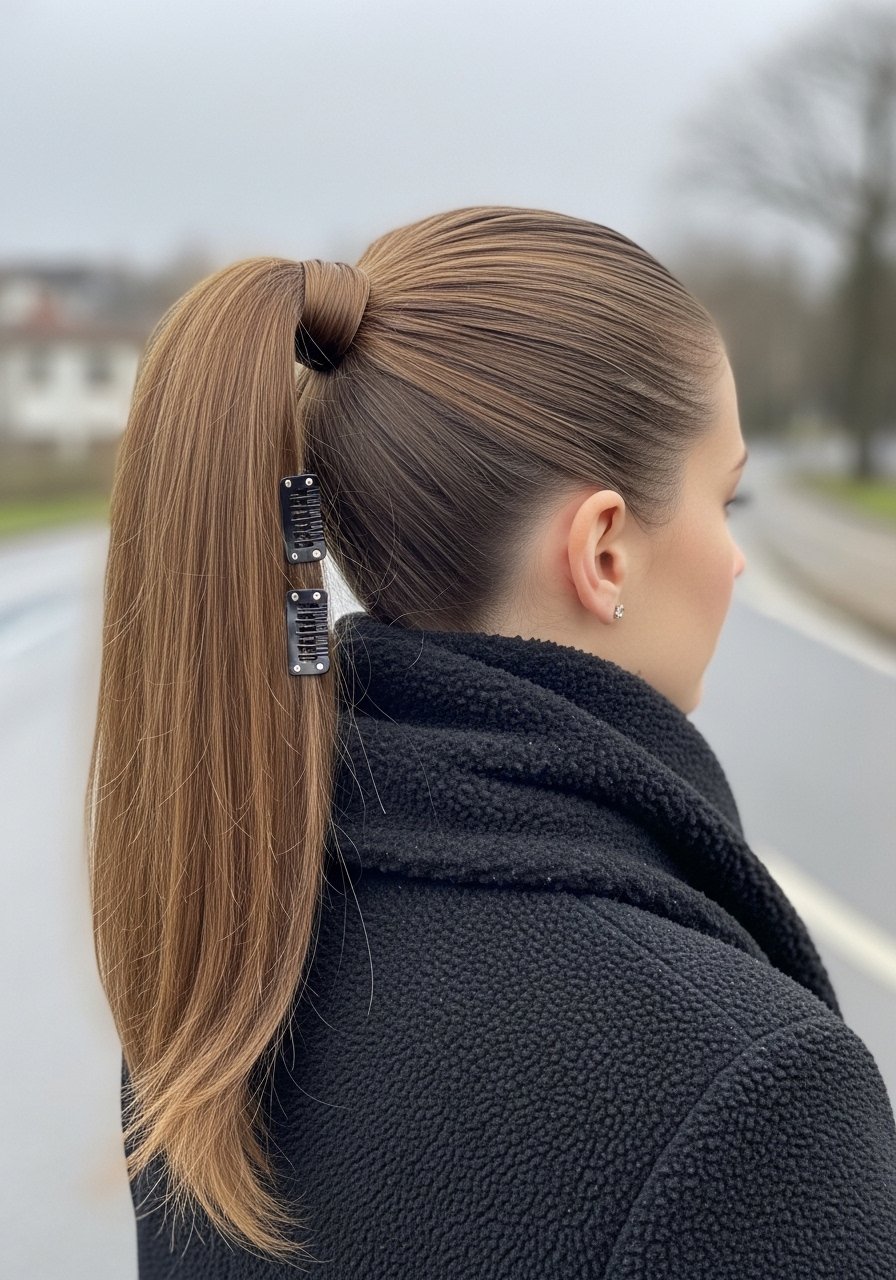
Want the drama without the commitment? Clip-in ponytail extensions add length and density instantly. I loop my natural hair into a high pony, secure a small elastic, then clip the extension at the base and wrap a natural hair piece around the seam for invisibility. This works for 3A to 4C textures if you pick a textured extension. A firm hold gel keeps the base flat while the extension gives volume. If you buy on Amazon, search for a clip-in ponytail with a comb base and read reviews on texture match. The real trick is sectioning the base into three parts before clipping to distribute tension evenly, not just one bulky section that pulls. Wear for special events or long days, but remove at night to avoid breakage along the hairline.
Feed-In Braided Base For Unshakable Hold
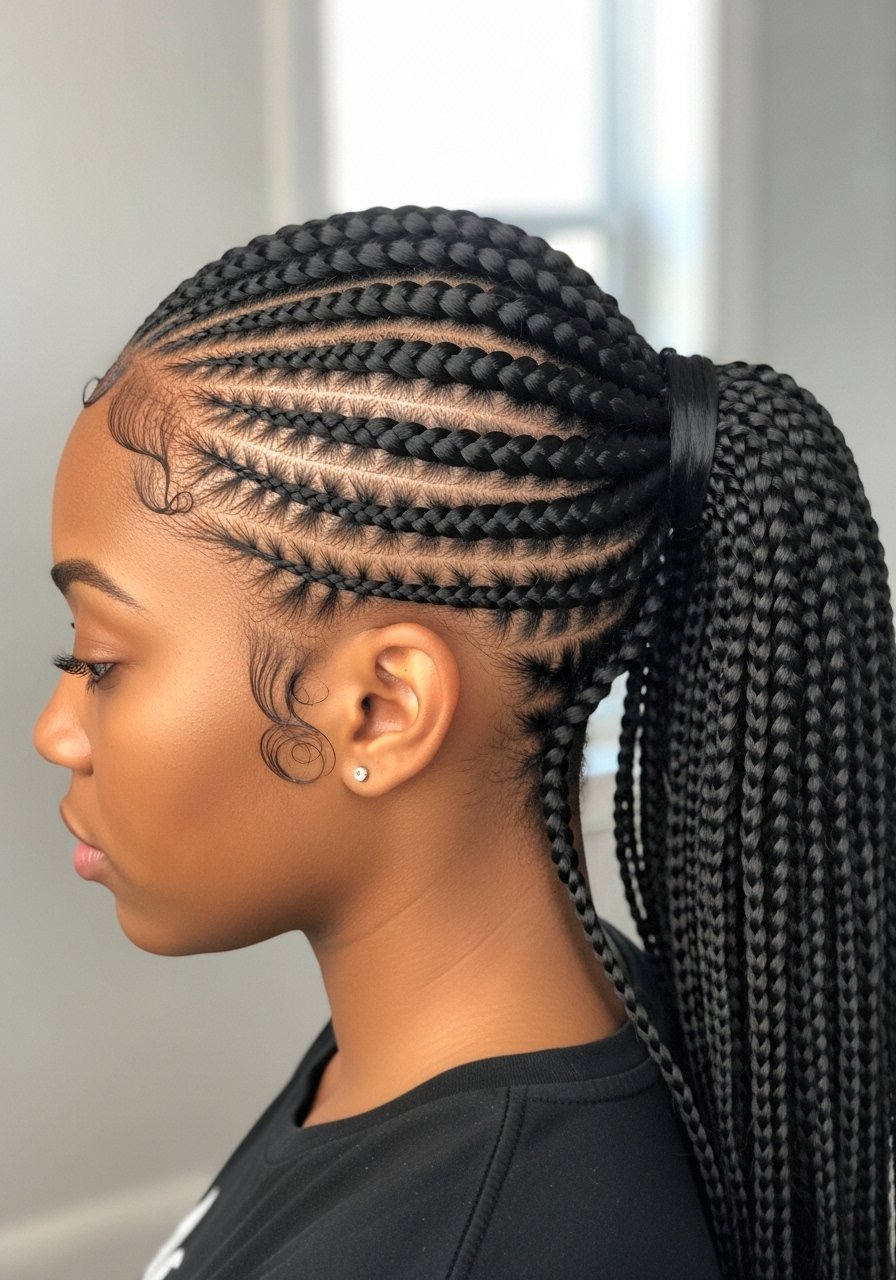
If your ponytail slides out by day two, build a braided foundation. I do a three-braid feed-in across the nape for 4C and thick 3C hair, which anchors the elastic and spreads tension. Use a light gel on the parts to reduce frizz and feed in small hair sections every 1 inch so the braids lay flat. After braiding, smooth over a lightweight pomade and gather into a ponytail. This is a salon technique you can DIY with a little practice. Time required is 20 to 35 minutes depending on sectioning. Watch for scalp tension. If the braids pull, loosen the feed-ins by adding smaller amounts of hair per stitch. For extra longevity, sleep with a silk scarf and reapply a drop of oil to the braid edges once a week.
Sleek Wet Look That Doesn’t Crack

“Wet look” gels can leave hair crunchy. My trick is applying a mousse while hair is damp, finger-combing to shape, then sealing with a thin slick of a lightweight oil after the mousse dries to the touch. For 2C through 3B textures, use about one pump of mousse evenly, then one drop of a lightweight argan oil on the ponytail only, not the roots. If you must use a gel, a pea-sized amount concentrated at the hairline stops stiffness. Most heat protectants you spray on dry hair before flat ironing barely work. They need to absorb into damp or just-dried hair to actually shield the cuticle. If you flat iron strands before wrapping the pony, keep the iron under 375 degrees and always apply a thermal protectant first.
Bubble Ponytail That Plays With Texture
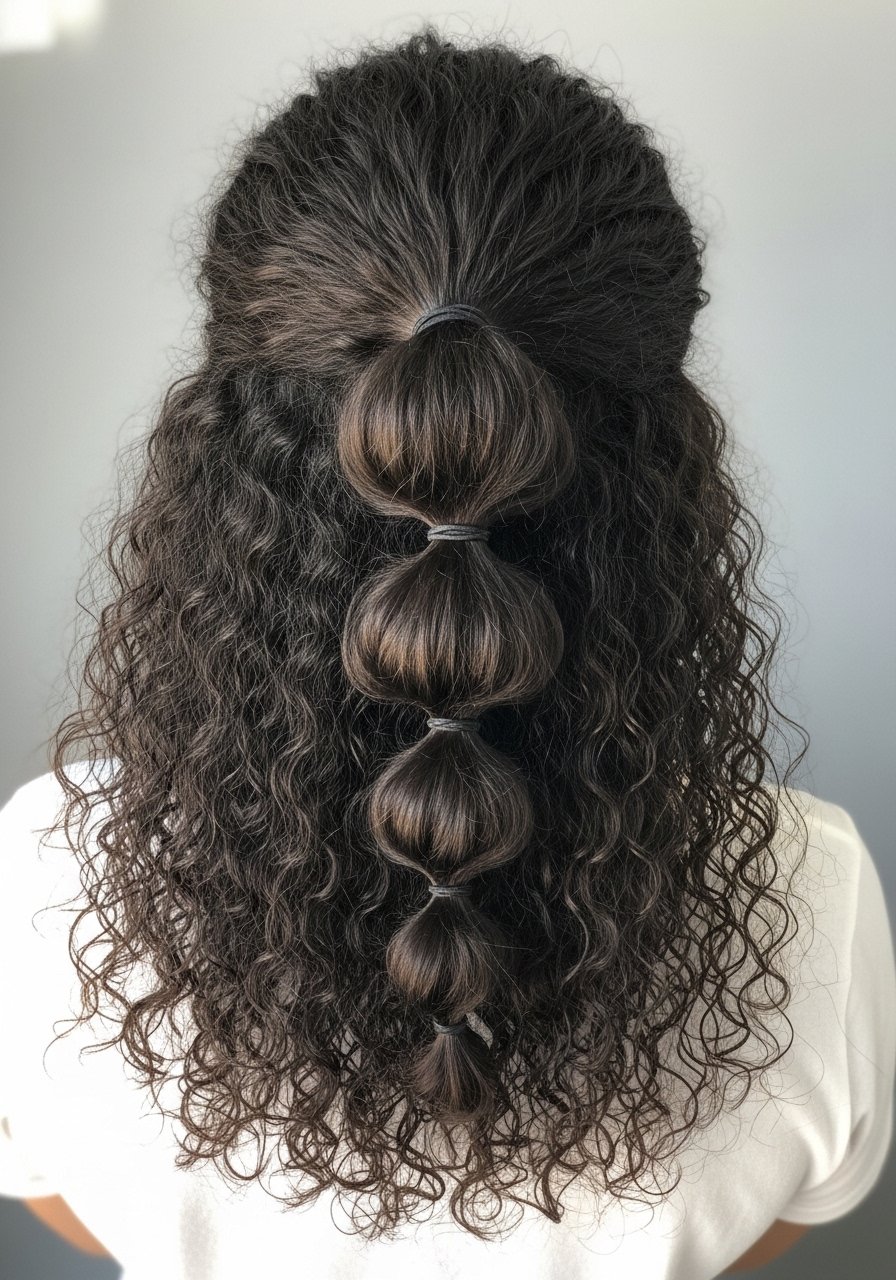
Bubble ponytails are forgiving for natural hair that wants volume. After a sleek base, place elastic every 2 to 3 inches along the length to create bubbles. For thicker 3C to 4B hair, use 1.25 inch spacing. Gently pull at each section to expand the bubble instead of adding more product, which keeps the bubbles soft and touchable. A texturizing spray in between bubbles helps definition. A common mistake is using too many elastics that cause breakage. Use soft no-damage elastics and wrap the elastic once only. This look is fast, five to ten minutes after the base is prepared, and great for second-day hair when you want style without a wash.
Silk Scarf Wrapped Base For Polished Finish
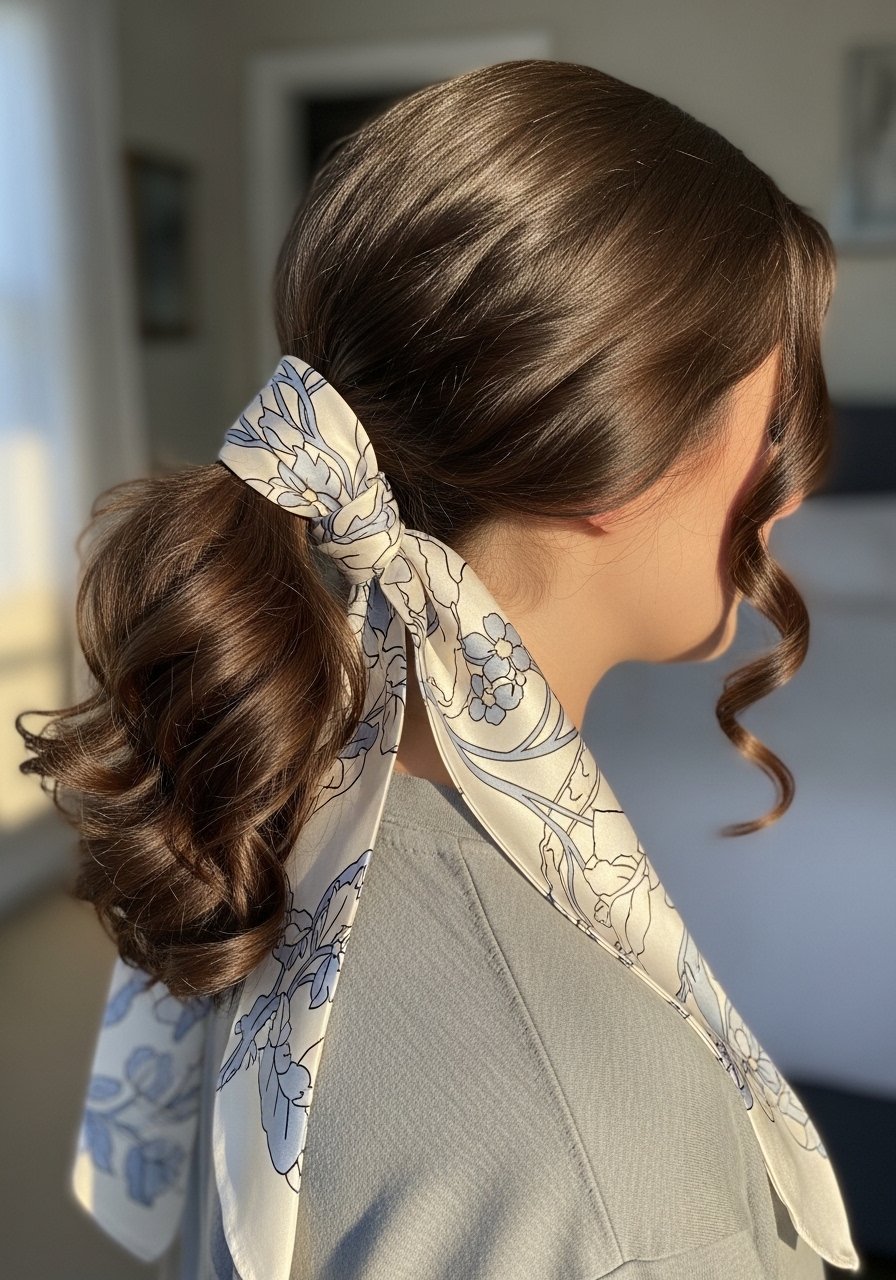
A silk scarf makes a cheap ponytail look intentionally styled. After smoothing your base, tie a 14-inch silk scarf around the elastic, knot it twice, and let the tails fall or tuck them under for a cleaner finish. For 3A to 4C hair, silk reduces friction at the base so the wrap does less damage than synthetic ties. The trick I learned is to fold the scarf into a narrow band before wrapping so it lies flat. Silk also protects the hair when you lean back in a chair. If your scarf keeps loosening, pin the knot with a discreet bobby pin hidden under the wrap. A scarf doubles as a color accessory when you want a quick update.
High Puff Ponytail That Embraces Volume
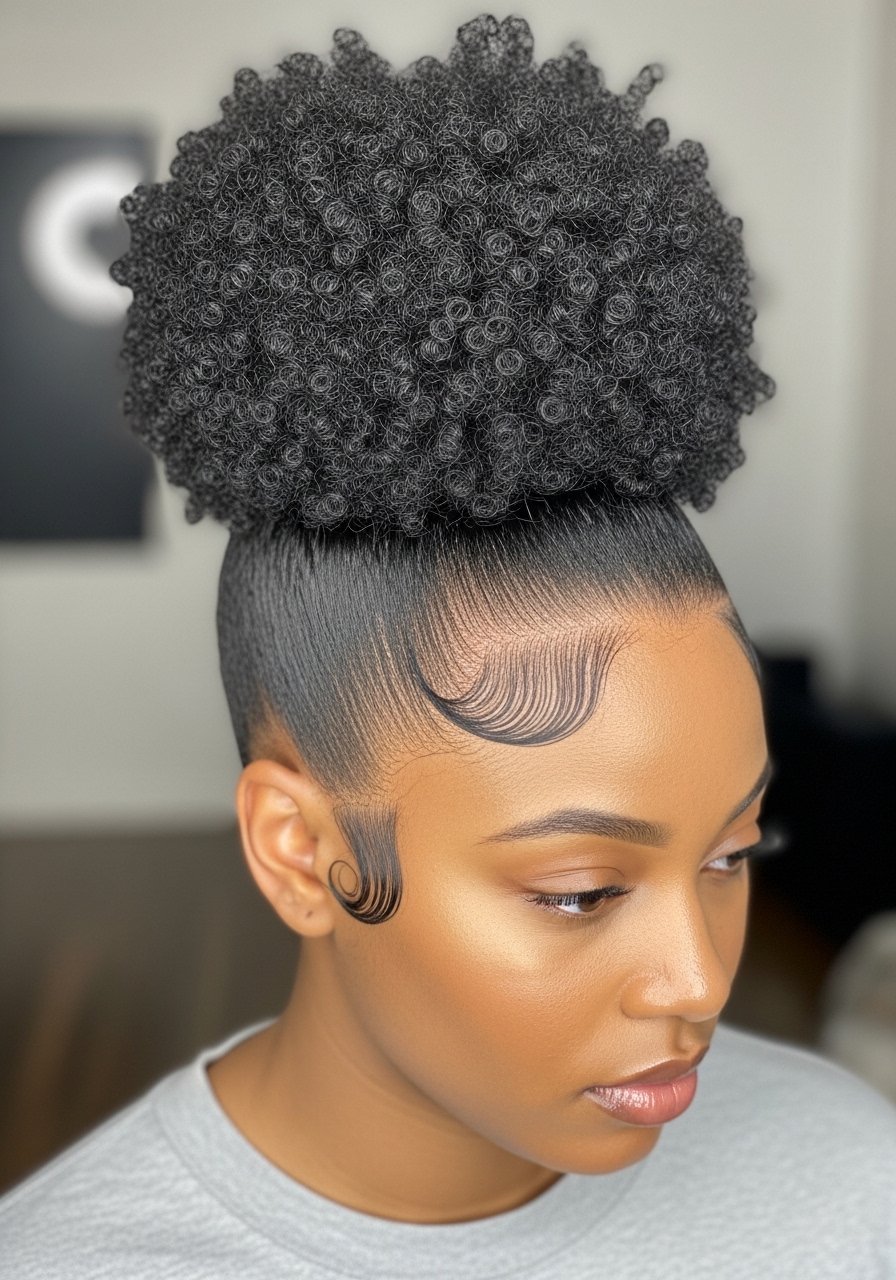
When I want a quick, office-appropriate slick back for 4C hair, the high puff is my go-to. Smooth your edges with a water-based leave-in, gather hair with a wide-tooth comb into a high pony and use a strong but gentle puff cuff to secure, spreading tension across the crown. For extra hold, I braid the very front perimeter in small invisible braids and smooth the rest into the puff. This prevents edge breakage from a single elastic. Puff cuffs are cheap and can be switched out daily so you are not constantly tugging at the same hairline section. Avoid rubber bands that trap moisture. If you color-treat the front, patch test any edge product for scalp sensitivity.
What I Actually Keep in My Slick Pony Kit
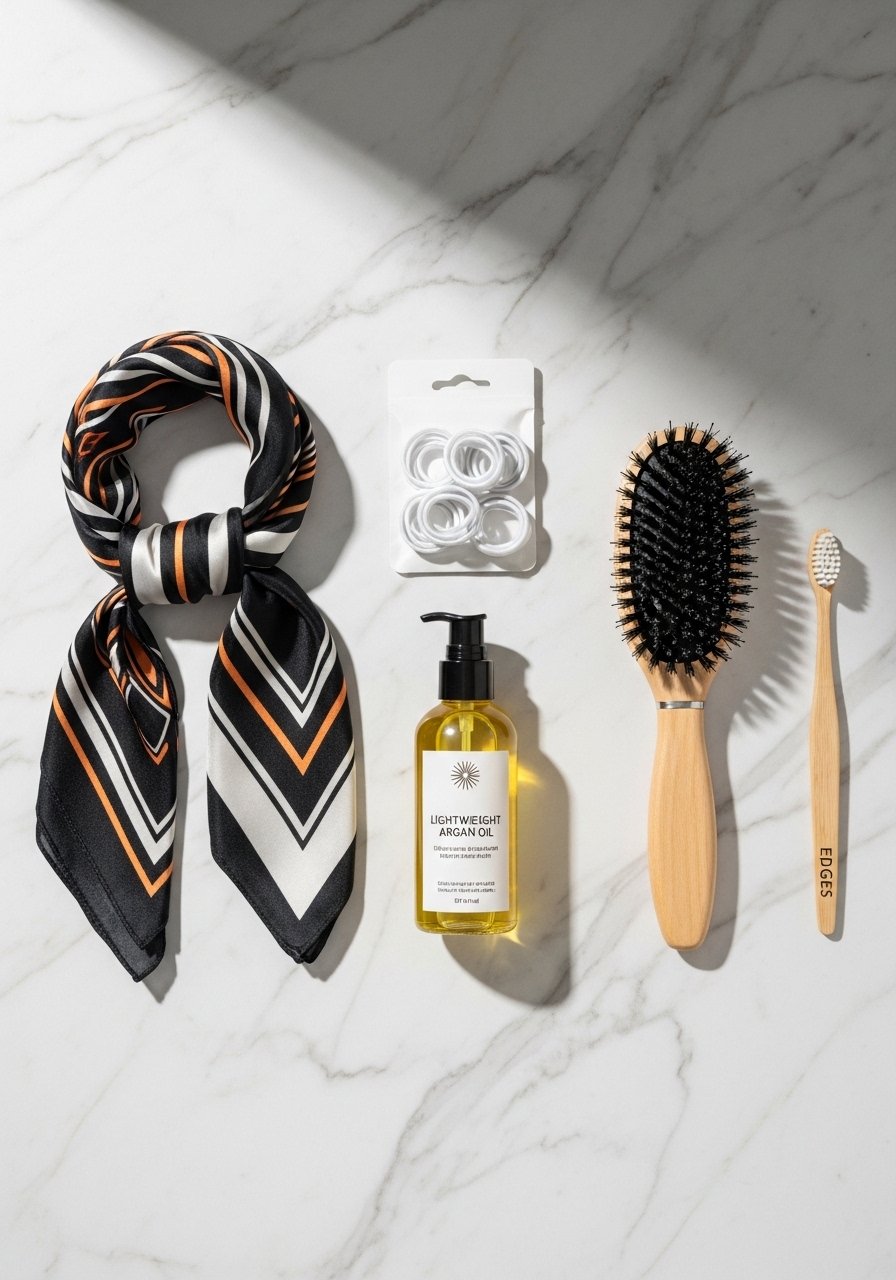
Silk hair scarf, medium size. Foldable, I use it every other ponytail to stop frizz and protect the base.
Eco Styler Olive Oil Gel, 16 oz. Cheap and reliable for edges and smoothing without crusty flakes.
Scunci No Damage Hair Elastics, pack of 60. Soft, low-tension elastics that cut breakage risk.
Clip-In Ponytail Extension, textured match options. Read reviews and pick the texture closest to your own.
Microfiber Hair Towel. Cuts dry time and reduces puff before you style.
Lightweight Argan Oil, 1 oz dropper. Use one drop on the ponytail ends to finish the look.
Hair Nets For Sleek Styles, pack of 10. Invisible hold for flyaways that lasts.
Olaplex No.3 Hair Perfector, 3.3 oz. Weekly bond maintenance if you color or heat style. Buy from the official Olaplex store on Amazon or Sephora to avoid counterfeits.
Half-Up Sleek Ponytail With Face-Framing Curls
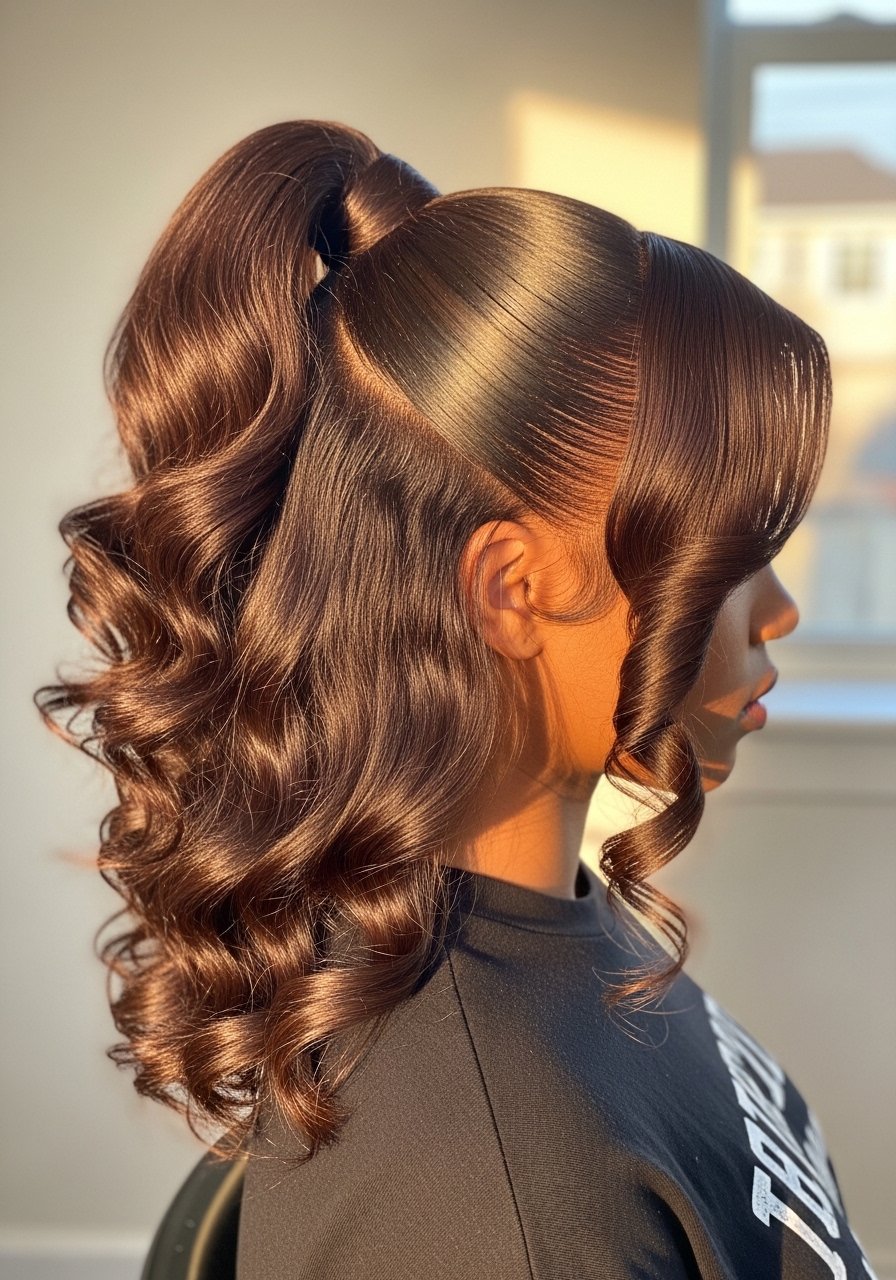
This look balances structure and softness for 2C through 3B hair. Section the top third of your hair and smooth the crown with a light pomade. Secure the top section into a sleek mini pony and wrap a small strand around the elastic. The lower half gets 1-inch wand curls, done on 300 degrees for fine hair and 325 for coarser textures. Heat protectant goes on damp hair, not dry. The cuticle is more open and the product actually absorbs. For curl hold without crunch, mist with a medium-hold spray and scrunch once cooled. The specific detail most people skip is spacing the face-framing curls every 1.5 to 2 inches, not every half inch, which stops the look from appearing manufactured. This style takes about 15 minutes once you get the sectioning right.
Faux Undercut Slick Ponytail With Braided Sides
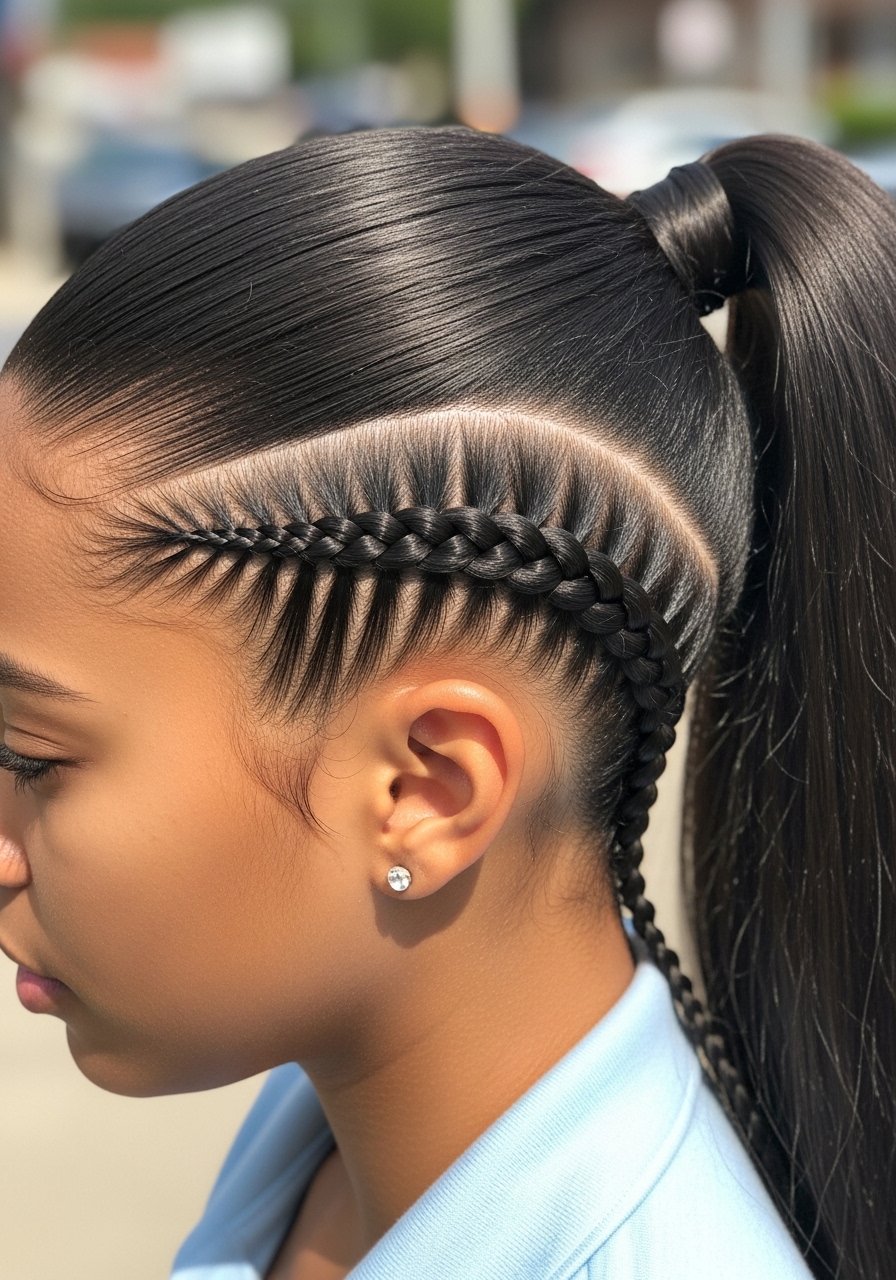
If you like the undercut look but not the shave, braid the sides into tight cornrows and release the rest into a smooth top ponytail. This creates the visual of a shaved side while preserving length. For 4A to 4C hair, feed-in small sections into the cornrows every 0.75 inch to maintain a low profile. The braided sides reduce bulk around the ears and stop the ponytail from drooping to the side. Beware of too-tight braids that can cause traction. If your scalp is sensitive, space the braids wider or swap to flat twists. This is a salon-style finish you can do at home with practice and a pointed tail comb for clean parts.
Invisible Net Finish For Flyaway-Free Hold
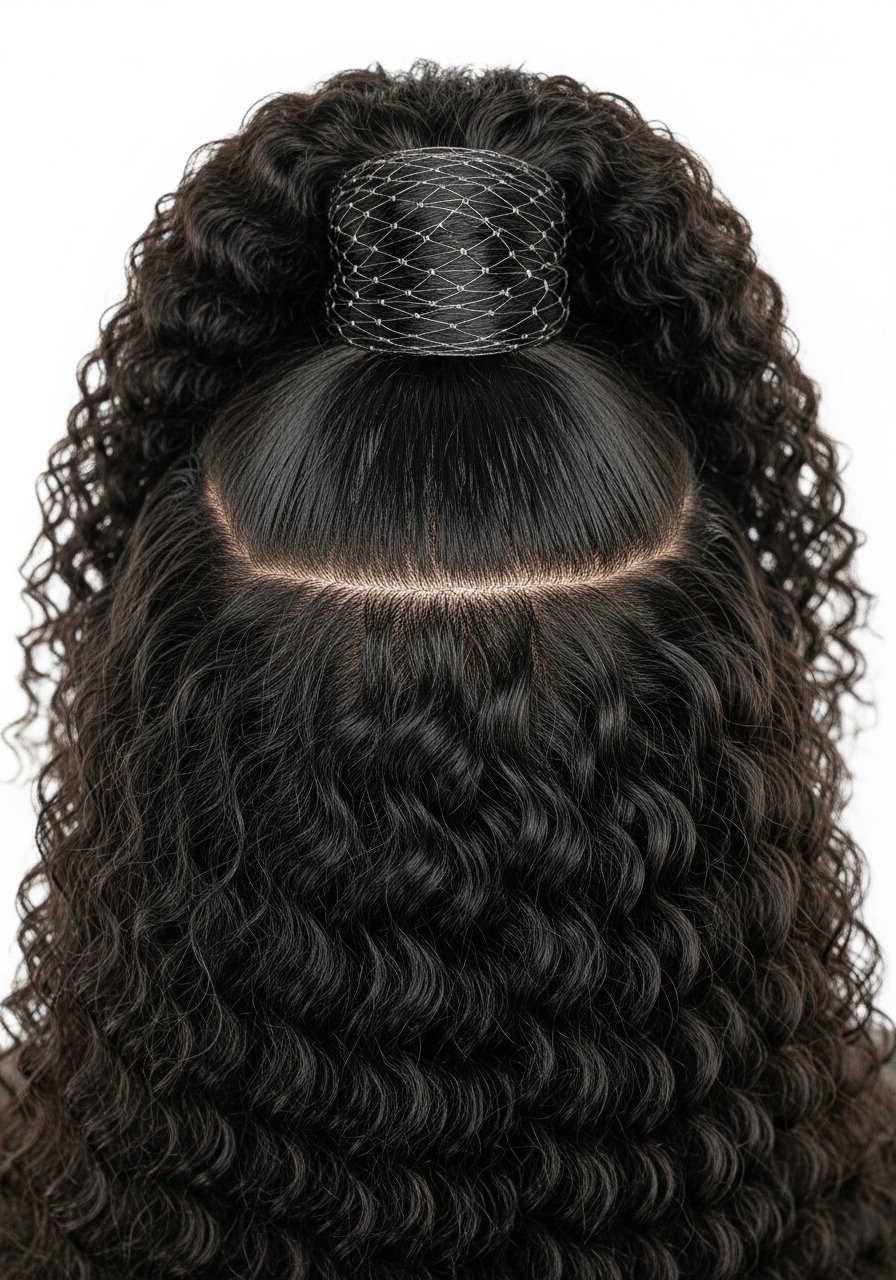
When humidity attacks, an invisible net is the final hack. After smoothing your ponytail, lay a fine mesh wig net over the entire style and re-smooth with a soft brush. The net tucks under the elastic and holds baby hairs without product buildup. For 2C to 4C hair, this method adds a polished finish for photos or long events. Nets are breathable but not a sleep solution. Remove gently to avoid tangles. I learned the hard way by ripping one off and pulling a handful of hair. Always detangle under the net with your fingers before removing it.
Five-Minute Work-From-Home Slick Back
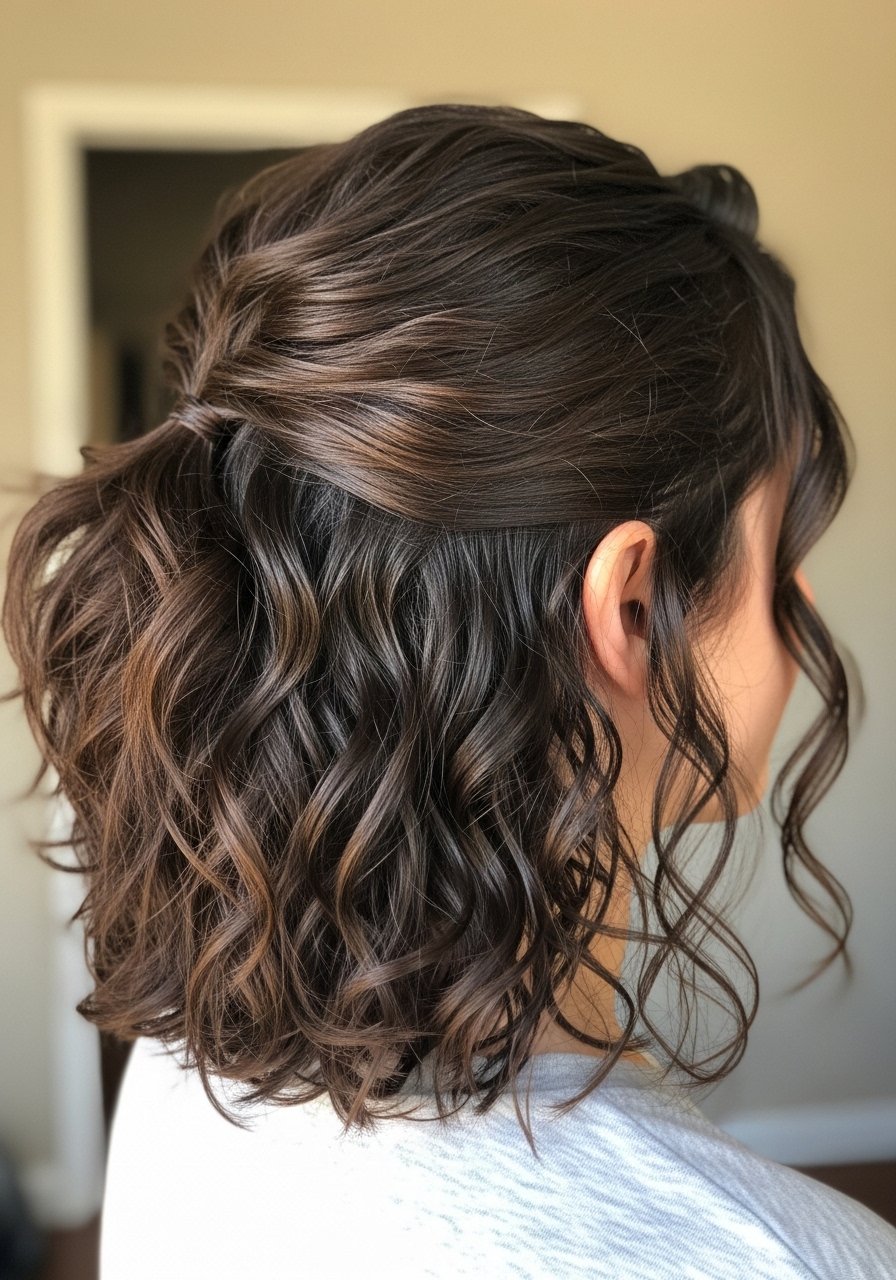
This is my go-to when I have five minutes between Zoom calls. Spray the roots with a little dry shampoo to add grip, smooth the hair back with a wide-tooth comb, and secure with a soft elastic. Run a tiny amount of oil down the ponytail if ends look dry. For 3A to 4B textures this keeps the style from slipping while still looking effortless. A common mistake is using a heavy oil at the roots which makes the scalp greasy. Use the 80/20 product placement rule, placing most product on mid-lengths and ends, not the scalp. If you need a touch of extra hold, a single finger-sweep with a small dab of gel on the hairline will do.
What I Wish I Knew Before Doing This Often
Heat protectant before any iron over 300 degrees is non-negotiable. I burned my ends flat once by skipping this step. Hair grows about half an inch a month at most, regardless of what biotin gummies promise you. The real progress comes from preventing breakage, not miracle pills. If you color or frequently heat style, use a weekly bond builder and sleep on silk. The mistakes I made most were concentrating products at the root and over-tightening elastics at the same spot every day. Rotate your ponytail placement and loosen the elastic at night. Also, check edges weekly for signs of strain and give them a break with loose styles or scarves.
Frequently Asked Questions
Q: How often should I slick my hair back without causing breakage?
A: Aim for two to three slicked-back styles a week if you use soft elastics and alternate placement. If you do a daily sleek ponytail, change the base location and use a silk scarf overnight to reduce tension. If you notice thinning at the hairline, switch to looser styles and see a trichologist if it persists.
Q: Can I use Olaplex No.3 if my hair is not damaged, or will it make hair heavy?
A: Olaplex No.3 will not weigh down most hair when used sparingly. Use a quarter-sized amount on mid-lengths to ends once a week and rinse. It helps with strength when you heat-style frequently. Buy from the official Olaplex store on Amazon or Sephora to avoid counterfeits.
Q: My ponytail falls flat after two hours. What am I missing?
A: Two things, usually. One, you need a secure base. Try a feed-in braid or two small braids at the nape to anchor the elastic. Two, add texture in the ponytail with a texturizing spray a few inches from the scalp. Also, try no-damage elastics and avoid over-smoothing, because a completely tensioned base can slip.
Q: Is a silk scarf safe for color-treated hair and heat styling?
A: Yes, silk reduces friction and helps color last longer by preventing breakage. Use a folded narrow scarf for wrapping the elastic, and for heat styling always use a heat protectant on hair before running irons near the scarf or the wrapped area.
Q: How often should I use an edge product without irritating my scalp?
A: Limit strong edge products to three times a week and use thin layers. If your scalp is sensitive or producing flakes, stop and patch test any new product on behind-the-ear skin for 48 hours first. For daily smoothing, water-based leave-ins are gentler than heavy pomades.
Q: Can I do these slick back looks on second or third day hair?
A: Definitely. Second-day hair often holds better if you refresh with a spritz of water or a little mousse at the roots before smoothing. Dry shampoo at the roots creates grip for the elastic. For textured hair, a quick finger detangle and a micro-dose of oil on the ends is enough to make the style look fresh.