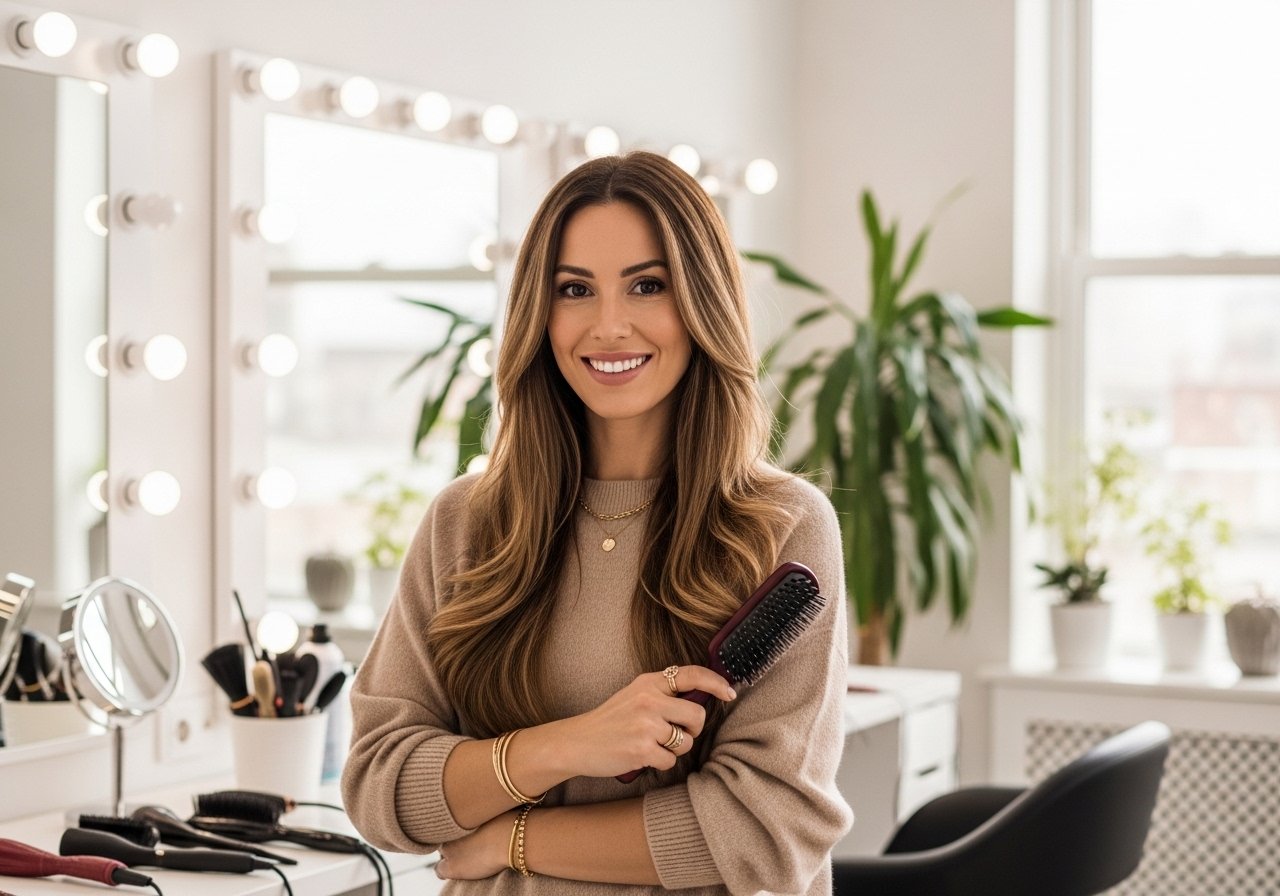
I spent my cousin’s sangeet doing hair for the family and learned that a veil will highlight every bobble, every loose pin, and every wrong product choice. These 15 styles are what I actually used for real weddings, the ones that survived rain, long ceremonies, and impatient relatives. They work best on medium to thick hair shoulder length to mid-back, and most are doable at home with one rehearsal and basic tools. Budget ranges from under $20 for pins to one splurge for a professional updo. Salon help is worth it for color or heavy extensions, otherwise you can DIY most with a practice run.
Classic Low Bun With Draped Veil
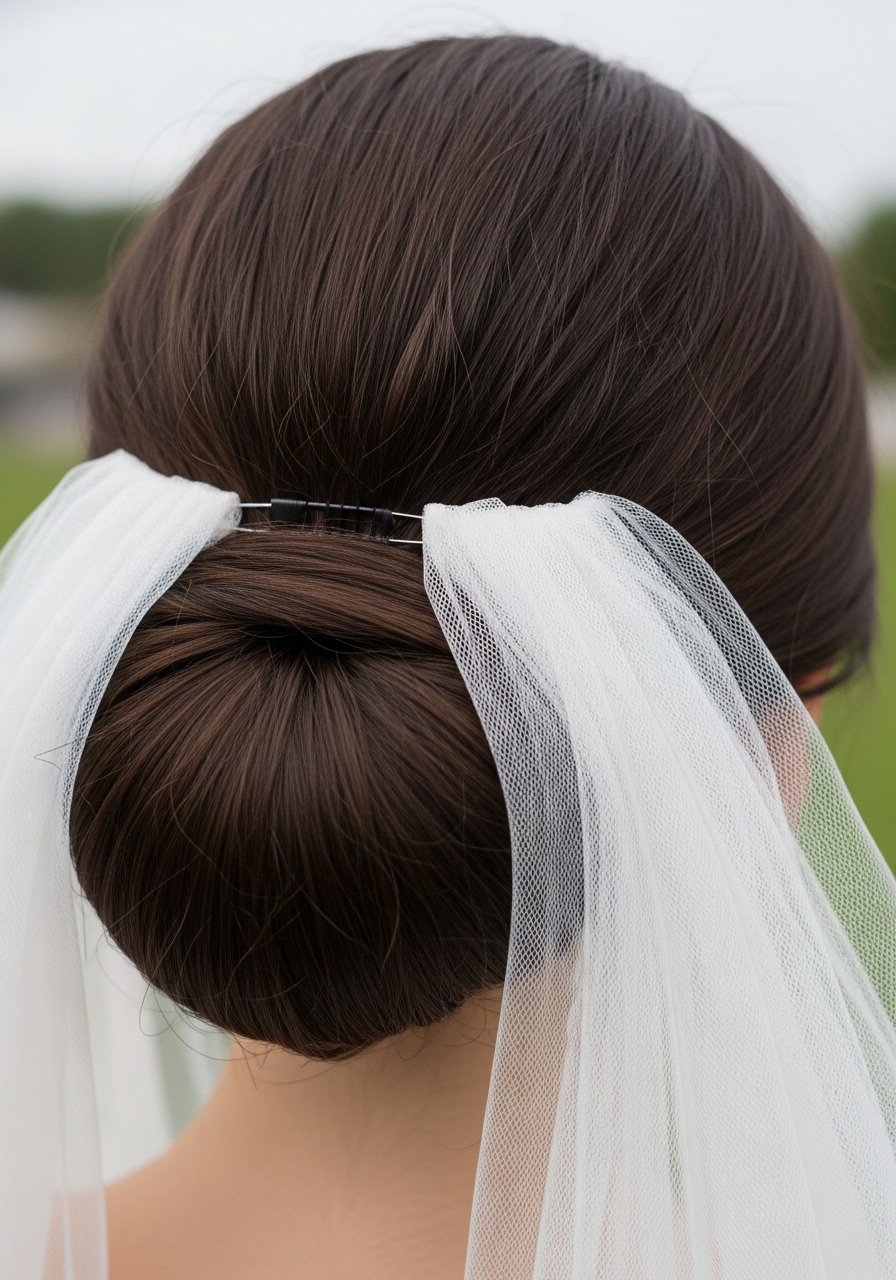
If you want the veil to look effortless and stay put, the low bun is the fail-safe. I section the hair into three parts, rough twist the center into a base knot and wrap the sides over it to create a 2- to 3-inch wide foundation that takes pins well. Use four to six 2-inch bobby pins inserted in an X for each anchor point. A small dab of a strong-hold gel at the hairline keeps baby hairs calm without a crunchy look. If your hair is fine, add a 2-inch foam donut beneath the bun for volume. Heat protectant before any iron over 300F is a rule I follow when smoothing the front pieces with a flat iron at 320F.
Side-Swept Curls Pinned Under Embellished Veil
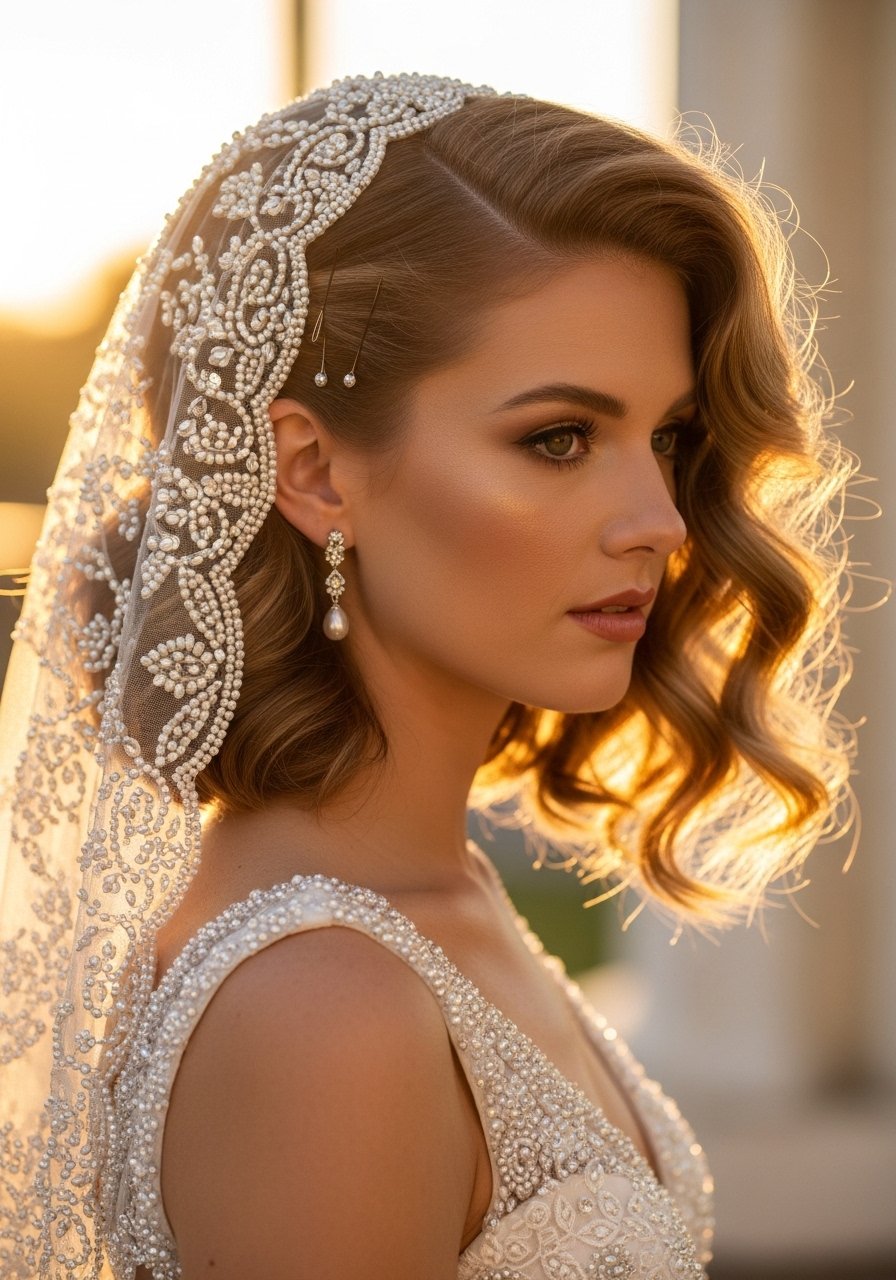
This reads bridal but still moves. I curl 1.25-inch sections away from the face at 340F, finger-comb once cooled, then pin the curls toward the opposite ear in three staggered pins to stop the veil from slipping. Two spritzes of anti-humidity spray mid-shaft keeps the curls from drooping during a long reception. The trick most people miss is letting curls cool completely before pinning, otherwise the pins loosen as hair relaxes. Works best on 2A to 3B textures, and if you have thick 3C hair, do smaller sections so the veil doesn't float.
Braided Crown With Center-Part Veil
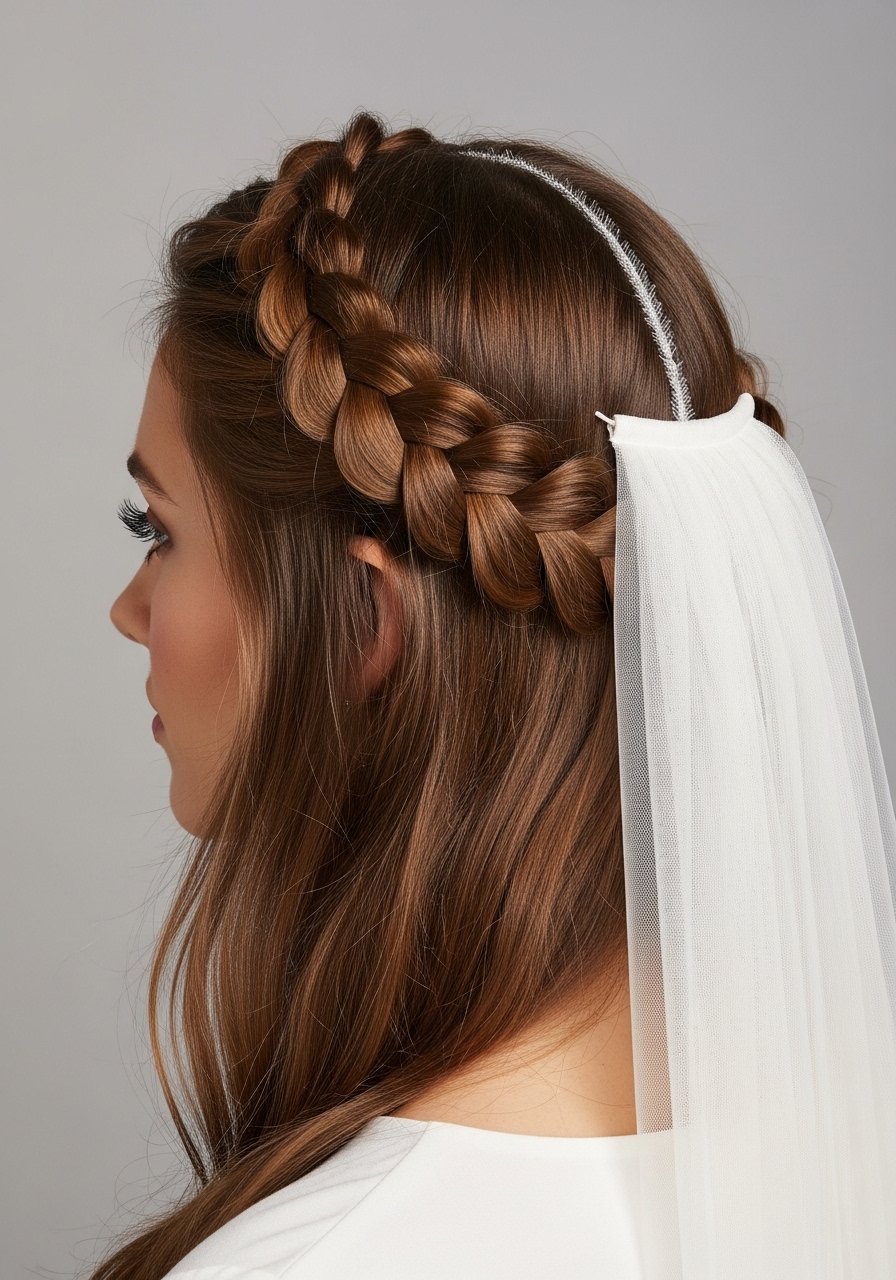
A crown braid keeps the veil stable and looks regal with a center-part dupatta. I French braid two 1.5-inch sections starting at the temples, then join them at the back into a single three-strand braid. Use a bit of medium hold cream on the sections for grip, about a pea-size amount per section. For most textures from 2B through thicker 3C, the braid sits flat and gives a secure base for a Velcro-free veil attachment. If your scalp is sensitive, avoid heavy glue clips and use silk-padded pins to reduce pulling.
Messy Textured Bun With Dupatta-Pin Method
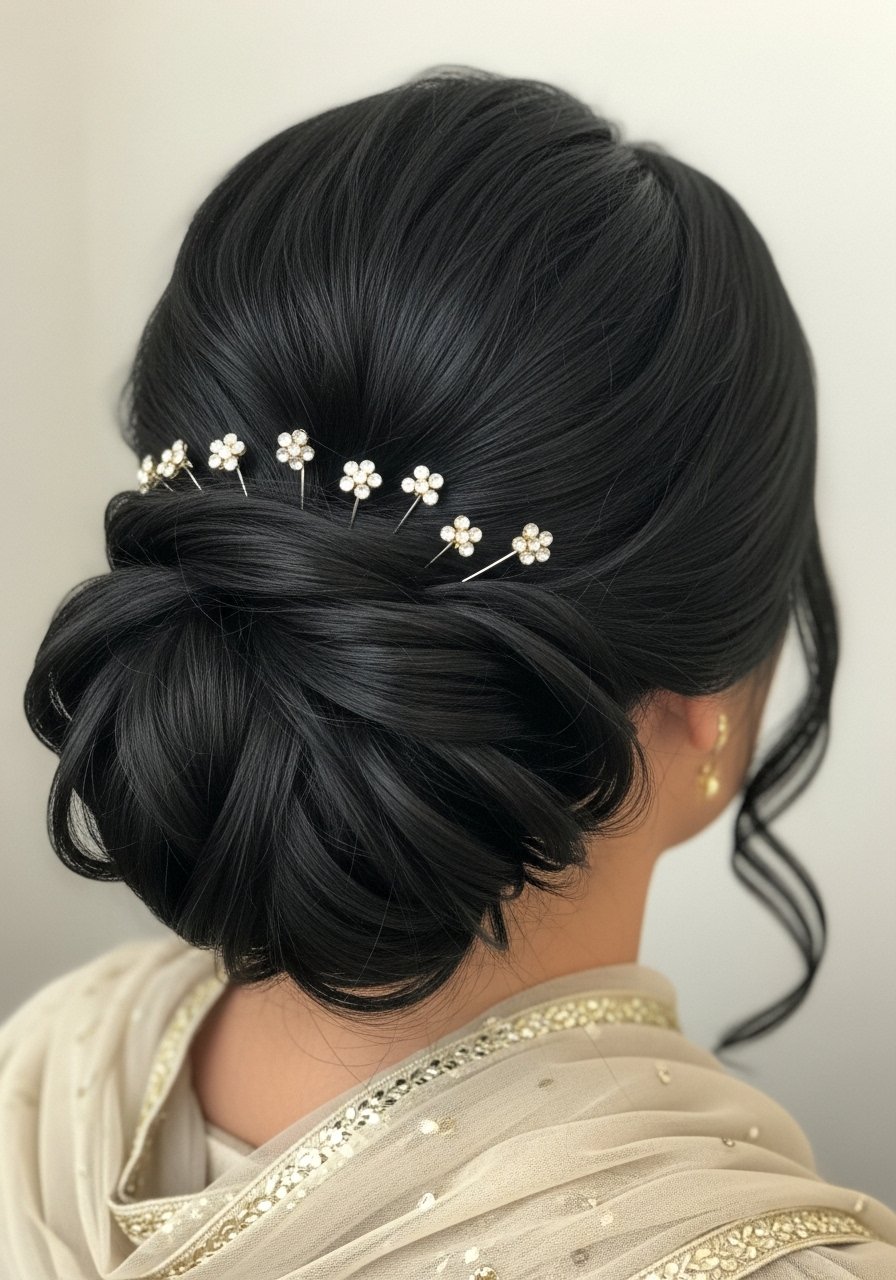
This look survives dance floor chaos and humidity. I rough-dry with a diffuser until about 70 percent dry, add a texturizing spray in the mid-shaft, then twist into a loose bun and secure with five U-shaped pins. Dupatta-pin method means the veil is anchored to the hair and not the veil alone, so you use two long pearl pins through the bun base and the dupatta fabric. Most mistakes happen when people pin only the veil fabric or use cheap pins that bend. If the dupatta is heavy, add an internal net or small hair comb sewn to the fabric to distribute weight.
Sleek Middle-Part Low Pony With Invisible Pins
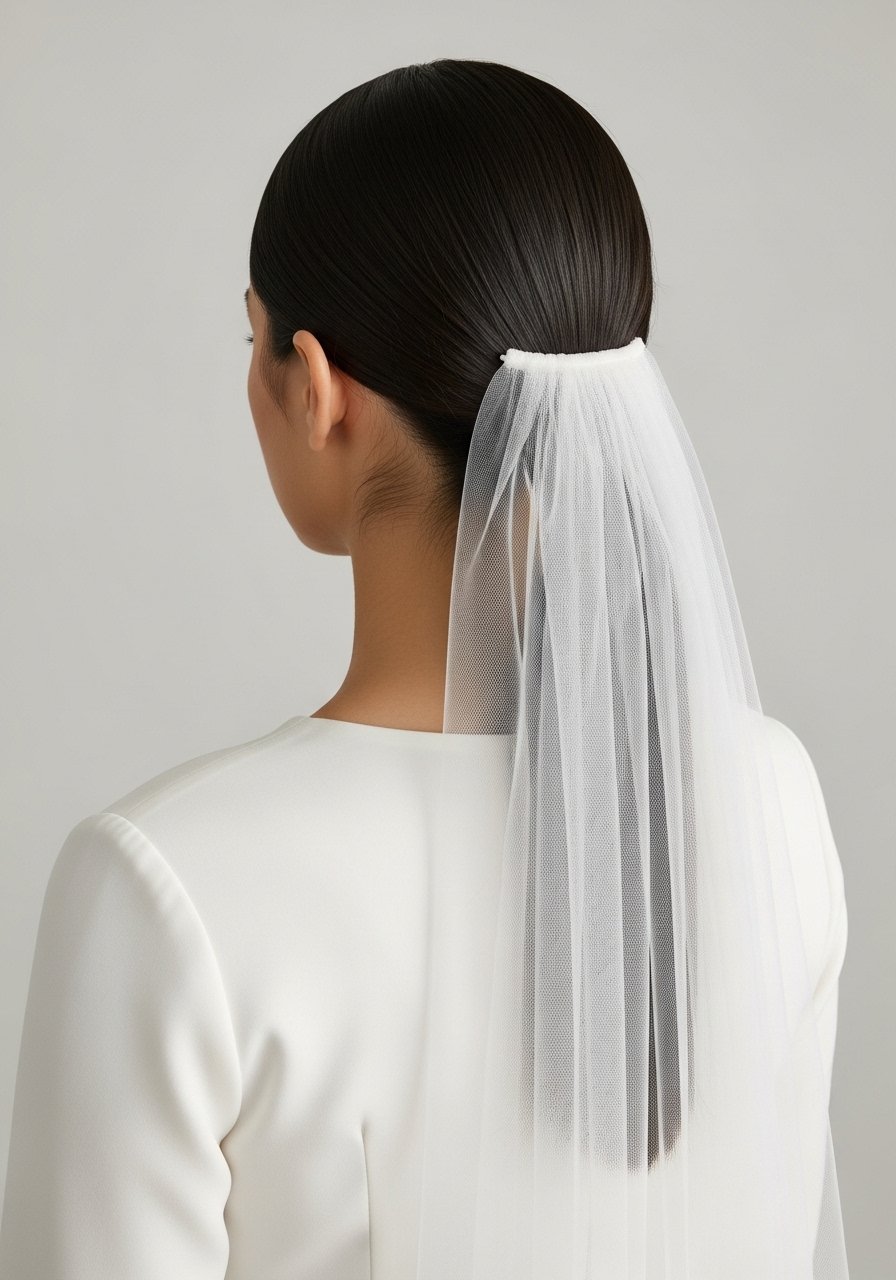
This is for brides who want simple and modern. I use a damp-to-dry styling method, smoothing a quarter-size of lightweight cream along the lengths, then blow dry on medium with a round brush until 95 percent dry. Create a precise middle part with a fine-tooth comb, secure the pony low with a no-slip elastic, and hide the elastic with a wrapped hair piece pinned underneath. Use two invisible veil combs inserted under the wrap and angle them so the veil sits flat. If you plan to flat iron pieces, remember heat protectant before any iron over 300F.
Half-Up Floral Braid That Holds a Veil
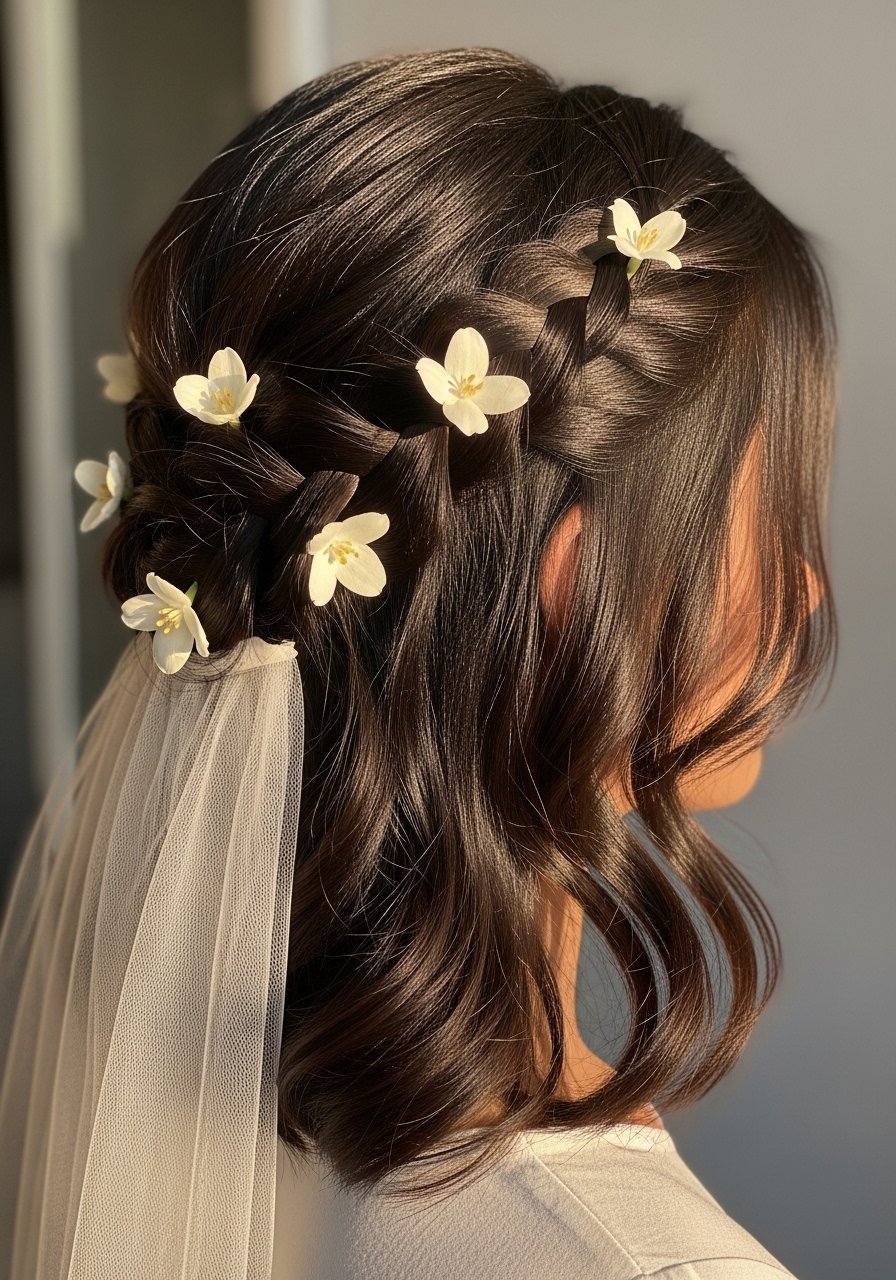
This feminine half-up gives you face framing and security for a dupatta. I take two 1.5-inch front sections, lightly twist them, then weave a three-strand braid across the back and pin every 1.5 inches. Tuck fresh jasmine or faux florals into the braid using U-pins. If your hair is fine, interweave a 1-inch weft at the braid base for thickness. Common mistake is using too many heavy flowers which pull the braid out. Time required is under 30 minutes if you practice once.
Traditional Jooda With Maang Tikka and Veil
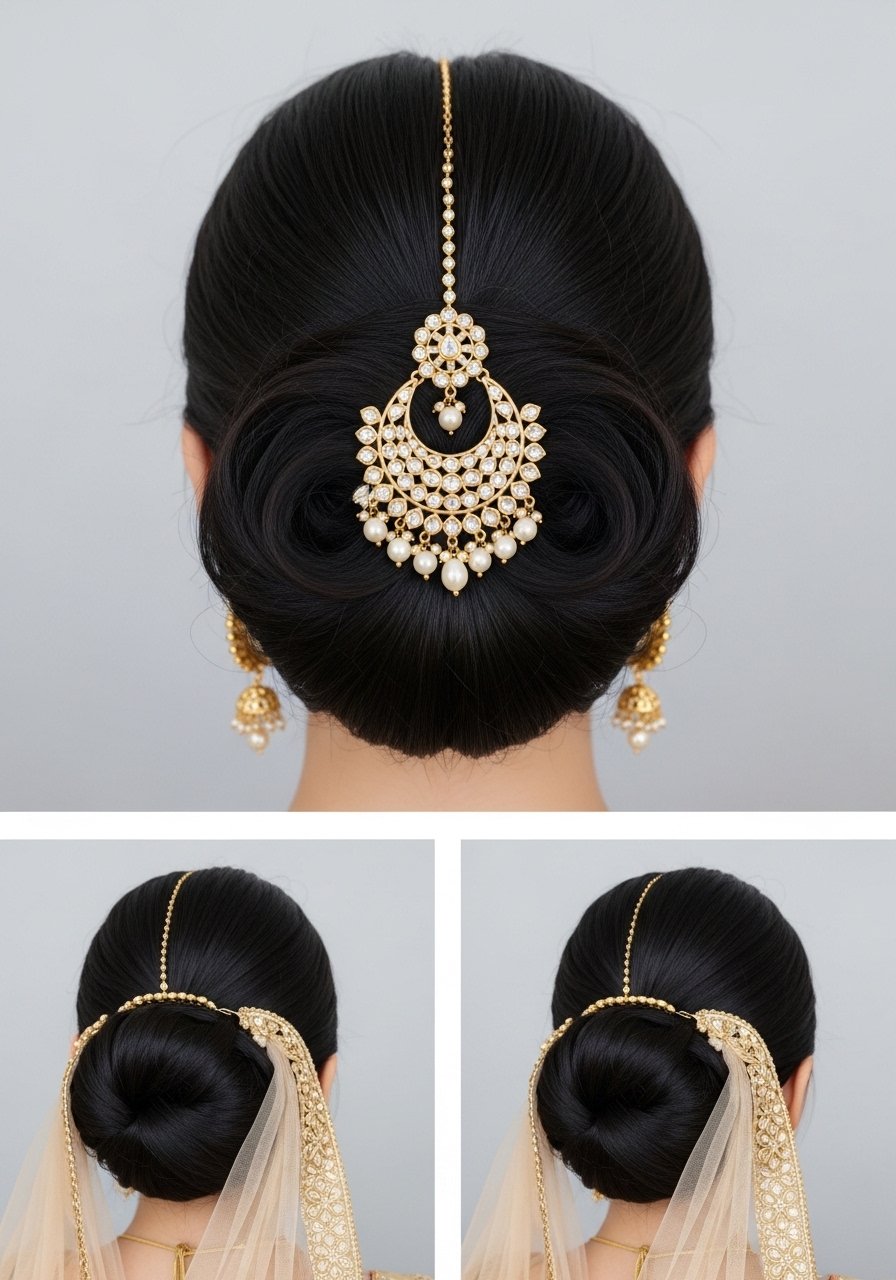
The jooda needs structure to handle jewelry weight. I make a low, tight coil and secure it into a compact bun with six to eight long pins so the maang tikka can hook into the hair without sliding. If the tikka has a hook, sew a tiny loop of thread to the fabric edge so it clips cleanly into the bun. If you are coloring or lightening for wedding highlights, book color appointments at least three weeks before the ceremony and do a patch test for any metal allergies. Remember, never lift bleach over previous color at home, that is a salon-only job.
What I Bring to Every Bridal Veil Hair Kit
- Honestly I will not leave the house without a pack of 2-inch bobby pins and 2-inch long U-pins. Bobby pins bulk pack keeps me from hunting for missing pins at 3 a.m.
- For smoothing edges, a small 3.4oz strong-hold gel works wonders. Strong hold hair gel 3.4oz
- For shine and frizz defense, I carry a travel-size anti-humidity spray. Anti-humidity spray travel-size
- A 20-count pack of veil combs and small sewing needles if the fabric needs a loop. Veil combs and sewing needle kit
- A 1oz tube of strong fabric adhesive for last-minute dupatta repairs. Buy from the official brand store on Amazon to avoid fakes: Fabric adhesive small tube
- For textured looks I keep a 5oz texturizing spray. Texturizing spray 5oz
- If the bride needs damage control pre-wedding, a 3.3oz Olaplex No. 3 helps rebuild bonds. Buy from the official store on Amazon or Sephora to be safe. Olaplex No. 3 hair perfector 3.3oz
- A small heat tool kit with a 1.25-inch curling iron and a lightweight flat iron. 1.25-inch curling iron, lightweight flat iron
- A silk scarf to wrap hair while you dress and prevent friction. Silk scarf for hair
- Extra elastics and a travel sewing kit for emergency fabric fixes. Hair elastics pack
Vintage Finger Waves Under a Netted Veil
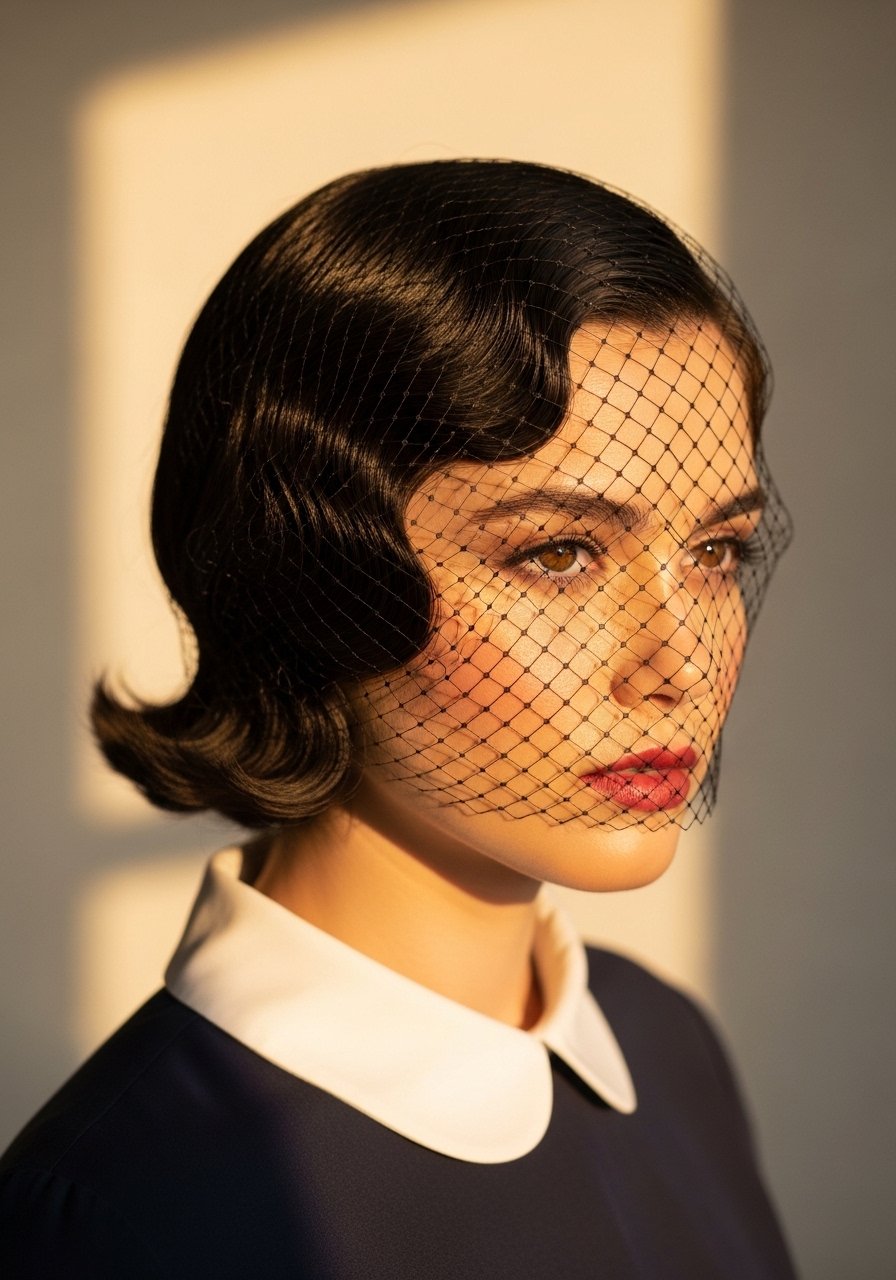
Finger waves look luxe under a netted veil. Work on damp hair, sculpt with two fingers and a tail comb, then set with clips and a medium-hold setting lotion for 20 to 30 minutes. I usually let them air-dry under a silk scarf so the waves stay. A common mistake is trying to press the waves with a hot iron instead of setting when damp. This method is best for straight to wavy 1B to 2C hair. Use a silk scarf overnight if you do a rehearsal the day before so waves do not flatten.
High Bun With Veil Anchored to Hairnet Base
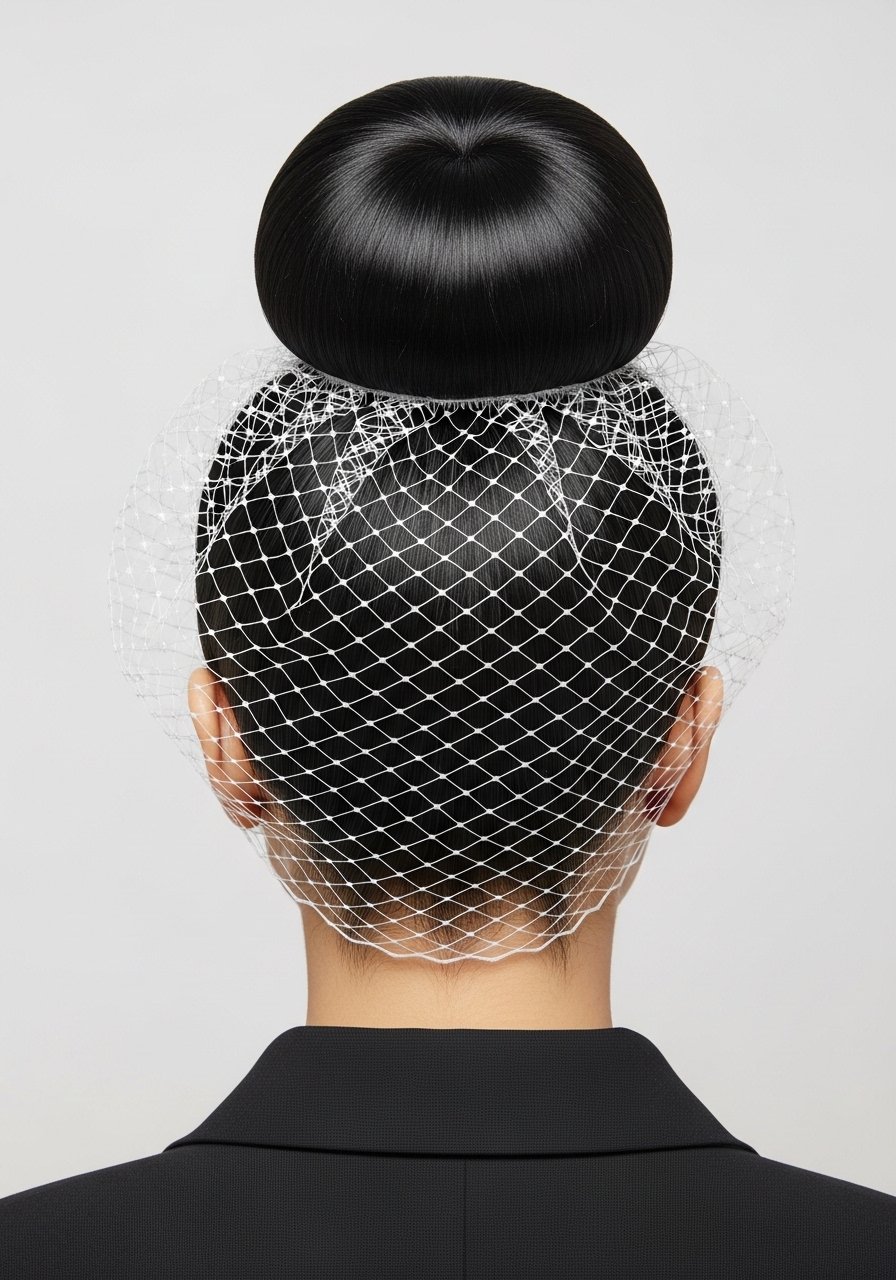
High buns are dramatic but heavy veils will tug. I place a breathable hairnet over the bun and sew or pin the veil to the net, not to single hairs. This spreads the weight and avoids breakage. For brides with high forehead jewelry, test the veil position in a mirror while sitting to mimic how photographs will capture the height. If you must use a hot donut under the bun, make sure hair covers it fully to avoid a visible shape. Allergy patch test the veil glue or adhesive tape if you're using them near the hairline.
Loose Waves With Veil Pinned at Nape
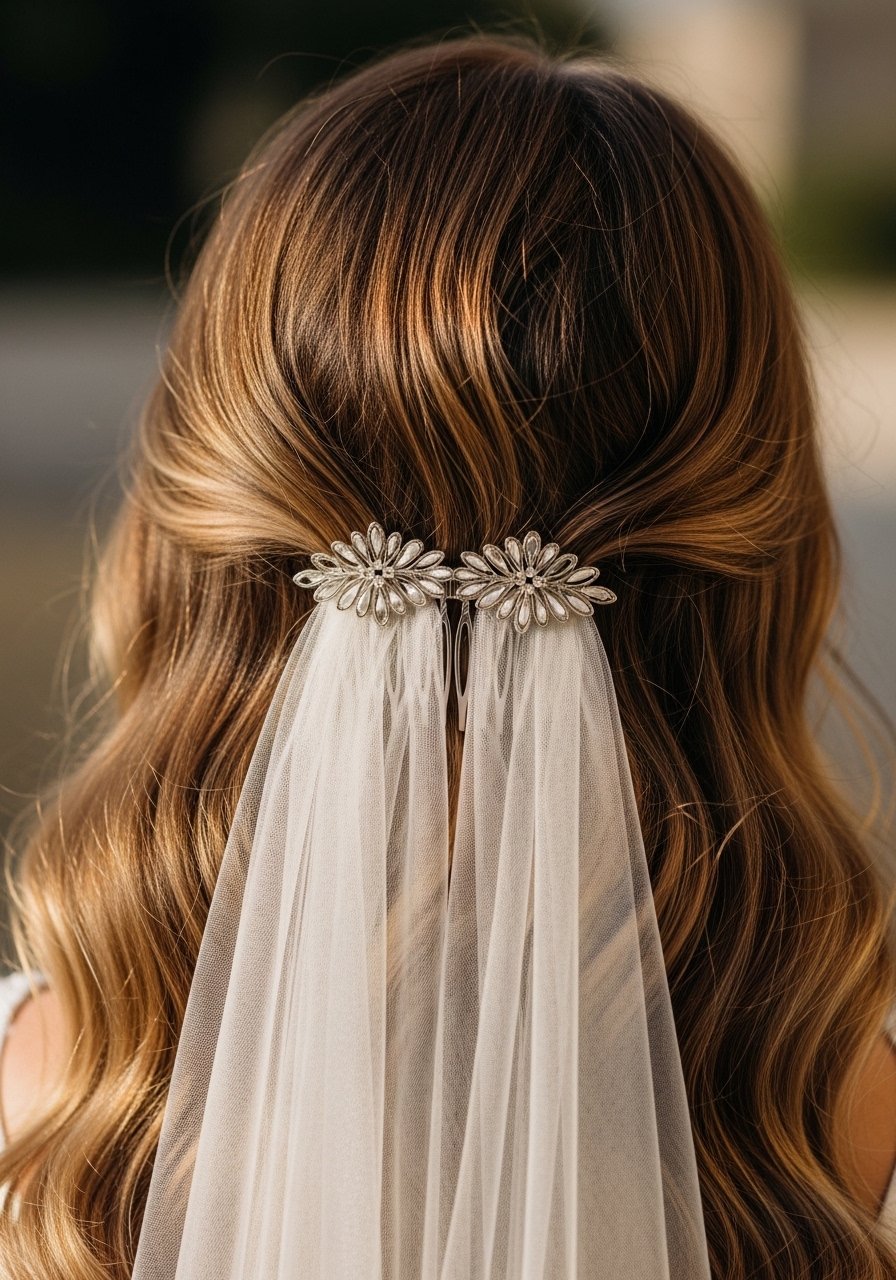
This is my favorite when a bride wants movement. I curl 1.5-inch sections at 340F, brush lightly so waves soften, then use two combs at the nape inserted in opposite directions to lock the veil. Do not overuse hairspray on the roots because it stiffens and pops in photos. If your hair is porous from color, a leave-in cream before the curl helps; "My curls looked great on TikTok and like wet noodles by 11am. Finally figured out it was the gel-only routine. Added a leave-in cream underneath and it changed everything." This method suits 2A through 3B textures.
Fishtail Braid Wrapped Around Veil Edge
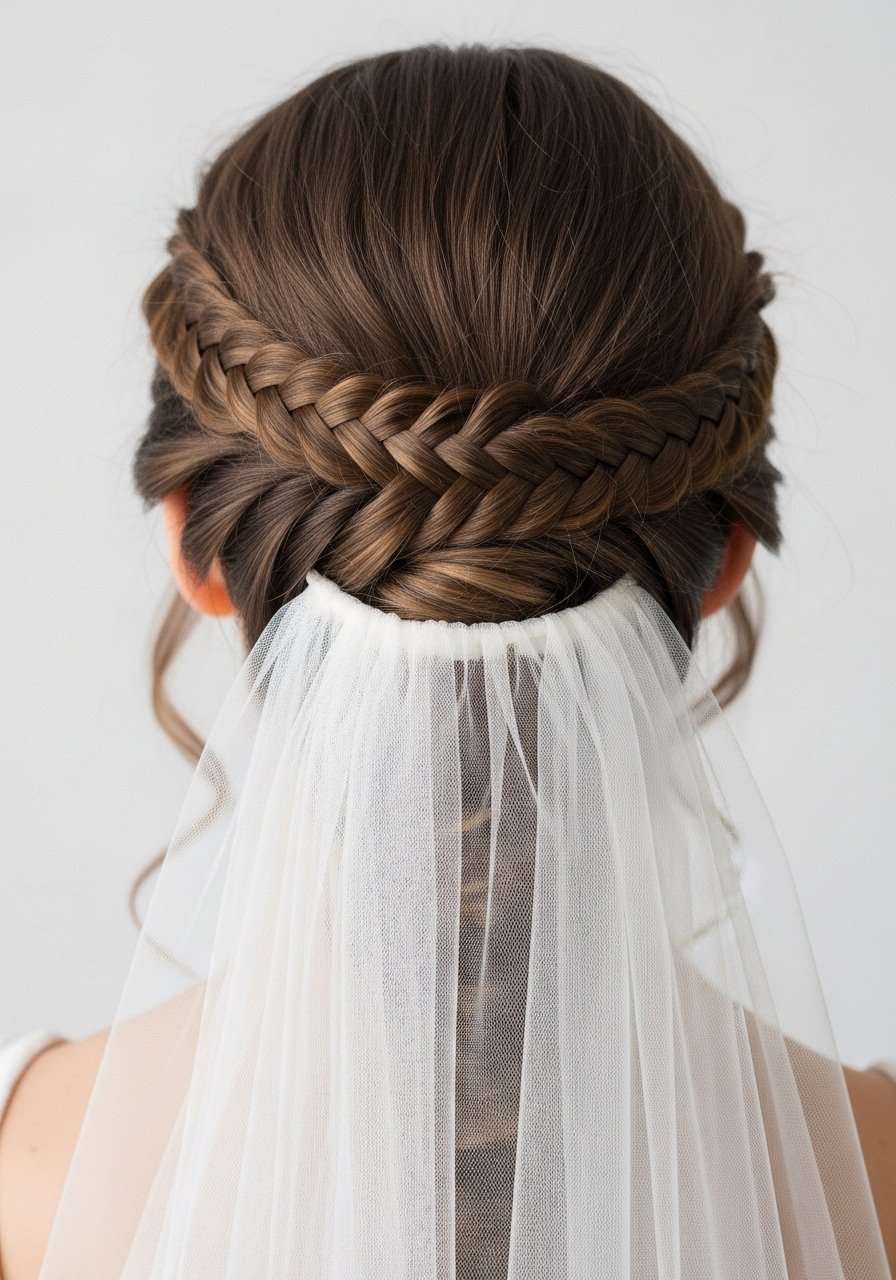
A fishtail braid has a flat profile, which makes it perfect to contour a dupatta edge. Start with two even sections and pull tiny outer strands across for at least 20 passes so the plait reads tight and tidy. Tidy up the gap at the ear with a 1-inch ribbon if the veil fabric is thin. A common error is making the braid too loose, which lets the veil slip. This is best on long hair, or on hair extended with a single weft for continuity. Braid time is about 15 to 25 minutes.
Bubble Ponytail Under Sheer Dupatta
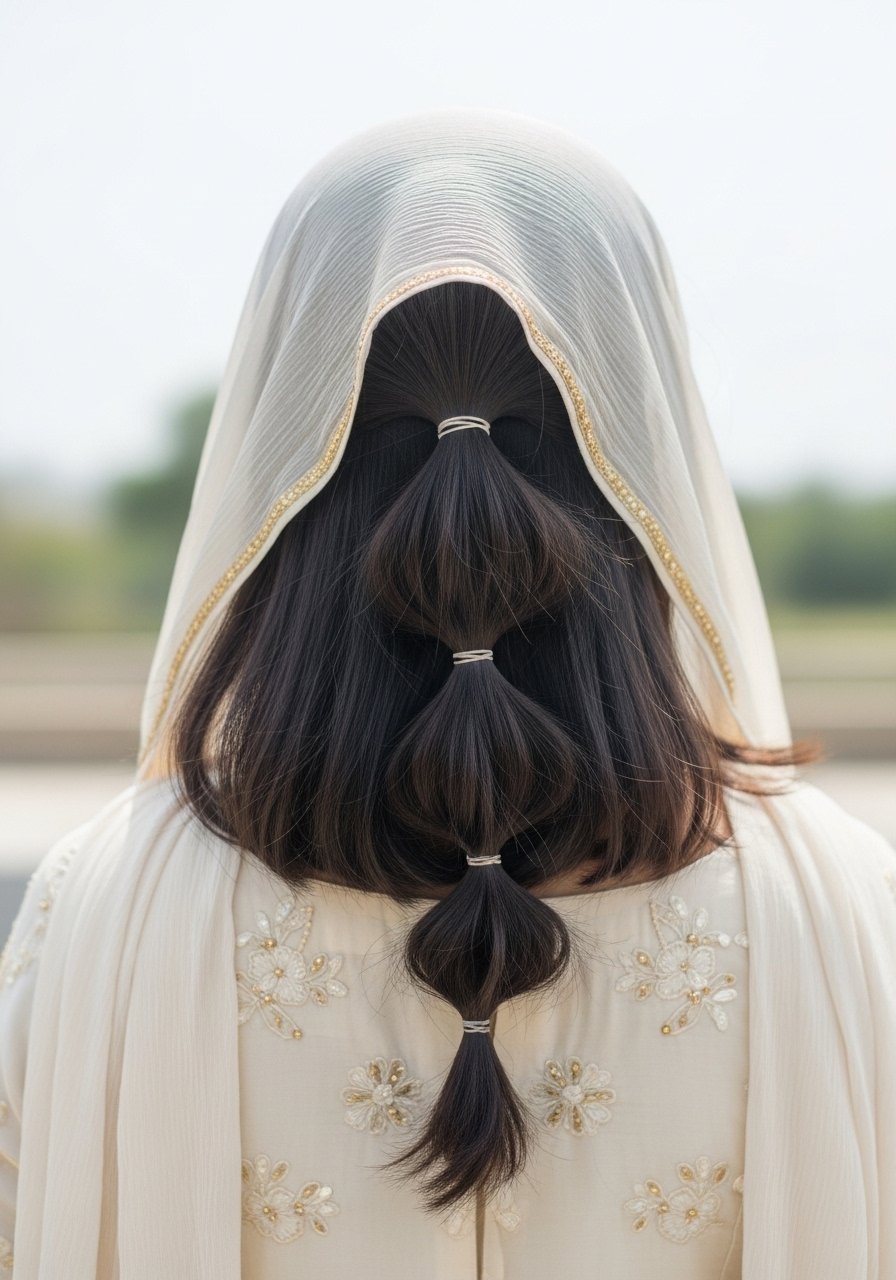
This is playful and keeps the veil off the face while still feeling bridal. Create a low pony, then place elastics every 2.5 to 3 inches and gently pancake each bubble for volume. Insert the dupatta comb above the first elastic so it floats and does not crush the bubbles. If the venue is windy, tuck a hidden anchor elastic under the veil comb and into the top bubble. This works on thick hair best, and you can add a 2-inch weft if your hair is short.
Side Chignon With Decorative Veil Comb

Side chignons carry decorative combs beautifully. I twist the hair into a low chignon and insert the comb into the bun, angling it so the teeth bite into the coil. For heavy embroidered dupattas, sew a small loop into the fabric edge so the comb can hook through instead of relying on friction. Most people over-Tease the roots and end up with a top-heavy look. Keep root volume controlled with a pinch backcombing, no more than two fingers worth.
Heatless Ribbon-Tied Waves That Survive Venues
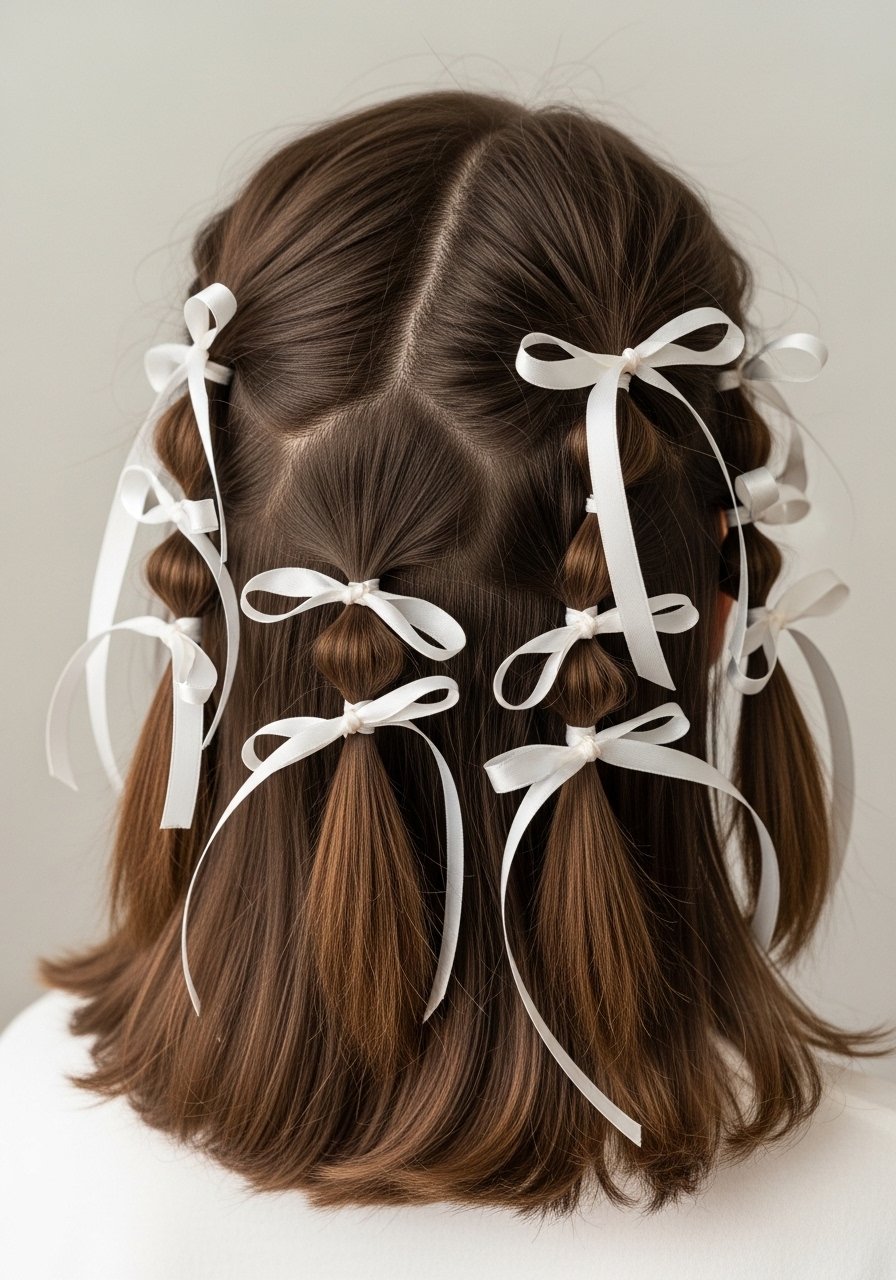
When the venue does not allow hot tools, ribbon waves are my go-to. Take 1-inch sections, twist and wrap around a ribbon, tie loosely and sleep on it. Morning take-down with two gentle shakes yields loose S-shaped waves that hold all day. For thicker hair, use narrower sections and two ribbons per head to spread tension. One tip I learned is to use a satin ribbon to reduce friction. This saves heat and is a great option for destination weddings where you want a tool-free backup.
When to Book the Salon: Color, Cut, and Veil Test Run
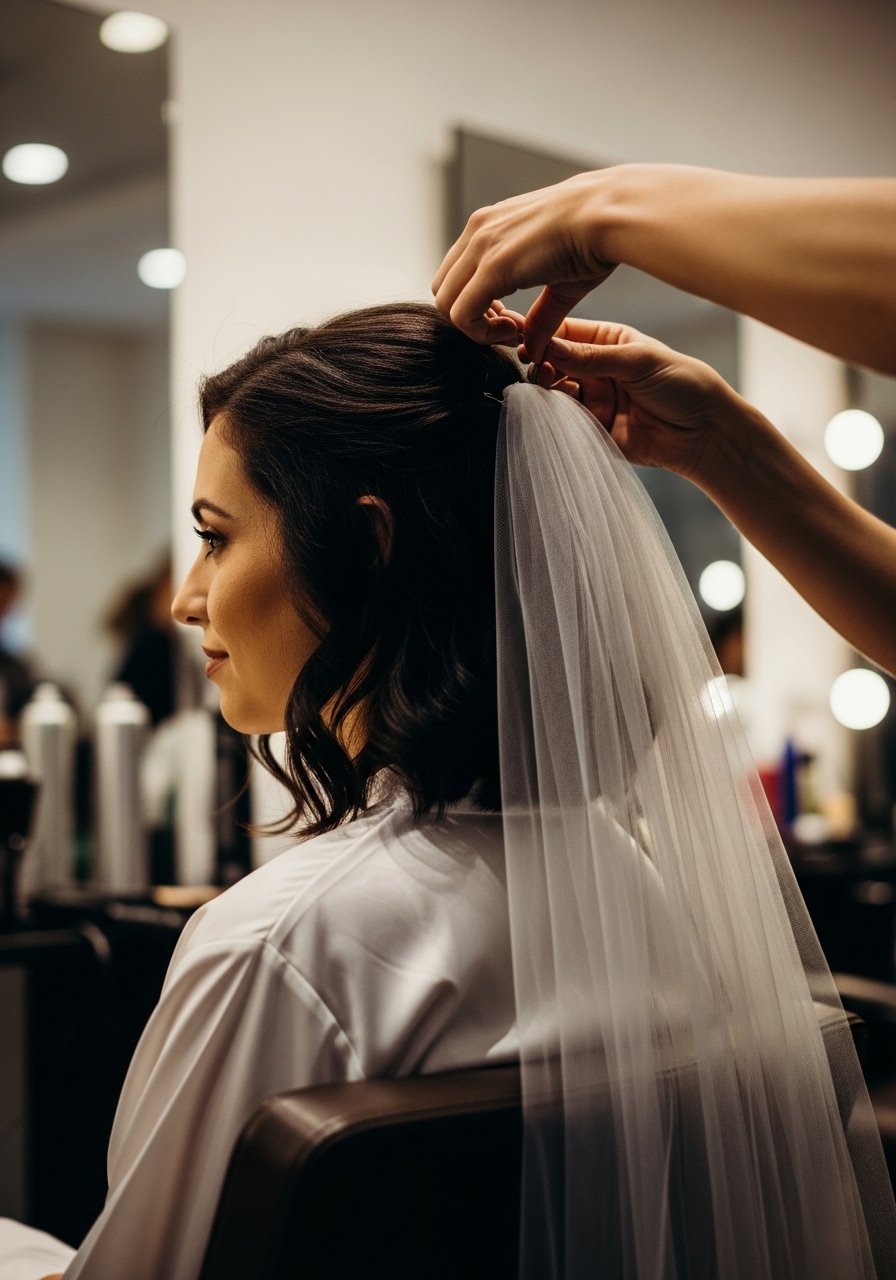
If you are changing color, doing highlights, or planning extensions, book the salon at least four to six weeks before the wedding. That gives color time to settle and trims to grow in if needed. Never attempt lifting bleach over previous color at home. Hair grows about half an inch a month at most, regardless of what biotin gummies promise you. I also recommend a veil test run one to two weeks before, so you can try the exact dupatta weight and make any needed adjustments. If you buy Olaplex or K18 at Amazon, buy from official sellers to avoid fakes.
Mistakes I Made Wearing a Veil and What Fixed Them
- Heat protectant works better when it absorbs. Most heat protectants you spray on dry hair before flat ironing barely work. They need to absorb into damp or just-dried hair to actually shield the cuticle. Heat protectant spray
- Do a full rehearsal with your veil. Pins that seem fine during a quick try on can fail under an eight-hour ceremony.
- Use the 80/20 product placement rule. I put 80 percent of product in the mid-lengths and ends and 20 percent at the roots to avoid greasy photographs. A travel-size anti-frizz serum is perfect for the ends. Anti-frizz serum travel-size
- Pack backups. Bring three extra elastics, a small spool of thread, and an emergency spray. You will use them.
- When in doubt, add structure. A tiny hidden net or sewn loop in the dupatta saves the hair from having to carry all the weight.
Frequently Asked Questions
Q: How do I prevent a heavy dupatta from pulling out my hairstyle?
A: Spread the weight. Sew a small loop into the dupatta edge and anchor it to a hairnet or a sturdy bun base. Use two anchor points rather than one and test by bending forward to mimic movement. If the dupatta is extremely heavy, the salon can add an internal comb or an extra stitched panel.
Q: Can I attach a veil to hair extensions?
A: Yes, but make sure the extensions are installed and blended at least two weeks before the event. That gives you time to trim and style. Clip-ins are the easiest for a one-day solution. For sewn wefts, tell your stylist you plan to attach a veil so they make the base stable.
Q: Will hairspray visible in photos?
A: Heavy flake-y sprays can show up. Use a light mist from 10 to 12 inches away and hold the veil in place while the spray sets. A matte anti-humidity spray applied mid-shaft usually looks fine in photos.
Q: How often should I use weekly bond treatments before the wedding?
A: Once a week for three to four weeks is realistic. Overdoing intensive treatments can make hair feel limp. If your hair is freshly colored, consult your colorist, and buy from official sellers to avoid counterfeits for premium brands.
Q: Is it safe to pin a maang tikka directly into the hair?
A: Yes if the base is stable. Use a compact bun or a sewn loop for the tikka hook. If the family has heavy jewelry, distribute the weight with pins on both sides so it does not pull on a single point.
Q: Can short hair hold a veil?
A: Short hair can work with the right accessories. Use a small hair comb sewn to the dupatta and anchor it into a styled halo braid or a hidden headband. Faux hairpieces and clip-in extensions make this much easier.
Q: What is the single biggest styling mistake I should avoid?
A: Skipping a rehearsal. Even experienced brides who do their own hair are surprised by how a veil alters balance and movement. Do a full dress, jewelry, and veil run at least once.